Ei Electronics Ei144 User Instructions
230 v smoke & heat alarms
Hide thumbs
Also See for Ei144:
- Product manual (2 pages) ,
- Installation instructions manual (16 pages) ,
- User instructions (12 pages)
Advertisement
Quick Links
..c::,..
E
el
Electronics~)
fire
+
gas detection
230V- SMOKE & HEAT ALARMS
ALKALINE PRIMARY BATTERY BACK·UP
r
<
•...
· · · · · · · · : · , ;
' . .....
..~:,
V' "
.
! .
\~
\\\\
.
(,~'\f'~'\ D
~
"
•
/10
'.
<'
... 1 II11_tlloll$iltil'il
'-lHIISmil
.1II1RB:tr.ll5l9l
RECHARGEABLE LITHIUM CELL BACK·UP
EI161 RC • IOnisation
· · · · · · , , ·
"
/'"
'\,
'\
r
I
41""
\~~.'~
"'''' g)
" . :".
~)
()
IWJWj!5I!'!II
lifillill:ltIemu;m1
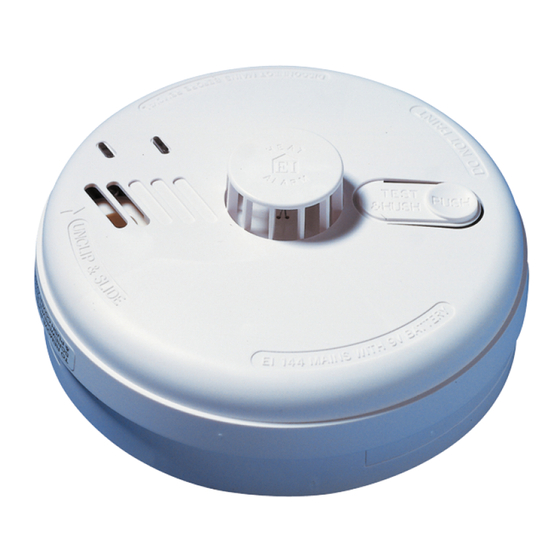
USER INSTRUCTIONS
1. REGULAR CHECKS
8
Look for:
Constant green light
5?
(L)
0
."
Red light flash every 40 sec.
5?
'~'t
a
~ff/
~
."..--
.....
,
""
...
/
F~
\
5?
Vacuum around
•
~~;d"eo
.. ro",,,"
PIN B16009
Rev4
©
Ei Electronics
2010
*
DISCONNECT MAINS BEFORE REMOVAL
*
~~
D
LOCATE THE ARROW ON THE FRONT FACE OF THE ALARM.
THE SLOT IS LOCATED DIRECTLY ABOVE THE ARROW.
INSERT SCREWDRIVER
+
~~.- ~
C)~
~
INSERT A FLAT·BLADED SCREWDRIVER HORIZONTALLY
APPROX. 10m INTO THE CENTRE OF THE REMOVAL SLOT
~
WITH THE SCREWDRIVER STILL INSERTED, PUSH THE LOWER
HALF OF THE ALARM AWAY FROM THE SCREWDRIVER. IN THE
DIRECTION OF THE ARROW ON THE COVER
4
REMOVE ALARM
~
~
+
+
HOLD THE LOWER HALF OF THE ALARM AND REMOVE FROM
THE BASE PLATE BY MOVING IT VERTICALLY DOWNWARDS,
TOWARDS THE FLOOR.
2
3. IMPORTANT INFORMATION
00
~
~
Do not paint your alarm. Do not allow
paint, water or dust to contaminate your
alarm.
Your alarm is a mains
230V
AC
electrical appliance. Do not open or
insert anything into the alarm.
Do not connect Alternative Energy
sources e.g. Wind, Solar, UPS with
non-sinusoidal outputs. (see installation
section on page 10 of Installer Instructions)
Regularly check that the green
indicator light on the cover is lit.
--------- . . . . . - --J
Test weekly - press and hold the test
button on the alarm for
10
seconds. The
alarm will sound loudly and the red light
on the cover should flash rapidly. All the
other interconnected alarms should sound.
If alarm beeps once every
40
seconds
over
20
minutes, the battery is probably
depleted (models
Ei141/144/146
only)
and must be replaced. (see "CHANGING
THE BATTERY" section on page 4).
If a nuisance alarm occurs, press the
tesUhush button to silence the alarm for
10
minutes.
Clean your alarm regularly. This will
reduce the risk of false alarms.
Remove or completely cover your alarm
when decorating to prevent dust or other
contamination damaging the unit.
If your alarm sounds for no reason and
will not reset, it can be removed by
releasing the clip on the base .
(see "ALARM REMOVAL" section on page 2).
3
4. CHANGING THE BATTERY
(Models
Ei141 I 144 I 146
only)
1. Switch off mains power to alarm (green light on co'
should go out).
2.
Remove unit as shown in "ALARM REMOW
section on page
2.
3.
Locate battery slot in base of alarm as shown bel<
4. Unclip battery from battery snap connectors.
5.
Connect new battery by clipping back on to batt
snap connectors. Use only
9V
Alkaline batter
Duracell
MN1604,
Energizer
522.
Other batteries (
cause problems.
We recommend that the "use by date" on the batte!,]
should still have at least
2
years to go. aide
batteries will give beeps prematurely.
6.
Slide unit back on to the base. A click should be he
as the alarm engages. (The unit cannot be repla!
on the base unless a battery is installed).
7.
Press and hold the test button· horn should
SOL
loudly.
8. Reinstate mains power to alarm (green light on co
should come on).
(Ei14111441146
ONLY)
4 WAY PLUG
ENGAGES SOCKET
,......--.
ON MOUNTING PLATE
-
TO CONNECT MAINS AND BATTE
We recommend that the battery is replaced at leas
every three years for optimum performance.
5. TESTING
&
MAINTAINING YOUR
ALARM
INSPECTION &TESTING PROCEDURE
Check all your alarms weekly, especially after
installation or after re-occupation (e.g.
f~II~"
holiday):
(i) Check that the green mains indicator light is on
it is off check circuit breakers, fuses and wiring e
Check the red light on the cover flashes every
seconds.
(ii) Press the test button for up to
10
seconds to ens
4
Advertisement


Need help?
Do you have a question about the Ei144 and is the answer not in the manual?
Questions and answers