Table of Contents
Advertisement
Quick Links
User Ma nu al f o r t h e e a s i c h a ng e
Rep la c e m e n t S e ri e s :
E i141EK - Io n i s at i o n
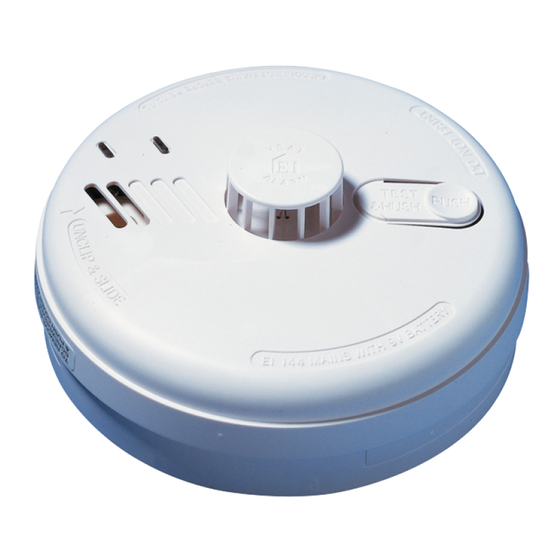
Ei 144 E K - He a t
E i161EK - Io n i s at i o n
Ei 164 E K - He a t
C ongr atu l atio ns ! You hav e p urchased a genuin e Ei
Ele ct r on i c s re pla cem ent smoke/he at alarm kit .
T hi s re pl a ceme nt kit cont ains eve ryt hing yo u ne e d to
e as il y, qu i c kly an d sa fely rep lace your mains po we r e d ,
Ei El e ct ronic s sm oke or heat alarm .
1. R em o vi n g t h e E xisting Alar m
1
D i s c o nn e c t t he mains power
Warning!
Befo r e t he exist ing al arm i s rem o v e d
t he m ain s po we r mu st b e di sconnect ed.
L oo k o n yo ur main s dist rib utio n bo ard f o r a
s w it ch mar ke d "Smoke Al arm s" or simi la r a n d
s w it ch this off . I f t here isn't a switch ma rk e d
w i t h a r eco gnisable lab el, swi tch th e m a in s
p ower off .
N o te: T his w ill cut p owe r t o everythi ng i n th e
h ou se including t he light s.
2
L o c a t e t h e rem oval Slot
L o c at e t h e d ir ect ional ar row on the f ro nt f ace o f
t h e a l arm , th e r em ova l slot is lo cat ed directl y
a b o ve the ar r ow.
P a g e 1
3
In s er ti ng th e r em ov al tool
Ei 14 6 EK - Op t ic a l
In s e r t th e s u p p lie d r e mo v a l to o l a pp rox. 1cm into
th e a la r ms r e mo v a l s lo t a n d le v e r i t down gently.
Ei 16 6 EK - Op t ic a l
4
S l id e the al ar m off the mounting pl a te
With th e r e mo v a l to o l s till in s e r te d, slide the lower
h a lf o f th e a la r m a w a y fr o m th e r e mov al tool in the
d ir e c ti o n o f th e a r r o w o n th e c o v e r.
5
R em ov e the a la r m
R e mo v e th e a la r m fr o m th e b a s e by mov ing i t
v e r tic a lly to w a r d s th e flo o r.
2. Co nne c ti ng th e N ew A l ar m
1
A ttac h the a l ar m
P la c e th e a la r m o n th e b a s e , s lig htly offset fr om
th e c e n tr e a n d s lid e in th e o p p o s i te direc tio n to
th e a r r o w o n th e c o v e r u n ti l it " c lic ks" into place.
Pa g e 2
2
R ec on nec t th e m ai ns po w er
A fter the new al ar m has been attached to the
base pl ate, r econnect the m ai ns power supply.
3 . Ch ec ki ng t he new Al a rm
1
C he ck i ng th e i n di ca ti ng l i ght s
O nc e t h e ne w a la r m h as b e en
c o n ne c t e d an d t h e m ai ns p o w er
h a s be e n re s t o r ed i t is i m p or t a n t
t o c h ec k t he i nd ic a t i ng l ig ht s .
I f t he a la r m is wo r k in g c or r e c t ly
t h e
GR EEN L I GH T
c o n st an t l y an d t h e
s h o ul d f la s h o n c e ev e r y 4 0 s e c .
2
Tes ti ng t he al ar m s
P r ess and hol d the tes t
button for 10 s econds, the
alarm shoul d s ound l oudl y.
If there ar e other al arm s i n the
house these s houl d al so sound
withi n 10 seconds of the test
button being pr essed.
A ny pr obl em s?
If y ou ha ve an y pro bl em s fi t ti ng y our ne w
al ar m pl eas e gi ve u s a c al l on: 08 00 612 48 37
or em ai l s upp ort @ eas i ch ange .c o. uk
4 . Ke epi ng a R ec ord
Now that you have i nstall ed and tes ted your new alarm ,
i t i s es sential to k eep a r ec or d of the date when it was
fitted. We have i nc luded a handy r epl acement r ecor d
sti cker i n thi s pack.
Fi ll i n the date and sti ck i t near your di str ibuti on boar d
for future refer ence.
Page 3
s h o ul d be o n
R ED L I GH T
Advertisement
Table of Contents

Related Manuals for Ei Electronics Ei141EK


Summary of Contents for Ei Electronics Ei141EK
- Page 1 R ec on nec t th e m ai ns po w er In s er ti ng th e r em ov al tool A fter the new al ar m has been attached to the base pl ate, r econnect the m ai ns power supply. User Ma nu al f o r t h e e a s i c h a ng e Rep la c e m e n t S e ri e s : 3 .
- Page 2 1. Chec k that the gr een m ai ns indi cator l i ght i s on. 5. I m p o r t a n t I nf o r mation 6. Ch ang i ng th e B atter y ( 1 41 EH / 1 44EH / 14 6EH onl y) ( If i t is off check ci r cui t br eaker s, fus es etc .) Chec k the red l i ght on the cov er flashes ever y 40 seconds.
- Page 3 P le a s e n o te : T h e io n is a tio n a n d h e a t alar ms ( E i141EH/ In certain cir cums tanc es even wi th r egul ar cleaning, 8 .
- Page 4 T he re d light will flash every 10 seco nds t o in d i ca te L o w B a t t e ry & O t h e r B e e p s : (E i1 6 1 E H/164EH /166EH only) 1 2.
Need help?
Do you have a question about the Ei141EK and is the answer not in the manual?
Questions and answers