Table of Contents
Advertisement
Register your product online
網上登記新產品保養
Save the planet and register your product warranty online!
Enjoy extra 1-month free warranty upon online registration.
「惠」環保出力,減少用紙!於網上登記產品更可獲額外多一個月保養。
https://rebrand.ly/WPwarranty
Health & Safety, Use & Care, Installation Guide and
Online Warranty Registration Information
產品安全指引、使用說明、安裝指南及
網上登記保養資料
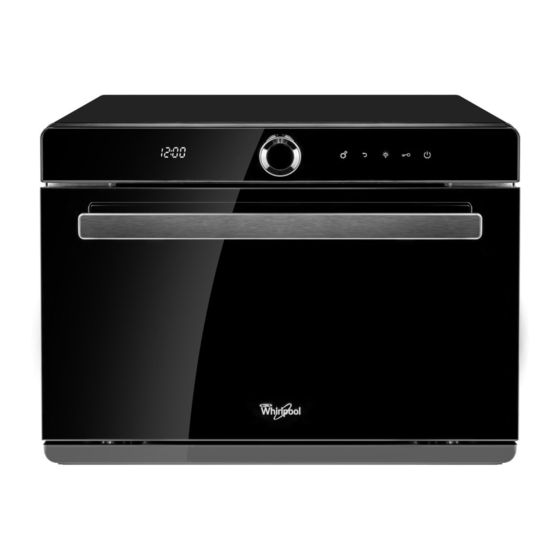
CS2320
Model
:
產品型號
S48893-Whirlpool Combi Steamer User Manual_V16.indd 1-2
26/7/2016 下午12:58
Advertisement
Table of Contents

Related Manuals for Whirlpool CS2320


Summary of Contents for Whirlpool CS2320
- Page 1 Save the planet and register your product warranty online! Enjoy extra 1-month free warranty upon online registration. 「惠」環保出力,減少用紙!於網上登記產品更可獲額外多一個月保養。 https://rebrand.ly/WPwarranty Health & Safety, Use & Care, Installation Guide and Online Warranty Registration Information 產品安全指引、使用說明、安裝指南及 網上登記保養資料 CS2320 Model 產品型號 S48893-Whirlpool Combi Steamer User Manual_V16.indd 1-2 26/7/2016 下午12:58...
- Page 2 設置時鐘 蒸氣模式 加強熱風對流模式 頂部 / 底部 / 上下燒烤模式 熱風對流模式 熱風模式 熱風加蒸氣模式 全功能蒸焗模式 發酵模式 翻熱麵包模式 慢煮模式 乾果模式 解凍模式 預熱模式 26-27 消毒模式 保溫模式 烘乾爐腔模式 除垢模式 31-32 預約功能 33-34 烹調過程中調校 / 結束後追加時間功能 35-36 餘溫高溫提示 童鎖功能 S48893-Whirlpool Combi Steamer User Manual_V16.indd 3-1 26/7/2016 下午12:58...
- Page 3 12. 應使用耐高溫容器進行烹調,如耐熱性玻璃、耐熱性 避免觸電。本產品提供的接地插頭必須插在單相兩極帶接地 其他烹調模式。 32. 請定期清除電源插頭上的灰塵。長期不使用時,請拔出 塑料容器等。所有非耐熱性容器都不應放進蒸焗爐使用。 的插座上。 15. 剛完成烤焗煮食後或爐腔處於高溫狀態下,使用蒸氣相 電源插頭。拔除電源插頭時不要拉扯電線,應手握插頭 蒸煮容器耐熱溫度應高於 120° C,而烤焗容器耐熱溫度 關模式,爐腔內的蒸氣可能會迅速蒸發,蒸氣不易被看 拔除。 應高於 250° C。 到。這是正常現象。 33 請不要讓蒸焗爐處於無人監看的狀態下工作。 13. 第一次使用各種燒烤或烤焗的功能時,可能會產生氣 16. 當使用蒸焗爐時,切勿用手觸摸爐門、爐窗及外框。 34. 過熱的脂肪和油很容易著火。除了烤肉,在烹調過程中 味,這是正常現象。 17. 請使用直接從水喉取的自來水、食用水或蒸餾水注入儲 對油進行加熱也是很危險的,應禁止這樣操作。 S48893-Whirlpool Combi Steamer User Manual_V16.indd 2-3 26/7/2016 下午12:58...
- Page 4 5. 頂部發熱管:產生熱能烹調食物。 (A) 主要用於「蒸氣」時使用。其疏氣孔設計亦可用於其他烹調模式。 6. 水箱:盛載清水以產生蒸氣。 (B) 如需進行多層煮食,建議將此蒸盤放於較底層的位置,如進行三層煮食,請放中間位置。可使爐腔內空氣更流通、 7. 入氣口:讓蒸氣進入爐腔內。 讓爐腔溫度更平均。 3. 焗盤 ( 接油盤) 8. 爐門:1. 確保爐門關上後,才開啟烹調程式。 (A) 主要用於「熱風加蒸氣」、 「全功能蒸焗」或「熱風」等模式時使用。或於烹調肉類時放於底層,盛載煮食中滴下來的油。 2. 在烹調過程中,將爐門打開,烹調會暫停;把爐門關上後,會自動繼續原先的烹調設定。 (B) 食物無容器盛放時,請用牛油紙或鍚紙,平鋪在焗盤上使用。 9. 接水盤:盛載開門後流出的倒汗水及除垢功能中的污水。 4. 隔熱手套 由蒸焗爐拿出食物或托盤時使用。 5. 海綿 用於吸取爐腔內的倒汗水。 S48893-Whirlpool Combi Steamer User Manual_V16.indd 4-5 26/7/2016 下午12:58...
- Page 5 解除靜音模式 : 在待機狀態下長按返回鍵 3 秒即可解除靜音模式。 爐燈鍵 1. 輕按一次,爐燈亮 3 分鐘,顯示屏上不會顯示爐燈圖標; 2. 長按 3 秒,爐燈長亮,顯示屏上會顯示爐燈圖標,再長按 3 秒取消長亮; 3. 打開爐門,爐燈亮 3 分鐘。 童鎖鍵 長按 3 秒可啟動 / 解除童鎖。 啟動童鎖 : 長按童鎖鍵 3 秒啟動,控制面板會被鎖定並不能控作。 解除童鎖 : 長按童鎖鍵 3 秒即可解除童鎖功能。 電源鍵 如果開啟蒸焗爐後,沒有進行任何操作,包括打開或關閉爐門,5 分鐘後,蒸焗爐將自動進入省 電模式,顯示屏會熄滅。省電模式下只有電源鍵能操作。 S48893-Whirlpool Combi Steamer User Manual_V16.indd 6-7 26/7/2016 下午12:58...
- Page 6 示會亮起。 至調校的穩定而潮濕的的環境。 發酵模式 慢煮模式 解凍模式 消毒模式 烘乾爐腔模式 時間 5 - 419 分鐘 用於麵團發酵,例如薄餅的餅 發酵 30 分鐘 / 35° C ( 最長 6 小時 59 分鐘 ) 翻熱麵包模式 乾果模式 預熱模式 保溫模式 除垢模式 底或製作麵包時的麵團。麵團 溫度 30 - 40° C 發酵的速度會比在室溫下快, 麵團表面也不會過乾。 S48893-Whirlpool Combi Steamer User Manual_V16.indd 8-9 26/7/2016 下午12:58...
- Page 7 25 分鐘 此 功 能 適 用 於 任 何 蒸 氣 烹 調 溫度不可調校 的模式後使用。 以上建議擺放層數、位置僅供參考。客人可因應食物 份量、種類和存放食物的容器,去調整擺放配件的層 當蒸氣模式或其他帶有蒸氣功 數和位置。 能模式使用的累計時間達 到 100 個小時,“除垢提示” 時間不可調校 除垢 50 分鐘 圖示會亮起,提醒用戶進行除 溫度不可調校 垢模式。 需配合除垢劑使用。 S48893-Whirlpool Combi Steamer User Manual_V16.indd 10-11 26/7/2016 下午12:58...
- Page 8 翻熱麵包 “1” 默認 10 分鐘 不需要 第 3 層 焗盤 燒烤架 / 室溫麵包 1 個 麵包 翻熱麵包 “2” 默認 8 分鐘 不需要 第 3 層 焗盤 4. 完成時間設置。( 如下圖 ) 以上的建議烹調食譜僅提供參考。客人喜歡的生熟程度、開始溫度、所烹調的食物份量、大小、食物形狀和容器的種類 等,都會影響烹調時間和烹調效果。 注意 : 在設置過程中,若連續 5 分鐘內用戶沒有任何操作,當前所有設置將會被取消並返回到待機畫面,進入待機狀態。 S48893-Whirlpool Combi Steamer User Manual_V16.indd 12-13 26/7/2016 下午12:58...
- Page 9 2. 按旋鈕確認小時位 00 設定。( 如下圖 ) 然後畫面會自動跳至分鐘選項。 3. 轉動旋鈕直到顯示分鐘轉至 40,按旋鈕確認。( 如下圖 ) 然後畫面會自動跳至溫度選項。 3. 轉動旋鈕直到顯示分鐘轉至 40,按旋鈕確認。( 如下圖 ) 然後畫面會自動跳至溫度選項。 4. 轉動旋鈕直到顯示溫度轉至 90° C,按旋鈕確認。( 如下圖 ) 4. 轉動旋鈕直到顯示溫度轉至 210° C,按旋鈕確認。 ( 如下圖 ) 5. 設置完成,開始烹調。 5. 設置完成,開始烹調。 S48893-Whirlpool Combi Steamer User Manual_V16.indd 14-15 26/7/2016 下午12:58...
- Page 10 2. 按旋鈕確認小時位 00 設定。( 如下圖 ) 然後畫面會自動跳至分鐘選項。 3. 轉動旋鈕直到顯示分鐘轉至 40,按旋鈕確認。( 如下圖 ) 然後畫面會自動跳至溫度選項。 3. 轉動旋鈕直到顯示分鐘轉至 40,按旋鈕確認。( 如下圖 ) 然後畫面會自動跳至溫度選項。 4. 轉動旋鈕直到顯示溫度轉至 210° C,按旋鈕確認。 ( 如下圖 ) 4. 轉動旋鈕直到顯示溫度轉至 210° C,按旋鈕確認。( 如下圖 ) 5. 設置完成,開始烹調。 5. 設置完成,開始烹調。 S48893-Whirlpool Combi Steamer User Manual_V16.indd 16-17 26/7/2016 下午12:58...
- Page 11 2. 按旋鈕確認小時位 00 設定。( 如下圖 ) 然後畫面會自動跳至分鐘選項。 3. 轉動旋鈕直到顯示分鐘轉至 40,按旋鈕確認。( 如下圖 ) 然後畫面會自動跳至溫度選項。 3. 轉動旋鈕直到顯示分鐘轉至 40,按旋鈕確認。( 如下圖 ) 然後畫面會自動跳至溫度選項。 4. 轉動旋鈕直到顯示溫度轉至 210° C,按旋鈕確認。 ( 如下圖 ) 4. 轉動旋鈕直到顯示溫度轉至 210° C,按旋鈕確認。( 如下圖 ) 5. 設置完成,開始烹調。 5. 設置完成,開始烹調。 S48893-Whirlpool Combi Steamer User Manual_V16.indd 18-19 26/7/2016 下午12:58...
- Page 12 3. 轉動旋鈕直到顯示分鐘轉至 40,按旋鈕確認。( 如下圖 ) 然後畫面會自動跳至溫度選項。 3. 轉動旋鈕直到顯示分鐘轉至 40, 按旋鈕確認。 ( 如下圖 ) 然後畫面會自動跳至溫度選項。 ( 如下圖 ) 4. 按旋鈕確認預設溫度 35° C 的設定。 4. 轉動旋鈕直到顯示溫度轉至 210° C ,按旋鈕確認。( 如下圖 ) ( 如下圖 ) 5. 設置完成,開始烹調。 5. 設置完成,開始烹調。 S48893-Whirlpool Combi Steamer User Manual_V16.indd 20-21 26/7/2016 下午12:58...
- Page 13 2. 轉動旋鈕直到顯示分鐘轉至 25,按旋鈕確認。( 如下圖 ) 然後畫面會自動跳至模式選項。 3. 轉動旋鈕直到顯示分鐘轉至 40,按旋鈕確認。( 如下圖 ) 然後畫面會自動跳至溫度選項。 3. 此時自動進入麵包類型的選擇項,預設模式是“1”,即是冷藏麵包翻熱模式,按旋鈕確認。( 如下圖 ) 4. 按旋鈕確認默認溫度 60° C 的設定。 ( 如下圖 ) 如果需改變模式,可在此時轉動旋鈕至模式顯示為“2”,按旋鈕確認。 5. 設置完成,開始烹調。( 如下圖 ) 4. 設置完成,開始烹調。( 如下圖 ) 注意 : “組合鍵 : 爐腔溫度顯示”功能不適用於翻熱麵包模式。 S48893-Whirlpool Combi Steamer User Manual_V16.indd 22-23 26/7/2016 下午12:58...
- Page 14 3. 轉動旋鈕直到顯示分鐘轉至 40,按旋鈕確認。( 如下圖 ) 然後畫面會自動跳至溫度選項。 3. 按旋鈕確認分鐘位 00 設定。( 如下圖 ) 然後畫面會自動跳至溫度選項。 4. 轉動旋鈕直到顯示溫度轉至 60° C,按旋鈕確認。( 如下圖 ) 4. 轉動旋鈕直到顯示溫度轉至 90° C,按旋鈕確認。 ( 如下圖 ) 5. 設置完成,開始烹調。( 如下圖 ) 5. 設置完成,開始烹調。( 如下圖 ) S48893-Whirlpool Combi Steamer User Manual_V16.indd 24-25 26/7/2016 下午12:59...
- Page 15 1. 在待機狀態下,順時針旋轉旋鈕至 預熱模式圖示閃爍,預設的預熱模式是蒸氣模式,按旋鈕確認功能。 ( 如下圖 ) 3. 設置完成,開始預熱。( 如下圖 ) 2. 此時自動進入烹調溫度的設置;按旋鈕確認預設溫度 100° C 的設定。 ( 如下圖 ) 預熱結束時,顯示屏顯示會“END”及發出聲效提示操作已完成 ( 如下圖 ) 。預熱完成後,客人可以根據需要, 選擇其他烹調模式進行烹調。 3. 設置完成,開始預熱。 ( 如下圖 ) 注意 : “烹調過程中調校 / 結束後追加時間功能”功能不適用於此模式。 S48893-Whirlpool Combi Steamer User Manual_V16.indd 26-27 26/7/2016 下午12:59...
- Page 16 2. 按旋鈕確認小時位 00 設定。( 如下圖 ) 然後畫面會自動跳至分鐘選項。 3. 按旋鈕確認分鐘位 30 的設定。( 如下圖 ) 然後畫面會自動跳至溫度選項。 3. 轉動旋鈕直到顯示分鐘轉至 35,按旋鈕確認。 ( 如下圖 ) 4. 轉動旋鈕直到顯示溫度轉至 60° C,按旋鈕確認。 ( 如下圖 ) 4. 設置完成,開始烹調。 ( 如下圖 ) 5. 設置完成,開始烹調。 ( 如下圖 ) S48893-Whirlpool Combi Steamer User Manual_V16.indd 28-29 26/7/2016 下午12:59...
- Page 17 C. 開始除垢模式。 ( 如下圖 ) 第 1 個階段需時 30 分鐘,程式完成後,顯示屏上的時間位會閃動,並發出聲效去提示第 1 個階段完成。 同時顯示屏上 接水盤圖示會亮起,提醒用戶倒掉接水盤內的污水。 請倒掉污水,並裝回接水盤。 2. 第 2 個階段 : 第 1 次除垢清潔 打開爐門,將 550 亳升淨水倒入水箱至水箱上550毫升 除垢圖標位置。 將水箱放回機內並關上爐門,程式會自動啟動,繼續除垢清潔工作。 第 2 個階段完成後,顯示屏上的時間位會閃動,並發出聲效提示第 2 個階段完成,同時顯示屏上 接水盤圖示會 亮起,提醒用戶倒掉接水盤內的污水。 請倒掉污水,並裝回接水盤。 S48893-Whirlpool Combi Steamer User Manual_V16.indd 30-31 26/7/2016 下午12:59...
- Page 18 5. 此時畫面會進 入 預 約 烹 調 結 束 時 間 的 小 時 位 設 置, 時 鐘位 顯 示 的 時 間 會 切 換 回 現 時 的 時 間 16: 30, 小時位“16”會閃爍;同時,顯示屏上方 預約功能圖示會閃爍顯示,表示正在進行預約功能設定。 ( 如下圖 ) S48893-Whirlpool Combi Steamer User Manual_V16.indd 32-33 26/7/2016 下午12:59...
- Page 19 注意 : 預約模式適用於 9 個主要烹調模式,翻熱麵包模式,慢煮模式和乾果模式。( 詳情請參閱第 8-10 頁控制面板 - 4. 轉動旋鈕直到顯示分鐘轉至 00,按設置鍵 確認。( 如下圖 ) 然後畫面會自動跳至溫度選項。 主要功能介紹 / 詳細說明 ) 建議 : 預約設置後,可啟動兒童安全鎖功能,以防止不小心觸摸到控制面板而誤將預約取消。童鎖設置可參見本說明 書第 7 頁 “控制面板 - 基本功能說明”內說明。當達到預約的啟動時間,蒸焗爐會正常啟動,不受童鎖影響。 5. 轉動旋鈕直到顯示溫度轉至 100° C,按旋鈕確認。 ( 如下圖 ) 6. 設置完成,開始新設置的烹調設定。 ( 如下圖 ) S48893-Whirlpool Combi Steamer User Manual_V16.indd 34-35 26/7/2016 下午12:59...
- Page 20 A. 啟動童鎖 : 操作步驟: 可長按 童鎖鍵 3 秒鐘,進入童鎖狀態,此時顯示屏上方的童鎖圖示亮起。 ( 如下圖 ) 1. 按旋鈕確認追加時間功能,顯示屏會自動跳至分鐘位選項。( 如下圖 ) B. 解除童鎖 2. 轉動旋鈕直到顯示分鐘轉至 03,按旋鈕確認。( 如下圖 ) 長按 童鎖鍵 3 秒鐘,即可解除童鎖,此時顯示屏上方的童鎖圖示會消失。 3. 設置完成,即啟動追加時間烹調。( 如下圖 ) 注意 : 如果用戶在烹調結束後,3 分鐘內沒有進行任何操作,將自動返回到待機狀態。 S48893-Whirlpool Combi Steamer User Manual_V16.indd 36-37 26/7/2016 下午12:59...
- Page 21 B . 內隔熱罩安裝 漬 , 可 重 覆 以 上 的 步 驟。 切 勿 使 用 含 金 屬 成 份 的 清 將內隔熱罩放入爐腔並對應上背部的螺絲位,用 2 顆配套螺絲順時針方向扭緊,確保牢固。 潔布、磨砂 型潔 具、鋼刷、表 面粗糙的抹布清潔。 注意 : 整個拆卸與安裝過程,必須小心操作,避免刮傷手或刮花腔體表面。 S48893-Whirlpool Combi Steamer User Manual_V16.indd 38-39 26/7/2016 下午12:59...
- Page 22 注意 : 1. 在扣合 的時 候,用雙母指 並需要稍微用力往後壓,以便 鋼架扣位更 加容易扣 回固定件。 風扇不能正常運作 與客戶服務部聯絡 2. 需 確保爐腔冷 卻, 圖標消失後,才進行清潔。 主機電腦板損壞 導電橡膠按鍵裝置錯誤或損壞 按鍵失靈 與客戶服務部聯絡 主機電腦板損壞 水管被折疊、堵塞或損壞 無蒸氣噴出 水泵損壞 與客戶服務部聯絡 水箱內無水或水箱沒有放置妥善 蒸焗爐漏水 沒有把儲水箱完整推進到位 請將水箱加滿水並妥善安裝 S48893-Whirlpool Combi Steamer User Manual_V16.indd 40-41 26/7/2016 下午12:59...
- Page 23 會產生大量蒸氣,爐腔內多餘的蒸汽會通過出風口排 蒸氣凝結在出風口或蒸氣從爐門四周縫隙處溢出 出,但少部分蒸汽由於環境溫度,會凝結在出風口口 產品尺寸(高 × 闊 × 深) 405 x 530 x 457 毫米 處,或部分蒸氣可能從門縫四周漏出,這是正常現象。 烹調結束後,風扇會延時工作 3 分鐘,將腔體內的熱量 烹調結束後風扇仍在工作 排出。這是產品冷卻爐腔和電子元件,屬於正常現象。 爐腔尺寸(高 × 闊 × 深) 244 x 387 x 342 毫米 這是水垢,是正常現象。如發現白色粉末 ( 水垢 ) , 如發現有白色粉末在入氣口流出 爐腔容積 請啟動除垢模式,以清潔水管。 不銹鋼受熱後,如清潔處理不善,會產生變黃現象。 如爐腔 / 爐底有變黃現象 建議每次使用蒸焗爐後,進行清潔以避免變黃現象產 淨重 約 25 kg 生。 S48893-Whirlpool Combi Steamer User Manual_V16.indd 42-43 26/7/2016 下午12:59...
-
Page 24: Table Of Contents
Preheat Mode 73-74 Sterilization Mode Keep Warm Mode Cavity Drying Mode Descaling Mode 78-79 Preset Function 80-81 Adjust or Increase the Cooking Time 82-83 during/after Cooking is Completed Residual Heat Indicator Child Lock S48893-Whirlpool Combi Steamer User Manual_EN_V12.indd 1-1 26/7/2016 下午12:55... -
Page 25: General Preparation And Advice
It must be securely placed on 1. Stop using the combi steamer and contact Whirlpool 29. Remove the power supply plug before cleaning. Do not a firm and level surface. Failure to do so can cause Customer Service immediately if the door or door seal is 15. -
Page 26: Mounting The Appliance
2. The combi steamer will pause if you open the oven door during cooking. The selected mode will continue automatically once the door is closed. 9. Drip Tray: To collect excess water when the door is open and foul water from Descaling Mode. S48893-Whirlpool Combi Steamer User Manual_EN_V12.indd 48-49 26/7/2016 下午12:55... -
Page 27: Control Panel
(B) When baking food without any container, please place baking paper or aluminum foil onto the baking tray. 4. Insulated gloves To take food or rack out from the combi steamer. 5. Sponge To remove condensation inside the oven. S48893-Whirlpool Combi Steamer User Manual_EN_V12.indd 50-51 26/7/2016 下午12:55... -
Page 28: Control Panel - Basic Functions
After 5 minutes without operation after activate the combi steamer, including opening or closing the oven door. Combi steamer will automatically enter to power-saving mode, display panel goes out. In power-saving mode, only power button is operable. S48893-Whirlpool Combi Steamer User Manual_EN_V12.indd 52-53 26/7/2016 下午12:55... -
Page 29: Control Panel - Major Features
Temperature: Setting bread and cookies, pastries and 100-230°C This indicates the actual desserts. oven temperature during cooking. When changed to this temperature display, the thermostat icon lights up. S48893-Whirlpool Combi Steamer User Manual_EN_V12.indd 54-55 26/7/2016 下午12:55... - Page 30 Slow Cook 30 minutes / 60°C 59 mins) be preserved the original flavor Temperature: 50- without overcooking. Food can 90°C be placed in vacuum bags for this mode. S48893-Whirlpool Combi Steamer User Manual_EN_V12.indd 56-57 26/7/2016 下午12:55...
-
Page 31: Use And Cooking Tips
The suggested cooking time above is solely for reference. Cooking time and results are affected by the preferred degree of doneness, starting temperature as well as the quantity, size and shape of food and containers. S48893-Whirlpool Combi Steamer User Manual_EN_V12.indd 58-59 26/7/2016 下午12:55... -
Page 32: Operation Instructions
Important: If no action is taken within 5 minutes during the setting process, all settings will be cancelled and the display will return to the standby screen. The combi steamer is in standby. S48893-Whirlpool Combi Steamer User Manual_EN_V12.indd 60-61 26/7/2016 下午12:55... -
Page 33: Turbo Convection Mode
4. Turn the knob until the temperature display shows 210°C. Press the knob to confirm (as shown in the diagram below). 5. Setting is complete. The combi steamer will start cooking. 5. Setting is complete. The combi steamer will start cooking. S48893-Whirlpool Combi Steamer User Manual_EN_V12.indd 62-63 26/7/2016 下午12:55... -
Page 34: Convection Mode
4. Turn the knob until the temperature display shows 210°C. Press the knob to confirm (as shown in the diagram below). 5. Setting is complete. The combi steamer will start cooking. 5. Setting is complete. The combi steamer will start cooking. S48893-Whirlpool Combi Steamer User Manual_EN_V12.indd 64-65 26/7/2016 下午12:55... -
Page 35: Forced Air + Steam Mode
4. Turn the knob until the temperature display shows 210°C. Press the knob to confirm (as shown in the diagram below). 5. Setting is complete. The combi steamer will start cooking. 5. Setting is complete. The combi steamer will start cooking. S48893-Whirlpool Combi Steamer User Manual_EN_V12.indd 66-67 26/7/2016 下午12:55... -
Page 36: Proving Mode
5. Setting is complete. The combi steamer will start cooking (as shown in the diagram below). 4. Setting is complete. The combi steamer will start cooking (as shown in the diagram below). Important: The function of “Combination Button: Cavity temperature display” is not available in this mode. S48893-Whirlpool Combi Steamer User Manual_EN_V12.indd 68-69 26/7/2016 下午12:55... -
Page 37: Slow Cook Mode
5. Setting is complete. The combi steamer will start cooking (as shown in the diagram below). 5. Setting is complete. The combi steamer will start cooking (as shown in the diagram below). S48893-Whirlpool Combi Steamer User Manual_EN_V12.indd 70-71 26/7/2016 下午12:55... -
Page 38: Defrost Mode
4. Turn the knob until the temperature display shows 60°C. Press the knob to confirm (as shown in the diagram below). 5. Setting is complete. The combi steamer will start cooking (as shown in the diagram below). S48893-Whirlpool Combi Steamer User Manual_EN_V12.indd 72-73 26/7/2016 下午12:55... -
Page 39: Sterilization Mode
Important: The function of “Adjust or Increase the Cooking Time during/after Cooking is Completed” is not available in 4. Setting is complete. The combi steamer will start cooking (as shown in the diagram below). this mode. S48893-Whirlpool Combi Steamer User Manual_EN_V12.indd 74-75 26/7/2016 下午12:55... -
Page 40: Keep Warm Mode
4. Turn the knob until the temperature display shows 60°C. Press the knob to confirm (as shown in the diagram below). 5. Setting is complete. The combi steamer will start cooking (as shown in the diagram below). S48893-Whirlpool Combi Steamer User Manual_EN_V12.indd 76-77 26/7/2016 下午12:55... -
Page 41: Descaling Mode
4. Descaling is complete. Also, descaler is required for this mode. Customer can select the Wpro descaler under Whirlpool brand. This product can be used in steamer for cleaning limescale deposits effectively, optimizing machine performance and prolonging the lifespan of the Important: appliance. -
Page 42: Preset Function
(as shown in the diagram below). S48893-Whirlpool Combi Steamer User Manual_EN_V12.indd 80-81 26/7/2016 下午12:55... -
Page 43: Adjust Or Increase The Cooking Time
Note: If no action is taken within 3 minutes after cooking is completed, the combi steamer will return to standby mode. 6. Setting is complete. Cooking will be resumed with new settings (as shown in the diagram below). S48893-Whirlpool Combi Steamer User Manual_EN_V12.indd 82-83 26/7/2016 下午12:55... -
Page 44: Residual Heat Indicator
9. It is suggested to run the Descaling Mode at least once a month or when the descaling icon lights up. S48893-Whirlpool Combi Steamer User Manual_EN_V12.indd 84-85 26/7/2016 下午12:55... -
Page 45: Cleaning And Maintenance
Put the back panel inside the oven, matching the screw holes in the rear plate. Insert the 2 original screws and turn clockwise until tight and secure. Important: Exercise caution during the whole process to avoid cutting your hands or scratching the oven surface. S48893-Whirlpool Combi Steamer User Manual_EN_V12.indd 86-87 26/7/2016 下午12:55... -
Page 46: Others
Water pump is damaged Contact after-sales service Water tank is empty or not in place The water tank is not in a correct Fill the water tank and put it back Water leakage position correctly S48893-Whirlpool Combi Steamer User Manual_EN_V12.indd 88-89 26/7/2016 下午12:55... -
Page 47: Product Specifications
Product Dimension (H x W x D) 405 x 530 x 457 mm Cavity Dimension (H x W x D) 244 x 387 x 342 mm Oven Capacity Net Weight Approximately 25 kg S48893-Whirlpool Combi Steamer User Manual_EN_V12.indd 90-91 26/7/2016 下午12:55... - Page 48 S48893-Whirlpool Combi Steamer User Manual_EN_V12.indd 92-93 26/7/2016 下午12:55...
Need help?
Do you have a question about the CS2320 and is the answer not in the manual?
Questions and answers