
Related Manuals for Whirlpool CS1250


Summary of Contents for Whirlpool CS1250
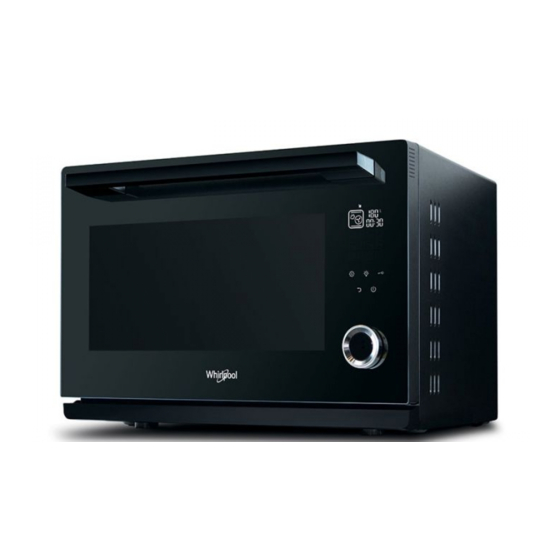
- Page 1 Health & Safety, Use & Care, Installation Guide and Online Warranty Registration Information 產品安全指引、使用說明、安裝指南及 網上登記保養資料 Model : CS1250 產品型號...
-
Page 2: Table Of Contents
目錄 使用前的準備與須知 清潔及保養 頁 頁 重要安全資訊 清潔及保養 首次使用前須知 如何拆下上發熱管 使用注意及建議事項 產品放置事項 接地說明 其他須知 頁 產品及配件結構圖 控制面板 故障排解 41- 42 控制面板 - 基本功能說明 產品規格 控制面板 - 主要功能介紹 控制面板 - 主要功能詳細說明 10-11 使用及烹調小貼士 操作方法說明 頁 設置時鐘 蒸氣模式 熱風加蒸氣模式 頂部 / 底部 / 上下燒烤模式 熱風模式... -
Page 3: 重要安全資訊
使用前的準備與須知 重要安全資訊 使用注意及建議事項 本說明包含有關產品安全、使用、維護及保養的重要 1. 如發現爐門或爐門密封邊損壞時,請停止使用 資訊,請仔細閱讀本說明書,並將本說明書存放於容 產品並 儘快聯絡惠而浦客戶服務部。 易提取的地方,以備將來查閱。 2. 如電源線損壞,必須由供應商 / 製造商或合格技術 人員更換,以免造成危險。 3. 請勿於此爐附近加熱或使用易燃物品,以免產生 首次使用前須知 火警或爆炸。 4. 切勿使用本產品烘乾布料、紙張、香料、藥材、 1. 此產品很重,需要兩個人或以上安裝或移動此 木材、花朵或其他易燃的物件,否則可能會造成 產品,必須將產品放置在堅固及平穩的表面, 火災。 否則會造成身體傷害或產品損壞。 5. 切勿過度烹調食物,否則可能引致火災。 2. 此產品只設計作室內和家庭用途。請依照說明書 6. 使用蒸焗爐時切勿離開,尤其正當在使用紙、塑膠 內列明的煮食方法使用。切勿使用此產品作戶外、 或其他易燃材料的物件進行烹調。當用作為食物 商業或其它用途。 加熱時,紙張可能會著火或燒焦,某些塑料則可能 3. 請確保家中使用的電壓與產品標籤上的電壓一致。 溶化。如發現有物件在蒸焗爐內或外被點燃或 4. -
Page 4: 產品放置事項
使用前的準備與須知 17. 請使用直接從水喉取的自來水、食用水或蒸餾水 36. 請勿堵塞爐門感應器,否則會造成意外及造成火 注入儲水箱,直至水位達到標註“MAX”(最高水 災。 位 ) 的位置。把儲水箱完整推進於凹位內,直至聽 37. 此蒸焗爐不可以接駁及透過外置計時裝置或遙遠 到「卡」一聲,確保固定到位。 控制系統使用。 18. 水箱出現裂紋或缺口時,請勿繼續使用,以免引 38. 烹調過程中或完結後水箱溫度可能偏高。 起因漏水而導致的漏電或觸電。 19. 為確保衛生,並防止冷凝水在蒸爐內積聚,請於 注意: 高溫!小心燙傷! 每次使用後清空水箱及確保爐腔完全乾透。 20. 除清水外,切勿使用儲水箱盛載其他液體 ( 除垢劑 除外 )。 39. 需要監管兒童,不要讓兒童玩此產品。 21. 以蒸氣模式烹調過程中儘量不要打開爐門,以免 蒸氣流失和爐腔溫度下降,影響烹調效果。如有 產品放置事項 需要打開爐門,請酌量增加蒸煮時間。 22. 烹調過程中如需翻轉食物或因其他需要必須打開 1. 產品的四周必須有足夠的通風空間,切勿在爐頂 爐門時,請盡量不要靠近爐門... -
Page 5: 產品及配件結構圖
使用前的準備與須知 產品及配件結構圖 出風口 爐門感應器 頂部發熱管 爐燈 排出蒸氣口 水箱 爐門 接水盤 蒸氣進入口 1. 控制面板:用於操作蒸焗爐(詳細請參考控制面板說明 P.7-11) 2. 出風口:排出爐內多餘的熱氣及水蒸氣。 3. 爐燈:爐腔照明,以便觀察烹調的食物。 4. 排出蒸氣口:爐腔內多餘的蒸氣由此孔排出。 5. 頂部發熱管:產生熱能烹調食物。 6. 水箱:盛載清水以產生蒸氣。 7. 蒸氣進入口:讓蒸氣進入爐腔內。 8. 爐門:1. 確保爐門關上後,才開啟烹調程式。 2. 在烹調過程中,將爐門打開,烹調會暫停;把爐門關上後,會自動繼續原先的烹調設定。 9. 接水盤:盛載開門後流出的倒汗水及除垢功能中的污水。 10. 爐門感應器:感應爐門是否關上。... - Page 6 使用前的準備與須知 燒烤架 金屬盤 (接油盤) 金屬盤 (接油盤) 隔熱手套 海綿 1. 燒烤架 (A) 如需進行多層煮食,建議將此燒烤架放於較底層的位置,如進行二層煮食,請放於下層位置。可使 爐腔內空氣更流通、讓爐腔溫度更平均。 (B) 食物無容器盛放時,請用牛油紙或錫紙,平鋪在燒烤架上使用。 (C) 燒烤架上可承受的最大重量為4公斤。 2. 金屬盤(接油盤) (A) 食物無容器盛放時,請用牛油紙或錫紙,平鋪在金屬盤上使用。 (B) 金屬盤上可承受的最大重量為5公斤。 3. 隔熱手套 由蒸焗爐拿出食物或托盤時使用。 4. 海綿 用於吸取爐腔內的倒汗水。...
-
Page 7: 控制面板
使用前的準備與須知 控制面板 控制面板 LED顯示屏 爐燈鍵 童鎖鍵 設置鍵 電源鍵 返回鍵 旋鈕 旋鈕按鍵 功能 / 時間 / 溫度設定 確定 / 開始 / 暫定設定... -
Page 8: 控制面板 - 基本功能說明
使用前的準備與須知 控制面板 - 基本功能說明 圖示 功能說明 旋鈕 功能 / 時間 / 溫度設定 旋鈕按鍵 確定 / 開始 / 暫停設定 設置鍵 1. 時鐘設定 : 在待機狀態下長按設置鍵 3 秒鐘,即可進入設置時鐘畫面,進行時鐘設定。 ( 詳細請參閱第 13 頁“設置時鐘”); 2. 預約功能設定 : 烹調模式、烹調時間和烹調溫度設定後,按設置鍵,即可進入預約功能畫面, 進行預約設定。 ( 詳細請參閱第 34-35 頁“預約功能”); 3. 在暫停狀態下,按設置鍵可重新調整烹調時間和溫度。( 詳細請參閱第 36 頁“烹調過程中 調校功能”) 返回鍵... -
Page 9: 控制面板 - 主要功能介紹
使用前的準備與須知 控制面板 - 主要功能介紹 水箱圖標 圖標常亮為程序需要用水,烹調 前請確保水箱已加滿水;圖標閃 爍亮起為水箱缺水提示 清潔接水盤提示 圖標使用蒸氣相關功能 後才亮起;圖標會在烹 調結束後閃爍約3分鐘 烹調過程中調校 / 除垢提示 結束後追加時間 爐燈 設置溫度 可調節範圍: 30° C - 230° C 童鎖 預約功能 時鐘和時間 時鐘:在待機狀態下顯示 9 個主要烹調模式 為 24 小時制。 ( 詳情參照 “控制面板 - 顯示範圍:00:00 - 23:59 主要功能詳細說明” ) 時間:即設定烹調時間。 可調範圍由00:05 - 12:59 翻熱西式麵包模式... -
Page 10: 控制面板 - 主要功能詳細說明
使用前的準備與須知 控制面板 - 主要功能詳細說明 默認時間 / 時間 / 圖示 模式 功能介紹 溫度 溫度選擇範圍 此模式以蒸氣烹調食物 , 可保留 時間 5 - 419 分鐘 食物原有的味道,營養及顏色。 (最長 6 小時 59 分鐘) 蒸氣 30分鐘 / 100° C 適合蒸煮蔬菜,肉類,海鮮或 溫度 50 - 110° C 燉湯等。 以熱風煮食並加入蒸氣,讓烹 調的食物不會因烤焗的高溫而... - Page 11 使用前的準備與須知 控制面板 - 主要功能詳細說明 默認時間 / 時間 / 圖示 模式 功能介紹 溫度設置 溫度選擇範圍 此程式會以已調節的最佳溫度 時間 5 - 59 分鐘 翻熱中式包點 去翻熱麵包,過程中加入蒸氣, 10 分鐘 / 100° C 溫度不可調校 使效果像剛出爐的新鮮包點。 此程式會以已調節的最佳溫度 時間 5 - 59 分鐘 去翻熱麵包,過程中透過上下發 翻熱西式麵包 10 分鐘 / 160° C 溫度不可調校 熱管加熱,以烘烤麵包,使效果...
-
Page 12: 使用及烹調小貼士
使用前的準備與須知 使用及烹調小貼士 1. 所有烹調模式的最短設定的時間為 5 分鐘。 (d) 加熱後,先讓食物在爐內放置片刻,略加攪 ( 除 ‘追加烹調時間’ 功能外 ) 拌後取出。 2. 完成某些烹調程式後,風扇會延時工作 3 分 (e) 使 用 奶 瓶 或 加 熱 嬰 兒 食 物 後 , 即 攪 拌 或 鐘,將爐腔內的熱量排出,這是正常現象。 搖動,餵食前應檢查溫度,避免燙傷。 3. 烹調過程中,如果將爐門打開,蒸焗爐會自動 5. -
Page 13: 設置時鐘
操作方法說明 設置時鐘 首次開機後,蒸焗爐發出「必」一聲後即進入待機畫面,時鐘默認顯示 12:00 ( 如下圖 ),顯示屏全亮。 在開機後畫面後,若在 5 分鐘內沒有進行任何操作,會自動進入省電模式,此時顯示屏熄滅,省電模式下 只有 電 源鍵能操作。省電模 式下按“電源鍵” 退出省電 模式 ,機 器進 入開 機 後畫 面。 例如 : 設置現前時間為 13 時 20 分。 操作 步 驟: 1 . 在待機 畫 面 下 , 長 按 設置鍵 3 秒,小時位閃爍... -
Page 14: 蒸氣模式
操作方法說明 蒸氣模式 此模式以蒸氣烹調食物,可保留食物原有的味道,營養及顏色。適合蒸煮蔬菜,肉類,海鮮或燉湯等。 每次使用前,請確保水箱已加滿水。 溫度 時間 開機預設 100° C 30 分鐘 設定範圍 50° C - 110° C 5 分鐘 - 6 小時 59 分鐘 例如:設置烹調時間為 1 小時 40 分鐘,溫度為 90° C。 操作步驟: 1. 在待機狀態下,順時針旋轉旋鈕至 蒸氣模式圖示閃爍,按旋鈕確認功能。( 如下圖 ) 然後畫面會自動跳至 溫度選項。 2. 轉動旋鈕直到顯示溫度轉至 90° C,按旋鈕確認。( 如下圖 ) 然後畫面會自動跳至小時選項。 3. -
Page 15: 熱風加蒸氣模式
操作方法說明 熱風加蒸氣模式 以熱風煮食並加入蒸氣,讓烹調的食物不會因烤焗的高溫而流失水份。背部風扇使熱風均勻循環流動, 可確保多層烤焗的食物受熱更平均。適用於煮各種食物。可把食物放在鋪有錫紙或牛油紙的焗盤上直接 烤焗。每次使用前,請確保水箱已加滿水。 溫度 時間 開機預設 180° C 30 分鐘 設定範圍 100° C - 230° C 5 分鐘 - 1 小時 30 分鐘 例如:設置烹調時間為 40 分鐘,溫度為 210° C。 操作步驟: 1. 在待機狀態下,順時針旋轉旋鈕至 熱風加蒸氣模式圖示閃爍,按旋鈕確認功能。( 如下圖 ) 然後 畫面會自動跳至溫度選項。 2. 轉動旋鈕直到顯示溫度轉至 210° C,按旋鈕確認。( 如下圖 ) 然後畫面會自動跳至小時選項。 3. -
Page 16: 頂部 / 底部 / 上下燒烤模式
操作方法說明 頂部 / 底部 / 上下燒烤模式 設有三種不同的燒烤模式,分別為頂部燒烤模式,底部燒烤模式和上下燒烤模式 ( 頂部及底部燒烤 )。 可因應食材種類和所需的烹調效果去選擇合適的燒烤模式。可把食物放在鋪有錫紙或牛油紙的燒烤架或 焗盤上直接烤焗。 頂部燒烤模式 : 適合燒烤食材或用於烤焗的最後階段,作加強食物金黃度及烤色的作用。 底部燒烤模式 : 適合烘焙的最後階段或局部時段只需底部加熱的食物,如薄餅或馬卡龍等菜式。熱力會 從底部散發出來。 上下燒烤模式 : 傳統的一層烘焙與烤焗。熱力會從上面及底部散發出來,使食物達到均勻的烤焗效果。 適用於烹調肉類、魚類、麵包以及各式曲奇、糕點及甜品等。尤其適合頂部有濕潤配料的蛋糕。 溫度 時間 開機預設 180° C 30 分鐘 設定範圍 100° C - 230° C 5 分鐘 - 1 小時 30 分鐘 例如:設置烹調時間為 40 分鐘,溫度為 210° C。 操作步驟:... -
Page 17: 熱風模式
操作方法說明 熱風模式 設有風扇在背部,風扇會將背部發熱線產生的熱氣,均勻地送到爐中每一個角落。使多層烤焗的食物受熱 更平均。可使用於一層或以上的烤焗。可把食物放在鋪有錫紙或牛油紙的焗盤上直接烤焗。 溫度 時間 開機預設 180° C 30 分鐘 設定範圍 100° C - 230° C 5 分鐘 - 1 小時 30 分鐘 例如:設置烹調時間為 40 分鐘,溫度為 210° C。 操作步驟: 1. 在待機狀態下,順時針旋轉旋鈕至 熱風模式圖示閃爍,按旋鈕確認功能。( 如下圖 ) 然後畫面會 自動跳至溫度選項。 2. 轉動旋鈕直到顯示溫度轉至 210° C,按旋鈕確認。( 如下圖 ) 然後畫面會自動跳至小時選項。 3. -
Page 18: 熱風對流模式
操作方法說明 熱風對流模式 上下發熱線及背部風扇同時運作,用於各種烤焗菜式,如肉類、海鮮類、薄餅、麵包以及各式曲奇、糕 點及甜品等。可把食物放在鋪有錫紙或牛油紙的燒烤架或焗盤上直接烤焗。 溫度 時間 開機預設 180° C 30 分鐘 設定範圍 100° C - 230° C 5 分鐘 - 1 小時 30 分鐘 例如:設置烹調時間為 40 分鐘,溫度為 210° C。 操作步驟: 1. 在待機狀態下,順時針旋轉旋鈕至 熱風對流模式圖示閃爍,按旋鈕確認功能。(如下圖) 然後畫面 會自動跳至溫度選項。 2. 轉動旋鈕直到顯示溫度轉至210° C,按旋鈕確認。( 如下圖 ) 然後畫面會自動跳至小時選項。 3. -
Page 19: 加強熱風對流模式
操作方法說明 加強熱風對流模式 以較 短 時間烤焗食物,加快 烹調時間。適用烤 焗體積較 大的 肉類 及糕 點。 建 議把 食物 放在 鋪 有錫 紙或 牛油紙的焗盤上直接烤焗。 溫度 時間 開機預設 180° C 30 分鐘 設定範圍 100° C - 230° C 5 分鐘 - 1 小時 30 分鐘 例如:設置烹調時間為 40 分鐘,溫度為 210° C。 操作步驟:... -
Page 20: 全功能蒸焗模式
操作方法說明 全功能蒸焗模式 此模式集合上下火、熱風、蒸氣功能於一身,全功能的完美結合。煮食過程中加入蒸氣,讓烹調的食物 不會因烤焗而流失水份。適用於煮各種食物。例如較大的肉類或烤焗濕潤的蛋糕。可把食物放在鋪有錫 紙或牛油紙的焗盤上直接烤焗。每次使用前,請確保水箱已加滿水。 溫度 時間 開機預設 180° C 30 分鐘 設定範圍 100° C - 230° C 5 分鐘 - 1 小時 30 分鐘 例如 : 設置烹調時間為 40 分鐘,溫度為 210° C。 操作步驟: 1. 在待機狀態下,順時針旋轉旋鈕至 全功能蒸焗模式圖示閃爍,按旋鈕確認功能。( 如下圖 ) 然後畫面會 自動跳至溫度選項。 2. -
Page 21: 發酵模式
操作方法說明 發酵模式 此模式以蒸氣運作,使爐腔達至已調校的穩定而潮濕的環境。用於麵糰發酵:如薄餅的餅底或製作麵包 的麵糰。麵糰發酵速度會較室溫下快,麵糰表面也不會過乾。每次使用前,請確保水箱已加滿水。 溫度 時間 開機預設 35° C 30 分鐘 設定範圍 30° C - 40° C 5 分鐘 - 6 小時 59 分鐘 例如:設置烹調時間為 40 分鐘,溫度為 35° C。 操作步驟: 1. 在待機狀態下,順時針旋轉旋鈕至 發酵模式 4. 轉動旋鈕直到顯示分鐘轉至 40,按旋鈕確認。 圖示閃爍,按旋鈕確認功能。( 如下圖 ) ( 如下圖 ) 然後畫面會自動跳至溫度選項。... -
Page 22: 翻熱中式包點模式
操作方法說明 翻熱中式包點模式 此程式會以已調節的最佳溫度去翻熱包點,過程中加入蒸氣,使效果像剛出爐的新鮮包點。每次使用前,請 確保水箱已加滿水。 建議烹調時間:一般冷藏麵包所需翻熱時間大約是 10-15 分鐘;室溫麵包所需翻熱時間大約是 8-13 分鐘。 如果有餡的麵包則視乎需要增加烹調時間。此建議烹調時間僅供參考。客人需因應麵包份量、大小、種類 和個人喜好等自行調整翻熱時間。 溫度 時間 開機預設 100° C 10 分鐘 設定範圍 不可調較 5 分鐘 - 59 分鐘 例如:烹調從雪櫃取出的麵包,設置烹調時間為 25 分鐘。 操作步驟: 1. 在待機狀態下,順時針旋轉旋鈕至 翻熱中式包點模式圖示閃爍,按旋鈕確認功能。(如下圖) 然後 畫面會自動跳至分鐘選項。 2. 轉動旋鈕直至顯示分鐘轉至 25,按旋鈕確認。( 如下圖 ) 3. 設置完成,開始烹調。( 如下圖 ) 烹調結束時,顯示屏會顯示“END”並發出聲效,提示操作已完成。同時... -
Page 23: 翻熱西式麵包模式
操作方法說明 翻熱西式麵包模式 此程式會以已調節的最佳溫度去翻熱麵包,使效果像剛出爐的新鮮麵包。 建議烹調時間:一般冷藏麵包所需翻熱時間大約是 10-15 分鐘;室溫麵包所需翻熱時間大約是 8-13 分鐘。 如果有餡的麵包則視乎需要增加烹調時間。此建議烹調時間僅供參考。客人需因應麵包份量、大小、種類 和個人喜好等自行調整翻熱時間。 溫度 時間 開機預設 160° C 10 分鐘 設定範圍 不可調較 5 分鐘 - 59 分鐘 例如:烹調從雪櫃取出的麵包,設置烹調時間為 25 分鐘。 操作步驟: 1. 在待機狀態下,順時針旋轉旋鈕至 翻熱西式麵包模式圖示閃爍,按旋鈕確認功能。(如下圖) 然後 畫面 會自動跳至分鐘選項。 2. 轉動旋鈕直至顯示分鐘轉至 25,按旋鈕確認。( 如下圖 ) 3. 設置完成,開始烹調。( 如下圖 ) 烹調結束時,顯示屏會顯示“END”並發出聲效提示,提示操作已完成。同時顯示屏... -
Page 24: 慢煮模式
操作方法說明 慢煮模式 以蒸氣維持爐腔的溫度。以低溫慢煮,沒有經過高溫加熱,可使各種肉類和海鮮保存原有的鮮味。需配合 真空袋使用。每次使用前,請確保水箱已加滿水。 溫度 時間 開機預設 60° C 30 分鐘 設定範圍 50° C - 90° C 5 分鐘 - 6 小時 59 分鐘 例如:設置烹調時間為 40 分鐘,溫度為 60° C。 操作步驟: 4. 轉動旋鈕直到顯示分鐘轉至 40,按旋鈕 1. 在待機狀態下,順時針旋轉旋鈕至 慢煮模式 圖示閃爍,按旋鈕確認功能。( 如下圖 ) 然後畫面 確認。( 如下圖... -
Page 25: 乾果模式
操作方法說明 乾果模式 以低溫熱風抽乾食物,適合製作各種生果片,蔬菜片或肉乾。 溫度 時間 開機預設 80° C 60 分鐘 設定範圍 40° C - 90° C 5 分鐘 - 12 小時 59 分鐘 例如:設置烹調時間為 2 小時,溫度為 90° C。 操作步驟: 1. 在待機狀態下,順時針旋轉旋鈕至 乾果模式 4. 按旋鈕確認分鐘位00設定。( 如下圖 ) 圖示閃爍,按旋鈕確認功能。( 如下圖 ) 然後 畫面會自動跳至溫度選項。... -
Page 26: 解凍模式
操作方法說明 解凍模式 以蒸氣去解凍冷藏或冷凍食物。每次使用前,請確保水箱已加滿水。 溫度 時間 開機預設 55° C 30 分鐘 設定範圍 50° C - 60° C 5 分鐘 - 6 小時 59 分鐘 例如:設置烹調時間為 1 小時 40 分鐘,溫度為60° C。 操作步驟: 4. 轉動旋鈕直到顯示分鐘轉至 40,按旋鈕 1. 在待機狀態下,順時針旋轉旋鈕至 解凍模式 確認。( 如下圖 ) 圖示閃爍,按旋鈕確認功能。( 如下圖 ) 然後畫面 會自動跳至溫度選項。... -
Page 27: 預熱 - 蒸氣模式
操作方法說明 預熱 - 蒸氣模式 預熱蒸氣模式,使爐腔達至預設溫度。 3. 設置完成,開始預熱。( 如下圖 ) 溫度 開機預設 100° C 設定範圍 50° C - 110° C 預熱功能的烹調時間均毋需設定;當達到設定的 預熱溫度時,顯示屏會顯示“END”和發出聲效, 提示操作已完成。 例 如 : 以 蒸 氣 進 行 預 熱 , 設 置 烹 調 溫 度 為 預熱結束時,顯示屏會顯示“END”及發出 100° C。 聲效,提示操作已完成。同時顯示屏... -
Page 28: 預熱 - 烤焗模式
操作方法說明 預熱 - 烤焗模式 預熱烤焗模式,使爐腔達至預設溫度。 3. 設置完成,開始預熱。( 如下圖 ) 溫度 開機預設 180° C 設定範圍 100° C - 230° C 預熱功能的烹調時間均毋需設定;當達到設定的 預熱溫度時,顯示屏會顯示“END”和發出聲效, 提示操作已完成。 預熱結束時,顯示屏會顯示“END”及發出 例 如 : 以 烤 焗 進 行 預 熱 , 設 置 烹 調 溫 度 為 聲效,提示操作已完成 ( 如下圖 )。預熱完成 200°... -
Page 29: 保溫模式
操作方法說明 保溫模式 以熱風保溫食物,適合將剛煮的食物保溫。 溫度 時間 開機預設 55° C 30 分鐘 設定範圍 50° C - 60° C 5 分鐘 - 3 小時 59 分鐘 例如:設置烹調時間為 1 小時 30 分鐘,溫度為 60° C。 操作步驟: 1. 在待機狀態下,順時針旋轉旋鈕至 保溫模式 4. 按旋鈕確認分鐘位30的設定。 圖示閃爍,按旋鈕確認功能。( 如下圖 ) 然後畫面 會自動跳至溫度選項。... -
Page 30: 烘乾爐腔模式
操作方法說明 烘乾爐腔模式 此模式會以高溫加熱爐腔,蒸發爐腔中多餘水份及蒸氣。此功能適用於任何以蒸氣烹調的模式後使用。 溫度 時間 開機預設 230° C 25 分鐘 設定範圍 不可調校 不可調校 操作步驟: 1. 在待機狀態下,順時針旋轉旋鈕至 烘乾爐腔模式圖示閃爍,按旋鈕確認功能。( 如下圖 ) 2. 開始烹調。( 如下圖 ) 烹調結束時,顯示屏會顯示“END”並發出聲效,提示操作已完成。 同時顯示屏上 增加烹調時間圖示 (在烹調結束後,客人可按需 要追加烹調時間) 會閃爍。 注意 :“烹調過程中調校” 功能不適用於此模式。... -
Page 31: 消毒模式
操作方法說明 消毒模式 以 110° C 高溫蒸氣消毒,可消毒餐具或嬰兒奶瓶等。每次使用前,請確保水箱已加滿水。 溫度 時間 開機預設 110° C 30 分鐘 設定範圍 不可調校 5 分鐘 - 6 小時 59 分鐘 例如:設置烹調時間為 35 分鐘。 操作步驟: 1. 在待機狀態下,順時針旋轉旋鈕至 消毒模式 3. 轉動旋鈕直到顯示分鐘轉至 35,按旋鈕 圖示閃爍,按旋鈕確認功能。( 如下圖 ) 然後畫面 確認。( 如下圖 ) 會自動跳至小時選項。 4. -
Page 32: 除垢模式
除垢模式分 3 個階段,分別進行 1 次除垢和 2 次除垢清潔。在整個除垢過程中,需要更換水箱內的液體 3 次,並需要倒掉接水盤內的污水。當需要倒掉接水盤內的污水時,顯示屏上 會相應亮起去提醒用戶。 除垢模式需配合除垢劑使用。客人可選用惠而浦獨家推出的Wpro除鈣去垢劑,此產品適用於蒸爐,有 效清空蒸爐管道內的鈣化聚積物和保持機器良好的操作性能。詳情可到惠而浦(香港)有限公司網站www. whirlpool.com.hk了解。 進行除垢模式時,建議使用除垢劑和淨水分量如下: 第 1 階段:除垢,時間為 30 分鐘。建議使用 10 亳升除垢劑和 120 亳升淨水。 第 2 階段:第 1 次除垢清潔,時間為 10 分鐘。建議使用 130 亳升淨水。 第 3 階段:第 2 次除垢清潔,時間為 10 分鐘。建議使用 130 亳升淨水。... - Page 33 操作方法說明 3 第3個階段:第2次除垢清潔 A. 打開爐門,將 130 亳升淨水倒入水箱至水箱上130毫升 除垢圖標位置。 B. 將水箱放回機內並關上爐門,程式會自動啟動,繼續除垢清潔工作。 C. 第 3 個階段完成後,顯示屏會顯示 “End” 提示,並發出聲效提示,同時顯示屏上 清潔接水盤圖示會 閃爍,提醒用戶倒掉接水盤內的污水。 D. 請倒掉污水,並裝回接水盤。 4. 除垢完成。 注意 : 1.“烹調過程中調校 / 結束後追加時間”功能不適用於此模式。 2. 除垢過程中,如操作有誤 ( 包括操作過程中按暫停或沒有按指示下開關爐門等 ),除垢模式程式 會被擾亂而無法正常運作。建議重新啟動除垢模式並按照除垢模式中的指示再次操作。...
-
Page 34: 預約功能
操作方法說明 預約功能 在進行預約功能設定前,必須先完成時鐘設定。時鐘設定可參見本說明書第 13 頁“設置時鐘”內說明。 例如:現時時間為 16:30,設置預約底部燒烤模式,烹調時間為 40 分鐘,溫度為 210° C,結束時間為 18:00。 操作步驟: 1. 在待機狀態下,順時針旋轉旋鈕至 底部燒烤模式圖示閃爍,按旋鈕確認功能。( 如下圖 ) 然後畫面會 自動跳至溫度選項。 2. 轉動旋鈕直到顯示溫度轉至為 210° C,按旋鈕確認。( 如下圖 ) 然後畫面會自動跳至小時選項。 3. 按旋鈕確認小時位00設定。( 如下圖 ) 然後畫面會自動跳至分鐘選項。 4. 轉動旋鈕直到顯示分鐘轉至 40,按設置鍵 確認。( 如下圖 ) 5. 此時畫面會進入預約烹調結束時間的小時位設置,時鐘位顯示的時間會切換回現時的時間 16:30, 小時位... - Page 35 操作方法說明 6. 轉動旋鈕直到小時位轉至 18,按旋鈕確認。( 如下圖 ) 然後畫面會自動跳至分鐘選項。 7. 轉動旋鈕直到顯示分鐘轉至 00,按旋鈕確認。 8. 顯示屏上 預約功能圖示會亮起,預約烹調時間切換回現時時間 16:30。表示預約設置完成。( 如下圖 ) A. 查詢預約狀態 可按設置鍵 3 秒,以查詢預約結束時間,預約功能圖示會閃爍顯示;再按設置 3 秒,可返回預約 設置畫面。 B. 取消預約設定: 如需取消預約設定,可直接按 電源鍵,即退出預約設定,並自動返回到待機畫面。 注意 : 預約模式適用於 9 個主要烹調模式,翻熱中式包點模式,翻熱西式麵包模式,慢煮模式和乾果模式。 ( 詳情請參閱第 9-11 頁控制面板 - 主要功能介紹 / 主要功能詳細說明 ) 建議...
-
Page 36: 烹調過程中調校 / 結束後追加時間功能
操作方法說明 烹調過程中調校 / 結束後追加時間功能 A. 烹調過程中進行調校 在烹調過程中,可以根據需要去增加或減少烹調時間和溫度。 例如:已設定的烹調時間 01:40 和溫度 90° C,改為烹調時間 02:00 及溫度 100° C。 操作步驟: 1. 於烹調過程中,按旋鈕暫停烹調,時間位會閃爍。( 如下圖 ) 2. 按設置鍵 自動進入調較設置,溫度位會閃爍;顯示屏上 烹調過程中調校圖示會亮起。( 如下圖 ) 3. 轉動旋鈕直到顯示溫度轉至 100° C,按設置鍵 確認。( 如下圖 ) 然後畫面會自動跳至小時選項。 4. 轉動旋鈕直到顯示小時轉至 02,按設置鍵 確認。( 如下圖 ) 然後畫面會自動跳至分鐘選項。 5. 轉動旋鈕直到顯示分鐘轉至 00,按旋鈕確認。( 如下圖 ) 6. - Page 37 操作方法說明 B. 烹調結束後追加時間功能 烹調結束後,可以根據需要去增加烹調時間。 溫度 時間 設定範圍 不可調校 1 分鐘 - 59 分鐘 烹調結束後,顯示屏會顯示“End”並發出聲效提示。同時顯示屏上 結束後追加時間圖示會閃爍。 清潔接水盤提示圖示會閃爍約 3 分鐘 ( 註 : 清潔接水盤提示圖示只會在使用蒸氣相關功能後才亮起 )。 ( 如下圖 ) 如增加烹調時間,可根據以下步驟操作: 例如:烹調結束後,追加烹調時間 3 分鐘。 操作步驟: 1. 按旋鈕確認追加時間功能,顯示屏會自動跳至分鐘位選項。( 如下圖 ) 2. 轉動旋鈕直到顯示分鐘轉至 03,按旋鈕確認。( 如下圖 ) 3. 設置完成,即啟動追加時間烹調。( 如下圖 ) 注意...
-
Page 38: 餘溫高溫提示
操作方法說明 餘溫高溫提示 在待機狀態或省電模式狀態下,完成煮食後,只要爐腔內的溫度高於 50° C,顯示屏上 高溫提示圖標 就會亮起,提醒用戶爐腔內溫度較高,不適宜進行清潔 ( 如下圖 )。直到爐腔內的溫度低於 50° C,顯示 屏上高溫提示圖標才會消失,建議用戶於圖示消失後才進行清潔。 童鎖功能 用來鎖住按鍵,防止兒童在沒有成人指導的情況下使用蒸焗爐。 A. 啟動童鎖: 可長按 童鎖鍵 3 秒鐘,進入童鎖狀態,此時顯示屏上方的童鎖圖示亮起。 ( 如下圖 ) B. 解除童鎖 長按 童鎖鍵 3 秒鐘,即可解除童鎖,此時顯示屏上方的童鎖圖示會消失。... -
Page 39: 清潔及保養
清潔及保養 清潔保養 1. 在正常情況下,清潔產品是唯一所需的保養方法。 8. 如 果爐 腔非 常 骯髒 ,可 於清 潔 前, 先以 「 消 毒 模 式」(110° C ),蒸 煮 30 分鐘,來 溶 解 油 漬, 2. 請務必在蒸焗爐冷卻狀態下, 圖示消失後進 待機身冷卻後,才開始進行清潔。如遇上頑固的 行清潔與保養。清潔之前,需切斷電源。請勿 油漬,可重覆以上的步驟。切勿使用含金屬成份 使用蒸氣清潔器清洗本蒸焗爐。 的清潔布、磨砂型潔具、鋼刷、表面粗糙的抹布 3. 蒸焗爐必須保持清潔,否則可能導致爐身受到 清潔。 腐蝕,縮短蒸焗爐的使用壽命,所以每次使用... -
Page 40: 如何拆下上發熱管
清潔及保養 如何拆下上發熱管 1. 用拇指向後按壓發熱管彈片尖端至彈片邊緣,把固定發熱管的鋼架拉下,如下圖箭頭所示位置; 用拇指向後按壓發熱管彈片尖端至彈 片邊緣,把固定發熱管的鋼架拉下。 2. 即可對爐腔頂部進行清潔;( 如下圖 ) 發熱管移向下後,方便對爐腔頂部 進行清潔。 3. 清潔完成後,將上發熱管稍微向上壓,扣回上發熱管的固定件。 注意 : 1. 在扣合的時候,用雙拇指並需要稍微向上壓,以便鋼架扣位更加容易扣回固定件。 2. 需確保爐腔冷卻, 圖標消失後,才進行清潔。... -
Page 41: 故障排解
清潔及保養 故障排解 A. 如出現以下情況 如以下情況出現 ... 可能成因 解決方法 蒸焗爐沒有連接到電源 確保蒸焗爐連接電源 顯示屏上顯示消失 插座有問題 用其他電器再測試插座是否有問題 電源線不能正常工作 與客戶服務部聯絡 電源插頭沒有插好 重新插好電源插頭 爐門沒有關好 重新關閉爐門 蒸焗爐不能操作 水箱沒有放置妥善 重新放回水箱並妥善安裝 電路版損壞 與客戶服務部聯絡 兒童安全鎖被鎖住 解除兒童安全鎖 顯示屏損壞 與客戶服務部聯絡 顯示屏顯示異常 電路板損壞 爐門沒有關上 重新把爐門關上 烹調期間大量排出水或蒸氣 爐門封邊損壞 與客戶服務部聯絡 爐燈損壞 與客戶服務部聯絡 爐燈不亮 主機電腦板損壞 風扇電機損壞 與客戶服務部聯絡... - Page 42 其他須知 B. 下列情況均屬正常 如以下情況出現 ... 首次使用各種燒烤或烤焗模式時,蒸焗爐有少量 這是由蒸焗爐內的保護部件有油脂揮發所引起的。 白煙冒出及異味。 這屬於正常現象,非損壞。 使用蒸氣相關功能時有聲音 水箱吸水時或會混入空氣造成聲音,是正常現象。 使用與蒸氣相關的功能時,蒸焗爐運轉過程中爐腔 內會產生大量蒸氣,爐腔內多餘的蒸汽會通過出風口 蒸氣凝結在出風口 排出,但少部分蒸汽由於環境溫度,會凝結在出風 口處,這是正常現象。 某些烹調程式結束後,風扇會延時工作 3 分鐘,將 腔體內的熱量排出。這是產品冷卻爐腔和電子元 烹調結束後風扇仍在工作 件,屬於正常現象。 這是水垢,是正常現象。如發現白色粉末 ( 水垢 ), 如發現有白色粉末在入氣口流出 請啟動除垢模式,以清潔水管。 不 鏽 鋼 受 熱 後 , 如 清 潔 處 理 不 善 , 會 產 生 變 黃 現象。建議每次使用蒸焗爐後,進行清潔以避免變...
-
Page 43: 產品規格
其他須知 產品規格 型號 CS1250 額定電壓及額定頻率 220-240V ~ 50/60Hz 額定輸入功率 2100W 產品尺寸(高 × 闊 × 深) 330 x 500 x 441 毫米 爐腔尺寸(高 × 闊 × 深) 220 x 366 x 309 毫米 爐腔容積 25公升 淨重 約 17 公斤... - Page 44 Table of Contents Table of Contents ■ General Preparation and Advice ■ Cleaning and Maintenance Page before Use Page Cleaning and Maintenance Important Safety Information How to Lower the Upper Heater Precautions before First Use Precautions and Advice 45-46 ■ Others Page Mounting the Appliance Troubleshooting...
-
Page 45: General Preparation And Advice
1. Two or more people are required to install or move this appliance as it is heavy. It must be securely placed on 1. Stop using the combi steamer and contact Whirlpool a firm and level surface. Failure to do so can cause Customer Service immediately if the door or door seal is physical injuries or damage to the appliance. - Page 46 General Preparation and Advice General Preparation and Advice before Use before Use 10. Use oven gloves to take food and containers out of the 25. When combi steam is plugged, never touch the appliance to avoid burning. appliance, the power cord or plug with wet hands or other wet body parts.
-
Page 47: Mounting The Appliance
General Preparation and Advice before Use General Preparation and Advice before Use ■ Mounting the Appliance 1.Good ventilation must be ensured around the combi steamer. Do not place any objects on top of the appliance and allow a minimum distance of 30cm between the combi steamer and any overhead wall cabinet. Keep a minimum distance of 5cm between both sides of the appliance and walls. -
Page 48: Earthing Instructions
General Preparation and Advice before Use General Preparation and Advice before Use ■ Earthing Instructions General Preparation and Advice before Use This appliance must be earthed. In case of electric leakage, the ground can provide a current loop to avoid electric shock. The power supply plug that comes with this appliance must be inserted into a single-phase-bipolar socket with grounding. - Page 49 General Preparation and Advice General Preparation and Advice before Use before Use Grill Rack Grill Rack Metal Tray (Oil Collector) Steam Tray (with holes) Baking Tray Metal Tray (Oil Collector) (Oil Collector) Insulated Gloves Insulated Gloves Sponge Sponge 1. Grill Rack (A) For multi-layers cooking, it is recommended to place the grill rack on the lowest level for better air circulation and even oven temperature.
-
Page 50: Control Panel
General Preparation and Advice before Use Control Panel LED Display Panel Oven Light Button Setting Button Child Lock Button Return Button Power Button Rotary Knob Rotary Knob Button Function / Time / Temperature Setting Confirm / Start / Pause Settings... -
Page 51: Control Panel - Basic Functions
General Preparation and Advice before Use... -
Page 52: Control Panel - Major Features
General Preparation and Advice before Use Control Panel - Major Features Water Tank Icon This icon lights up as the function operated with water, please ensure water tank is filled before cooking. Flashing icon indicates that water tank is empty. Drip Tray Cleaning Reminder This icon lights up only if the steam mode has been in operation, the... -
Page 53: Control Panel - Description Of Major Features
General Preparation and Advice before Use General Preparation and Advice before Use ■ Control Panel – Description of Major Features Time/ Function Default Time/ Temperature Icon Mode Descriptions Temperature Selection Range S t e a m c o o k i n g p re s e rve s Time: 5-419 mins the original taste, nutrients (maximum 6 hours... - Page 54 General Preparation and Advice before Use General Preparation and Advice before Use Time/ Function Default Time/ Temperature Icon Mode Descriptions Temperature Selection Range T h e u p p e r a n d b o t t o m Time: 5-90 mins heater and rear fan operate (maximum 1 hours...
- Page 55 General Preparation and Advice before Use General Preparation and Advice before Use Time/ Default Time/ Temperature Function Icon Mode Temperature Selection Descriptions Range Time: 5-779 mins Food is dehydrated with hot (maximum 12 hours air in low heat. Suitable for Drying Fruit 60 minutes / 80°C 59 mins)
-
Page 56: Use And Cooking Tips
General Preparation and Advice before Use General Preparation and Advice before Use ■ Use and Cooking Tips 1. Minimum time setting is 5 minutes for all cooking modes feeding to avoid burning. (Except the “Increase the Cooking Time after Cooking is 5. -
Page 57: Operation Instructions Page
Operation Instructions Operation Instructions ■ Setting the Clock display panel lights up completely. The combi steamer returns to energy saving mode if no button is pressed or door is opened for 5 minutes. Under energy mode and back to the startup screen. Example: Set the clock to the current time 13:20. -
Page 58: Steam Mode
Operation Instructions Operation Instructions ■ Steam Mode Steam cooking preserves the original taste, nutrients and color of food. It is suitable for steaming vegetables, meat and seafood or braising soup. Always ensure the water tank is filled before using this mode. Temperature Time Default Setting... -
Page 59: Forced Air + Steam Mode
Operation Instructions Operation Instructions ■ Forced Air + Steam Mode Cooking food with hot air and steam to prevent moisture loss during high temperature cooking. The rear fan provides good circulation of hot air to ensure even heating on multiple levels. This mode is suitable for all types of food. It is recommended to place aluminum foil or baking paper onto the baking tray cooking. -
Page 60: Upper/Bottom Grill/Conventional Bake Mode
Operation Instructions Operation Instructions ■ Upper/ Bottom Grill/ Conventional Bake Mode Three grill modes are available: upper grill, bottom grill and conventional bake (upper and bottom grill). You can select a suitable mode according to the types of food and cooking result that you are looking for. It is recommended to place aluminum foil or baking paper onto the baking tray before cooking. -
Page 61: Forced Air Mode
Operation Instructions Operation Instructions ■ Forced Air Mode The appliance comes with a rear fan which distributes the hot air produced by the rear heater evenly inside the oven. Foods baking paper onto the baking tray before cooking. Temperature Time Default Setting 30 mins Setting Range... -
Page 62: Convection Mode
Operation Instructions Operation Instructions ■ Convection Mode The upper and lower heaters and rear fan operate simultaneously in this mode. Suitable for all baking dishes, such as meat, seafood, pizzas, bread and cookies, pastries and desserts. It is recommended to place aluminum foil or baking paper onto the baking tray before cooking. -
Page 63: Turbo Convection Mode
Operation Instructions Operation Instructions ■ Turbo Convection Mode Cooking time is shortened in this mode to bake and roast food quickly. It is suitable for baking large meat and cakes. It is recommended to place aluminum foil or baking paper onto the baking tray before cooking. Temperature Time Default Setting... -
Page 64: Convection + Steam Mode
Operation Instructions Operation Instructions ■ Convection + Steam Mode This mode combines upper, lower heat, hot air and steam cooking. It is a perfect all-in-one combination cooking. Adding steam during the cooking process can prevent moisture loss during high temperature cooking. Suitable for cooking all types of food, such as large cuts of meat or baking moist cakes. -
Page 65: Proving Mode
Operation Instructions Operation Instructions ■ Proving Mode This mode works with steam to ensure stable high temperature and humidity inside the oven. It allows dough (for pizza or bread) to rise quicker in a stable environment, and is used for fermenting dough for pizzas or bread. Always ensure that the Temperature Time Default Setting... -
Page 66: Bun Reheat Mode
Operation Instructions Bun Reheat Mode Bun reheated at a regulated temperature and steam is added to reheat that tastes just like freshly-steamed bun. Always ensure that the water tank is filled before using this mode. Suggested cooking time: Reheating time for frozen bun: about 10-15 minutes; Reheating time for room temperate bun: about 8-13 minutes. -
Page 67: Bread Reheat Mode
Operation Instructions Operation Instructions ■ Bread Reheat Mode Bread is reheated at a regulated temperature that tastes just like freshly-baked. Suggested cooking time: Reheating time for frozen bread: about 10-15 minutes; Reheating time for room temperate bread: It is recommended to add cooking time for bread with fillings as needed. Temperature Time Default Setting... -
Page 68: Slow Cook Mode
Operation Instructions Operation Instructions ■ Slow Cook Mode Steam is injected to maintain temperature inside the oven for slow cooking. Low temperature is used, meat and seafood can Temperature Time Default Setting 30 mins Setting Range 5 mins - 6 hours and 59 mins Example: Set the cooking time to 40 minutes;... -
Page 69: Drying Fruit Mode
Operation Instructions Operation Instructions ■ Drying Fruit Mode Food is dehydrated with hot air in low heat. Suitable for preparing dried fruit and vegetable slices or meat jerkies. Temperature Time Default Setting 60 mins Setting Range 5 mins - 12 hours and 59 mins Example: Set the cooking time to 2 hours;... -
Page 70: Defrost Mode
Operation Instructions Operation Instructions ■ Defrost Mode Temperature Time Default Setting 30 mins Setting Range 5 mins - 6 hours and 59 mins Example: Set the cooking time to 1 hour and 40 minutes; defrosting temperature is 60°C. Steps: 1.In standby mode, turn the knob clockwise to 4. -
Page 71: Preheat - Steam Mode
Operation Instructions Operation Instructions ■ Preheat - Steam Mode The Preheat Mode can be operated with steam mode. The oven 3. Setting is complete. The combi steamer will start will be heated to preset temperature. preheating (as shown in diagram below). Temperature Default Setting Setting Range... -
Page 72: Preheat - Baking Mode
Operation Instructions Operation Instructions ■ Preheat - Baking Mode The Preheat Mode can be operated with baking mode. The 3. Setting is complete. The combi steamer will start oven will be heated to preset temperature. preheating (as shown in diagram below). Temperature Default Setting 180°C... -
Page 73: Keep Warm Mode
Operation Instructions Operation Instructions ■ Keep Warm Mode Keeping food warm with hot air. Suitable for keeping cooked dishes warm. Temperature Time Default Setting 30 mins Setting Range 5 mins - 3 hours and 59 mins Example: Set the cooking time to 1 hours and 30 minutes; cooking temperature is 60°C. Steps: 1. -
Page 74: Cavity Drying Mode
Operation Instructions Operation Instructions Operation Instructions ■ Cavity Drying Mode In this mode, the oven is heated to a high temperature so any excessive moisture and steam are evaporated. This function is used for drying the oven after any steam cooking modes. Temperature Time ■... -
Page 75: Sterilization Mode
Operation Instructions Operation Instructions ■ Sterilization Mode At sterilizing mode, high temperature 110°C is used to sterilize dinnerware, cutlery or feeding bottles. Always ensure that the Temperature Time Default Setting 30 mins Setting Range Cannot be adjusted 5 mins - 6 hours and 59 mins Example: Set the cooking time to 35 minutes. -
Page 76: Descaling Mode
Also, descaler is required for this mode. Customer can select the Wpro descaler under Whirlpool brand. This product can be used in steamer for cleaning limescale deposits effectively, optimizing machine performance and prolonging the lifespan of the appliance. - Page 77 Operation Instructions Operation Instructions 3. Stage 3: 2nd descaling and cleaning process Open the oven door. Fill the water tank up to the level of the descaling 130ml icon with 130ml pure water. Put the water tank back into place and close the oven door. Descaling and cleaning will begin automatically. When done, the display will show “END”...
-
Page 78: Preset Function
Operation Instructions Operation Instructions ■ Preset Function You must set the clock before using the preset function. For instructions on clock setting, please see “Setting the Clock” on page 57 of this instruction manual. Example: The current time is 16:30. You want to preset cooking time for the Bottom Grill Mode. Cooking time is 40 minutes and temperature is 210°C. - Page 79 Operation Instructions Operation Instructions jump to minute setting automatically . 8. The light up. Display will change from operating time back to the current time 16:30, indicating preset setting is complete (as shown in the diagram below). A. Checking Preset Function Status Press and hold the setting button and hold the setting button for 3 seconds again to return to the preset function screen.
-
Page 80: Adjust The Setting During Cooking Process / Increase The Cooking
Operation Instructions Operation Instructions ■ Adjust the Setting during Cooking Process / Increase the Cooking Time after Cooking is Completed. A. Adjust the setting during cooking process You can extend or shorten the cooking time and the temperature as required during the cooking process. Example: Change the cooking time and temperature settings from 01:40 and 90°C to 02:00 and 100°C. - Page 81 Operation Instructions Operation Instructions B. Increase the cooking time after cooking is completed You can increase the cooking time after cooking is completed. Temperature cannot be adjusted. Temperature Time Setting Range Cannot be adjusted 1 – 59 mins When cooking is completed, the “END” will be shown on display and an audio tone sounds. The “Extended Cooking Time”...
-
Page 82: Residual Heat Indicator
Operation Instructions Operation Instructions ■ Residual Heat Indicator In standby or energy-saving mode the “Residual Heat Indicator” icon will be shown to warn that cavity exceed 50°C and ■ Child Lock Steamer is equipped with child lock so that children cannot switch on or change any setting accidentally. A. -
Page 83: Cleaning And Maintenance Page
Cleaning and Maintenance Cleaning and Maintenance ■ Cleaning and Maintenance 1. Under normal circumstances, cleaning is the only 10. Tap water, drinking water or distilled water is suggested maintenance required. for steaming function. Avoid using mineral water. 2. Cleaning and maintenance should only be carried out 11. -
Page 84: How To Lower The Upper Heater
Cleaning and Maintenance Cleaning and Maintenance ■ How to Lower the Upper Heater 1. Put your thumbs to press against the spring hock to the back until release and pull down the upper heater. Push back gently towards the arrow position as shown below. Put your thumbs to press against the spring hock to the back until release and pull down the upper heater. -
Page 85: Others
Others Others ■ Troubleshooting A. Possible Problems Problem Cause Solution Combi steamer is not connected Ensure it is connected to power to power supply supply Check if other electrical appliances No Display Malfunction of power socket work normally Power cords is not working Contact after-sales service Power supply plug is not Try to plug in the power supply... - Page 86 Others Others B. Following conditions are normal Condition Cause These are emitted by the protective oil and it is time of use normal. This is normal during water pumping into machine Noise can be heard using any steam related mode for steaming.
- Page 87 Others Others ■ Product Speci cations Model CS1250 Rated Voltage and Frequency 220 240V 50 60Hz Rated Input Power 2100W Product Dimension (H x W x D) 330 x 500 x 441 mm Cavity Dimension (H x W x D)
- Page 88 Register your product online 網上登記新產品保養 Save the planet and register your product warranty online! Enjoy extra 1-month free warranty upon online registration. 「惠」環保出力,減少用紙!於網上登記產品更可獲額外多一個月保養。 https://rebrand.ly/WPwarranty...
Need help?
Do you have a question about the CS1250 and is the answer not in the manual?
Questions and answers