
Related Manuals for NKE GYROPILOT 3


Summary of Contents for NKE GYROPILOT 3
- Page 1 GYROPILOT 3 PROCESSOR User Manual This manual describes the installation and initialization of the GyroPilot 3 driver and explains its operation and settings.
-
Page 2: Table Of Contents
Contents Introduction ............................. 4 1.1. Operating principle of the GyroPilot 3 calculator ..............4 1.2. Functionalities ......................... 4 Installation ............................5 2.1. Equipment supplied......................... 5 2.2. Processor orientation ......................5 2.2.1. Automatic detection of the case orientation ..............5 Configuration ........................... 6 3.1. - Page 3 4.4.5. Tacking angle ......................... 16 4.4.6. Tacking velocity ......................17 4.4.7. Man Overboard (MOB) ....................17 4.4.8. Speed reference ......................17 4.4.9. Time before cut-off ....................... 17 4.4.10. Rudder offset ......................... 17 4.4.11. Dead angle ........................17 4.4.12. Setting of the autopilot alarms ..................17 4.5.
-
Page 4: Introduction
Each of these actions can be customised to adapt the operation of the GyroPilot 3 processor to suit the user's expectations and needs. -
Page 5: Installation
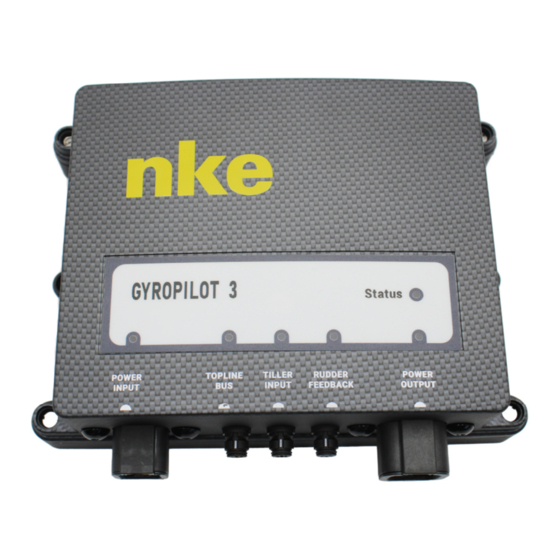
2. INSTALLATION 2.1. EQUIPMENT SUPPLIED The GyroPilot 3 processor is supplied in its packaging with a GyroPilot 3 bus cable 90-60-550, a GyroPilot 3 Power Input cable 90-60-553 and a Gyro3 Actuator 1X cable 90- 60-554 2.2. PROCESSOR ORIENTATION The pilot constantly checks the orientation of the case. The objective is to ensure that it is always oriented with the connectors facing down, that it has not become unhooked from its location, or is not incorrectly positioned, so as to enable steering. -
Page 6: Configuration
As long as confirmation is not obtained, it relies on the old orientation found, to be able to use the full functionality of the autopilot within the first seconds. 3. CONFIGURATION 3.1. CONNECTION GyroPilot 3 Actuator Junction box Rudder angle sensor Tiller... -
Page 7: Equipment Configutation
3.2.1. The type of rudder angle There are two types of rudder angle sensors that can be connected to the GyroPilot 3: The nke rotary sensor or an analog linear sensor. nke rotary rudder angle: The sensor should be mounted in parallel with the rudder stock or false rudder stock. - Page 8 Analog linear rudder angle: The GyroPilot 3 system also integrates linear rudder angles. To take such a sensor into account, it is necessary to measure the triangle of the steering system (see picture below). 5...
-
Page 9: The Type Of Hydraulic Ram
This is why it is necessary to take the most accurate benchmarks as possible. 3.2.2. The type of hydraulic ram The GyroPilot 3 processor allows you to choose in the "Pilot-Maintenance" menu, the type of hydraulic ram used. 3.2.3. The type of circuit supply clutch (PWM/DC) The type of clutch used can be selected by the user in the "Pilot-Maintenance"... -
Page 10: Results Of The Rudder Initialisation
Based on all this information, it calculates the autopilot speed which is the boat speed data that the autopilot will consider. For the GyroPilot 3, the speed used by the autopilot is only a selection of the speed source (ground or surface) chosen by the skipper via a nke display. -
Page 11: Operation
"Pilot" menu and then "Mode select" or from a pilot page by pressing the OK button and then "Mode select". The GyroPilot 3 processor has a total of 6 steering modes, but a display will only show the modes that can be used with the sensors available on the installation. If, for example, there is no wind speed/wind vane sensor, the wind modes will not be available. - Page 12 Select "Compass" in the steering mode. Steer your boat and press the Auto button to activate the GyroPilot 3. The pilot then takes the heading as a reference. The GyroPilot 3 is then activated and steers the boat. You can use the +/-1 and +/-10 keys on a PAD, a remote control or a display to adjust the set-point.
-
Page 13: Apparent Wind Mode
4.1.4. True Wind Mode In true wind mode, the GyroPilot 3 steers the boat according to the true wind angle given by the system. Why use the True Wind mode? The true wind mode is particularly effective when sailing downwind in heavy swell: In these conditions, the GyroPilot 3 shows its potential. -
Page 14: Gps Mode
The SUPER modes are used in addition to the main modes. They allow the autopilot's set point to be adjusted slightly in response to a temporary phenomenon: heel variation, gust In the GyroPilot 3, only one SUPER mode can be activated at one time. There are 3 states in a SUPER mode: Status: OFF. -
Page 15: Heel Angle Mode
o the SUPER mode has deactivated itself due to a manoeuvre or change in the main mode. Status: ON. The SUPER mode is activated • 4.2.1. Heel angle mode This mode allows you to maintain a constant heel angle. It can be activated when following a set-point in compass, apparent wind, true wind or polar mode. -
Page 16: Autopilot Settings
4.4. AUTOPILOT SETTINGS 4.4.1. Autopilot gain The pilot gain allows the boat to be more responsive. Gain increase is often used in the following circumstances: In rough sea conditions, the increase of the gain allows to counter more efficiently the •... -
Page 17: Tacking Velocity
The setting range is between 0 and 3°. 4.4.12. Setting of the autopilot alarms The GyroPilot 3 processor has two configurable alarms The wind direction alarm, called "wind/heading", monitors a change in wind direction in compass mode and a heading change in wind mode. -
Page 18: Tacking
4.5. TACKING The GyroPilot 3 allows you to tack in any mode: compass, apparent wind, true wind or polar. Tacking or gybing is executed by a long press on the +/-10 key of a pilot control box. 4.6. The radio transmitter must first be activated in scan mode (see transmitter manual). - Page 19 Each time the skipper acknowledges the same alarm, the time delay doubles. Thus, an alarm with a time delay of one hour will be disabled for one hour after the first acknowledgement, two hours after the second and four hours after the third.
-
Page 20: Evolution Of The Processor
• In case of overload, the processor keeps steering. It limits the intensity to 25A for the • duration of the overload. However, if this lasts longer than 10 minutes, the GyroPilot 3 stops steering. Linear rudder sensor management. •... -
Page 21: Specifications
6. SPECIFICATIONS 6.1. TECHNICAL SPECIFICATIONS Parameter Value Dimensions 210 x 150 x 72 mm / 8.26’ x 5.90’ x 2.83’ (length x height x thickness) Weight 650g, case only / 1.43 lbs 3.2 kg / 7.04 lbs with cable (3 x 6m) Power supply 9V –... - Page 22 Speed reference Surface speed Man over board Crew mode Upwind/downwind limit 90° Heel angle gain Wind limit heel angle mode 5° Leeward limit heel mode Gust gain Gust limit 10° Gust filtering 100 seconds Heading/Wind alarm Battery alarm 10 Volts DC...
-
Page 23: Liability
With regard to the supply prototypes or pilot products, the customer acknowledges that NKE is only bound by a simple obligation of means; that the risk of malfunctions of these products is inherent in their nature, and that NKE can, therefore, not be held liable in this respect.
Need help?
Do you have a question about the GYROPILOT 3 and is the answer not in the manual?
Questions and answers