Table of Contents
Advertisement
Quick Links
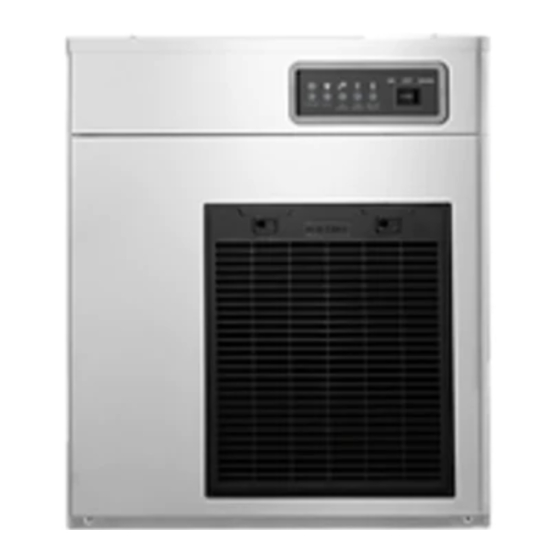
FLAKE ICE MAKER
USER MANUAL
MODEL : IFI-770F, N / IFI-770WF, WN
※ This machine cannot be used in any other country where the electric voltage
for its power supply is not available.
※ This product is designed for indoor installation.
Please be sure to install it indoors.
※ The external appearance, design, color, and/or components of this machine
may be changed without prior notice for the sake of the Company's product
manufacture.
※ For maximum hygiene, be sure to clean and sterilize the product
on a daily basis.
Advertisement
Table of Contents

Related Manuals for icetro IFI-770N


Summary of Contents for icetro IFI-770N
- Page 1 FLAKE ICE MAKER USER MANUAL MODEL : IFI-770F, N / IFI-770WF, WN ※ This machine cannot be used in any other country where the electric voltage for its power supply is not available. ※ This product is designed for indoor installation. Please be sure to install it indoors.
-
Page 2: Table Of Contents
INDEX 1. Preparations for safety 2. Specifications 9~12 3. Part names 13~20 4. Installation 13~14 - Suitable installation condition and place - How to disassemble the panels - How to install the storage bin 16~17 - Installing the ice maker and connecting storage bin - How to connect water inlet and outlet hoses - About grounding - After installation... -
Page 3: Preparations For Safety
1. Preparations for safety Warning Failure to follow these instructions may result in severe personal injury or death. Failure to follow these instructions may result in parts replacement expense and / Caution or service repair expense. SHOULD BE DONE PROHIBITION DO NOT DO NOT DISCONNECT... - Page 4 Warning Do not place or store heavy items or the top of the product. ◆ Damage by excessive weight can cause the unit to overheat and/or fire. Do not install the machine under humidity area or near the water sprayed zone. ◆...
- Page 5 Warning Do not disassemble Do not modify the parts of icemaker, and repair alone by yourself without a qualified technician. ◆ It may happen the fire and extra, ordinary operation, and would result in the serious problem. Prohibition Do not bend the power cord severely, or allow it to be pressed by a heavy matter, which can cause damage to the cord.
- Page 6 Warning Disconnect power plug For long term usage interruption or product shut-down, close the water supply valve, remove the ice from the product and unplug the power cord. Disconnect power plug For cleaning or servicing, unplug the power cord, shut off the water feed and wait for the product to come to a complete stop.
- Page 7 Caution Caution Remove any moisture or oil or anything that may cause slipping on the ground near the product. ◆ Slipping and hitting the ice maker or sticking one's hand into the bottom will cause injury. Hand over As you turn over the icemaker to the other user, please turn over the operation manual, too.
-
Page 8: Specifications
2. Specifications IFI-770F/N IFI-770WF/WN Category AC 220V 60Hz, 1PH AC 230V 50Hz, 1PH AC 220V 60Hz, 1PH Ice Shape FLAKE NUGGET FLAKE NUGGET FLAKE NUGGET ※ Maximum Production Capacity 310±10% 295±10% 335±10% 310±10% 310±10% 295±10% kg/day(lbs/day) (683±10%) (650±10%) (738±10%) (683±10%) (683±10%) (650±10%) at A/W 10℃(A/W 50℉) -
Page 9: Part Names
3. Part names - Air cooled type FRONT REAR TOP PANEL POWER CORD WATER INLET 560 mm(22") DISPLAY PANEL POWER SWITCH STATUS INDICATOR MAIN S/W(ELB) FRONT FILTER CONDENSER 557 mm(21.9") DRAIN OUTLET BOTTOM 286 mm(11.3") ICE OUTLET(ID Φ138 mm(5.4")) - Page 10 LEFT RIGHT 55 mm(2.2") 645 mm(25.4") 640 mm(25.2") LEFT PANEL RIGHT PANEL SIDE FILTER...
- Page 11 3. Part names - Water cooled type FRONT REAR TOP PANEL POWER CORD WATER INLET 560 mm(22") DISPLAY PANEL POWER SWITCH STATUS INDICATOR MAIN S/W(ELB) COND. WATER OUTLET COND. WATER INLET HAND VALVE 557 mm(21.9") COND. WATER DRAIN DRAIN OUTLET BOTTOM 286 mm(11.3") ICE OUTLET(ID Φ138 mm(5.4"))
- Page 12 LEFT RIGHT 55 mm(2.2") 645 mm(25.4") 640 mm(25.2") LEFT PANEL RIGHT PANEL...
-
Page 13: Installation
4. Installation Suitable installation condition and place ⊙ Places without heat source The product has to be installed at places without a heat ◆ source such as stove or gas range or any place with ambient temperature of 10 ~ 38 ℃(50~100 ℉). ⊙... - Page 14 Suitable installation condition and place ⊙ Be sure to install the product in clean places. ◆ Ice will be used for food or human consumption. Thus, the installation site must be clean and hygienic. ⊙ The product must be installed indoors. ◆...
-
Page 15: How To Disassemble The Panels
How to disassemble the panels Top panel: Unscrew the fixing screws at the front top, lift the panel, and push to the back to remove it. Front panel: Unscrew the fixing screws at the bottom of the front panel and pull both sides to remove the panel. -
Page 16: How To Install The Storage Bin
How to install the storage bin 1. Unpack the ice storage bin and make sure that it will not be moved after installation. 2. Connect the drain hose at the bottom outlet part and fully tighten the joints at the connecting part in order to minimize leaks. Tighten the joints at the connecting part, face the outlet of the hose upward, and pour some water into the bin to check for leaks. - Page 17 4. Move the ice maker little by little until the front door opens freely. 5. Screw the fixing brackets to the back of the ice maker. The ice maker must be fixed as in the figure below after putting it on top of the bin. The manufacturer shall not be liable for any incident caused by failure to fix the ice maker, such as fall of the maker.
-
Page 18: How To Connect Water Inlet And Outlet Hoses
How to connect water inlet and outlet hoses [ Connecting water inlet and outlet hoses to product ] Specifications of connecting parts Appropriate water Category Water pressure AC 220V / 60Hz temperature AC 230V / 50Hz Water inlet for cooling 10 ~ 32 ℃... -
Page 19: About Grounding
About grounding ※ Be sure to ground the product to prevent electric shock. ⊙ Grounding method - if there is a grounding terminal In case of plugging the icemaker into an rating AC outlet equipped with a grounding terminal, extra grounding is not necessary. ⊙... -
Page 20: After Installation
After installation ⊙ Protection of the water supply hose Do not put any heavy object on the water supply hose. Do not step on it either. ⊙ The appropriate water pressure, water temperature, or ambient temperature is... This ice maker must be used under conditions of 1~5 kg/㎠, water supply of 10~32 ℃(50~90 ℉), and ambient temperature of 10~38 ℃(50~100 ℉). -
Page 21: Starting The Product 20~23
5. Starting the product How to power on Circuit breaker 1. Set the circuit breaker switch on the back to 'OFF'. 2. Set the power switch on the front to center('OFF'). OFF DRAIN TEMP MOTOR WATER ERROR ERROR 3. Insert the plug to a power outlet that suits power requirements. -
Page 22: Ice Making
Ice making 1. Set the power switch on the front to left('ICE') to start the product. ◆ Water is supplied for a moment while the ice making operation is stabilized, and ice making starts after the motor runs for 60 seconds. Water outlet(evaporator) 1. -
Page 23: Stopping The Product
Stopping the product 1. Set the power switch on the front to center ('OFF') to stop the product. OFF DRAIN TEMP MOTOR WATER ERROR ERROR ◆ While ice making is underway, the operation stops, and the motor is run for an additional 60 seconds. This is for protecting the motor by removing any ice or water from the cylinder. -
Page 24: Product Status Indication Lamp Guide
6. Product Status Indication Lamp Guide OFF DRAIN TEMP MOTOR WATER ERROR ERROR POWER LAMP(GREEN) - Lamp on when power is on. ●Blinking(every 2 seconds) : in time of automatic cleaning. FULL LAMP(YELLOW) - Lamp on when ice become full. NO WATER LAMP(YELLOW) - Lamp on when water supply is short. -
Page 25: Essential Measures To Prevent Freezing And Bursting 25~26
7. Essential measures to prevent freezing and bursting Make sure to remove water from the water supply tank and the evaporator Water inside the product gets frozen when ambient temperature is lower than 0℃(32℉) and prevents the product from running properly. When the product is not in use for extended periods such as winter, be sure to remove coolant and water completely from the inside of the product as follows: Not removing all coolant and water will cause freezing and bursting, Caution... -
Page 26: Removing Water From Condenser(Water Cooled Type)
Removing water from condenser(water cooled type) 1. Set the power switch on the top right of the front and the switch of the circuit breaker to 'OFF' and unplug the power cord. 2. Lock the tap and make sure to remove the hoses at the water inlet and outlet ports in the back of the product. -
Page 27: Maintenance, Clearing And Sterilizing 27~30
8. Maintenance, clearing and sterilizing ※ Make sure that the product is maintained in accordance with the label and the user manual included in the package. ● Make sure that only a qualified technician services the product. ● In order to minimize the risk of electric shocks, do not touch or disassemble the electrical parts of the product. -
Page 28: Maintenance Schedule
Maintenance schedule ※ Following maintenance schedule is for reference. ※ More frequent maintenance will be needed in accordance with the local hygiene regulations, water quality, and conditions of the site. Inspection Area Details schedule Daily SCOOP 1. Clean the ice scoop with mild detergent. 2. -
Page 29: Cautions For Cleaning The External Panel(Stainless Steel)
Cautions for cleaning the external panel(stainless steel) ※ How to remove rust How to clean rusted parts 1. Rust spots in early stage - Rust spots in early stage mean that the stainless steel itself is not severely affected, thus mild detergent or any commercially available cleaning agent will restore original state. -
Page 30: Cleaning / Sterilizing 30~31
Cleaning / Sterilizing ※ The ice maker requires cleaning and sterilizing at least twice a year. It may need more frequent cleaning and sterilizing. ◆ Make sure to comply with the following. Do not use ammonia-based detergent to prevent damage to the personnel or the ice maker itself. ●... - Page 31 3. Cleaning and sterilizing Distill 74ml(12.5 fl.oz) of 5.25% sodium hypochlorite solution(for whitening) with 19L(642.5 fl.oz) of warm water. (Refer to the user manual of the solution as the ratio may vary per manufacturer). This is the minimum ratio - increase the ratio of the solution as needed. ※...
-
Page 32: Error Type
9. Error type Disabling Type Cause Indicator lamp Measures Operation indication Automatically disabled 'FULL' indicator Filled Storage bin is filled with ice cubes. Use ice cubes when the storage bin Stops lights up has some room. Water supply Water for ice making is not supplied 'NO WATER' Check water Power back on when... -
Page 33: Before Contacting The Manufacturer
10. Before contacting the manufacturer Make sure to check the following if the product is operated inappropriately. If the issue persists, contact the local distributor where you purchased the product or the customer service center. Please provide the information on the warranty when you contact us. (Model, serial number, name of distributor, date of purchase and detailed description of issue) Operational status What to check... - Page 34 MEMO...
- Page 35 MEMO...
- Page 36 Online Internet Service http://www.icetro.com 3 2 4 0 3 5 6 - 0 1...
Need help?
Do you have a question about the IFI-770N and is the answer not in the manual?
Questions and answers