
Related Manuals for Kellfri 23-TV15ATV


Summary of Contents for Kellfri 23-TV15ATV
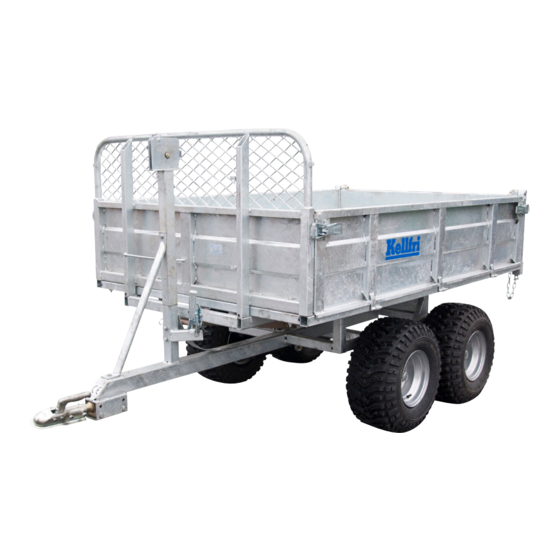
- Page 1 23-TV15ATV TIPPING TRAILER Read the operating instructions carefully before using the product! Operating instructions translated from Swedish...
-
Page 2: Table Of Contents
Deviation form Warranty terms and conditions Kellfri designs and supplies efficient, affordable machinery and components for forestry, agriculture, construction and gardening in Sweden, the rest of the Nordic region and Europe. We recommend that you always read and follow the safety instructions and the instructions in the machine’s operating manual. -
Page 3: Introduction
INTRODUCTION Thank you for choosing a product from Kellfri AB. Compliance with the safety instructions, operating manual and sound common sense will guarantee many years of enjoyment using the product. Kellfri’s equipment and products are aimed at self-employed farmers, horse enthusiasts and other country-dwellers who have stringent demands on performance. -
Page 4: Safety Instructions
For the safety of both yourself and others, it may be a good idea to read through the safety instructions every now and then. If the safety instructions or the operating manual are dam- aged, or become unusable for any other reason, new copies may be ordered from: Kellfri AB, Munkatorpsgatan 6, SE-532 40 SKARA, Sweden. -
Page 5: Surroundings
SURROUNDINGS Check that the work area is free from bystanders and objects before hitching or using the equip- ment. Otherwise, there is a risk of serious injury. Be extra careful if there are children in the vicinity of the area where the equipment or product is used or stored. Check that there are no low-hang- ing electrical cables within the work area. -
Page 6: Use
Only those who understand the safety instructions and the operating manual may use the equipment or product. Exercise caution and care when working with the equipment or prod- uct, and only use it as described in the instruction manual. There is a risk of crushing when working with equipment that has moving parts. Exercise cau- tion when working with equipment with hydraulic hoses, as oil under pressure can penetrate the skin. -
Page 7: Maintenance And Service
MAINTENANCE AND SERVICE • Make sure that the equipment is stable and cannot tip over when carrying out maintenance and service work. • Replace damaged or worn parts immediately to reduce the risk of injuries. • Carry out maintenance, service and checks in line with recommendations. •... -
Page 8: Tipping Trailers
TIPPING TRAILERS • Carefully read the trailer's operating manual before using the machine. • Always check that the performance of the machine combination to be used with the trailer guar- antees safety and functionality. If cracks, twists, play or fatigue are detected, discontinue use and rectify the fault. -
Page 9: Load The Trailer Correctly
LOAD THE TRAILER CORRECTLY! Table of contents... -
Page 10: Warning Decals
WARNING DECALS Make sure warning decals are always visible and clean them when necessary. Do not use a high-pressure washer directly on the warning decal. If apart with a decal is replaced, or the decal becomes worn or in any other way unusable, order a new set of decals. SYMBOL EXPLANATION Read the operating manual! Before carrying out work. -
Page 11: Service And Troubleshooting
SERVICE INTERVAL MEASURE Tyres Before each use Check the air pressure in the tyres. It must always at least be the recom- mended air pressure. See info on the sidewalls of the tyres for exact values. Do not exceed the maximum pressure! Wheel nuts Perform an initial check after 2-3 hours of... -
Page 12: Maintenance Instructions
CARE INSTRUCTIONS 1. Do not overload the tractor and trailer. 2. After wheel replacement, check that the wheel nuts are tightened and repeat after a stable pe- riod of operation. The tightening torque must not exceed 45 kpm. Use a torque wrench if possible. 3. -
Page 13: Winch-Assisted Tipping
Winch-assisted tipping. Make sure the hitch is correctly attached and will stay in place. Tilt the trailer by carefully raising the floor using the winch. WARNING! Risk of crushing! Do not permit anyone to stand under suspended loads! Table of contents... -
Page 14: Assembly Instructions
ASSEMBLY INSTRUCTIONS It is recommended that fitting is carried out by at least two people. M10x120 M12x95 M10x70 M10x110 M10x65 M12x50 M12x30 M10x55 M12x80 Table of contents... - Page 15 Fitting the wheel axles on the bogie. Position the bogie with the brackets upwards, as illus- trated, to make it easier to fit the wheel axles. Fit the wheel axles, secure with a spring pin. Then turn the assembled bogie to fit the wheels. 90 Nm 1.2–1.5 Bar Fit the wheels, lubricate the axle pin and then check the air pressure on all wheels.
- Page 16 Fit the box frame to the bogie. Tighten all bolts. Fit the brackets to the frame and then screw the floor of the bed into place. Tighten all bolts. Fitting the towing device. Don't forget to lubricate moving parts. Table of contents...
- Page 17 Fitting the headboard. Fit the square profile with support roller for wire. Don't forget to lubricate the support roller. Screw the stabiliser rod on securely. Table of contents...
- Page 18 Fit the square profiles for mounting the sides and tailgate. Optional: extension sides. Fitted on the trailer’s existing flaps. Drill holes in the flaps and screw them in place. See figure below for hole dimensions and hole spacing (dimensions in mm). Table of contents...
- Page 19 Fitting the tailgate. Fit the lifting arm under the bed. Then check that the pins are fitted securely in place. Fit the chains on the tailgate. Table of contents...
-
Page 20: Figures
Table of contents... - Page 21 Table of contents...
-
Page 22: Notes
NOTES: Table of contents... -
Page 23: Deviation Form
DEVIATION FORM We are grateful for your help in pointing out any defects in the product supplied to you by Kellfri. Before making a claim, read Kellfri’s general purchase terms and conditions in our catalogue or on our website www.kellfri.co.uk, and in the operating manual if supplied. -
Page 24: Warranty Terms And Conditions
WARRANTY TERMS AND CONDITIONS The warranty’s validity - Kellfri’s warranty is valid for 12 months from the date of purchase The warranty covers - Reimbursement for parts replaced after a material fault or manufac- turing fault has been verified. The warranty does not...
Need help?
Do you have a question about the 23-TV15ATV and is the answer not in the manual?
Questions and answers