
Subscribe to Our Youtube Channel
Related Manuals for Kellfri 23-TV07PRO


Summary of Contents for Kellfri 23-TV07PRO
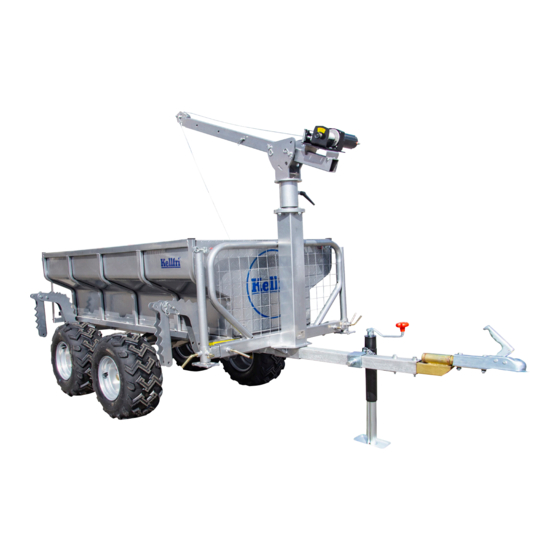
- Page 1 23-TV07PRO TIPPING AND FORESTRY TRAILER ATV PRO NOTE! The winch is sold separately Read this manual carefully before using the product! Translated from the original...
-
Page 2: Product Details
INTRODUCTION Thank you for choosing a product from Kellfri AB. Compliance with the general safety instruc- tions, instruction manual and sound common sense will guarantee many years of enjoyment using the product. Kellfri’s equipment and products are aimed at self-employed farmers who have stringent performance demands. -
Page 3: Product Safety Instructions
1,000 kg. Replace the ball coupling if any excess wear is detected • EU regulations stipulate how fast a vehicle with a non-brake trailer is allowed to drive. Always comply with these regulations. Kellfri is not liable for any modifications, changes or rebuilds carried out by customers! -
Page 4: Instructions For Emergency Situations
INSTRUCTIONS FOR EMERGENCY SITUATIONS In case of emergency, call 112. Always have a mobile phone or emergency phone available when working alone. A first aid kit and fire extinguisher must be kept in an easily accessible location when carrying out any work, maintenance and service. - Page 5 SURROUNDINGS Check that the work area is free from bystanders, children and objects before hitching or using the trailer. There is a risk of serious bodily harm. Be extra careful if there are children in the vicinity of the area where the equipment or product is used or stored. Check that there are no low-hanging electrical cables within the work area.
-
Page 6: After Use
Only those who understand the safety instructions and the operating instructions may use the equipment or product. Take caution and care when working with the equipment and only use it in the way described in the operating instructions. There is a risk of crushing when work- ing with equipment that has moving parts. -
Page 7: Maintenance And Service
MAINTENANCE AND SERVICE Make sure the trailer is stable and cannot tip over when carrying out maintenance and service work. Replace damaged or worn parts to reduce the risk of injuries. Carry out maintenance, service and checks in line with recommendations. Only use spare parts with equal perfor- mance to reduce the risk of injuries and breakdowns. - Page 9 PARTS - TRAILER 1x - Frame 2x - Bogie axle 1x- Beam - front 4x Holders (bolsters) 1x - Beam (rear) 1x - Center beam 4x - Wheel 1x - Headboard...
- Page 10 PARTS - TRAILER 2x - Support leg holder 2x - Support leg 1st - Connecting bar Tow bar with ball coupling 1x - Jack stand 1x- Bed...
- Page 11 MOUNTING - TRAILER 2. Then fit all wheels. Note The wheel tracks 1. Mount the boogie axle on the right and left should point to the direction of travel, there is side of the frame. See picture below: an arrow on the tyre that shows the direction. 3a.
- Page 12 4. Front beam is mounted before the headboard. 5. Mount the headboard, support bracket and support legs are mounted on each side of the headboard. See pictures below: 6. Mount the tow bar and jack stand. Note! the jack stand is fitted on the connecting bar before mounting the tow bar.
- Page 13 7. Mount the rear beam and all four holder (bolsters) 8. Install the bed onto the trailer. Lift he bed carefully and secure with pin shafts. Check and make sure all bolts and nuts are tightened before use.
- Page 14 Crane Assembly Mount the rotary housing to the upper frame on the headboard, tighten all bolts and mount the crane holder. Mount the crane’s outer tube in the desired position and then mount the inner pipe. 1x - Inner tube 1x Outer tube 1x - Crane holder 1x - Rotary housing...
- Page 15 Claims form We are grateful for your help in pointing out any defects in the product supplied to you by Kellfri. Before making a claim read Kellfri’s general purchase terms and conditions in our catalogue or on our website www.kellfri.se, as well as in the instruction manual if supplied.
-
Page 16: Ec Declaration Of Conformity (Original)
You are always welcome to give your feedbacks, reviews or ask us about our equipment and products. Kellfri AB is constantly working on further developing their products and therefore reserves the right to modify, among other things the design and appearance without further notice.
Need help?
Do you have a question about the 23-TV07PRO and is the answer not in the manual?
Questions and answers