
Related Manuals for Kellfri 23-TV15ATV


Summary of Contents for Kellfri 23-TV15ATV
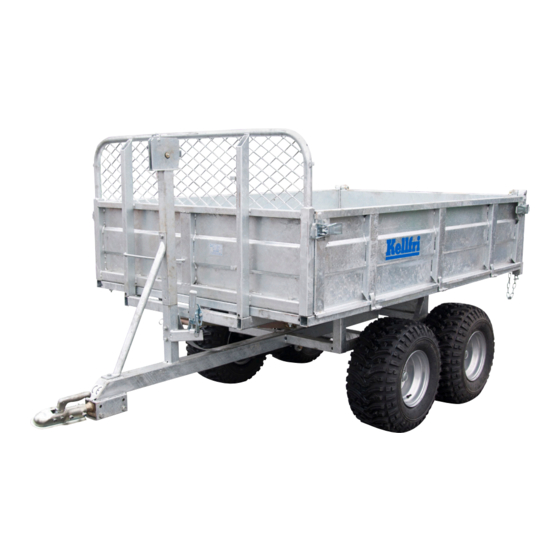
- Page 1 23-TV15ATV TIPPING TRAILER READ THIS MANUAL CAREFULLY BEFORE USING THE PRODUCT !!! TRANSLATED FROM THE ORIGINAL...
-
Page 2: Product Information
INTRODUCTION Thank you for choosing a product from Kellfri AB. By following general safety information, operating instructions and common sense, you will have many years of enjoyable use of the product. Kellfris equipment and products are aimed to be use by active farmers with high demands on functionality. -
Page 3: Basic Safety Instructions
Kellfri AB, Munkatorpsgatan 6, 532 37 SKARA Sweden. Tel.: +46 (0)511 242 50 (Pls. contact the retailer) https://www.kellfri.co.uk/ Do not use the equipment or product if you feel ill, tired or are under the influence of alcohol. -
Page 4: Warning Labels
WARNING LABELS Make sure that the warning labels are always visible, clean the warning labels if necessary. Do not wash with high pressure washer directly on the warning label. If any part of the decal is worn or label becomes frayed or otherwise unreadable, order new decals. When traveling on public roads, LGF plate must be fixed,visiblely and clearly. -
Page 5: Personal Protective Equipment
PERSONAL PROTECTIVE EQUIPMENT Wear suitable clothing and footwear. Do not wear loose clothing or jewelry when working with the equipment. Remember to put up long hair when working with equipment that ro- tates. Use protective gloves as there is a risk of burns if any hot surfaces are touched such as exhaust pipes, and avoid getting oil and petrol on skin. -
Page 6: Use & Operation
USE / OPERATION Only people who understand the safety information and instructions in this manual may op- erate the equipment. Be alert and careful when working with the machine and only use the tool or product in the manner described in this manual. When working with equipment that has moving parts, there is always the risk of injury. -
Page 7: Maintenance And Service
Use only original replacement parts or spare parts with equivalent performance to reduce the risk of damage. Check all nuts and bolts are tightened after performning maintenance and service.Never weld towing eye as it alters the strength!Contact Kellfri for spare parts. SERVICE INTERVALL... -
Page 8: Care Instructions
CARE INSTRUCTIONS Do not overload the trailer. After changing wheels, check the wheel nuts are tightened to make sure that they are tightened. The tightening torque must not exceed 45 kgm. If possible, use a torque wrench. Ensure that the bearing position is correct to avoid bearing gap and abnormal wear of bearings. - Page 9 Tilting using the winch. Make sure the hook is properly secured in the pin and can not un- hook. Tilt the trailer by pulling up the bed gently with the help of the winch. WARNING! Risk of crushing! No one is allowed to stand under the suspended load!
-
Page 10: Installation Instructions
INSTALLATION INSTRUCTIONS It is recommended that the installation is carried out by at least two persons. M12x95 M10x120 M10x70 M10x110 M10x65 M12x50 M12x30 M10x55 M12x80... - Page 11 Assembling the wheel axle on the bogie. Set rear suspension with brackets upwards as illustrated to easily assemble the wheel axle. Mount the wheel axles, secured with spring pin. Then invert the assembled bogies for mounting the wheels. 90 Nm 1,2-1,5 Bar Fit the tires, lubricate the axle shaft and then check the air pressure of each wheel...
- Page 12 Install the platform frame on the bogie. Tighten all bolts. Fit the brackets on the frame and tighten the platform bed. Tighten all bolts Installation of the towing device. Do not forget to lubricate moving parts.
- Page 13 Front gate assembly Install bar with wire block for the wire. Do not forget to lubricate the wire block. Mount the stabilizer bar.
- Page 14 Fit the bars for mounting the side and rear flaps. Optional: extension flaps. - Mounted on the trailers existing flaps. - Drill holes in the boards and mount them. See the figure below for hole size and hole distance measurement (mm).
- Page 15 Fitting the rear flaps Mount the lifting arm under the bed. Then check that the pins are secured and can not loosen. Install the chains on the tailgate.
-
Page 16: Warranty Terms And Conditions
Other equipment must meet the hardware requirements of the Directive Tina Baudtler, VD Kellfri AB is constantly working on further developing their products and therefore re- servesthe right to modify, among other things the design and appearance without notice 2015-09-22 CUSTOMER SERVICE You are always welcome to give your feedbacks, reviews or ask us about our tools and products.
Need help?
Do you have a question about the 23-TV15ATV and is the answer not in the manual?
Questions and answers