gCreate gMax 2 PRO Quick Start Manual
Hide thumbs
Also See for gMax 2 PRO:
- User manual (21 pages) ,
- Unboxing and setup instructions (9 pages)
Advertisement
Quick Links
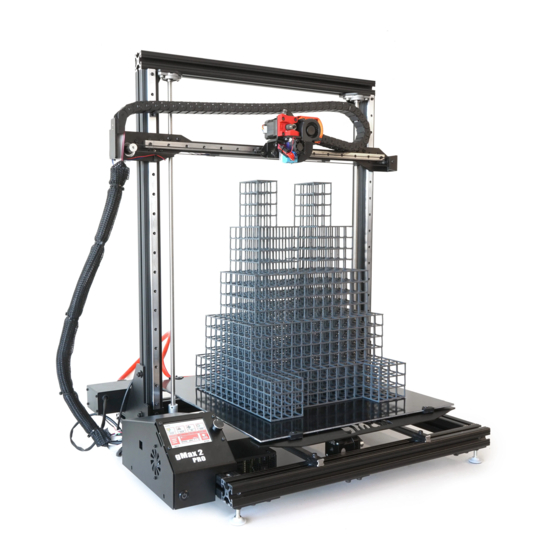
gMax 2 PRO
Getting Started
v210819 (Marlin 2 Firmware)
Even if you are familiar with 3d prin ng, please review this guide
to set up and learn about your gMax Printer.
This guide should be used a er you have received the printer and followed the
unboxing instruc ons. This manual is for Single and Dual extruder printers
Check out youtube.com/gCreate3d
to watch a gMax 2 Ge ng Started Video
Advertisement

Related Manuals for gCreate gMax 2 PRO


Summary of Contents for gCreate gMax 2 PRO
- Page 1 2 PRO Getting Started v210819 (Marlin 2 Firmware) Even if you are familiar with 3d prin ng, please review this guide to set up and learn about your gMax Printer. This guide should be used a er you have received the printer and followed the unboxing instruc ons.
- Page 2 2 PRO Extruder Extruder Drag Chain Extruder Swing Arm Diagram Extruder Drive Gear Blower Fan Hotend Hotend Fan (Active cooling) BLTouch Bed Sensor Hotend Nozzle Filament Bracket Lead Screw Pillow Block Extruder Carriage Lead Screw Nut Block X-Axis Arm...
- Page 3 • Never open the electronics case when the printer is powered on. • Any modifications or attempted repairs, not explicitly directed by gCreate, that cause damage are not covered under the Warranty Pg 2...
-
Page 4: Printer Accessories
Printer Accessories Open the accessory box and remove all the parts. Each printer comes with a scraper for removing parts from the build plate, a power cord, hex keys, nozzle cleaning brush and an extra bag of hardware for future upgrades. Filament Spool Bracket Print Scraper SD Card... -
Page 5: Plug In And Turn On
Insert Filament In Extruder 1. We recommend cu ng off the first 12” of a new spool of filament. 2. Every me you insert filament, cut end of filament at a 45 degree angle and straighten 4” of the end of the filament by bending it. 3. - Page 6 LCD Screen Breakdown Hotend #1 Heated Printer Temp Bed Temp Speed Speed No fica ons Current Temp / Target Temp Coordinates of Extruder (X, Y, Z) No fica ons Se ngs Print Menu Menu gMax Initial Run (Required) 1. You must run the supplied gcode file to test your gMax printer a er transport.
-
Page 7: Bed Leveling
Bed Leveling The gMax 2 Pro uses Bilinear Bed Leveling (BBL) in marlin to probe the bed and create a 3d mesh for the first layer. The mesh is saved to memory and helps ensure the extruder lays down a proper fist layer. It is important the x-axis stays level relative to the bed. - Page 8 Your First Print (Required) 1. A er conduc ng the Ini al Run and leveling the arm, this first print will confirm that your gMax is running the same as when it le the manufacturing facility. This is a necessary and useful print. Make sure to run it with the supplied filament and on the cold acrylic bed.
- Page 9 Babystepping Cheat Sheet Extruder is too low Extruder is perfect Extruder is too high Extruder Extruder Extruder Too low and nozzle Correct height. Too high and is digging in the bed Sticks to bed just not adhering to causing damage. enough.
- Page 10 Removing the Print. Strength vs Finesse 1. If the bed is acrylic, a er the print finishes you can immediately remove it. If you are using a heated bed, turn it off and let it cool several minutes before removing or you risk damaging the print surface or warping you rpart.
- Page 11 Taking the time to learn the best settings will result in a better printing experience. 1. For sl cing, we recommend PrusaSlicer, Cura or Simplify3d. View our forum at forum.gcreate.com, our YouTube channel youtube.com/gcreate3d or the respec ve slicing program websites for more informa- 2.
- Page 12 Useful Tips While You Print 1. You can adjust the speed of your print in real me by turning the LCD screen knob. Slowing the speed can be used to improve the print at a difficult area or if the print isn’t cooling enough.
- Page 13 Dual Extruder Printers - 2in1 Dual The 2in1 dual extruder uses similar settings as the single extruder and does not require independent adjustments of the hotend height. Make sure to update your slicing settings. 1. Make sure when using the 2in1 dual extruder to insert the le (extruder #1) filament first un l it comes out the hotend.
- Page 14 Dual-Extrusion Printing TIps (Dual Chimera) 1. Use a “Brim” and an “Ooze Shield”. The Ooze Shield will help clean the inac ve nozzle during a print to avoid wiping the plas c on the part. e part. Prime Tower Se ngs: Ooze Shield Skirt/Brim offset: 0 Skirt/Brim Layers: 2...
- Page 15 Water Soluable (PVA) Support Material You can use the gMax 2 PRO dual extruder to print your part out of one material and the support material out of water soluable PLA material. This support can then be dissolved away in water for a cleaner surface finish.
Need help?
Do you have a question about the gMax 2 PRO and is the answer not in the manual?
Questions and answers