gCreate gMax 2 PRO User Manual
Large format desktop fdm 3d printer.
Hide thumbs
Also See for gMax 2 PRO:
- Quick start manual (15 pages) ,
- Unboxing and setup instructions (9 pages)
Table of Contents
Advertisement
gMax 2 PRO
Updated 210827
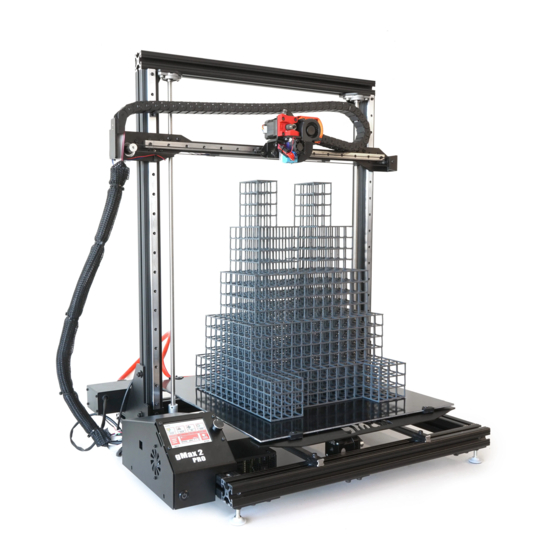
The gMax 2 Pro is a large format desktop FDM 3D printer. These machines can create an infinite number
of designs in all shapes, sizes, colors, and functionalities. The possibilities are truly endless. We at
gCreate hope you enjoy this machine as much as we have enjoyed making it. For the best experience
with your gMax, please review this user guide before operating and keep it handy for future reference.
Page 1
Advertisement
Table of Contents

Related Manuals for gCreate gMax 2 PRO


Summary of Contents for gCreate gMax 2 PRO
- Page 1 2 PRO Updated 210827 The gMax 2 Pro is a large format desktop FDM 3D printer. These machines can create an infinite number of designs in all shapes, sizes, colors, and functionalities. The possibilities are truly endless. We at gCreate hope you enjoy this machine as much as we have enjoyed making it.
- Page 2 Cautions and Warnings 3D printing is a very fun and useful way to generate physical objects from your 3d models but it is still a complex process with specific restraints. • The gMax can accept new accessories including filament spool brackets, hotends, and external peripherals, however unauthorized repairs or modifications that lead to damage are not covered under the warranty.
-
Page 3: Table Of Contents
Contents Basic Operation ............................. 5 Loading Filament ............................5 Inserting Filament ..........................5 Changing Filament Manually ........................ 5 Changing Filament Automatically ......................5 Filament Runout ........................... 5 Bed Leveling ............................5 Using Your Printer ............................. 6 Start from SD, USB or Host Software ....................6 Heated Bed Operation .......................... - Page 4 Y-Axis Belt ............................14 Stepper drivers ............................15 Adjusting the Power..........................15 Replacing a Stepper Driver ......................... 15 Hotend Maintenance ..........................16 Nozzle Clogged or Worn Out ......................16 Replace Nozzle ............................ 16 Replace Hotend ........................... 16 Loose Hotend Parts ..........................16 BLtouch Replace Pin ..........................
-
Page 5: Basic Operation
Basic Operation Loading Filament Inserting Filament You can insert filament with the extruder hot or cols. 1. Cut the end of the filament at a 45 degree angle. 2. Pinch the swing arm on the extruder and insert the filament so it will be pinched between the drive gear and grooved bearing. -
Page 6: Using Your Printer
Start from SD, USB or Host Software Once you have sliced your file in your preferred software you are ready to print. For information on slicing refer to the gCreate website or the slicing software webpages for tips and tricks. •... -
Page 7: The First Layer
2. If you are using a heated bed, turn it off and let it cool several minutes before removing or you risk damaging the print surface. 3. If the first layer printed correctly you should see no curling at the edges. 4. -
Page 8: Gcode Example
Firmware is the software that lives on the printer and LCD boards to control the printer. Firmware can periodically be updated to unlock new features or fix existing bugs. Please make sure to download the latest firmware for your printer from the gCreate websites and not directly from the source github. Page 8... -
Page 9: Printer Firmware (Marlin 2.X)
Upload Mainboard Firmware (Marlin 2.x) The gMax 2 Pro uses the popular Marlin 2.x open-source firmware and it has been tailored for the machine. Our edits to the firmware can be found on our forum or download pages. We offer pre- compiled .bin files for the printer so updating is... -
Page 10: Firmware Error Codes
Menu > Settings > Machine > EEPROM > Reset 4. Note: You may need to go to “ ” to properly reset the print back to the factory settings after the firmware update. The printer will display “Failed to enable bed leveling” after a reset because the bed leveling matrix has been erased. Click OK and run bed leveling again. - Page 11 • Home offsets o Reset the printer to factory defaults. The home offsets may have been changed causing the center of the bed to shift. • LCD missing fonts/config mismatch o Your LCD screen firmware may have become corrupted or mixed versions of firmware and files were installed.
-
Page 12: 3D Models
FDM printers like the gMax as they were designed for other technologies. Make sure the models are watertight solid models that do not have intersecting faces. Refer to the gCreate forum and gcreate.com for articles on 3d model issues. Page 12... -
Page 13: Troubleshooting 3D Models
Lubricating linear rails The gMax 2 Pro uses Hiwin linear guide rails and blocks. The guide blocks contain rows of recirculating ball bearings and it performs best when lubricaled and clear of debris. -
Page 14: X-Axis Belts
X-Axis Belts The gMax 2 Pro was designed so the x-axis belt will remain in-place even if you swap extruders. A metal plate is bolted to the x-axis linear block and the belts are attached to either end. You do not need to remove the extruder to replace or tighten the belts. -
Page 15: Stepper Drivers
Stepper drivers The gMax 2 Pro uses TMC2130 stepper drivers. The drivers have an adjustable potentiometer on the top for adjusting the maximum current. You can also adjust the current to the drivers from the LCD screen. Make sure you have proper cooling in the electronics case or the drivers can and will overheat. When the drivers overheat the firmware will automatically reduce the power to the drivers, in 50ma increments, to avoid damage but this could lead to lost steps. -
Page 16: Hotend Maintenance
Hotend Maintenance Nozzle Clogged or Worn Out If your nozzle clogs it could be from a number of issues. If you use a lot of high temp or specialty filaments and they remain on for 24+ hours, carbon can build up in the nozzle resulting in clogging. We recommend changing nozzles often especially if you have important prints. -
Page 17: Bltouch Replace Pin
• Make sure the swing arm M4 bolt holding the U groove bearing is tight. BLtouch Replace Pin If the pin on your BLTouch leveling sensor broke off, you can easily replace it. 1. Turn off the printer. 2. Remove the (2) bolts holding the BLTouch to the extruder bracket allowing it to drop down. 3. -
Page 18: Lubricating The Lead Screws
Adjusting Bearings LCD Screen Breakdown The gMax 2 PRO uses a 3.5” responsive touchscreen with an STM32 processor and open source firmware. The screen firmware is independent of the printer firmware and must be updated separated via an SD card. Note, due to it’s open-source nature, some settings are visible that so not pertain to the gMax 2 PRO. -
Page 19: Heating, Cooling And Extruding
Re-calibrate the screen if needed. Menu > Settings > Machine > Features Various features that can usually be turned on or off like the power loss recovery, filament runout sensor and other options. Many of these features are available during a print as well. Notes: ▪... -
Page 20: Custom Gcode
200 for the extruder) and hit start. Then let the process complete. Custom gcode The gMax 2 PRO has several useful custom gcode routines pre-installed. Up to 15 routines can be utilized and they can be added by modifying the config.ini file. Note to add your own custom routines you must use “/n”... - Page 21 Other Page 21...
Need help?
Do you have a question about the gMax 2 PRO and is the answer not in the manual?
Questions and answers