Table of Contents
Advertisement
Quick Links
OPERATING MANUAL
FEATURES:
• Integrates with Transcendent VMS
• Supports Remote Configuration by Web Client
• Supports PTZ Mode and Platform Mode
• Controls up to 256 PTZ Cameras in PTZ Mode
• Playback Control of TV Wall Client
• Macro Setup and Calling
• Linked Display Window, Picture in Picture,
Roaming Control
• Multi-Language Support (English, Spanish,
Chinese, Polish)
• 3 Year Warranty
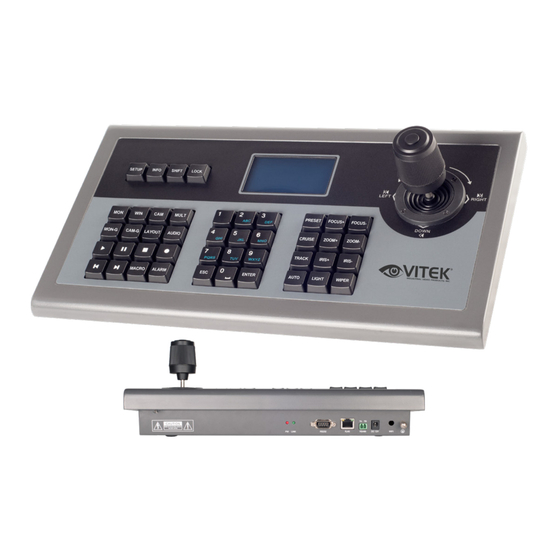
Transcendent VMS-Integrated
Network IP Keyboard Controller
Dimensional Vector Operation
(Preliminary)
PLEASE NOTE:
Complete User Guide, Software, Tools, and Updates are
available online. Scan the QR Code or visit:
http://www.vitekcctv.com/Downloads
VT-TKBD11
with LCD Display and Four
Advertisement
Table of Contents

Related Manuals for Vitek VT-TKBD11

Summary of Contents for Vitek VT-TKBD11
- Page 1 VT-TKBD11 Transcendent VMS-Integrated Network IP Keyboard Controller with LCD Display and Four Dimensional Vector Operation OPERATING MANUAL (Preliminary) FEATURES: • Integrates with Transcendent VMS • Supports Remote Configuration by Web Client • Supports PTZ Mode and Platform Mode • Controls up to 256 PTZ Cameras in PTZ Mode •...
- Page 2 This manual may contain technically incorrect information or printing errors. Updates will be made as needed. We will improve or update products or procedures in this manual as needed. The content is subject to change without notice. NOTE: The LCD display can be easily damaged. Do not press the display or expose it to sunlight for prolonged periods.
-
Page 3: Table Of Contents
Contents 1 Introduction ......................1 1.1 Introduction ......................1 1.2 Rear Panel Instructions ..................1 1.3 Front Panel Instructions ..................1 1.4 Rules of Key Pressing ..................3 1.5 Joystick Control ....................4 2 Setup ........................5 2.1 Startup the Keyboard ..................5 2.2 System Setup ..................... - Page 4 5.6.3 Create, Call or Stop Cruise/Track ............16 5.6.4 Focus +/- ....................17 5.6.5 Zoom +/- ....................18 5.6.6 Iris +/- ..................... 18 5.6.7 Start or Stop Auto Scan ................18 5.6.8 Enable/Disable Light ................19 5.6.9 Enable/Disable Wiper ................19 5.7 Record Playback ....................
- Page 5 DIMENSIONS NOTES...
-
Page 6: Introduction
1 Introduction 1.1 Introduction This network keyboard is fully compatible with the Transcendent VMS of our company, which can control camera, screen, monitor, etc. All menus can be displayed on the screen of the keyboard so that it is easy to use. 1.2 Rear Panel Instructions Name Description... - Page 7 Functions Name SETUP Local setup, such as keyboard ID, network setup. INFO Local information, such as ID, model, network parameters. SHIFT Auxiliary key for main interface shift or PTZ shift or security questions shift. LOCK Lock keyboard: press this key to lock the keyboard. Set the TV wall.
-
Page 8: Rules Of Key Pressing
next 30 seconds from the current playing time point by clicking this button; when the recording is on hold, the system will play the next frame by clicking this button. MACRO Macro function key: set and call macro instructions. ALARM Set the first image of the current output as an alarm large image. -
Page 9: Joystick Control
1.5 Joystick Control Figure Operation Function PTZ control mode: control the speed dome to move PTZ control mode: control the speed dome to move Down down. PTZ control mode: control the speed dome to move Left left. PTZ control mode: control the speed dome to move Right right. -
Page 10: Setup
2 Setup 2.1 Startup the Keyboard Connect the network cable to the keyboard and then connect the power. After the device starts, please enter the default password (123456), and then press “Enter” key to go to main interface (see left figure). Press the “Setup” key to go to the system setup menu (see right two figures). -
Page 11: Keypad Id Setup
2.2.2 Keypad ID Setup Select the keypad ID setup menu and press “Enter” key to go to the keypad ID setup. The effective value of the ID ranges from 01 to 32. To set keypad ID, press the digital number and “Enter” key (e.g., press 32 and then press “Enter”... -
Page 12: Default Setup
subnet mask is 255.255.255.0. v Default GW: The default gateway is 192.168.1.1. Please input it according to the actual network. v DNS server: The default DNS server is 8.8.8.8. Please input it according to the actual network. v Alternate server: The default alternate server is 4.4.4.4. Please input it according to the actual network. -
Page 13: Mode Setup
parameters of the PTZ. 2.4 Mode Setup Select and press “Enter” to go to the selection mode. Three mode options: platform mode, PTZ mode and serial port mode. 2.5 Language Setup Select and press “Enter” to switch the language between English, Chinese, Polish, Spanish, Hungarian, and Italian. -
Page 14: Ptz Mode
3 PTZ Mode 3.1 Mode Setup There are 3 different modes to select from. Platform mode, PTZ mode and Serial Port. Select PTZ mode and press “Enter” to select. Some models may connect 256 PTZs and control PTZs which support ONVIF. Tips: Some models support a default mode (platform mode or PTZ mode), it will restore to the last working mode after restart. -
Page 15: Ptz Shift
3.4 PTZ Shift Some models support shifting the PTZs by pressing “Number plus SHIFT.” Select another PTZ and setup the IP address, port, name, and password. Please see 3.2 PTZ IP Setup for more details. Press “SHIFT” to switch the PTZs of which the IP address is setup. -
Page 16: Serial Port Mode
4 Serial Port Mode 4.1 Mode Settings Select “Serial Port Mode” and press “Enter” to switch it to the serial port mode. In serial port mode, the PTZ camera can only be connected to the keyboard by RS485 interface directly. After the PTZ camera and the keyboard are connected through the RS485 interface, please configure the PTZ parameters. -
Page 17: Decoding
5 Decoding Before using the network keyboard to control video output of the decoder, please make sure the authentication server, media transfer server, storage server, alarm server and TV wall server of the Transcendent VMS all starts, and they are all connected with the decoder. Note: Here we only use platform mode as an example. -
Page 18: Screen Display Mode
5.2 Screen Display Mode At present, one monitor (or output) is only to support 1/4/9/16/25/36 screen display mode. To set the screen display mode 1. Select a TV wall. Enter the number and then press “MON” key to call this TV wall. For example, enter “1”... -
Page 19: Camera->Monitor
5.3 Camera->Monitor Select the input signal (camera) to the designated TV wall and window. 1. Select a TV wall. For example, enter “1” and then press “MON” to select NO.1 TV wall. 2. Select a window. For example, enter “3” and then press “WIN” to select NO. 3 window. 3. -
Page 20: Set And Call Macro
Camera group settings: Go to the channel group setting interface to create a channel (camera) group and set its dwell time. Note: The effective value is from 1 to 999999. When entering “0” and then pressing “CAM-G”, it means stopping the auto-switching of the group in the specific window and only playing the image of the current camera. -
Page 21: Set Or Call Preset
1. Select a TV wall. For example, enter “1” and press “MON”. 2. Select a window. For example, enter “3” and press “WIN”. 3. Control the speed dome/PTZ by moving the joystick. When moving the joystick back to the original place, the speed dome stops moving. Note: The camera input in the above example of NO. -
Page 22: Focus
Press “ESC” to cancel the settings. To create Track 1. Select a TV wall. For example, enter “1” and press “MON”. 2. Select a window. For example., enter “3” and press “WIN”. 3. Enter the track number on the keyboard and then press and hold “ TRACK” for more than two seconds. -
Page 23: Zoom
5.6.5 Zoom +/- To set zoom +/- 1. Select a TV wall. For example, enter “1” and press “MON”. 2. Select a window. For example, enter “3” and press “WIN”. 3. Press “ZOOM+” or “ZOOM -”. 5.6.6 Iris +/- To set iris +/- 1. -
Page 24: Enable/Disable Light
5.6.8 Enable/Disable Light To enable or disable light 1. Select a TV wall. For example, enter “1” and press “MON”. 2. Select a window. For example, enter “3” and press “WIN”. 3. Press “LIGHT” to enable light; press “LIGHT” again to disable light. 5.6.9 Enable/Disable Wiper To enable or disable wiper 1. -
Page 25: Play The Next 30S Or Frame
1. Select a TV wall. For example, enter “1” and press “MON”. 2. Select a window. For example, enter “3” and press “WIN”. 3. Press key to play the recording of the previous 30 seconds. 5.7.4 Play the Next 30s or Frame When the recording is playing in the current window, you may play the recording of the next 30 seconds. -
Page 26: Others
6 Others 6.1 View Information You may check the keyboard, model, SN, current mode, version, date, local IP, subnet mask and so on by pressing “INFO” key on the keyboard. Check the next page of the information by moving the joystick down. 6.2 Lock You can lock the keyboard by pressing “LOCK”... -
Page 27: Web
7 Web 7.1 Web Access In order to view the keyboard from a network it must be connected to a LAN or internet. ① The network setup should be done accordingly. The keyboard shall be powered on and connected to the network. Please see 2.5 ②... -
Page 28: Upgrade
7.2 Upgrade Get the software from your vendor when there is a new software version. 1. Click “Browse” button to select the save path of the upgrade file. 2. Click “Upgrade server firmware” to start upgrading the application program. 4. After successfully update the software, the device will restart automatically. Notice: You cannot disconnect to PC or close the keyboard during upgrade. -
Page 29: Detailed Specifications
8 Detailed Specifications Display LCD Display Joystick Four-dimensional rocker Keys Four functional areas Multi-Language Menu Yes - English, Spanish, Chinese, Polish Network Interface One RJ45 10/100M Adaptive Ethernet Port PTZ Mode and Platform Mode Control Mode Network Management Network Keyboard can be Configured and Software can be Upgraded by Web Client Serial Port Two standard serial ports: RS485 ×... -
Page 30: Appendix
(3) years, or as otherwise stated above, from the date of purchase by the end user. This warranty is nontransferable and extends only to the original buyer or end user customer of a VITEK Authorized Reseller. The product must have been used only for its intended purpose, and not been subjected to damage by misuse, willful or accidental damage, caused by excessive voltage or lightning.
Need help?
Do you have a question about the VT-TKBD11 and is the answer not in the manual?
Questions and answers