Table of Contents
Advertisement
Quick Links
Slugger
Magforce
®
™
With Smart Magnet™ Circuitry
Slugger
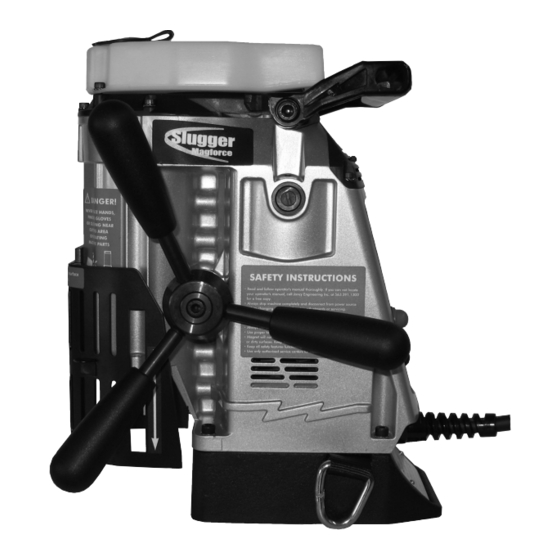
Portable Magnetic Drilling Machine
®
OPERATOR'S MANUAL
WARNING!
,
before use
be sure everyone using this machine reads and understands
.
all safety and operating instructions in this manual
EYE PROTECTION
HEARING PROTECTION
NEVER PLACE
LINE VOLTAGE
BEWARE OF
REQUIRED
REQUIRED
FINGERS NEAR
PRESENT
ROTATING
CUTTING AREA OR
MACHINE PARTS
MACHINE ARBOR
MODEL: #06920 (120V) OR #06921 (220V)
Serial #
Date of Purchase
Advertisement
Table of Contents

Related Manuals for Slugger Magforce 06920


Summary of Contents for Slugger Magforce 06920
- Page 1 Slugger Magforce ® ™ With Smart Magnet™ Circuitry Slugger Portable Magnetic Drilling Machine ® OPERATOR’S MANUAL WARNING! before use be sure everyone using this machine reads and understands all safety and operating instructions in this manual EYE PROTECTION HEARING PROTECTION...
-
Page 2: Table Of Contents
Slugger® Portable Magnetic Drilling Machine Congratulations on your purchase of a Slugger® portable magnetic drilling machine. Slugger® drilling machines are designed to deliver fast, efficient hole drilling performance in portable applications. Please take a moment to complete and mail your product warranty registration card. Doing so will validate your machine’s warranty period and ensure prompt service if needed. -
Page 3: Important Safety Instructions
important safety instructions WARNING! when using electric tools basic safety precautions should always be followed to reduce risk of fire electric shock and personal injury READ AND SAVE ALL INSTRUCTIONS FOR FUTURE REFERENCE. 1. Work Area Safety a) Keep work area clean and well lit. Cluttered or dark areas invite accidents. b) Do not operate power tools in explosive atmospheres, such as in the presence of flammable liquids, gases or dust. - Page 4 important safety instructions d) Remove any adjusting key or wrench before turning the power tool on. A wrench or key left attached to a rotating part of the power tool may result in personal injury. e) Do not overreach. Keep proper footing and balance at all times. This enables better control of the power tool in unexpected situations.
-
Page 5: Special Instructions
8. Always use proper tooling. Keep cutters securely fastened. 9. Do not use dull or broken cutters. 10. Do not use Slugger® drilling machines on surfaces or materials being welded. Doing so can damage the machine’s electrical components. 11. Beware of slugs ejected at end of cut. They become HOT during the cut. -
Page 6: Grounding Instructions, Extension Cords
grounding instructions WARNING! Improperly connecting the grounding wire can result in the risk of electrical shock. Check with a qualified electrician if you are in doubt as to whether the outlet is properly grounded. Do not modify the plug provided with tool. Never remove the grounding prong from the plug. -
Page 7: Contents Of Package
4. Material that has been flame cut may have become heat-treated and therefore difficult to drill. Avoid drilling near such areas whenever possible. 5. Drilling with the Magforce™ in horizontal positions requires a special lubrication for Slugger® cutters. Consult Jancy Engineering for details. -
Page 8: Before The Cut, Ready To Make The Cut, After The Cut
6. Connect machine to power source. 7. Lower Slugger® cutter to surface of material to be cut. Coolant will be released down the pilot into center of Slugger® cutter. Coolant flow can be stopped by lifting pilot pin off work surface. -
Page 9: Basic Troubleshooting
basic troubleshooting 1. Magnetic base not holding securely Material is too thin to engage magnet. • Surface of material being drilled must be free of chips, debris, rust and mill scale. • Size of cutter exceeds machine’s rated capacity. • Check magnet face for unevenness, nicks and burrs. -
Page 10: Regular Maintenance
regular maintenance 1. Keep bottom of magnet clean, free of chips, burrs, nicks, oil and other contaminants. Inspect magnet face to ensure surface is flat and square. A worn magnet surface dramatically reduces magnetic holding force. WARNING! always remove cutter from drill before measuring runout never use hands or fingers to rotate quill 2. -
Page 11: Connection Diagram
connection diagram PUSH-BUTTON HARNESS PC BOARD (PN 06962V1) (PN U55006) MOTOR OFF PUSH BUTTON (RED) BLACK MOTOR WHITE MOTOR ON MTR SW PUSH BUTTON (GREEN) BLACK WHITE USED MAGNET ON / OFF SWITCH (PN 06510) BLACK R SW POWER BLACK MAGNET BLACK MAGNET POWER CONNECTOR... -
Page 12: Machine And Spoke Handle Breakdown
machine and spoke handle breakdown SPOKE HANDLE ASSEMBLY (06315) -
Page 13: Machine And Spoke Handle Parts List
machine and spoke handle parts list MACHINE PARTS LIST item description part FRAME ASSEMBLY 06936V1 BALL BEARING UH3045 FIELD, 120V 06922A FIELD, 220V 06923A ARMATURE ASSEMBLY, 120V 06914 ARMATURE ASSEMBLY, 220V 06915 M4 X 10 FHSCS UH0410 QUILL ASSEMBLY 06908 HELICAL GEAR 06802 EXTERNAL RETAINING RING... -
Page 14: Armature, Quill, Gearcase Cover Parts List
armature quill and gearbox cover brakedown and parts list ARMATURE ASSEMBLY - 120V (06914) - 220V (06915) QUILL ASSEMBLY (06908) item description part ARMATURE SUPPORT BRACKET 06324 BALL BEARING UH3024 ARMATURE, 120V 06582 ARMATURE, 220V 06586 BALL BEARING UH3039 item description part SPLINE DRIVE SHAFT... -
Page 15: Dimensions And Specifications
Magnet dead lift 1810 lbs. on 1" plate (821 kg on 25mm Plate) 4-1/4" Slugger cutter diameter (maximum) 1-5/8" (41mm) 3-5/16" Slugger depth of cut (maximum) 2" (52mm) 84.2 4" Spindle CL to Guard Face 3-5/16" (84.2mm) Spindle CL to Magnet Face 1-3/8"... - Page 16 ® other available lugger drills description model max diameter depth capacity USA5 120V 18066 2-3/8" 3" USA5 220V 18080 2-3/8" 3" USA101 120V USA101 1-1/2" 2" USA101 220V USA101-2 1-1/2" 2" USA200 120V HOLEMAKER II 1-3/8" 2" USA200 220V HOLEMAKER II 1-3/8" 2"...
Need help?
Do you have a question about the Magforce 06920 and is the answer not in the manual?
Questions and answers