Table of Contents
Advertisement
Quick Links
Advertisement
Table of Contents

Related Manuals for Optos P200TxE


Summary of Contents for Optos P200TxE
- Page 1 User Guide Optos OCT Ophthalmoscope P200TxE...
- Page 2 In the United States of America, Federal law restricts this device to sale by or on the order of a physician. CAUTION Page 2 of 84 Part Number: G110230-003-ENG English Copyright 2019-2021, Optos plc. All rights reserved.
- Page 3 This document may only be used for your personal, non-commercial use. This document and all its contents (including without limitation, all text, formats, graphics and logos) are the property of Optos plc and are protected from unauthorized copying and dissemination by the Copyright, Designs and Patents Act 1988 (as amended), by various intellectual property laws and by international conventions.
- Page 4 Page 4 of 84 Part Number: G110230-003-ENG English Copyright 2019-2021, Optos plc. All rights reserved.
-
Page 5: Table Of Contents
Get started 3.1 Switch on each day 3.1.1 Switch on the image server 3.1.2 Switch on the scan head 3.1.3 Switch on browser-based review clients Part Number: G110230-003-ENG Page 5 of 84 Copyright 2019-2021, Optos plc. All rights reserved. English... - Page 6 4.8.2.1 Capture scans quickly and recapture if necessary 4.8.2.2 Using the auto-routines 4.8.2.3 Live OCT positioning 4.8.2.4 Minimizing eye dryness 4.8.3 How to capture an OCT follow-up scan Page 6 of 84 Part Number: G110230-003-ENG English Copyright 2019-2021, Optos plc. All rights reserved.
- Page 7 7.2 Warranty 7.3 Cleaning 7.3.1 General cleaning 7.3.2 Cleaning before each patient 7.3.2.1 How to remove the head and chin rests 7.3.3 Cleaning the main mirror Part Number: G110230-003-ENG Page 7 of 84 Copyright 2019-2021, Optos plc. All rights reserved. English...
- Page 8 7.5 Cable management Troubleshooting 8.1 Why can't I login? 8.2 What information do I need when contacting Optos? 8.3 How do I image if the alignment system does not recognize the eye? 8.4 How do I restart the scan head? 8.5 How do I restart the image server? 8.6 What should I do if the PC drive on the image server is full?
- Page 9 FIGURE 2: Network data flow FIGURE 3: Optos OCT line scan example position and scan pattern FIGURE 4: Optos OCT raster scan example area, scan pattern and fixed center FIGURE 5: Optos OCT retina scan example scan area and cross hairs...
- Page 10 FIGURE 6: Optos OCT optic nerve head scan example target and scan lines FIGURE 7: Hand control FIGURE 8: Chin rest and head rest FIGURE 9: Example capture and review workflow FIGURE 10: Position of the canthus mark on the covers...
-
Page 11: Warnings And Cautions
User Guide. If you identify a serious issue related to the safety and performance of your device or a public health risk you should forward the details to the relative authority and your Optos representative (see Contact us on page 79). - Page 12 Remove the fabric cover before operating the scan head. Measurements on Optos UWF optomap and OCT images are based on scale factors derived from the wide-angle schematic eye model published by Navarro et al . This...
-
Page 13: Laser Safety
Your device will be installed by Optos trained personnel. Do operate the device until they have completed the installation and training. Your Optos representative will configure the settings when the device is installed. These settings should be changed in the course of normal operation. -
Page 14: Electrical Safety
Care must be taken never to touch exposed parts of the device while in physical contact with a patient. If the mains cable is damaged do not use the system and contact your Optos representative (see Contact us on page 79). -
Page 15: Environmental Safety
Relocate the affected device or devices Increase the separation between the equipment and the affected device Consult the Optos service representative for further suggestions Part Number: G110230-003-ENG Page 15 of 84 Copyright 2019-2021, Optos plc. -
Page 16: Device Failure
If you suspect the device may be faulty (see Troubleshooting on page 65). WARNING If the fault still persists, please contact your Optos representative (see Contact us on page 79). The device is isolated from the mains by the main power cable and IEC connector. In an emergency, the device should be isolated by unplugging from the mains power supply. - Page 17 If you believe cleaning sprays or liquids have got into the equipment, disconnect the power supply and have the equipment checked by Optos qualified service personnel. let the cleaning wipes come into contact with the inside of the instrument.
-
Page 18: Maintaining Information Security
WARNING device as this may result in non-compliance. IT networks used by medical devices Connection of the P200TxE device to an IT that includes other NETWORK DATA COUPLING... -
Page 19: Software On Optos-Supplied Pcs
Chapter 1 - Warnings and cautions 1.10 Software on Optos-supplied PCs Only install software when supplied and instructed by Optos. Installing new software Contact Optos Customer Support if you need to install other software (see Contact us on page 79). Updating existing software CAUTION Your System Administrator should carry out software upgrades using the software and instructions provided by Optos. - Page 20 Indicates the item is a medical device. Authorized representative in the European Community. In accordance with Directive 93/42/EEC. 0197 Consult accompanying documents. Disposal in compliance with WEEE Directive. Page 20 of 84 Part Number: G110230-003-ENG English Copyright 2019-2021, Optos plc. All rights reserved.
-
Page 21: Introduction
The device is offered in a number of configurations depending on the needs of the end user. Optos’ technology is designed to operate through a minimum pupil diameter of 2 mm. Although pupil dilation is required, the decision to dilate is a medical decision to be made by the eyecare professional. -
Page 22: Intended Users
The system prevents the operator altering laser power or exposure times, therefore no specific pre-requisite training is required prior to receiving Optos training. The review of images, as an assist to diagnosis, may only be conducted by a healthcare professional qualified in optometry or ophthalmology. -
Page 23: System Parts
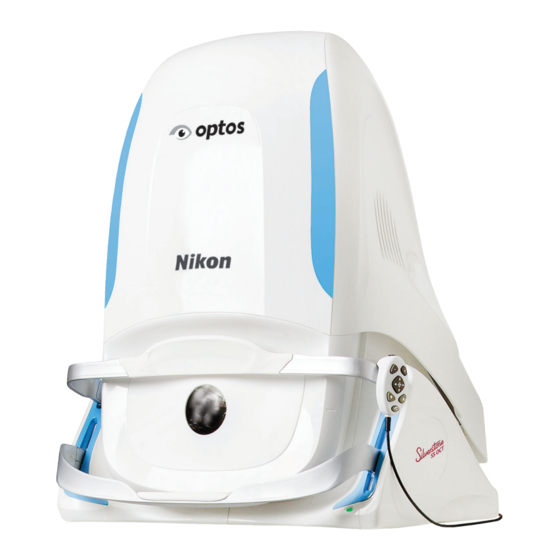
Chapter 2 - Introduction 2.7.1 System parts FIGURE 1: P200TxE device connected to network Name of Part Description The scan head comprises the light sources (lasers and swept source) and Scan head electronics used to capture patient images. The head rest supports the patient's head when the patient is being imaged Head rest (see Using the chin rest and head rest on page 34). -
Page 24: Network Specification And Characteristics
FIGURE 2: Network data flow 2.7.3 Image modalities Optos multi-modal ultra-widefield retinal imaging enables the capture of posterior images, with a field of view of up to 200 degrees in a single capture, and in an imaging time of less than 0.4 seconds. -
Page 25: Slo Imaging Modalities
2.7.3.2 OCT imaging modalities Measurements on Optos UWF optomap and OCT images are based on scale factors derived from the wide-angle schematic eye model published by Navarro et al . -
Page 26: Figure 3: Optos Oct Line Scan Example Position And Scan Pattern
Captures a high density raster scan of OCT images covering a 20 x 20 degrees (6 mm x 6 mm) field of view centered around the optic nerve head. The Optos OCT optic nerve head scan comprises 111 horizontal line scans. -
Page 27: Multi-Mode Workflow
Automatic registration of image features. These registered points are used to align images that are viewed together. You can also register image reference points manually. Part Number: G110230-003-ENG Page 27 of 84 Copyright 2019-2021, Optos plc. All rights reserved. English... -
Page 28: Accessories And Detachable Parts
Mains power cables required for the region will be supplied. Page 28 of 84 Part Number: G110230-003-ENG English Copyright 2019-2021, Optos plc. All rights reserved. -
Page 29: Get Started
1. Remove the scan head fabric cover. 2. Check the image server is switched and fully started up before switching the scan head. Part Number: G110230-003-ENG Page 29 of 84 Copyright 2019-2021, Optos plc. All rights reserved. English... -
Page 30: Switch On Browser-Based Review Clients
I restart the image server? on page 67). You will be unable to capture images if the self-tests have been successful. Please restart the scan head. If the problem persists please contact your Optos representative (see Contact us on page 79). 3.1.3 Switch on browser-based review clients... -
Page 31: How To Shut Down The Scan Head
Image files cannot be viewed on browser-based review clients when the image server has been shut down. Restart the image server each week to allow updates to install (see Restart the image server each week on the next page). Part Number: G110230-003-ENG Page 31 of 84 Copyright 2019-2021, Optos plc. All rights reserved. English... -
Page 32: Restart The Image Server Each Week
The image browser can be used to select a suitable SLO image at the start of the OCT capture process. Contrast Adjusts the image contrast while capturing angiography images. Page 32 of 84 Part Number: G110230-003-ENG English Copyright 2019-2021, Optos plc. All rights reserved. -
Page 33: Using The Touch Screen Keyboard
Move the depth position of the OCT scan upwards, towards the vitreous. Raise chin rest. The higher the position the higher the sensitivity. Part Number: G110230-003-ENG Page 33 of 84 Copyright 2019-2021, Optos plc. All rights reserved. English... -
Page 34: Using The Chin Rest And Head Rest
The head rest comprises a forehead pad that supports the patient's head. The chin rest and head rest should be kept clean (see Cleaning before each patient on page 61). FIGURE 8: Chin rest and head rest Page 34 of 84 Part Number: G110230-003-ENG English Copyright 2019-2021, Optos plc. All rights reserved. -
Page 35: Capture Images
4 Capture images These procedures should be used as the basic procedure for all image captures. Please contact your Optos representative if the image modality you want is available (see Contact us on page 79). To achieve optimal patient positioning the patient is typically seated in front of the device. Space may be required to allow the table height to be adjusted while the patient is sitting in the chair. -
Page 36: Adding A New Patient
Order not being available, patient details being changed, or the MWL Server being down, must be reconciled using OptosAdvance. Note Please contact your Optos representative if introducing MWL to your site. 4.1.4 Working with Modality Work List (MWL) When enabled, the scan head supports the selection of patients from a DICOM MWL Server. -
Page 37: How To Align The Patient
Take care to ensure that cables are not trapped. You can judge the height of the table by viewing the patient in the live camera view. Part Number: G110230-003-ENG Page 37 of 84 Copyright 2019-2021, Optos plc. All rights reserved. English... -
Page 38: Figure 10: Position Of The Canthus Mark On The Covers
Ask the patient to confirm that they are comfortable, that their head is firmly supported by the head rest and chin rest, and that their teeth are together and mouth closed. FIGURE 11: Aligned patient Page 38 of 84 Part Number: G110230-003-ENG English Copyright 2019-2021, Optos plc. All rights reserved. -
Page 39: How To Capture Slo Images
You can also capture using the hand control. 5. Check the quality of the images (see What to do after the image is captured on the next page). Part Number: G110230-003-ENG Page 39 of 84 Copyright 2019-2021, Optos plc. All rights reserved. English... -
Page 40: What To Do After The Image Is Captured
2. Align the patient (see How to align the patient on page 37). 3. Ask the patient to keep their head still in the standard alignment. 4. Select the eye steered direction. Page 40 of 84 Part Number: G110230-003-ENG English Copyright 2019-2021, Optos plc. All rights reserved. -
Page 41: How To Capture Slo Stereo Images
You can also capture using the hand control. Part Number: G110230-003-ENG Page 41 of 84 Copyright 2019-2021, Optos plc. All rights reserved. English... -
Page 42: How To Capture Slo Angiography Images
The contrast is set separately for optomap and optomap images. When you change between optomap and optomap icg, the device uses the most recent contrast settings for the selected image modalities. Page 42 of 84 Part Number: G110230-003-ENG English Copyright 2019-2021, Optos plc. All rights reserved. -
Page 43: How To Capture Oct Images
Check that the SNR is 8 or greater before capturing the scan. 8. Select the live SLO image on the touch screen or press the top button on the hand control to capture. Part Number: G110230-003-ENG Page 43 of 84 Copyright 2019-2021, Optos plc. All rights reserved. English... -
Page 44: The Patient's View Of Oct Alignment
You should instruction the patient in terms of positioning, fixation, and when to blink and when to not blink and hold still. Providing instructions on these important aspects will help obtain good quality images. Page 44 of 84 Part Number: G110230-003-ENG English Copyright 2019-2021, Optos plc. All rights reserved. -
Page 45: Capture Scans Quickly And Recapture If Necessary
OCT setup. 4.8.3 How to capture an OCT follow-up scan You can follow-up previous scans. Part Number: G110230-003-ENG Page 45 of 84 Copyright 2019-2021, Optos plc. All rights reserved. English... -
Page 46: How To Check Oct Scans
Scan position errors indicate that the scan position cross reference to the optomap image Scan could not be established. position error You should attempt to recapture the scan. Page 46 of 84 Part Number: G110230-003-ENG English Copyright 2019-2021, Optos plc. All rights reserved. -
Page 47: Artifacts - Low Signal Strength
Local weak signals may be the result of the following: Part Number: G110230-003-ENG Page 47 of 84 Copyright 2019-2021, Optos plc. All rights reserved. English... -
Page 48: Figure 14: Examples Of Local Weak Signal Strength
FIGURE 14: Examples of local weak signal strength. FIGURE 15: Example of local weak signal near the fovea. FIGURE 16: Example of local weak signal with acceptable global SNR. Page 48 of 84 Part Number: G110230-003-ENG English Copyright 2019-2021, Optos plc. All rights reserved. -
Page 49: Artifacts - Eye Movements
Blinks can be ignored if they does not affect important structures such as the fovea or optic disc. The Optos software automatically detects possible blinks (see How to check OCT scans on page 46). You should replay the frames and assess if this is significant. -
Page 50: Artifacts - Clipping
It allows the operator to perform a defined sequence of SLO and OCT captures, by stepping through the desired mode settings. Page 50 of 84 Part Number: G110230-003-ENG English Copyright 2019-2021, Optos plc. All rights reserved. -
Page 51: How To Manage The Patient Session
If the session in incomplete or incorrect select outside the summary to continue the session. Part Number: G110230-003-ENG Page 51 of 84 Copyright 2019-2021, Optos plc. All rights reserved. English... - Page 52 Page 52 of 84 Part Number: G110230-003-ENG English Copyright 2019-2021, Optos plc. All rights reserved.
-
Page 53: Review Images
Captured images and scans are displayed using the OptosAdvance software. 1. Double-click to run OptosAdvance. 2. Log in using your username and password. 3. Select the patient. Part Number: G110230-003-ENG Page 53 of 84 Copyright 2019-2021, Optos plc. All rights reserved. English... -
Page 54: Exiting The Review Software
6. Compare results across studies if required. Note Detailed instructions can be found in the application help files. 5.3 Exiting the review software To leave OptosAdvance, select Logoff Page 54 of 84 Part Number: G110230-003-ENG English Copyright 2019-2021, Optos plc. All rights reserved. -
Page 55: Manage The System
User Management > Accounts. 4. Select Add. 5. Enter the details for the new user and select the privileges to be assigned to them. 6. Select Save. Part Number: G110230-003-ENG Page 55 of 84 Copyright 2019-2021, Optos plc. All rights reserved. English... -
Page 56: How To Change Users
The ability to edit network settings is restricted to System Administrators. If there are any connection problems ask your System Administrator to review your settings and where necessary contact your Optos representative for instructions on how to proceed (see Contact us on page 79). -
Page 57: Quality Checks
6.7.1 Self-tests Each time the system starts it runs a series of self-tests. If any problems are identified please follow the on- screen instructions and take appropriate action or contact your Optos representative (see Contact us on page 79). 6.7.2 Status indicator The status of the scan head is identified using different colored lights on the status indicator. - Page 58 Page 58 of 84 Part Number: G110230-003-ENG English Copyright 2019-2021, Optos plc. All rights reserved.
-
Page 59: Maintenance And Cleaning
Your device will be installed by Optos trained personnel. Do operate the device until they have completed the installation and training. Your Optos representative will configure the settings when the device is installed. These settings should be changed in the course of normal operation. -
Page 60: Cleaning
If you believe cleaning sprays or liquids have got into the equipment, disconnect the power supply and have the equipment checked by Optos qualified service personnel. let the cleaning wipes come into contact with the inside of the instrument. -
Page 61: Cleaning Before Each Patient
Dispose of the dirty cloth after each wipe to avoid transferring the dust back on to the mirror. You will have to use several wipes to clean the mirror. Part Number: G110230-003-ENG Page 61 of 84 Copyright 2019-2021, Optos plc. All rights reserved. English... -
Page 62: Disinfection
4. Inspect the surface of the mirror for visible dust. Take note of any smudges or spots. 5. Fold an Optos-approved cleaning cloth twice so that it has a number of layers. 6. Use single downward strokes to gently wipe the mirror. Always start from the top of the visible area. -
Page 63: Battery Replacement
A 3V Lithium coin battery is embedded in the hardware for the device and does require to be changed by users. If there is a problem, please contact your Optos representative (see Contact us on page 79). 7.5 Cable management Do ... - Page 64 Page 64 of 84 Part Number: G110230-003-ENG English Copyright 2019-2021, Optos plc. All rights reserved.
-
Page 65: Troubleshooting
Note If you require further assistance, please contact your Optos representative (see Contact us on page 79). When contacting Optos you will need to supply your site number (see What information do I need when contacting Optos? on page 67). TABLE 9: List of problems and solutions... -
Page 66: Why Can't I Login
Chapter 7 - Troubleshooting Problem Possible cause Solution optomap images System slit mirror requires Contact Optos to arrange for a Field Service show horizontal cleaning. Engineer to clean the slit mirror. line artefacts. Use the recommended cleaning materials and optomap images... -
Page 67: What Information Do I Need When Contacting Optos
2. Restart the image server. 3. Switch the power back on to the scan head. If you still experience problems please contact your Optos representative (see Contact us on page 79). 8.2 What information do I need when contacting Optos? You will need to provide your Site Number when contacting Optos. -
Page 68: What Should I Do If The Pc Drive On The Image Server Is Full
PC. Exit any programs if prompted. 3. Log on PC when prompted. 4. You can now login to the scan head and re-open any Optos applications on the other PCs. 8.6 What should I do if the PC drive on the image server is full? -
Page 69: Technical Specification
User Guide. Read the warnings and cautions before using your device (see Warnings and cautions on page 11). If you have any questions regarding the correct use of your device, please contact your Optos representative (see Contact us on page 79). -
Page 70: Connections
Mains power cable and switch Protective earth must be fitted. U.K. Power Cable Fuse: 13A Network cable Hand control and Optos Service use Touch screen Page 70 of 84 Part Number: G110230-003-ENG English Copyright 2019-2021, Optos plc. All rights reserved. -
Page 71: Scan Head Dimensions
The touch screen is powered from the scan head at +12V. disconnect or connect the touch screen while the scan head is in use. WARNING Part Number: G110230-003-ENG Page 71 of 84 Copyright 2019-2021, Optos plc. All rights reserved. English... -
Page 72: Battery
725 mm to 1205 mm (29 inches to 47 inches) Where wheelchair accessibility is required the table must meet wheelchair accessibility standards. 9.1.7 Battery remove the scan head covers. Only Optos trained technical personnel are permitted to service the device. CAUTION The device contains a 3V Lithium coin battery. -
Page 73: Laser Safety Designation (Iec 60825-1)
14 micron 9.2.1 External Laser warning information Location of Laser warning Warning information Positioned on the rear scan CLASS 1 LASER DEVICE head cover. Part Number: G110230-003-ENG Page 73 of 84 Copyright 2019-2021, Optos plc. All rights reserved. English... -
Page 74: Internal Laser Warning Information
CLASS 3B LASER RADIATION 9.3 Electromagnetic compatibility (EMC) The P200TxE is intended for use in the electromagnetic environment as specified in the following tables. The customer or the user of the device should assure that it is used in such an environment. - Page 75 3Vrms distance calculated from the equation applicable to the Conductive RF frequency of the transmitter. IEC61000-4-6 150kHz to 80MHz Recommended separation distance d=1.2√P Part Number: G110230-003-ENG Page 75 of 84 Copyright 2019-2021, Optos plc. All rights reserved. English...
-
Page 76: Recommended Separation Distances
This section lists the recommended separation distances between portable and mobile communication equipment and the device. The P200TxE is intended for use in an electromagnetic environment in which radiated RF disturbances are controlled. The customer or the user of the P200TxE can help prevent electromagnetic interference by maintaining a... - Page 77 At 80MHz and 800MHz the higher frequency range applies. These guidelines may apply in all situations. Electromagnetic propagation is affected by absorption and reflection from structures, objects and people. Part Number: G110230-003-ENG Page 77 of 84 Copyright 2019-2021, Optos plc. All rights reserved. English...
- Page 78 Page 78 of 84 Part Number: G110230-003-ENG English Copyright 2019-2021, Optos plc. All rights reserved.
-
Page 79: Contact Us
Fax: +44 (0) 1383 843 333 All inquiries: ics@optos.com Website: optos.com Existing customers will need to provide their site number to allow Optos to access their details. You can find the site number on the documentation received from Optos. 10.2 Regional Offices Please check optos.com... -
Page 80: Australia
Customer Support (DE): (0) 800 723 6805 Customer Support (AT): (0) 800 24 48 86 10.2.6 Norway Telephone: +47 800 16711 All inquiries: ics@optos.com Customer Support: +47 800 16711 Page 80 of 84 Part Number: G110230-003-ENG English Copyright 2019-2021, Optos plc. All rights reserved. -
Page 81: Spain
Telephone: +44 (0) 1383 843 300 Fax: +44 (0) 1383 843 333 All inquiries: ics@optos.com Customer Support Freephone: 0808 100 45 46 Customer Support: +44 (0) 1383 843 350 Part Number: G110230-003-ENG Page 81 of 84 Copyright 2019-2021, Optos plc. All rights reserved. English... -
Page 82: European Authorized Representative
Chapter 9 - Contact us 10.3 European Authorized Representative EMERGO EUROPE Prinsessegracht 20 2514 AP, The Hague The Netherlands Page 82 of 84 Part Number: G110230-003-ENG English Copyright 2019-2021, Optos plc. All rights reserved. -
Page 83: Patient Alignment Guide
Optos Inc Optos plc Optos Australia Tel: 800-854-3039 Tel: +44 (0) 1383 843 300 Tel: +61 8 8444 6500 usinfo@optos.com ics@optos.com auinfo@optos.com Part Number: G110230-003-ENG Page 83 of 84 Copyright 2019-2021, Optos plc. All rights reserved. English... - Page 84 G110230-003-ENG English...
Need help?
Do you have a question about the P200TxE and is the answer not in the manual?
Questions and answers