Sign In
Upload
Manuals
Brands
Optos Manuals
Medical Equipment
P200TxE
Optos P200TxE Manuals
Manuals and User Guides for Optos P200TxE. We have
1
Optos P200TxE manual available for free PDF download: User Manual
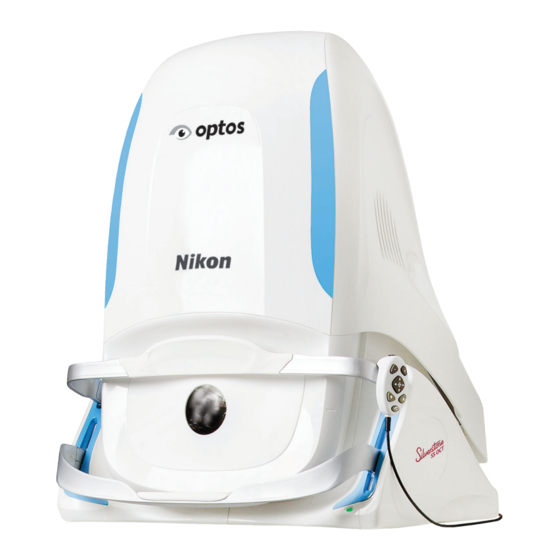
Optos P200TxE User Manual (84 pages)
Ophthalmoscope
Brand:
Optos
| Category:
Medical Equipment
| Size: 7 MB
Table of Contents
Table of Contents
5
Warnings and Cautions
11
General Safety
11
Laser Safety
13
Electrical Safety
14
Environmental Safety
15
EMC Safety
15
Device Failure
16
Cleaning Guidelines
16
Maintaining Information Security
18
Data Security
18
Software on Optos-Supplied Pcs
19
Symbol and Label Information
19
Introduction
21
Device Description
21
Clinical Benefits Statement
21
Intended Use
21
Intended Users
22
Target Environment
22
Contraindications
22
System Configuration
22
System Parts
23
FIGURE 1: P200Txe Device Connected to Network
23
Network Specification and Characteristics
24
Image Modalities
24
TABLE 1: Network Specification
24
FIGURE 2: Network Data Flow
24
SLO Imaging Modalities
25
OCT Imaging Modalities
25
FIGURE 3: Optos OCT Line Scan Example Position and Scan Pattern
26
FIGURE 4: Optos OCT Raster Scan Example Area, Scan Pattern and Fixed Center
26
FIGURE 5: Optos OCT Retina Scan Example Scan Area and Cross Hairs
26
FIGURE 6: Optos OCT Optic Nerve Head Scan Example Target and Scan Lines
26
Multi-Mode Workflow
27
System Software
27
Understanding the Review Software
27
Accessories and Detachable Parts
28
TABLE 2: List of Parts
28
Get Started
29
Switch on each Day
29
Switch on the Image Server
29
Switch on the Scan Head
29
Switch on Browser-Based Review Clients
30
Use Standby Mode at the End of each Day
30
How to Shut down the Scan Head
31
Install Software Updates
31
Log off the Image Server each Day
31
Restart the Image Server each Week
32
Use the System
32
Using the Touch Screen
32
TABLE 3: List of Touch Screen Icons
32
Using the Touch Screen Keyboard
33
Using the Hand Control
33
TABLE 4: List of Hand Control Buttons
33
FIGURE 7: Hand Control
33
Using the Chin Rest and Head Rest
34
FIGURE 8: Chin Rest and Head Rest
34
Capture Images
35
Selecting and Managing Patient Details
35
FIGURE 9: Example Capture and Review Workflow
35
Adding a New Patient
36
Selecting and Editing Existing Patient
36
Selecting a Patient Order from MWL
36
Working with Modality Work List (MWL)
36
How to Search Using MWL
36
How to Prepare for Image Capture
36
How to Align the Patient
37
Patient Coaching
37
Align the Patient
37
FIGURE 10: Position of the Canthus Mark on the Covers
38
FIGURE 11: Aligned Patient
38
How to Capture SLO Images
39
What to Do after the Image Is Captured
40
How to Capture SLO Eye Steered Images
40
TABLE 5: Examples of Eye Steering Buttons
40
How to Capture SLO Stereo Images
41
TABLE 6: Examples of Stereo Buttons
41
How to Capture SLO Angiography Images
42
Control Contrast
42
How to Capture OCT Images
43
FIGURE 12: OCT Capture Workflow
43
The Patient's View of OCT Alignment
44
How to Optimize OCT Scan Quality
44
FIGURE 13: Indication of What the Patient will See When Being Aligned for OCT Imaging
44
Capture Scans Quickly and Recapture if Necessary
45
Using the Auto-Routines
45
Live OCT Positioning
45
Minimizing Eye Dryness
45
How to Capture an OCT Follow-Up Scan
45
How to Check OCT Scans
46
TABLE 7: Scan Results
46
Artifacts - Low Signal Strength
47
FIGURE 14: Examples of Local Weak Signal Strength
48
FIGURE 15: Example of Local Weak Signal Near the Fovea
48
FIGURE 16: Example of Local Weak Signal with Acceptable Global SNR
48
Artifacts - Eye Movements
49
Artifacts - Blinks
49
FIGURE 17: Possible Movement Detected
49
FIGURE 18: Possible Blink Detected
49
Artifacts - Clipping
50
Artifacts - Alignment of Essential Structures
50
How to Capture Using Multi-Mode
50
FIGURE 19: Example of Clipped B-Scan
50
FIGURE 20: Example of Clipping Near the Fovea
50
FIGURE 21: Example of Clipping Near the Optic Disc
50
How to Manage the Patient Session
51
Review Images
53
Starting the Review Software
53
How to Start the Application
53
Reviewing Patient Images and Scans
53
FIGURE 22: Reviewing Images Workflow
53
Exiting the Review Software
54
Manage the System
55
Managing User Details
55
How to Create User Accounts for Use on the Scan Head
55
How to Create User Accounts on the Image Server
55
How to Change Users
56
How to Change the Language on the Scan Head
56
How to Change the Language Displayed in the Review Application
56
Storing and Archiving Images
56
Managing Connections
56
Managing the Modality Work List
56
Quality Checks
57
Self-Tests
57
Status Indicator
57
Software Update
57
TABLE 8: List of Status Indicator Lights
57
Maintenance and Cleaning
59
Servicing
59
Warranty
59
Cleaning
60
General Cleaning
60
Cleaning before each Patient
61
How to Remove the Head and Chin Rests
61
Cleaning the Main Mirror
61
Disinfection
62
Battery Replacement
63
Cable Management
63
Troubleshooting
65
TABLE 9: List of Problems and Solutions
65
Why Can't I Login
66
What Information Do I Need When Contacting Optos
67
How Do I Image if the Alignment System Does Not Recognize the Eye
67
How Do I Restart the Scan Head
67
How Do I Restart the Image Server
67
What Should I Do if the PC Drive on the Image Server Is Full
68
Technical Specification
69
Safety Designation (IEC 60601-1)
69
Scan Head
69
TABLE 10: Scan Head Safety Designation Details
69
Connections
70
FIGURE 23: Sample of the Connection Label
70
Scan Head Dimensions
71
Review Client Properties
71
Touch Screen Properties
71
TABLE 11: Scan Head Dimensions
71
TABLE 12: Review Client Properties
71
Battery
72
Environmental Considerations (Ambient)
72
TABLE 13: Touch Screen Properties
72
TABLE 14: Table Size Requirements
72
Laser Safety Designation (IEC 60825-1)
73
External Laser Warning Information
73
TABLE 15: Environmental Ranges
73
Internal Laser Warning Information
74
Electromagnetic Compatibility (EMC)
74
Guidance and Manufacturer Declaration - Electromagnetic Emissions
74
Guidance and Manufacturer Declaration - Electromagnetic Immunity
74
TABLE 16: List of Electromagnetic Emission Compliance
74
TABLE 17: List of Electromagnetic Immunity Compliance
74
Recommended Separation Distances
76
TABLE 18: List of Recommended Separation Distances
76
Contact Us
79
Global Headquarters
79
Regional Offices
79
United States and Canada
79
Australia
80
Denmark
80
France
80
Germany and Austria
80
Norway
80
Spain
81
Sweden
81
Switzerland
81
United Kingdom and Other European Countries
81
European Authorized Representative
82
Patient Alignment Guide
83
Advertisement
Advertisement
Related Products
Optos P200T
Optos P200T plus
Optos P200T E Series
Optos California P200DT rg Series
Optos California P200DT fa Series
Optos California P200DT icg Series
Optos P200TE
Optos California P200DTx rg
Optos 200tx
Optos Daytona
Optos Categories
Medical Equipment
More Optos Manuals
Login
Sign In
OR
Sign in with Facebook
Sign in with Google
Upload manual
Upload from disk
Upload from URL