
Related Manuals for Oricom pro600 DECT


Summary of Contents for Oricom pro600 DECT
- Page 1 Professional Series User Guide Pro800 DECT Digital Cordless Telephone Pro600 DECT Digital Cordless Telephone with Answering System Keep this user guide for future reference. Pro_600_800.indd 2008-11-11 16:17:29...
-
Page 2: Table Of Contents
TABLE OF CONTENTS Warnings and Safety Information ...1 Getting Started ...2 Operating the Telephone ...6 Telephone ...8 Using the menu ...12 Phone Book ...19 Caller ID ...21 Using the Answering Machine (Pro800 Only) ...23 Using Remote Access (Pro800 Only) ...26 Advanced Setting ...28 Troubleshooting ...30 Default settings ...31... -
Page 3: Warnings And Safety Information
IMPORTANT • Persons with pacemakers should seek advice from their doctor before using this product. • Avoid exposure of this telephone to moisture or liquid. • To prevent electric shock, do not open the handset or base cabinet. • Avoid metallic contact (e.g. metal clips, keys) between the battery contacts and charging conductors. • There is a slight chance that the telephone could be damaged by an electrical storm. It is recommended that users unplug the phone from the mains supply and telephone socket during a storm. • Do not use the handset in an explosive hazard area such as where there is gas leaking. • Follow the local regulations regarding the disposal of your packing materials, exhausted batteries and used phone. Wherever possible, recycle those materials. • We advise that this phone should not be used near intensive care medical equipment. -
Page 4: Getting Started
Pro_600_800.indd WARNING DO NOT USE STANDARD/ALKALINE BATTERIES IN THIS PRODUCT, AS THERE IS A RISK OF EXPLOSION AND/OR INJURY. USE ONLY NI-MH RECHARGEABLE BATTERIES AS SPECIFIED IN THIS USER GUIDE. CONTACT ORICOM FOR REPLACEMENT BATTERIES. RISK OF EXPLOSION IF BATTERY IS REPLACED BY AN INCORRECT TYPE. Never use non-rechargeable batteries. Use recommended type supplied with this product. • Never use alkaline or lithium batteries. - Page 5 Pack contents Depending on the model you have purchased this pack should contain the following items: If any of these are missing, please contact Oricom directly. Pro600-1/Pro800-1 Base units Cordless handsets Charging cradle Power adaptors Modular adaptor plug Line cord User guide Handset Rechargeable AAA Ni-MH Batteries (1.2V...
- Page 6 Getting Started Pro800 Memory 1/User profile 1 30 dB Boost Display Menu/Mute/Delete Internal call External call/Handsfree #/Keylock Pause (long press 0) */Ringer on/off Microphone Incoming Call/Charging/Line in Use Pro_600_800.indd Incoming call light Volume up/down & Equaliser Memory 2/User profile 2 Up/Redial Recall Headset socket (Headset not included) Phone Book Down/Calls list End call Alphanumeric keypad Answer on/off/Stop/Answer Mode PIN Code (under base) Date/Time Volume up Volume down Delete Fast forward/Memo Play/Pause/OK...
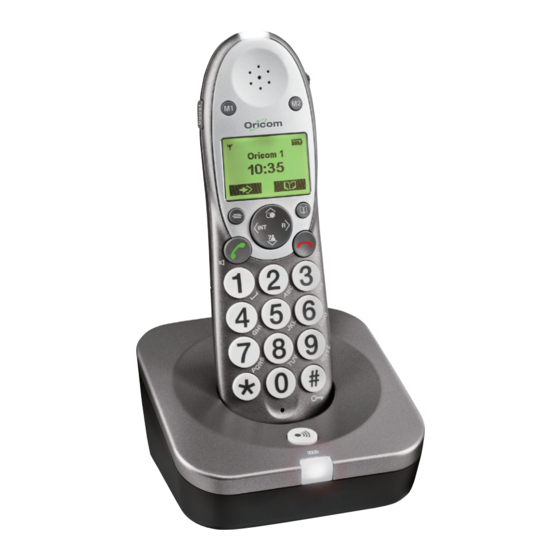
- Page 7 Pro600 Memory 1/User profile 1 30 dB Boost Menu/Mute/Delete Internal call External call/Handsfree Alphanumeric keypad */Ringer on/off Pause (long press 0) Microphone Pro_600_800.indd Incoming call light Volume up/down & Equaliser Memory 2/User profile 2 Up/Redial Headset socket (Headset not included) Display Phone Book Recall End call Down/Calls list Getting Started #/Keylock Find handset Incoming Call/Charging/Line in Use 2008-11-11 16:17:33...
-
Page 8: Operating The Telephone
Operating the Telephone Operating the Telephone The instructions throughout this guide are for both the telephone base and the cordless handset, unless stated otherwise. Display and explanation of operation sequences. Enter digits or letters Press the button shown, briefly 2 x Press the button shown, twice briefly 2 sec Press the button shown for 2 seconds Press and hold Press and hold the button shown Release... - Page 9 Navigating in the menu All the handset functions can be accessed via the menu. Please refer to "Using the menu" on page 12 for information on how to access each function. All descriptions in this operating manual assume that the handset is in Standby mode. Open the main menu Select the submenu required Open the submenu Select the function required Open the function Select the setting required Enter digits or letters using the relevant keys or Save Confirm the entries Cancel and return to standby mode Every process is automatically cancelled if there is no input within 20 seconds.
-
Page 10: Telephone
Telephone Telephone Making a call Enter the phone number (max. 24 digits) F ollowing incorrect input, press to delete the last digit Dial the phone number It is also possible to press the external call button first to obtain dialling tone. The digits entered will then be dialled immediately. It is not possible to correct wrong digits individually using this dialling procedure. End a call End the call Take a call or Take the call Redial Your telephone stores the last 10 telephone numbers dialled (max. 24 digits each). Open the redial list or Select an entry and dial the number Pro_600_800.indd Calling back missed calls Your telephone stores the last 30 incoming calls in the... - Page 11 Chain dialling This feature is used for more complex telephone services, eg for telephone banking or calling card procedures. Several numbers stored in the phone book can be dialled successively when a connection has already been made. It is also possible to combine numbers from the phone book with numbers entered manually. Numbers stored in the phone book can be chained and transmitted as required. O pen the phone book when a connection has been made or S elect the phone book entry and transmit the number Adjusting the receiver volume The receiver volume of your telephone is louder than with a standard telephone. Push up or down and release for each volume step.
- Page 12 Telephone Muting the microphone The microphone can be activated and deactivated during a telephone conversation when you are in handset or handsfree mode. , Mute On Switches the microphone off (Mute). , Mute Off Switches the microphone on Ringer on/off You can turn the bell of the ringer on and off. 2 sec Switches the bell ringer off 2 sec Switches the bell ringer on Keylock Calls can still be answered in the normal way when the keylock is on.
- Page 13 Conference calls You can hold a conference call between 1 external and 2 internal callers. HS1: <INT, , eg 2 During an external call, dial the number of the required handset HS2: Accept the internal call on the other handset HS1: Conf A ctivates conference call HS1 or HS2: End conference call Handset registration You only need to register a handset that has become deregistered from the base or if you have purchased a new handset. New additional handsets must be fully charged before you attempt to register them. Pro_600_800.indd At the base 10 sec ,...
-
Page 14: Using The Menu
Using the menu Using the menu Answering Machine (Pro800 Only) (see page 23) Phone book (see page 19) Priority/Default Setting If you are the main user of this telephone you should change the settings in the menu so that they are just right for you. These settings will be memorised automatically whenever you wish to make or answer a call. - Page 15 Changing the Profile "Equaliser" setting Select "Equaliser" , save Select and confirm Press the key to return to standby. Copy a User Profile You can copy a user profile to another compatible, registered handset. Open the Menu, select "Profile" Select "Profile 1 or 2" Select "Copy" < > 2, 3, 4 Select the handset Confirm or cancel Pro_600_800.indd Selecting a Profile for use Incoming calls When you receive an incoming call and before you answer the telephone, press the M1 or M2 key for the profile you wish to use. The display will confirm the profile that has been selected and you can answer the call as normal. Outgoing calls When you wish to make an outgoing call, press and hold the M1 or M2 key for the profile you wish to use. The...
- Page 16 Using the menu Handset Handset Ringing melody There are 10 different ringing melodies available. Open the Menu, select "Handset" Select "Ring tone" Select "External" or "Internal (intercom)" Melody 8 (External), The current setting is shown Melody 8 (Internal) , Save Select and confirm a ringing melody Handset Ringing volume There are 5 ringing volume settings available and "OFF". Open the Menu, select "Handset" Select "Ringer volume" Volume 3 The current setting is shown , Save S elect and confirm a ringing tone volume...
- Page 17 Handset name You can personalise your handset by naming it (max. 12 letters). Open the Menu, select "Handset" Select "Handset name" Delete the current name , Save Enter new name and confirm it Keypad Beep Open the Menu, select "Handset" Select "Keypad Beep" The current setting is shown Select and confirm "On" or "Off" Contrast There are 5 different contrast levels available so that you can set the display to how you find it most easy to read. Open the Menu, select "Handset" Select "Contrast" Level 3 The current setting is shown Select and confirm the contrast setting Pro_600_800.indd Auto talk With this feature set to "On", your handset will automatically answer the call when you pick up the handset from the base.
- Page 18 Using the menu Confirm beep Open the Menu, select "Handset" Select "Confirm beep" The current setting is shown Select and confirm "On" or "Off" Select base (This allows the handset to work on multiple bases) Open the Menu, select "Handset" Select "Select base" Auto The current setting is shown Select and confirm "Auto" or "Manual" Pro_600_800.indd Language There are 5 languages available, English, German, French, Spanish and Italian. Open the Menu, select "Handset" Select "Language" English The current setting is shown Select and confirm a language NZ Caller ID...
-
Page 19: Base Settings
"Off" Pro_600_800.indd Shaker You can plug a shaker accessory (VIB100 not included) into the socket on the back of the base. This can be purchased separately from the reseller where you purchased the product, or directly from Oricom (Australia). With this feature turned "ON" the shaker will vibrate when you receive an incoming call. Open the Menu, select "Base settings" Select "Shaker" The current setting is shown , save Select and confirm "On" or "Off"... - Page 20 Using the menu Time Date/Time Open the Menu, select "Time" Select "Date and Time" , save Enter the day, month and year, followed by the time in 24 hour clock and confirm. Set Time Format Open the Menu, select "Time" Select "Set time format" 24 Hour The current setting is shown S elect and confirm "12 hour" or 24 hour" Pro_600_800.indd Alarm Set Alarm...
-
Page 21: Phone Book
Phone Book 200 names and phone numbers can be stored in the phone book with a maximum of 16 letters and 24 digits for each entry. * Always enter the area dialling code with each phone book entry. * T he phone book entries are managed alphabetically. To go quickly to a phone book entry, enter the first letter of the corresponding entry. Entering a name The digit keys are also labelled with letters for the entry of the respective letters. Pressing the respective key the necessary number of times enables capital letters and digits to be entered. Space Delete P ress the "*" key to switch between upper "ABC" and lower "abc" case. To enter the same letter twice, press the button to enter the letter. - Page 22 Phone Book Show details Open the phone book Select a phone book entry Option, Select "Show details" Deleting phone book entries Open the phone book Select a phone book entry Option, Activate the deletion process (Delete entry or Delete all) Confirm the deletion or Cancel Pro_600_800.indd Copy phone book entries to another registered handset Open the phone book Select a phone book entry Option, Activate the copying process (Copy entry, Copy append or Copy all) < or >, eg HS2 Select the destination handset...
-
Page 23: Caller Id
Caller ID If you subscribe to your telephone operators service (charges may apply), numbers of the incoming calls will be displayed on the screen and stored in the call log (please consult your telephone service provider for details). The number of the caller (or name if stored in the Phone Book) appears in the display when the phone rings. If the caller has withheld their phone number, a corresponding message appears in the display. The phone number is not displayed and will not be stored in the calls list. A total of 30 incoming calls, with a maximum of 16 letters for the name and 23 digits for the number can be stored in the calls list. The flashing indicates new calls in the calls list. Displaying calls list entries Opens the calls list at most recent entry Select an entry >... - Page 24 Caller ID Deleting calls list entries Deleting a single calls list entry Opens the calls list at most recent entry Select an entry Option, Select "Delete" or Confirm or Cancel Deleting all calls list entries Opens the calls list at most recent entry Option, Select "Delete all"...
-
Page 25: Using The Answering Machine (Pro800 Only)
Answering Machine (Pro800 Only) Your answering machine can be ready for use within a few seconds of plugging in the telephone line cord and switching on the mains power. Just follow the steps in this section to set up and use your answering machine. Switch on/off Switches the answering machine on or off. The current answer mode is announced. Set the answer mode Switch the answering machine on 2 sec T o change the mode between "Answer &... - Page 26 Using the Answering Machine (Pro800 Only) Set the date and time 2 sec Enters date and time mode S elect a day of the week Confirm the day Select the hour Confirm the hour Select the minutes Confirm the minutes Check the date and time The current date and time setting is announced Record a memo You can use your answering machine to record memo messages for other users to listen to later.
- Page 27 Listen to your messages/memos via the handset Open the Menu, select "Ans Machine" S elect "Play New Msgs" or "Play All Msgs" Press the key to return to standby. Memory Full Should your answering machine become full either during a recording or after the memory has become full, "Memory Full" will be announced and the Answer Mode will change automatically to "Answer Only". You will need to delete some messages before any new messages can be recorded. Pro_600_800.indd Using the Answering Machine (Pro800 Only) 2008-11-11 16:17:42...
-
Page 28: Using Remote Access (Pro800 Only)
Using Remote Access (Pro800 Only) Remote Access (Pro800 Only) You can call your answering machine from any Touchtone phone or mobile phone whilst you are away from home to listen to your messages. PIN Code for remote access A 3-digit PIN code is required for remote access to your answering machine. The default code is "000" but for security reasons you should change this to a code personal to you. - Page 29 Remote commands Digit Function Rewind Play/Pause Fast Forward 1st OGM Playback (Answer & Record) 1st OGM Recording Stop Delete current message Answer Off Answer On/Answer mode Delete all old messages Skip announcement Switch to remote access Record a memo Pro_600_800.indd Using Remote Access (Pro800 Only) 2008-11-11 16:17:43...
-
Page 30: Advanced Setting
Advanced Settings Advanced Settings Setting the Recall time Two recall timings are available. Short 100ms (Australia) and Long 600ms (New Zealand). Open the Menu, select "Base settings" Select "Recall" Short The current setting is shown , save Select and confirm "Short" or "Long" R button on PBX phone systems If the telephone is connected to a PBX phone system functions such as transferring calls and automatic call back can be used via the R button. -
Page 31: Troubleshooting
Troubleshooting Problem Possible cause(s) Solution(s) Bad audio quality 1. Interference from nearby 1. Try a different connection point, one (crackles,echo, etc.). electrical appliance. 2. Base unit is installed in a room with thick walls. 2. Install the base unit in a DIFFERENT 3. -
Page 32: Technical Properties
Technical Properties Technical properties Feature Standard DECT GAP Power supply (base Input: 100~240VAC 50/60Hz 680mA station) Output: 12VDC 670mA Range Outdoors Approx 300m Indoors Approx 50m Standby Up to 100 h Max. talk time Up to 11 h Rechargeable batteries AAA 1.2V 800mAh NiMH Dialling mode Tone (DTMF) Pulse Permissable ambient 0ºC to 45ºC temperature Permissable relative 20% to 80% humidity Recall 100, 600 ms DECT: Digital Enhanced Cordless Telecommunication = Standard for cordless telephones. - Page 33 Default settings Cordless handset The default settings can be restored via the menu. Refer to page 28 for the sequence of menu option selections. Language English Handset name Oricom Handset Ringing melody (External) 8 Handset Ringing melody (Internal) 8 Handset Ringing volume Base Ringing melody Base Ringing volume Shaker Keypad beep Auto talk Contrast Backlight time Boost Memory Recall time 100 ms Dialling mode Tone PIN-Code 0000 Pro_600_800.indd Telephone Answering Machine The default settings can be restored via the menu. Refer...
-
Page 34: Maintenance/Guarantee
The Warranty Card is located in the package. (b) Exclusion and limitation of liability. Oricom will not be in breach of a warranty or condition expressly stated in this User Guide or the Warranty Card or implied by the Trade... - Page 35 Notes for operation in New Zealand The grant of a Telepermit for any item of terminal equipment indicates only that Telecom has accepted that the item complies with the minimum conditions for connection to its network. It indicates no endorsement of the product by Telecom, nor does it provide any sort of warranty.
-
Page 36: Index
Index Index Adjusting the Handsfree volume ... 9 Adjusting the receiver volume ... 9 Answering Machine (Pro800 Only) ... 23 Auto talk ... 15 Backlight time ... 15 Base Ringing melody ... 17 Base Ringing volume ... 17 Boost Memory ... 14 Boosting the receiver volume ... 9 Call in to check your messages ... - Page 37 Delete a single message/memo ... 24 Delete all messages/memos ... 24 Deleting a single calls list entry ... 22 Deleting all calls list entries ... 22 Deleting phone book entries ... 20 Dialling pause (PBX ONLY) ... 28 Dialling phone numbers from the phone book ... 8 Display and explanation of operation sequences..6 Displaying calls list entries ... 21 Editing phone book entries ... 19 End a call ...
- Page 38 Index Memory Full ... 25 Muting the microphone ... 10 Navigating in the menu ... 7 Night Light ... 18 Notes for operation in New Zealand ... 33 NZ Caller ID ... 16 Pack contents ... 3 Phone Book ... 19 PIN Code for remote access... 26 Priority/Default Setting ... 12 Pro600 ... 5 Pro800 ... 4 Purchasing additional handsets ... 3 Quick dial ...
- Page 39 Set the date and time ... 24 Set Time Format ... 18 Setting the Recall time ... 28 Shaker ... 17 Show details ... 20 Storing a quick dial entry ... 7 Storing calls list entries in the phone book ... 21 Switch on/off ... 23 System PIN ... 17 Take a call ... 8 Take two different calls at the same time ... 22 Talk time display ...
-
Page 40: Customer Support
Australia Oricom International Pty Ltd Locked Bag 658 South Windsor, NSW 2756 Pro_600_800.indd Customer Support Email: support@oricom.com.au Web: www.oricom.com.au Phone: (02) 4574 8888 Fax: (02) 4574 8898 2008-11-11 16:17:25...
Need help?
Do you have a question about the pro600 DECT and is the answer not in the manual?
Questions and answers