Table of Contents
Advertisement
Quick Links
Advertisement
Table of Contents

Related Manuals for JUNO JB126S2


Summary of Contents for JUNO JB126S2
- Page 1 User Manual Oven JB126S2 JB126D2...
-
Page 2: Table Of Contents
VISIT OUR WEBSITE TO: Get usage advice, brochures, trouble shooter, service and repair information: www.juno.de/support CONTENTS 1. SAFETY INFORMATION...................2 2. SAFETY INSTRUCTIONS.................4 3. INSTALLATION....................7 4. PRODUCT DESCRIPTION................9 5. CONTROL PANEL.................... 9 6. BEFORE FIRST USE..................11 7. DAILY USE...................... 12 8. - Page 3 be kept away from the appliance unless continuously supervised. Children should be supervised to ensure that they do not • play with the appliance. Keep all packaging away from children and dispose of it • appropriately. WARNING: The appliance and its accessible parts become •...
-
Page 4: Safety Instructions
Always use oven gloves to remove or insert accessories or • ovenware. To remove the shelf supports first pull the front of the shelf • support and then the rear end away from the side walls. Install the shelf supports in the opposite sequence. Do not use a steam cleaner to clean the appliance. - Page 5 2.2 Electrical connection Cable types applicable for installation or WARNING! replacement for Europe: Risk of fire and electric shock. H07 RN-F, H05 RN-F, H05 RRF, H05 VV-F, H05 V2V2-F (T90), H05 BB-F • All electrical connections should be made by a qualified electrician. For the section of the cable refer to the total •...
- Page 6 • Clean the appliance with a moist soft WARNING! cloth. Use only neutral detergents. Do not use abrasive products, abrasive cleaning Risk of damage to the appliance. pads, solvents or metal objects. • If you use an oven spray, follow the safety •...
-
Page 7: Installation
temperature Pyrolytic cleaning operation • Use only lamps with the same of all Pyrolytic Ovens and can be also a specifications. source for low level harmful fumes. 2.7 Service • Fumes released from all Pyrolytic Ovens / Cooking Residues as described are not •... - Page 8 (*mm) min. 550 min. 560 3.2 Securing the oven to the cabinet ENGLISH...
-
Page 9: Product Description
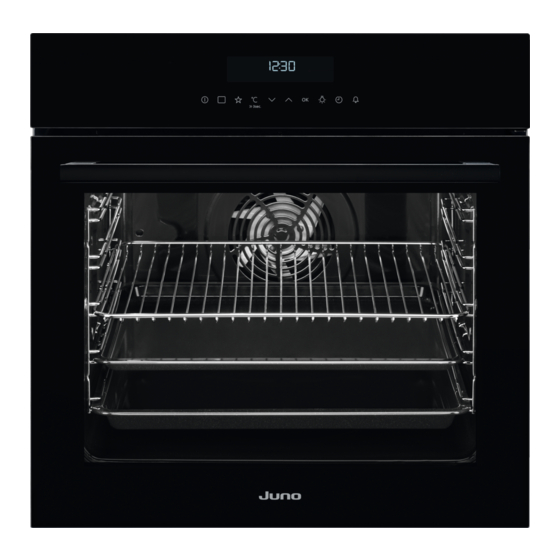
4. PRODUCT DESCRIPTION 4.1 General overview Control panel Electronic programmer Heating element Lamp Shelf support, removable Shelf positions 4.2 Accessories To bake and roast or as pan to collect fat. • Telescopic runners • Wire shelf With the telescopic runners you can put in For cookware, cake tins, roasts. - Page 10 Sensor Function Description Field ON / OFF To turn the oven on and off. Options To set a heating function or an automatic programme. My Favourite Pro‐ To store your favourite programme. Use it to have access gramme to your favourite programme directly or when the oven is off.
-
Page 11: Before First Use
Other indicators of the display: Symbol Name Description Functions You can choose an oven function. Automatic programme You can choose an automatic programme. My favourite programme The favourite programme operates. kg / g An automatic programme with a weight input op‐ erates. -
Page 12: Daily Use
6.2 Initial preheating Preheat the empty oven before the first use. Step 1 Remove all accessories and removable shelf supports from the oven. Step 2 Set the maximum temperature for the function: Let the oven operate for 1 h. Step 3 Set the maximum temperature for the function: Let the oven operate for 15 min. -
Page 13: Clock Functions
7.4 How to set: Temperature Oven func‐ Application Press to change the temperature in tion steps: 5 °C. To keep food warm. When the oven is at the set temperature a signal sounds and the Heat up indicator disappears. Keep Warm 7.5 How to check: Temperature 7.2 Notes on: Moist Fan Baking You can check the current temperature in the... - Page 14 Clock function Application End Time To set when the oven turns off. Time Delay To combine Duration and End Time function. Set + Go To turn on the oven with necessary settings with only one press of the sensor field any time later. Minute Minder To set a countdown time.
-
Page 15: Automatic Programmes
5. Press a sensor field (apart from ON / 7. Press to set the End Time and OFF) to start the Set + Go function. press . First you set the minutes and then the hours. 8.7 How to set: Minute Minder The oven turns on automatically later on, 1. -
Page 16: Using The Accessories
4. Touch or wait five seconds until the Programme appliance automatically starts to work. 5. When the set time ends, an acoustic WHOLE FISH signal sounds for two minutes. The PIZZA symbol flashes. 6. Touch a sensor field or open the oven QUICHE LORRAINE door to stop the acoustic signal. -
Page 17: Additional Functions
Wire shelf Push the shelf between the guide bars of the shelf support and make sure that the feet point down. Baking tray / Deep pan: Push the tray between the guide bars of the shelf support. Wire shelf, Baking tray / Deep pan: Push the tray between the guide bars of the shelf support and the wire shelf on the guide bars above. - Page 18 2. Turn on an oven function or setting. When the pyrolytic cleaning is turned 3. Touch and hold at the same on, the door is locked. When you press a time for 2 seconds. sensor field the display shows the A signal sounds.
-
Page 19: Hints And Tips
OFF), the display goes back to the day brightness mode for the next 10 seconds. (°C) – if the appliance is deactivated and you set the Minute Minder. When the 30 - 115 12.5 Minute Minder function ends, the display goes back to the night 120 - 195 brightness. - Page 20 Ramekins Pizza pan Baking dish Flan base tin Ceramic Dark, non-reflective Dark, non-reflective Dark, non-reflective 8 cm diameter, 28 cm diameter 26 cm diameter 28 cm diameter 5 cm height 12.3 Moist Fan Baking For the best results follow suggestions listed in the table below.
- Page 21 (°C) (min) Macaroons, 24 baking tray or dripping pan 25 - 35 pieces Muffins, 12 pieces baking tray or dripping pan 30 - 40 Savory pastry, 20 baking tray or dripping pan 25 - 30 pieces Short crust biscuits, baking tray or dripping pan 25 - 35 20 pieces Tartlets, 8 pieces...
- Page 22 (°C) (min) Apple True Fan Wire shelf 70 - 90 pie, 2 Cooking tins Ø20 Sponge Conven‐ Wire shelf 40 - 50 Preheat the oven cake, tional Cook‐ for 10 minutes. cake mould Ø26 cm Sponge True Fan Wire shelf 40 - 50 Preheat the oven cake,...
-
Page 23: Care And Cleaning
13. CARE AND CLEANING WARNING! Refer to Safety chapters. 13.1 Notes on cleaning Clean the front of the appliance with a microfibre cloth with warm water and a mild deter‐ gent. Use a cleaning solution to clean metal surfaces. Clean stains with a mild detergent. Cleaning Agents Clean the cavity after each use. - Page 24 Step 3 Pull the rear end of the shelf sup‐ port away from the side wall and remove it. Step 4 Install the shelf supports in the op‐ posite sequence. The retaining pins on the telescopic runners must point to the front. 13.3 How to use: Pyrolysis CAUTION! Clean the oven with Pyrolysis.
- Page 25 13.5 How to remove and install: Door The oven door has three glass panels. You can remove the oven door and the internal glass panels to clean them. Read the whole "Removing and installing door" instruction before you remove the glass panels. CAUTION! Do not use the oven without the glass panels.
- Page 26 Step 7 Hold the door glass panels by their top edge and carefully pull them out one by one. Start from the top panel. Make sure the glass slides out of the supports com‐ pletely. Step 8 Clean the glass panels with water and soap. Dry the glass panels carefully. Do not clean the glass panels in the dishwasher.
-
Page 27: Troubleshooting
Back lamp Step 1 Turn the glass cover to remove it. Step 2 Clean the glass cover. Step 3 Replace the lamp with a suitable 300 °C heat-resistant lamp. Step 4 Install the glass cover. 14. TROUBLESHOOTING WARNING! Refer to Safety chapters. 14.1 What to do if... - Page 28 Problem Possible cause Remedy Steam and condensation settle You left the dish in the oven for Do not leave the dishes in the on the food and in the cavity of too long. oven for longer than 15 - 20 mi‐ the oven.
-
Page 29: Energy Efficiency
15. ENERGY EFFICIENCY 15.1 Product Information and Product Information Sheet* Supplier's name Juno JB126D2 949498195 Model identification JB126S2 949498196 Energy Efficiency Index 81.2 Energy efficiency class Energy consumption with a standard load, conventional mode 0.93 kWh/cycle Energy consumption with a standard load, fan-forced mode 0.69 kWh/cycle... -
Page 30: Environmental Concerns
Moist Fan Baking When the cooking duration is longer than 30 min, reduce the appliance temperature to Function designed to save energy during minimum 3 - 10 min before the end of cooking. cooking. The residual heat inside the When you use this function the lamp appliance will continue to cook. - Page 32 867368323-B-172022...
Need help?
Do you have a question about the JB126S2 and is the answer not in the manual?
Questions and answers