Blodgett BLCT-6E Manual
Bct touch control combi tech
Hide thumbs
Also See for BLCT-6E:
- Installation operation & maintenance (47 pages) ,
- Installation operation & maintenance (47 pages) ,
- Installation operation & maintenance (37 pages)
Table of Contents
Advertisement
Advertisement
Table of Contents

Subscribe to Our Youtube Channel
Related Manuals for Blodgett BLCT-6E


Summary of Contents for Blodgett BLCT-6E
- Page 1 BCT Touch Control Combi Tech Manual 802-658-6600 www.blodgett.com...
-
Page 2: Table Of Contents
TABLE OF CONTENTS Oven Models Location of the Serial Number 5 USING THE TOUCH DISPLAY Basic Operations SETTINGS MENU 7 CHANGING SETTINGS ON THE USER MENU 8 Setting the Oven Light Setting the Screen Saver Setting the Language Setting the Setup Clock Viewing the Software Version CHANGING SETTINGS ON THE SUPERUSER DISPLAY 11... - Page 3 TABLE OF CONTENTS APPENDIX A: BURNER ELECTRODE ADJUSTMENTS 53 APPENDIX B: MEASURING GAS PRESSURE 55 APPENDIX C: GAS BURNER SETTINGS 56 APPENDIX D: TOUCH CONTROLLER “XPE” – SET-UP AND ADJUSTMENT 59 Converting A Gas Oven to Another Gas Type APPENDIX E: GAS PRESSURE-SWITCH ADJUSTMENT 60 APPENDIX F: GAS SEQUENCE DIAGRAM 62...
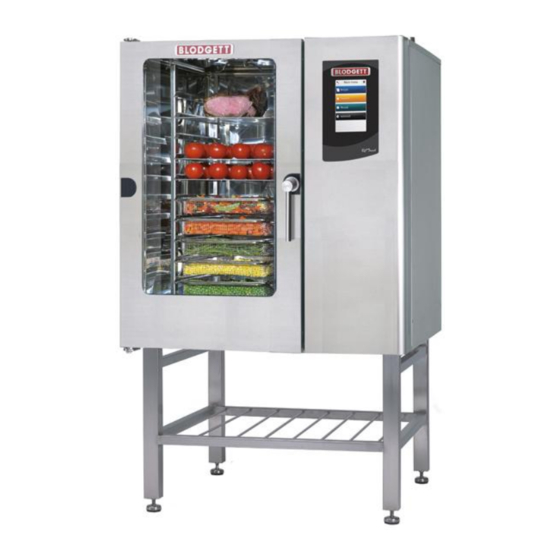
- Page 4 Oven Models with the Touch Screen Control BLCT-6E BLCT-23E BLCT-10E BCT-61E or Gas BCT-62E or Gas BCT-101E or Gas BLCT-61E or Gas BLCT-62E or Gas BLCT-101E or Gas Note: BCT - has a boiler BLCT – is a boilerless All gas ovens are boilerless.
- Page 5 LOCATING THE SERIAL NUMBER ON THE OVEN When you order parts or request service for your Blodgett Combi oven, you need both of the oven’s Serial Numbers, You can find the Serial Number and Type information as shown in the illustration below.
-
Page 6: Basic Operations
Using the Touch Display USING TOUCH DISPLAY The Touch display provides a friendly and easy way for you to operate and interact with the BCT and BLCT Combi ovens. You simply use the pads of your fingertips to perform the operations. Basic Operations ••... -
Page 7: Changing Settings On The User Menu
Note The computer has been thoroughly tested by the manufacturer prior to delivery, and the settings have been carefully reviewed. You should therefore only allow qualified personnel to make changes to the settings. Contact your BLODGETT for more information. SERVICE MANUAL... -
Page 8: Setting The Oven Light
Changing Settings on the User Menu CHANGING SETTINGS ON THE USER MENU You can change the basic settings from the User Menu. •• On the Settings Menu, touch the User button. Setting the Oven Light To set oven light, touch Oven light. Drag your finger up or down to select Continuous or 5 min., and then touch Setting the Screen Saver To set the screen saver, touch Screen saver. -
Page 9: Setting The Setup Clock
Changing Settings on the User Menu Setting the Setup Clock To set the clock, touch Setup clock. In the hour and min. lists drag your finger up or down to select the desired time. In the day, month and year lists drag your finger up or down to select the desired date. -
Page 10: Display
Changing Settings on the SuperUser Display CHANGING SETTINGS ON THE SUPERUSER DISPLAY You can access the following areas on the super user display. •• Sounds (See Setting Alarm Sounds on page 11) •• Settings (See Changing Settings on page 13) ••... - Page 11 Changing Settings on the SuperUser Display Set the desired sound properties. For each event, you can specify the following properties. Property What it does Sound Set Used to select the desired sound set for the alarm. The default sound set is Android. Sound File Used to select the specific sound from the set.
-
Page 12: Changing Settings
Changing Settings on the SuperUser Display Changing Settings The following describes the settings you can change via the SuperUser Menu. HACCP Logging You can specify whether you want the oven to automatically store and save HACCP (Hazard Analysis and Critical Control Points) data about the preparation process. If you enable this option, you can access information about production time and duration as well as production temperature and core temperature. - Page 13 Changing Settings on the SuperUser Display Core Temperature You use the Core temp. setting to specify whether the oven comes with a core temper-ature probe. The default setting is Yes. On the SuperUser display, touch Settings, and then touch Core temp. Drag your finger up or down to select Yes or No, and then touch OK.
-
Page 14: Adjustments
Changing Settings on the SuperUser Display Temperature Unit You use the Temp. unit setting to specify which temperature unit you want to use. The default setting is Celsius. On the SuperUser display, touch Settings, and then touch Temp. unit. Drag your finger up or down to select Celsius or Fahrenheit, and then touch Adjustments Cook and Hold Offset You use the Cook and hold offset setting to specify the difference between the... - Page 15 Changing Settings on the SuperUser Display Reheat Pulse Interval You use the Reheat pulse interval setting to specify the interval in seconds between injec-tions of water during the regeneration process. The injection itself lasts 1/10 of a second. The default setting is 8 seconds. On the SuperUser display, touch Adjustments, and then touch Reheat pulse interval.
- Page 16 Changing Settings on the SuperUser Display Calibrating ClimaOptima Auto Humidity You use the Calibrate auto humidity setting to calibrate the ClimaOptima humidity sensor. The oven has been calibrated prior to delivery, but we recommend that you calibrate the oven after the oven has been installed in its proper location. Calibration is Required After the Following Events: ••...
-
Page 17: Calibrating The Oven Door Sensor
Changing Settings on the SuperUser Display Step Time Temp. (Celsius) Oven Exhaust Cal. Approx. 15 min. Open Cal. Approx. 2 min. Open Cal. Approx. 2 min. Closed Cal. Approx. 8 min. Open Cal. Approx. 3 min. Closed Cal. Approx. 5 min. Closed Cooling Approx. -
Page 18: Logs And Statistics
Changing Settings on the SuperUser Display Open the door so that the door is in the first step open position and then touch Press when door open. Look at the Threshold and Actual values. •• The Threshold value displays the value that marks the shift between status door open and the status door closed. - Page 19 Changing Settings on the SuperUser Display Fault Statistics The Fault statistics list displays a list of all error codes, the number of times each error code has been displayed, and the date the error code was last displayed. On the SuperUser display, touch Logs and statistics, and then touch Fault statistics.
-
Page 20: Settings On The Technician Menu
Settings on the Technician Menu SETTINGS ON THE TECHNICIAN MENU You can access the following areas on the Technician Menu. •• Test Functions (See Using the Test Functions on page 21) •• Oven setup (See Changing the Oven Set-up on page 26) ••... - Page 21 Settings on the Technician Menu Testing the Oven On the Technician display, touch Test functions, and then touch Oven. Touch each icon to turn run component and test the functions. The button turns green if the component is active. Note: To run the Heat function the Convection Fan must also be turned At the bottom of the display the status of a number of input functions is displayed.
- Page 22 Settings on the Technician Menu Testing the Boiler On the Technician display, touch Test functions, and then touch Steam. Touch Empty to empty the steam generator, and then ensure that the displayed Level value is Low. Touch Fill to fill the steam generator, and then ensure that the displayed Level is High.
- Page 23 Settings on the Technician Menu Testing the External Ventilator and the Restart Lamp On the Technician display, touch Test functions, and then touch Miscellaneous. Touch External vent, to test if the external ventilation is working. The outlet is named terminal no.2. When external ventilation is activated, the outlet is active during program performance and until 10 minutes after the program has completed.
- Page 24 Settings on the Technician Menu Testing the Alarm This function tests the thermo-switch circuit. On the Technician display, touch Test functions, and then touch Main alarm. Touch Main contactor. If all status values are displayed in green and the status is On, it indicates that the alarm is working properly. If a value is displayed in red and the status is Off, a fault has occurred.
-
Page 25: Changing The Oven Set-Up
Settings on the Technician Menu Changing the Oven Set-up Specifying the Heating System On the Technician display, touch Oven setup, and then touch Heating. Slide your finger up or down to select Electric or Gas LPG, GAS LPGB, GAS G20 Pr, GAS G25, and then touch OK. You can see whether the oven is a gas or an electric oven on the serial plate located on the oven exterior on the bottom right side. -
Page 26: Gas Settings
Settings on the Technician Menu Setting the ClimaOptima function On the Technician display, touch Oven setup, and then touch Auto humidity. Slide your finger up or down to select Yes or No. Select Yes to enable ClimaOptima and No to disable ClimaOptima. Setting Up a Pass-through Oven Use this function to specify whether the oven is a pass-through oven that can be loaded and unloaded both from the front and the rear side. - Page 27 Settings on the Technician Menu Setting Description Min speed gas 1 Touch Min speed gas 1, and the slide your finger up or down to select the preferred value, and then touch OK. Start speed gas 1 Touch Start speed gas 1, and the slide your finger up or down to select the preferred value, and then touch OK.
-
Page 28: Making Temperature Adjustments
Settings on the Technician Menu Making Temperature Adjustments Use this function to adjust the oven or the core temperature offsets. This is useful when the temperature should correspond with the temperature of a 3rd party probe. The default setting is 0. Adjust the Oven Temperature On the Technician display, touch Adjustments. -
Page 29: Changing Oven Settings
Settings on the Technician Menu Changing Oven Settings On the Technician display, touch Settings. You can now change the following settings. Setting Description Custom mode Settings only applicable to a specific customer. Yes/No setting. Soap level monitoring Select Yes to display a message when the rinse or soap containers must be changed. -
Page 30: Deliming Settings
Settings on the Technician Menu Deliming Settings The Delime program is used to descale the steam generator. This function is not used if the oven is connected to a water treatment filter and the water has been tested to prove it meets the purity requirements but is still recommended to run every 90 hours. -
Page 31: Making Corrections To Bake Time
Settings on the Technician Menu Flushing the descaler On the Technician display, touch Delime. Touch Delime Program. Touch Delime. Touch Delime Flush. The flushing program starts, and the displays shows the current step of the process. Cook to Perfection Use this function to enable or disable automatic recalculation of the bake time in case of mistakes such during the baking process. -
Page 32: Enabling Demo Mode
Settings on the Technician Menu Specifying Middle East Specific Settings Enabling this setting disables all recipes containing pork. On the Technician display, touch Middle East. Touch Yes, and then touch OK. Enabling Demo mode When you want to use the oven for demonstration purposes, you should enable demo mode. -
Page 33: Troubleshooting
TROUBLESHOOTING If the oven displays an error code, try the solutions below before contacting Blodgett technical service. 802-658-6600 After each step is carried out, be sure to test if the oven is working again. General Error Codes Error Code 3 The bolier high limit has tripped because the temperature has risen above 135°C/275°F. - Page 34 Troubleshooting Error Code 4 The overheating switch of the oven chamber is off because the oven chamber temperature has risen above 350°C/662°F. Press the Q1 button (cavity high limit) at the bottom of the oven to reset the switch. If the oven comes with two fan motors, there are 2 overheating switches.
- Page 35 Troubleshooting Probe Chart Ohms Temp Error Code 6 F⁰ The drain temperature has been above 75°C/167°F for more than 5 minutes. It is normally kept below 60°C/140°F. Steps Check list Solution Check that the water is turned on. Check that the water supply connected to the oven is cold and not hot.
- Page 36 Troubleshooting Error Code 8 The probe is broken or is not connected properly. The program cannot be used until the error has been corrected. Steps Check list Solution Go to the test menu (miscellaneous) to see which information is displayed. Check the cable and the cable plugs and change the plug if necessary.
- Page 37 Troubleshooting Error Code 10 The temperature sensor (probe) in the drain is broken. The oven can still be used, but the error has to be corrected as soon as possible. Steps Check list Solution Go to the test menu (oven) to see which temperature is displayed.
- Page 38 Troubleshooting Error Code 12 The heat sink for the solid state relay is too hot because the temperature has risen above 120°C/248°F. Let it cool off for 20-30 minutes and then retry. Steps Check list Solution Go to the test menu (Main Alarm) to see which information is displayed.
- Page 39 Is the red LED in the frequency inverter Change the frequency flashing? inverter. Check how often and check the meaning (Contact Blodgett service) of the flashes printed on the side. Verify that the rotation sensor measures If you can measure 5VDC, 5VDC. (Measure 5VDC between the...
- Page 40 Troubleshooting Error Code 15 The CPU board temperature has risen above 60°C/140°F. Steps Check list Solution Go to the test menu to see which infor-mation the computer displays. Check whether the ambient temperature Move the oven if necessary, is too high. and clean the intake filter.
- Page 41 Troubleshooting Error Code 19 An internal error occurred. The oven server process is not responding. Oven server process failed. Steps Check list Solution Restart the oven. Error Code 20 An internal error occurred. A communication failure occurred between the computer and the IO board. The IO board software is not responding. Wrong software version on the IO board.
- Page 42 Troubleshooting Error Code 22 Program interrupted. There was a power outage while the program was running. The power outage lasted for so long that the program cannot be restarted. Steps Check list Solution The oven can be set up to restart after a power outage.
- Page 43 Troubleshooting Error Code 24 Drain blocked. The steam generator could not be emptied during flushing. The level sensor reports high water level when the generator is emptied. Steps Check list Solution Go to the test menu to see which information the computer displays. Check that there is no scale in the steam generator and no foreign objects in the empty pump.
- Page 44 Troubleshooting Error Code 26 The ClimaOptima sensor signals outside of the active area. Steps Check list Solution Go to the test menu to see which information the computer displays. Check the cable and the cable plugs and change the plug if necessary, and then test if the sensor is working.
- Page 45 Troubleshooting Error Code 28 An invalid combination of the main alarm has been detected. The main alarm is not displayed correctly. Steps Check list Solution Go to the test menu to see which information the computer displays. Check the cable and the cable plugs. Change the plug if necessary, and then test if the alarm is working.
- Page 46 Troubleshooting Error Code 34 The water pressure is too low. Steps Check list Solution Check that the water is turned on. Clean the solenoid valve filter. Check that the water pressure is at least Change the sensor. 36 psi. Error Code 37 While running the CombiWash program, the oven could not cool down to set point.
- Page 47 Troubleshooting Error Code 40 The IO board temperature has been too high. Steps Check list Solution Clean the filter at the bottom of the panel. Note that this is a warning. If the temperature continues to rise, the oven will stop and display error code 16.
-
Page 48: Gas Error Codes
Troubleshooting Gas Error Codes The following error codes are gas oven specific. Error 50/60 Pressure switch error. The pressure switch is active at start (timeout 20 sec.) Steps Check list Solution Go to the test menu, and adjust the Change the pressure switch. pressure switch. - Page 49 Troubleshooting Error 52/62 Gas valve failure. The gas valve does not open after 5 startup attempts (timeout 20 sec.) Steps Check list Solution Go to the test menu. Perform the startup sequence. Check that the controller receives If there is no feedback, feedback from the pressure switch and perform the startup the gas valve.
- Page 50 Troubleshooting Error 54/64 Fan error. The gas fan RPM before ignition is not correct. Steps Check list Solution Go to the test menu. Test the gas fan. If no, test the gas fan. Verify Verify that the RPMs are registered. that there is power input.
- Page 51 Troubleshooting Error 56/66 Gas failure. No flame has been detected after 5 attempts. Steps Check list Solution Check if gas supply is available. Check, clean, change electrode or burner. Go to the test function. Perform the startup sequence. Error 57/67 STOP during operation.
-
Page 52: Burner Electrode Adjustments
Appendix A: Burner Electrode Adjustments APPENDIX A: BURNER ELECTRODE ADJUSTMENTS BLCM, BLCP, BLCT 61 13kW 8 mm 4 mm 73 mm SERVICE MANUAL 53... - Page 53 Appendix A: Burner Electrode Adjustments BLCM, BLCP, BLCT 101, 102, 202 21 kW, 24kW, 48kW 8 mm 4 mm 78 mm SERVICE MANUAL...
-
Page 54: Measuring Gas Pressure
Appendix B: Measuring Gas Pressure APPENDIX B: MEASURING GAS PRESSURE Prepare gas-pressure meter. Open the gas-test nipple using a flat-headed screwdriver. Turn the screw counter-clockwise. When the gas-test nipple is opened, gas will escape. Be prepared and have the gas-pressure meter ready before opening the test nipple. Measure static the gas pressure. -
Page 55: Appendix C: Gas Burner Settings
Appendix C: Gas Burner Settings APPENDIX C: GAS BURNER SETTINGS When you adjust the gas burner, the tolerances are as follows: Max. rpm setting: ±0.2% Min. rpm setting: +/-0.2% Adjustment “CE” gas ovens (burner 1) Hot Air Burner 1 “Bottom” Gas Oven Adjustment Settings %, CO %, CO... - Page 56 Appendix C: Gas Burner Settings Adjustment “ETL” gas ovens (burner 1) Hot Air Burner 1 “Bottom” Houno Gas Oven Adjustment Settings %, CO %, CO RPM Adjustement Air Proving “MAX” RPM “MIN”, RPM normal operation Switch - ON Heat “u16” “u16”...
- Page 57 Appendix C: Gas Burner Settings Adjustment “ETL” gas ovens (burner 2) Hot Air Burner 2 “Top” Houno Gas Oven Adjustment Settings %, CO %, CO RPM Adjustement Air Proving “MAX” RPM “MIN”, RPM normal operation Switch - ON Heat “u17” “u17”...
-
Page 58: Touch Controller "Xpe" - Set-Up And
Appendix D: Touch controller “XPE” – Set-up and Adjustment APPENDIX D: TOUCH CONTROLLER “XPE” – SET-UP AND ADJUSTMENT Converting A Gas Oven to Another Gas Type When you convert to another gas type, never adjust the offset governor “Minimum”. Make the following adjustment on the “Max rpm” screw ••... -
Page 59: Gas Pressure-Switch Adjustment
Appendix E: Gas Pressure-switch Adjustment APPENDIX E: GAS PRESSURE- SWITCH ADJUSTMENT Turn off the gas inlet. If the gas to the oven is not turned off before the pressure switch is adjusted, the oven may ignite during the adjusting process creating high CO values. - Page 60 Appendix E: Gas Pressure-switch Adjustment Pressure-switch table OFF->ON Oven types Tolerance 1.06 = 61 3100 ±100 1.10 = 101 2300 ±100 1.20 2300 ±100 2.06 = 62 2800 ±100 2.10 = 102 2300 ±100 2.20 = 202 2300 ±100 If the registered value is lower than the value in the table, you have to adjust the pressure switch clockwise.
-
Page 61: Appendix F: Gas Sequence Diagram
Appendix F: Gas Sequence Diagram APPENDIX F: GAS SEQUENCE DIAGRAM SERVICE MANUAL... -
Page 62: Gas Components Position
Appendix G: Gas Components Position APPENDIX G: GAS COMPONENTS POSITION Gas components position 61, 62, 101, 102, Interface relay Coil gas-air unit Burner electrode Ignition trafo Gas-air unit Dungs Pressure switch control box SERVICE MANUAL 63... - Page 63 Appendix G: Gas Components Position Gas component position 202 Pressure switch Interface relay Coil gas-air unit Burner electrode Ignition trafo Gas-air unit Dungs control box Interface relay Coil gas-air unit Burner electrode Ignition trafo Gas-air unit Pressure switch SERVICE MANUAL...
-
Page 64: Appendix H: Gas Components
Appendix H: Gas Components APPENDIX H: GAS COMPONENTS Gas-Air unit Coil gas-air unit Cable coil Black 9kW White 18kW Red 27kW Voltage 230VAC 120VAC 230VAC 120VAC 230VAC 120VAC 230VAC 120VAC 230VAC 120VAC Part no. 32700180 32700177 32700181 32700178 32700182 32700179 32700170 32700173 32700169... -
Page 65: Identifying Gas-Air Units And Coil
Appendix I: Identifying Gas-air Units and Coil APPENDIX I: IDENTIFYING GAS- AIR UNITS AND COIL 13 kW - Black 21-24 kW – Red Yellow: 120VAC - Coil Red: 230VAC – Coil SERVICE MANUAL... -
Page 66: Error Codes On Dungs' Control Box
Appendix J: Error codes on Dungs’ Control Box APPENDIX J: ERROR CODES ON DUNGS’ CONTROL BOX SERVICE MANUAL 67... - Page 67 Appendix J: Error codes on Dungs’ Control Box SERVICE MANUAL...
- Page 68 Appendix J: Error codes on Dungs’ Control Box SERVICE MANUAL 69...
- Page 69 Appendix J: Error codes on Dungs’ Control Box SERVICE MANUAL...
-
Page 70: Safety
Safety SAFETY Please read the safety instructions carefully. •• Ensure that installation is carried out by qualified installation and service personnel only. •• Read, understand, and follow the instructions for use. •• Place trays filled with hot liquid at the bottom runners of the oven chamber and practice extreme caution when removing the tray from the oven chamber. -
Page 71: Service And Repair
Service and Repair SERVICE AND REPAIR •• All maintenance and repair must be carried out by qualified installation and service personnel only. Installation or service by other than qualified personnel may result in damage to the oven and/or injury to the operator. ••... -
Page 72: Warranty
DK-8940 RANDERS SV DENMARK T: +45 8711 4711 E: houno@houno.com www.houno.com PART OF...
Need help?
Do you have a question about the BLCT-6E and is the answer not in the manual?
Questions and answers