Table of Contents
Advertisement
Quick Links
Advertisement
Table of Contents

Related Manuals for AGFA Drystar AXYS XL


Summary of Contents for AGFA Drystar AXYS XL
- Page 1 Drystar AXYS XL 5367/400 Reference Manual 3753B EN 20210520 0952...
-
Page 2: Table Of Contents
| Drystar AXYS XL | Contents Contents Legal Notice ................5 About the safety notices in this document ......6 Scope ..................7 Advanced Operation (key-operator mode) ......8 The menu structure ........... 9 Accessing the Key-operator menus ......10 Data entry ..............12... - Page 3 Drystar AXYS XL | Contents | iii Installing new or upgrading existing software Using the installation wizard ....... 73 Controlling the printer via a remote PC (with browser) ..82 Features ..............83 Setup ...............84 Configuration with direct network cable ..85 Configuration over a network ......
- Page 4 | Drystar AXYS XL | Contents Key-operator user name and password .......133 Film density response data ..........134 Blue transparant (original Agfa branded Drystar film) Clear transparant (original Agfa branded Drystar film) Mammography film (original Agfa branded Drystar film for mammography) ..........137...
-
Page 5: Legal Notice
Agfa and the Agfa rhombus are trademarks of Agfa-Gevaert N.V., Belgium or its affiliates. Drystar is a trademark of Agfa NV, Belgium or one of its affiliates. All other trademarks are held by their respective owners and are used in an editorial fashion with no intention of infringement. -
Page 6: About The Safety Notices In This Document
6 | Drystar AXYS XL | About the safety notices in this document About the safety notices in this document The following samples show how warnings, cautions, instructions and notes appear in this document. The text explains their intended use. -
Page 7: Scope
Drystar AXYS XL | Scope | 7 Scope The reference manual contains information for the advanced operation of the printer and is available in English only. Refer to the user manual of the printer for general safety instructions, system information and instructions for performing a basic workflow. -
Page 8: Advanced Operation (Key-Operator Mode)
8 | Drystar AXYS XL | Advanced Operation (key-operator mode) Advanced Operation (key-operator mode) The printer features the following functions on the main menu level of the Key-operator mode: Menu item Function Show settings To consult the current settings of the printer. -
Page 9: The Menu Structure
Drystar AXYS XL | Advanced Operation (key-operator mode) | 9 The menu structure General Show settings General Other... Upper input tray Lower input tray Time and date Network(DICOM) Language Image quality Beep on empty tray Logical printers Installed datasets Change settings... -
Page 10: Accessing The Key-Operator Menus
10 | Drystar AXYS XL | Advanced Operation (key-operator mode) Accessing the Key-operator menus The Key-operator mode functions (i.e. the main menu level) can be accessed by pressing the Key-operator key on the front panel. After pressing the Key-operator key the main menu is displayed: Note: The two characters displayed in inverse video in the upper right corner indicate the current menu item (e.g. - Page 11 Drystar AXYS XL | Advanced Operation (key-operator mode) | 11 returned to the higher level menu. If you press this key on a data screen after entering information, all changes on that screen are lost. If the Key-operator does not interact with the menu for a longer period (ten minutes or more), the menu will time-out and revert back to the ready state.
-
Page 12: Data Entry
12 | Drystar AXYS XL | Advanced Operation (key-operator mode) Data entry When entering numerical or alphanumerical data, always adhere to the following principles: • Only (alpha) numerical data can be entered. • During data entry, the field is displayed in reverse mode. -
Page 13: Viewing Printer Information
Drystar AXYS XL | Advanced Operation (key-operator mode) | 13 Viewing printer information A number of data and parameter settings of the printer can be viewed by using the ‘Show settings’ function: Topics: • Accessing the Show settings menu •... -
Page 14: Accessing The Show Settings Menu
14 | Drystar AXYS XL | Advanced Operation (key-operator mode) Accessing the Show settings menu 1. Press the Key-operator key to enter the Key-operator mode. 2. On the Key-operator main menu, press the Confirm key to select ‘Show settings’. The Show settings menu is displayed: Visible 5 Restore config. -
Page 15: Viewing General Information
Drystar AXYS XL | Advanced Operation (key-operator mode) | 15 Viewing general information 1. On the Show settings menu, press the Confirm key to select ‘General’. The ‘General’ info screen is displayed (example): On the ‘General’ info screen you can see: •... -
Page 16: Viewing Input Tray Information
16 | Drystar AXYS XL | Advanced Operation (key-operator mode) Viewing input tray information Note: In this manual, we always will elaborate a case for the lower tray. The procedures of showing the settings are identical for the upper tray. -
Page 17: Viewing Network (Dicom) Information
Drystar AXYS XL | Advanced Operation (key-operator mode) | 17 Viewing network (DICOM) information 1. On the Show settings menu, press the Down key three times, followed by the Confirm key to select ‘Network (DICOM)’. The ‘Network (DICOM)’ screen is displayed (example): The following information on the current network settings is displayed: •... -
Page 18: Viewing General Image Quality Information
18 | Drystar AXYS XL | Advanced Operation (key-operator mode) Viewing general image quality information 1. On the Show settings menu, press the Down key four times, followed by the Confirm key to select ‘Image quality’. The following screen will appear: 2 <Modality name>... -
Page 19: Viewing Image Quality Information For A Modality
Drystar AXYS XL | Advanced Operation (key-operator mode) | 19 Viewing image quality information for a modality 1. On the Show settings menu, press the Down key four times, followed by the Confirm key to select ‘Image quality’. The following screen will appear: 2 <Modality name>... -
Page 20: Viewing The Logical Printers Configuration
20 | Drystar AXYS XL | Advanced Operation (key-operator mode) Viewing the logical printers configuration 1. On the Show settings menu, press the Down key five times, followed by the Confirm key to select ‘Logical printers’. The ‘Logical printers’ screen is displayed (example): This screen gives an overview of the logical printers defined in the printer. -
Page 21: Viewing Installed Datasets Information
Drystar AXYS XL | Advanced Operation (key-operator mode) | 21 Viewing installed datasets information 1. On the Show settings menu, press the Down key six times, followed by the Confirm key to select ‘Installed datasets’. The ‘Installed datasets’ screen is displayed (example): The following information is displayed for the installed datasets: •... -
Page 22: Changing The Configuration Settings
22 | Drystar AXYS XL | Advanced Operation (key-operator mode) Changing the configuration settings A number of data and parameters settings of the printer can be viewed and changed by using the ‘change settings’ function. Note: Some configuration settings are only adjustable via a remote browser PC: •... -
Page 23: Accessing The Change Settings Menu
Drystar AXYS XL | Advanced Operation (key-operator mode) | 23 Accessing the Change settings menu Note: Before you can change the settings, the ‘Printer installation wizard’ should be executed. If the printer has not yet been installed, the following screen is displayed: Proceed as follows to access the ‘Change settings’... - Page 24 24 | Drystar AXYS XL | Advanced Operation (key-operator mode) 8. Do one of the following: • If you want to save the configuration on the back-up USB flash drive, press the Confirm key (YES). The printer will now enter the ‘General save configuration procedure’.
-
Page 25: Changing The General Settings
Drystar AXYS XL | Advanced Operation (key-operator mode) | 25 Changing the General settings Topics: • Changing the date and time • Changing the language • Changing the beep on empty tray settings • Changing the site-specific data (via remote browser only) Changing the date and time 1. - Page 26 26 | Drystar AXYS XL | Advanced Operation (key-operator mode) 2. On the ‘General’ screen, press the Down key, followed by the Confirm key to select ‘Language’. The ‘Language’ screen is displayed with the available languages (contact Agfa for the latest language availability status). For example:...
- Page 27 Drystar AXYS XL | Advanced Operation (key-operator mode) | 27 Changing the site-specific data (via remote browser only) The following site-specific data are stored in the printer memory: Field Mandatory Site name Site address (contact) City Tel. country code Tel. number...
-
Page 28: Changing The Input Tray Settings
28 | Drystar AXYS XL | Advanced Operation (key-operator mode) Changing the input tray settings Note: In this manual, we always will elaborate a case for the lower tray. The procedures of showing the settings are identical for the upper tray. -
Page 29: Changing Network (Dicom) Configuration
Drystar AXYS XL | Advanced Operation (key-operator mode) | 29 Changing Network (DICOM) configuration Topics: • Changing the printer AE-title • Changing the hostname • Changing the domain name • Changing the printer IP address • Changing the netmask •... - Page 30 30 | Drystar AXYS XL | Advanced Operation (key-operator mode) Changing the hostname 1. On the Change settings menu, press the Down key three times, followed by the Confirm key to select ‘Network (DICOM)’. The ‘Network (DICOM)’ screen is displayed:...
- Page 31 Drystar AXYS XL | Advanced Operation (key-operator mode) | 31 If the Domain name has already been assigned, it will be shown on the display. 3. Enter the domain name by means of the arrow keys. 4. Press the Confirm key to store the data, or the Escape key to quit the procedure without any changes.
- Page 32 32 | Drystar AXYS XL | Advanced Operation (key-operator mode) Example 2: if the IP address is 120.0.120.120, then the data entry should be as follows: 4. Press the Confirm key to store the data, or the Escape key to quit the procedure without any changes.
- Page 33 Drystar AXYS XL | Advanced Operation (key-operator mode) | 33 4. Press the Confirm key to store the data, or the Escape key to quit the procedure without any changes. Related Links Accessing the Change settings menu on page 23...
- Page 34 34 | Drystar AXYS XL | Advanced Operation (key-operator mode) Accessing the Change settings menu on page 23 Data entry on page 12 Removing a modality 1. On the Change settings menu, press the Down key three times, followed by the Confirm key to select ‘Network (DICOM)’.
- Page 35 Drystar AXYS XL | Advanced Operation (key-operator mode) | 35 2. On the ‘Network (DICOM)’ screen, press the Down key seven times, followed by the Confirm key to select ‘Add modality’. 3. The ‘Collect info’ screen is displayed, asking you to gather the appropriate...
- Page 36 36 | Drystar AXYS XL | Advanced Operation (key-operator mode) • If you press the confirm key without entering a modality AE-title, the following message appears: • If you enter an existing modality AE-title, the following message appears: 12. Press the Confirm key to store the data, or the Escape key to quit the procedure without any changes.
- Page 37 Drystar AXYS XL | Advanced Operation (key-operator mode) | 37 Related Links Accessing the Change settings menu on page 23 Data entry on page 12 3753B EN 20210520 0952...
-
Page 38: Changing The Image Quality Settings
38 | Drystar AXYS XL | Advanced Operation (key-operator mode) Changing the image quality settings Topics: • Changing general image quality settings - Film calibration • Changing general image quality settings - Default densitometer • Changing Image quality settings for a modality - Selecting a lookup table •... - Page 39 Drystar AXYS XL | Advanced Operation (key-operator mode) | 39 Note: 1 pack = 100 sheets E.g., if the frequency is set to 5, this means that a film calibration is executed every 5 packs or every 500 sheets. Note: You can specify to perform an automatic film calibration after loading every “x”...
- Page 40 40 | Drystar AXYS XL | Advanced Operation (key-operator mode) Note: All shown densities will vary slightly according to the densitometer selection. Related Links Accessing the Change settings menu on page 23 Film density response data on page 134 Changing Image quality settings for a modality - Selecting a lookup table 1.
- Page 41 Drystar AXYS XL | Advanced Operation (key-operator mode) | 41 modality new parameters can be assigned via the local keypad. 4. The printer will continue with the ‘Select for Modality’ screen, allowing you to change the Look-up table, the Interpolation and the maximum density (Dmax) values manually.
- Page 42 42 | Drystar AXYS XL | Advanced Operation (key-operator mode) 2. Press the Up/Down key, followed by the Confirm key to select the modality for which you want to change the Image quality settings. The ‘Image quality’ screen for the selected modality is displayed: 3.
- Page 43 Drystar AXYS XL | Advanced Operation (key-operator mode) | 43 • If you select “Cubic Hi-Res” the following screen will appear, allowing you to adjust the smoothing factor: Enter the smoothing factor value by means of the arrow keys. (valid range [-5.00, 0.00]).
- Page 44 44 | Drystar AXYS XL | Advanced Operation (key-operator mode) • If you want to attribute the default profile, select ‘Profile default’ and press the Confirm key. The printer will be loaded with these settings and return to the ‘Image quality’...
- Page 45 Drystar AXYS XL | Advanced Operation (key-operator mode) | 45 6. Press the up/down key to select the desired maximum density setting for this modality. 7. Press the Confirm key to store the data, or the Escape key to quit the procedure without any changes.
-
Page 46: Printing Images
46 | Drystar AXYS XL | Advanced Operation (key-operator mode) Printing images Topics: • Accessing the print images menu • Printing test images 3753B EN 20210520 0952... -
Page 47: Accessing The Print Images Menu
Drystar AXYS XL | Advanced Operation (key-operator mode) | 47 Accessing the print images menu 1. Press the Key-operator key to enter the Key-operator mode. 2. On the Key-operator main menu, press the Down key twice followed by the Confirm key to select ‘Print image’. -
Page 48: Printing Test Images
48 | Drystar AXYS XL | Advanced Operation (key-operator mode) Printing test images Test images are useful for checking the print quality. The printer offers a number of built-in test images stored on the internal media. 1. On the Print image menu, press the Confirm key to select ‘Test image’. -
Page 49: Saving The Configuration Settings
Drystar AXYS XL | Advanced Operation (key-operator mode) | 49 Saving the configuration settings The save configuration menu allows you to save of all printer settings or to save only the network setting. Topics: • Accessing the save configuration menu •... -
Page 50: Accessing The Save Configuration Menu
50 | Drystar AXYS XL | Advanced Operation (key-operator mode) Accessing the save configuration menu 1. Press the Key-operator key to enter the Key-operator mode. 2. On the Key-operator main menu, press the Down key three times, followed by the Confirm key to select ‘Save configuration’. -
Page 51: General Save Configuration Procedure
Drystar AXYS XL | Advanced Operation (key-operator mode) | 51 General save configuration procedure Each time the settings have been changed and confirmed, an automatic backup of the old configuration is made on the internal media. You will also be asked to create a back-up on an external USB flash drive. - Page 52 52 | Drystar AXYS XL | Advanced Operation (key-operator mode) Related Links Accessing the save configuration menu on page 50 3753B EN 20210520 0952...
-
Page 53: Network Only Save Configuration Procedure
Drystar AXYS XL | Advanced Operation (key-operator mode) | 53 Network only save configuration procedure 1. On the Save configuration menu, press the Down key, followed by the Confirm key to select ‘Network only’. The following screen appears: Note: A blank network name or a network name with spacings is not allowed. - Page 54 54 | Drystar AXYS XL | Advanced Operation (key-operator mode) Note: The <save set name > is preceded by the characters “NWS”. NWS stands for Network only. 5. Label the USB flash drive with the NWS_<save_set_name> and press the Confirm key. The program will return to the Save configuration screen.
-
Page 55: Restoring The Configuration Settings
Drystar AXYS XL | Advanced Operation (key-operator mode) | 55 Restoring the configuration settings The restore configuration menu allows you to restore all configuration settings of the printer or to restore only the network setting: Topics: • Accessing the restore configuration menu •... -
Page 56: Accessing The Restore Configuration Menu
56 | Drystar AXYS XL | Advanced Operation (key-operator mode) Accessing the restore configuration menu 1. Press the Key-operator key to enter the Key-operator mode. 2. On the Key-operator main menu, press the Down key four times, followed by the Confirm key to select ‘Restore configuration’. -
Page 57: Restoring The Printer Settings
Drystar AXYS XL | Advanced Operation (key-operator mode) | 57 Restoring the printer settings When necessary, you can restore the configuration settings of the printer. Topics: • Restoring printer settings from an external USB flash drive • Restoring printer settings from the internal media Restoring printer settings from an external USB flash drive 1. - Page 58 58 | Drystar AXYS XL | Advanced Operation (key-operator mode) 4. Press the up/down arrow keys to select the desired save set file, followed by the Confirm key. The following confirmation screen is displayed: 5. Press the Confirm key (YES) to proceed with the selected file, or the Escape key (NO) to quit the procedure without any changes.
- Page 59 Drystar AXYS XL | Advanced Operation (key-operator mode) | 59 Note: Before restoring the save set file, you have the opportunity to save the current configuration. Therefore, the ‘Update back-up on USB-stick’ screen is displayed. 3. Do one of the following: •...
-
Page 60: Restoring The Network Settings
60 | Drystar AXYS XL | Advanced Operation (key-operator mode) Restoring the network settings When necessary, you can restore the network settings of the printer. You can only restore a back-up copy of the network settings from an external USB flash drive. - Page 61 Drystar AXYS XL | Advanced Operation (key-operator mode) | 61 When the restoring of the save set file is finished, the printer will ask you to remove the USB flash drive: 5. Remove the USB flash drive. As soon as the USB flash drive has been removed, the following screen is...
-
Page 62: Performing The Calibration Procedures
62 | Drystar AXYS XL | Advanced Operation (key-operator mode) Performing the calibration procedures Topics: • Accessing the Calibration menu • Film calibration 3753B EN 20210520 0952... -
Page 63: Accessing The Calibration Menu
Drystar AXYS XL | Advanced Operation (key-operator mode) | 63 Accessing the Calibration menu 1. Press the Key-operator key to enter the Key-operator mode. 2. On the Key-operator main menu, press the Down key five times followed by the Confirm key to select ‘Calibration’. -
Page 64: Film Calibration
64 | Drystar AXYS XL | Advanced Operation (key-operator mode) Film calibration Note: In this part, we always will elaborate a case for the lower tray. The procedure of film calibration is identical for the upper tray. The film calibration combines Dmax and sensitometry calibration, and is activated as one single procedure. - Page 65 Drystar AXYS XL | Advanced Operation (key-operator mode) | 65 The obtained maximum density (Dmax (3.20)) after calibration is displayed: • Calibration successful, but maximum density (Dmax) differs more than 2% from the target value. The obtained maximum density (3.02) after calibration is displayed: 3.02...
- Page 66 66 | Drystar AXYS XL | Advanced Operation (key-operator mode) Density response of film Different densitometers can give different results when measuring the same density area. This is due to spectral differences between the densitometers. The density values used in this manual are based on the Macbeth TR924 densitometer.
-
Page 67: Service Actions
Drystar AXYS XL | Advanced Operation (key-operator mode) | 67 Service actions The printer is capable of assisting the Service engineer and/or hospital technician to maintain or repair the printer. Topics: • Overview of service actions • Accessing the Service actions menu... -
Page 68: Overview Of Service Actions
68 | Drystar AXYS XL | Advanced Operation (key-operator mode) Overview of service actions Four groups of service actions are provided by the printer. Action Purpose Who? 1 Error mes- • To have an overview of the er- • Service engineer sages rors that have occurred. -
Page 69: Accessing The Service Actions Menu
Drystar AXYS XL | Advanced Operation (key-operator mode) | 69 Accessing the Service actions menu 1. Press the Key-operator key to enter the Key-operator mode. 2. On the Key-operator main menu, press the Down key six times followed by the Confirm key to select ‘Service actions’. -
Page 70: Installation
70 | Drystar AXYS XL | Advanced Operation (key-operator mode) Installation Topics: • Installing new or upgrading existing software • Using the installation wizard 3753B EN 20210520 0952... -
Page 71: Installing New Or Upgrading Existing Software
Drystar AXYS XL | Advanced Operation (key-operator mode) | 71 Installing new or upgrading existing software It is possible to install new software or new software components. Different software (components) can be installed: • language files, • modality specific files, •... - Page 72 72 | Drystar AXYS XL | Advanced Operation (key-operator mode) 5. Insert the USB flash drive. Note: If no data available on the USB flash drive, the following message is displayed: 6. If there are multiple dataset files present on the USB flash drive, a list is shown.
-
Page 73: Using The Installation Wizard
Drystar AXYS XL | Advanced Operation (key-operator mode) | 73 Using the installation wizard When you install the printer, the installation wizard will guide you through the complete installation procedure. Note: Although the Installation wizard consists of three separate steps, these steps cannot be performed separately Topics: •... - Page 74 74 | Drystar AXYS XL | Advanced Operation (key-operator mode) 6. Press the up/down arrow keys to increment/decrement the numbers or the month. Press the left/right arrow keys to move through the digits. 7. Press the Confirm key to store the data, or the Escape key to quit the procedure without any changes.
- Page 75 Drystar AXYS XL | Advanced Operation (key-operator mode) | 75 2. Press the Confirm key to continue. The ‘Printer IP address’ screen is displayed: If the IP address has already been assigned, it will be shown on the display. Note: When no DHCP server is available and when the IP address of the printer has never been set, the printer IP address will be set to the APIPA address 169.254.10.10.
- Page 76 76 | Drystar AXYS XL | Advanced Operation (key-operator mode) Note: Note that blank spaces will be ignored (see examples below). Example: if the netmask is 250.250.250.0, then the data entry should be as follows: 250.250.250. 0 6. Press the Confirm key to store the data, or the Escape key to quit the procedure without any changes.
- Page 77 Drystar AXYS XL | Advanced Operation (key-operator mode) | 77 Note: Entries are case sensitive. 10. Press the Confirm key to store the data, or the Escape key to quit the procedure without any changes. A screen summarizing the information you have entered will appear: -Netmask: 255.255.252.0...
- Page 78 78 | Drystar AXYS XL | Advanced Operation (key-operator mode) 1. Press the Confirm key to continue or press the Escape key to skip this step. The ‘Enter daily used Modality name’ screen is displayed: 2. Enter the daily used modality name (nickname) by means of the arrow keys.
- Page 79 Drystar AXYS XL | Advanced Operation (key-operator mode) | 79 Note: You can find the film type on the film packaging. Note: Mammography film types are only shown in the list when the option for the mammography application is activated.
- Page 80 80 | Drystar AXYS XL | Advanced Operation (key-operator mode) 13. Press the Confirm key to continue. Related Links Data entry on page 12 Saving the configuration WARNING: You need to complete this step, otherwise all the install data you have entered will be lost! 1.
- Page 81 Drystar AXYS XL | Advanced Operation (key-operator mode) | 81 CALIBRATION Option for further actions and to fill in the SITE-SPECIFIC DATA 5. Press the Confirm key to accept the installation or press the Escape key to redo the installation.
-
Page 82: Controlling The Printer Via A Remote Pc (With Browser)
82 | Drystar AXYS XL | Controlling the printer via a remote PC (with browser) Controlling the printer via a remote PC (with browser) Topics: • Features • Setup • Setting up the connection • Starting the remote session 3753B EN 20210520 0952... -
Page 83: Features
Drystar AXYS XL | Controlling the printer via a remote PC (with browser) | 83 Features • All functions that can be accessed via the local keypad and display can also be accessed via a remote PC via the network. -
Page 84: Setup
84 | Drystar AXYS XL | Controlling the printer via a remote PC (with browser) Setup The printer and the remote PC can be set up in two ways: • using a crossed network cable, or • using a straight network cable. -
Page 85: Configuration With Direct Network Cable
Drystar AXYS XL | Controlling the printer via a remote PC (with browser) | 85 Configuration with direct network cable In this configuration, a network UTP cable is used to connect the service PC directly to the printer. 3753B EN 20210520 0952... -
Page 86: Configuration Over A Network
86 | Drystar AXYS XL | Controlling the printer via a remote PC (with browser) Configuration over a network In this configuration, the PC is connected to the network. 3753B EN 20210520 0952... -
Page 87: Setting Up The Connection
Drystar AXYS XL | Controlling the printer via a remote PC (with browser) | 87 Setting up the connection Topics: • Setting up a direct link • Setting up a link through a network 3753B EN 20210520 0952... -
Page 88: Setting Up A Direct Link
88 | Drystar AXYS XL | Controlling the printer via a remote PC (with browser) Setting up a direct link To set up a direct link, you have to follow two procedures: • Attribute a fixed IP address to the PC, •... - Page 89 Drystar AXYS XL | Controlling the printer via a remote PC (with browser) | 89 3. Select Internet Protocol Version 4 (TCP/IPv4) from the list, then click the Properties button. 4. Specify IP address and subnet mask and click OK.
- Page 90 90 | Drystar AXYS XL | Controlling the printer via a remote PC (with browser) Note: In case of APIPA assigned addresses, set the printer IP address to 169.254.10.10 and the printer subnet mask to 255.255.0.0. Switching off the proxy settings of the browser 1.
-
Page 91: Setting Up A Link Through A Network
Drystar AXYS XL | Controlling the printer via a remote PC (with browser) | 91 The Local Area Network (LAN) Settings window will appear. 4. Switch off all proxy settings of the browser and click OK. The PC is ready to make a connection. -
Page 92: Starting The Remote Session
92 | Drystar AXYS XL | Controlling the printer via a remote PC (with browser) Starting the remote session Topics: • Starting the remote session • Entering the operator level • Entering the Key-operator level 3753B EN 20210520 0952... -
Page 93: Starting The Remote Session
Drystar AXYS XL | Controlling the printer via a remote PC (with browser) | 93 Starting the remote session Note: When starting the remote session, make sure the printer is in ‘Ready’ mode. To start the remote session, enter the printer IP address in the Address bar of the browser. -
Page 94: Entering The Operator Level
94 | Drystar AXYS XL | Controlling the printer via a remote PC (with browser) Entering the operator level To enter the operator level, enter the following user name and password: • User name: Operator • Password: Operator This level enables the operator to follow print jobs and perform common tasks. -
Page 95: Entering The Key-Operator Level
Drystar AXYS XL | Controlling the printer via a remote PC (with browser) | 95 Entering the Key-operator level To enter the Key-operator level, click Key-operator tools and enter the user name and password. You now have access to the printer functions in the Key-operator mode. - Page 96 96 | Drystar AXYS XL | Controlling the printer via a remote PC (with browser) Related Links Key-operator user name and password on page 133 3753B EN 20210520 0952...
-
Page 97: System Description
Drystar AXYS XL | System Description | 97 System Description Topics: • Main components • Functional description • Network configuration 3753B EN 20210520 0952... -
Page 98: Main Components
98 | Drystar AXYS XL | System Description Main components Topics: • Front view • Rear panel 3753B EN 20210520 0952... -
Page 99: Front View
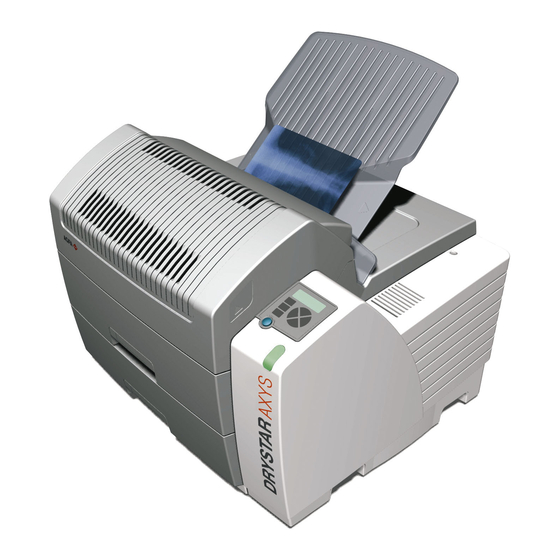
Drystar AXYS XL | System Description | 99 Front view Top cover Output tray User interface Input tray 3753B EN 20210520 0952... -
Page 100: Rear Panel
100 | Drystar AXYS XL | System Description Rear panel At the rear side of the printer, one slot and three connectors are available: USB port slot To insert a USB flash drive for software installation, back-up, etc. Network connector To connect to the hospital network. -
Page 101: Functional Description
Drystar AXYS XL | System Description | 101 Functional description The printer consists of two functional blocks: a controller and a print engine. The controller • captures the incoming digital data and stores the image, • composes the different images, and •... -
Page 102: Network Configuration
102 | Drystar AXYS XL | System Description Network configuration The printer supports standard network. This means that you can just plug it into the (existing) ethernet network without any additional options or accessories. The printer is also a native DICOM printer. Therefore the... -
Page 103: Problem Solving
Drystar AXYS XL | Problem solving | 103 Problem solving Topics: • Checking the status indicator LED • The printer does not print • Clearing of film jams • Film identification problems • Start-up errors • Maintaining image quality and resolving image quality problems •... -
Page 104: Checking The Status Indicator Led
104 | Drystar AXYS XL | Problem solving Checking the status indicator LED The LED on the front panel indicates the printer operating status. Use the following table to determine the status of your printer. Color Light Status Receive Printing... -
Page 105: The Printer Does Not Print
Drystar AXYS XL | Problem solving | 105 The printer does not print Proceed as follows when the printer does not print: Topics: • Reset of the printer • Checking the connections • Checking error messages • Checking USB flash drive error messages •... -
Page 106: Reset Of The Printer
106 | Drystar AXYS XL | Problem solving Reset of the printer The Power/Reset button restarts the printer after a software failure or an error. 3753B EN 20210520 0952... -
Page 107: Checking The Connections
Drystar AXYS XL | Problem solving | 107 Checking the connections If no error messages are displayed and you are unable to get the printer to respond, the problem may be caused by a fault in the connections. In this case, check that all connectors and cables are firmly attached to the printer. -
Page 108: Checking Error Messages
108 | Drystar AXYS XL | Problem solving Checking error messages If the printer is not printing your job, you should check the front panel display to see if the printer is indicating an error status. The operator is notified of the situation by means of an Error screen and a beep: •... -
Page 109: Checking Usb Flash Drive Error Messages
Drystar AXYS XL | Problem solving | 109 Checking USB flash drive error messages If the printer is not printing your job, you should check the front panel display to see if the printer is indicating an error status. A USB flash drive error can occur when the inserted USB flash drive is full, write protected or unreadable. -
Page 110: Checking The Print Queue
110 | Drystar AXYS XL | Problem solving Checking the print queue If no error message is displayed, you should check the print queue: The status can be: • printing (PR), • calculating (CA). A warning status, indicated by a blinking “W” in the upper right corner of the display, indicates that there is a problem that should be attended to. -
Page 111: Clearing Of Film Jams
Drystar AXYS XL | Problem solving | 111 Clearing of film jams A film jam can be situated either: • In the input tray section. • In the top section. Jams can be caused by: • Opening the top cover or input tray while a film is actually being printed. -
Page 112: Film Input Tray Jams
112 | Drystar AXYS XL | Problem solving Film input tray jams A film jam in the input tray can occur when the printer is opened while a film is currently printed, or when an individual film is incorrectly inserted in the input tray. - Page 113 Drystar AXYS XL | Problem solving | 113 For better accessibility, the tray can be removed from the printer by lifting it slightly and pulling it out completely. 3. Check if the film feed section of the input tray is clear.
-
Page 114: Film Transport Jams (Clearing From The Top)
114 | Drystar AXYS XL | Problem solving Film transport jams (clearing from the top) The following screen indicates that a jam occurred in the upper section of the film transport system. To remove a jammed film in the transport system:... - Page 115 Drystar AXYS XL | Problem solving | 115 WARNING: The print head unit can be warm. 4. Gently remove the film sheet(s). Note: Never use force to clear the jammed film. If it is not possible to gently remove the jammed film by pressing the transport buttons, proceed with the procedure as follows.
- Page 116 116 | Drystar AXYS XL | Problem solving WARNING: Never reuse a jammed film. This may cause damage to the thermal head and/or dust problems. Note: If the jam is still not cleared, call your local service organization. 3753B EN 20210520 0952...
-
Page 117: Unauthorized Opening Of The Printer
Drystar AXYS XL | Problem solving | 117 Unauthorized opening of the printer A jam can be caused by opening the printer covers or one of the input trays while a film is actually being printed. The following screen indicates that a jam has occurred: printing. -
Page 118: Film Identification Problems
118 | Drystar AXYS XL | Problem solving Film identification problems When you load a new film pack, the new Film Identification tag is read and the tray film format and type are set based upon the info in the Film Identification tag (RF-tag). -
Page 119: No Identification Code Detected
Drystar AXYS XL | Problem solving | 119 No identification code detected This error message appears when the Film Identification tag is not readable. There are two possible solutions for this problem: Topics: • Reload the current film pack or load another film pack •... - Page 120 120 | Drystar AXYS XL | Problem solving Remove and re-insert Remove and re-insert 除和重新 film pack -including film pack -including 片包 - 包括 protective sheet- protective sheet- 。 properly. follow properly. follow loading instructions loading instructions 明 2. To continue with the current (not identified) film pack, press the Confirm button.
-
Page 121: Invalid Content Of Film Identification Tag
Drystar AXYS XL | Problem solving | 121 Invalid content of Film Identification tag When you insert a new film pack with invalid content in the Film Identification tag, the following message is displayed: Try loading another film pack, or call your local service organization to resolve this problem. -
Page 122: Film Overrun From Current Pack
122 | Drystar AXYS XL | Problem solving Film overrun from current pack The following message is presented when more than 110 copies are printed from the current film pack: Reload a new film pack to resolve this problem. 3753B EN 20210520 0952... -
Page 123: Start-Up Errors
Drystar AXYS XL | Problem solving | 123 Start-up errors Topics: • Error messages while the printer starts up • Display self test failed • System self test failed • Software self test failed 3753B EN 20210520 0952... -
Page 124: Error Messages While The Printer Starts Up
124 | Drystar AXYS XL | Problem solving Error messages while the printer starts up The table below lists the possible error messages, which can appear on the display of the control panel while the printer starts up. Error message... -
Page 125: Display Self Test Failed
Drystar AXYS XL | Problem solving | 125 Display self test failed In case the display self test failed, following message appears: ERROR Display failure: xx The code ‘xx’ can help the Service engineer with the troubleshooting process. 3753B EN 20210520 0952... -
Page 126: System Self Test Failed
126 | Drystar AXYS XL | Problem solving System self test failed In case the system self test failed, following message appears: ERROR System failure 3753B EN 20210520 0952... -
Page 127: Software Self Test Failed
Drystar AXYS XL | Problem solving | 127 Software self test failed In case the software selftest has failed, following message appears: 3753B EN 20210520 0952... -
Page 128: Maintaining Image Quality And Resolving Image Quality Problems
128 | Drystar AXYS XL | Problem solving Maintaining image quality and resolving image quality problems In general, when you follow the procedure ‘Maintaining optimal Image Quality’ below, you should rarely encounter quality problems on printed films. However, should any problems occur, the paragraph ‘White dots or lines appear in the transport direction’... -
Page 129: Maintaining Optimal Image Quality
Drystar AXYS XL | Problem solving | 129 Maintaining optimal Image Quality Calibration is necessary to maintain optimal Image Quality. This is required in the following situations: • Before initial use of a film, • When a media with different batch number is loaded, •... -
Page 130: Persistent White Dots Or Lines Appear In The Transport Direction
130 | Drystar AXYS XL | Problem solving • In case these artifacts are visible: 1. Clean the print head. 2. If the image quality is not OK, perform a film calibration. • In case there are no artifacts: 1. Perform film calibration. -
Page 131: Warning Messages
Drystar AXYS XL | Problem solving | 131 Warning messages This section will inform you what to do when warning messages appear. A warning message is displayed when an event has occurred that might decrease image quality. Printing still remains possible. -
Page 132: Maintenance Messages
132 | Drystar AXYS XL | Problem solving Maintenance messages This section will inform you what to do when maintenance messages appear. A maintenance message is displayed whenever a maintenance action is due. Printing still remains possible. The Maintenance screen is displayed: Press the Confirm key to acknowledge the new maintenance condition. - Page 133 Drystar AXYS XL | Key-operator user name and password | 133 Key-operator user name and password • User name: Drystar • Password: axys 3753B EN 20210520 0952...
- Page 134 134 | Drystar AXYS XL | Film density response data Film density response data Topics: • Blue transparant (original Agfa branded Drystar film) • Clear transparant (original Agfa branded Drystar film) • Mammography film (original Agfa branded Drystar film for...
- Page 135 Drystar AXYS XL | Film density response data | 135 Blue transparant (original Agfa branded Drystar film) dens. Mac- Gretag X-rite X-rite X-rite X-rite X-rite Beth D200-2 361(t) TR-924 0.22 0.17 0.17 0.24 0.19 0.18 0.15 0.51 0.46 0.46 0.54 0.49...
- Page 136 136 | Drystar AXYS XL | Film density response data Clear transparant (original Agfa branded Drystar film) dens. Mac- Gretag X-rite X-rite X-rite X-rite X-rite Beth D200-2 361(t) TR-924 0.09 0.08 0.08 0.09 0.08 0.06 0.07 0.38 0.37 0.36 0.39 0.38...
- Page 137 Drystar AXYS XL | Film density response data | 137 Mammography film (original Agfa branded Drystar film for mammography) dens. Mac- Gretag X-rite X-rite X-rite X-rite X-rite Beth D200-2 361(t) TR-924 0.21 0.18 0.18 0.24 0.20 0.19 0.16 2.56 0.53 0.53...
Need help?
Do you have a question about the Drystar AXYS XL and is the answer not in the manual?
Questions and answers