Advertisement
Available languages
Available languages
Quick Links
UK - Installation and operating instructions
UK - Installation and operating instructions
- Installation and operating instructions
IT -
IT - Manuale di installazione ed uso
Manuale di installazione ed uso
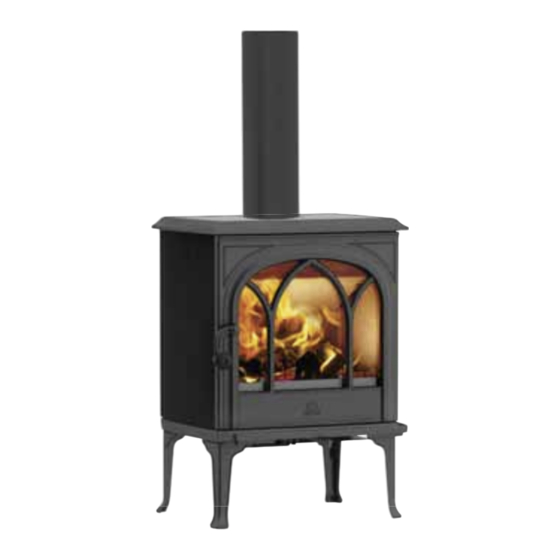
F 200 IT - Classic
Manualen må oppbevares under hele produktets levetid. Käyttöohje on säilytettävä tuotteen koko käyttöiän ajan.
The manuals which are enclosed with the product must be kept throughout the product's entire service life. Les
manuels fournis avec le produit doivent être conservés pendant toute la durée de vie du produit. Los manuales
suministrados con este producto deben guardarse durante todo el ciclo de vida del producto. I manuali inclusi con
il prodotto vanno conservati per l'intera durata di vita del prodotto.
Jøtul F 200 IT/F 205 IT
3
3
3
20
20
F 205 IT - Modern
Advertisement
Chapters

Related Manuals for Jøtul F 200 IT


Summary of Contents for Jøtul F 200 IT
- Page 1 Jøtul F 200 IT/F 205 IT UK - Installation and operating instructions UK - Installation and operating instructions - Installation and operating instructions IT - Manuale di installazione ed uso IT - Manuale di installazione ed uso F 200 IT - Classic F 205 IT - Modern Manualen må...
-
Page 3: Table Of Contents
Outside air connection Alu. fl ex - Ø 80 mm Approx. weight for ca 138 kg 11.0 Guarantee terms Jøtul F 200 IT/F 205 IT Optional extras External air supply cover, External air kit, short legs Dimensions, distances See fi g. 1 Technical data in acc. -
Page 4: Safety
ENGLISH 3.0 Safety Requirements for protection of infl ammable fl oors under the fi replace NB! To guarantee optimal performance and safety, Jøtul The fl oorplate must comply with national laws and regulations. recommends that its stoves are fi tted by a qualifi ed Contact your local building authorities regarding restrictions installer (see www.jotul.com for a complete list of dealers). - Page 5 ENGLISH...
- Page 6 ENGLISH...
- Page 7 ENGLISH...
- Page 8 ENGLISH...
-
Page 9: Installation
1. Screw the door knob onto the handle. The parts are in the included screw bag. 1. Remove the 8 transport screws 4.2 Installation Fig. 3a Installation of the door handle (F 200 IT - classic) 1. Install the door knob onto the handle. The parts are in the included screw bag. - Page 10 fl oor. Air supply The amount of combustion air for Jøtul’s products is approximately 20-40 m 3 /h. The outside air connection may be fi tted directly to the Jøtul F 200 IT/F 205 IT through: • the bottom •...
- Page 11 ENGLISH Fig. 5b Through the fl oor and ground plate Fig. 7a Switch between rear outlet and bottom outlet for outdoor air 1. Loosen the two screws that secure the outdoor air adapter. Fig. 7b Fig. 5c Through the fl oor and basement 2.
- Page 12 ENGLISH 4.5 Chimney and fl ue pipe Fig. 8 Installation of cover for outdoor air (Optional equipment - 50061978) • The fi replace must only be connected to a chimney and fl ue pipe approved for solid fuel fi replaces with fl ue gas temperatures as specifi...
-
Page 13: Daily Use
Fig. 11 control handles. These should move easily and work in a satisfactory manner. Fig. 10 Operating options on Jøtul F 200 IT/F 205 IT Pulled to the right : Open (only used during ignition). Centered valve: 100% combustion air. - Page 14 5.6 Wood consumption Jøtul F 200 IT/F 205 IT has a nominal heat output of ca. 5 kW. Use of wood, with nominal heat emission: Approx. 1,5 kg/h. 1. The ash grate (A) has open holes down towards the The size of the logs should be: ashtray (B).
-
Page 15: Maintenance
ENGLISH 6.0 Maintenance 5.9 How wind and weather aff ect the stove 6.1 Cleaning the glass The performance of the stove can be aff ected considerably by the wind acting on the chimney at diff erent strengths. It may The product is equipped with an air wash for the glass. Air is therefore be necessary to adjust the air supply to ensure good sucked in through the air vent on the top of the product and combustion performance. -
Page 16: Service
ENGLISH 7.0 Service 7.2 Replacing the exhaust defl ectors Any unauthorised modifi cations to the product are prohibited! Only original spare parts may be used! Fig. 16 Use tools with great care. Fig. 14 1. Lift the upper defl ector up to the rear edge. This is located on a groove in the lower defl... - Page 17 ENGLISH 7.3 Replacing the burn plates and ash Fig. 21a Replace the rear burnplate grate OBS! Ash grate and side burner plates must be removed fi rst Fig. 19 Replacing the ash grate 1. Carefully push the baffl e plate up to the rear edge (the baffl...
-
Page 18: Operational Problems - Troubleshooting
Cat. no. 50061978 9.2 External air kit Ø80 Cat. no. 51047509 9.3 Short legs F 200 IT/F 205 IT 1 piece F 200: Cat.no: 12061805 - Black paint (BP) 1. the insulation mat (A) is inserted into the groove on the 1 piece F 205: back of the burner plate (B), before carefully refi... - Page 19 ENGLISH The guarantee applies on the condition that the stove has been installed by a qualifi ed installer in accordance with applicable laws and regulations and Jøtul’s installation and operating instructions. Repaired products and replacement items are guaranteed within the original guarantee period. 2.
-
Page 20: Conformità Alle Leggi
Dimensioni condotto dei fumi Ø 150 mm Circolazione dell’aria Alu. fl ex - Ø 80 mm 9.0 Accessori opzionali Peso Jøtul F 200 IT/F 205 IT ca 138 kg Accessori opzionali Coperchio aria esterna, 10.0 Riciclaggio Kit di alimentazione dell’aria esterna 11.0 Termini della garanzia... -
Page 21: Sicurezza
ITALIANO 3.0 Sicurezza Requisiti per la protezione dei pavimenti infi ammabili davanti al camino Nota: per garantire prestazioni e sicurezza ottimali, le La piastra anteriore deve essere conforme alle leggi e alle stufe Jøtul devono essere montate da un installatore norme nazionali. - Page 22 ITALIANO...
- Page 23 ITALIANO...
- Page 24 ITALIANO...
- Page 25 ITALIANO...
-
Page 26: Installazione
ITALIANO 4.0 Installazione Fig. 3b Installazione della maniglia dello sportello (F 205 - Modern) • Prima dell'installazione del camino, verifi care attentamente l'assenza di eventuali segni di danneggiamento. • Il prodotto è pesante! Chiedere aiuto a qualcuno in fase di posizionamento e installazione. - Page 27 1. Fissare la guarnizione (B) all'estremità del condotto (A). Il condotto per l’aria esterna può essere inserito direttamente Inserire il condotto nello scarico fumi (C). in Jøtul F 200 IT/F 205 IT Series attraverso: Il condotto di scarico fumi viene installato allo stesso modo per •...
- Page 28 ITALIANO Fig. 5b Attraverso il pavimento e la piastra di terra Fig. 7a Passare dalla presa posteriore alla presa inferiore dell’aria esterna 1. Allentare le due viti che fi ssano l’adattatore aria esterna. Fig. 7b Fig. 5c Attraverso il pavimento e il basamento 2.
- Page 29 ITALIANO 4.5 Canna fumaria e condotto Fig. 8 Installazione del coperchio per aria esterna (Dotazione opzionale 50061978) • Il caminetto deve essere collegato solo a una canna fumaria e a un condotto approvati per caminetti a combustibile solido; le temperature dei gas prodotti dal fumo sono indicate nel capitolo “2.0 Dati tecnici”.
-
Page 30: Utilizzo Giornaliero
Fig. 11 manopole di comando. Devono muoversi facilmente e funzionare in modo soddisfacente. Fig. 10 Opzioni di funzionamento per Jøtul F 200 IT/F 205 Spostata a destra: Aperta (utilizzata solo durante l’accensione). Al centro: Aria di combustione 100% Spostata a sinistra: Chiusa. - Page 31 5.6 Consumo di legna Jøtul F 200 IT/F 205 IT ha una portata termica nominale di ca. 5 kW. Uso di legna con una produzione nominale di calore: Circa 1,5kg/h. Le dimensioni dei ciocchi devono essere pari a: Fascine: 1.
-
Page 32: Manutenzione
ITALIANO 6.0 Manutenzione 5.9 Come vento e agenti atmosferici infl uiscono sulla stufa 6.1 Pulizia del vetro Le performance della stufa possono essere infl uenzate notevolmente dal vento che agisce sul camino con una Il prodotto dispone del sistema di pulizia ad aria del vetro. forza diversa. -
Page 33: Manutenzione
ITALIANO 7.0 Manutenzione 7.2 Sostituire i defl ettori dei fumi È vietata ogni modifi ca non autorizzata al prodotto. Utilizzare solo ricambi originali. Fig. 16 Utilizzare gli utensili con grande attenzione. Fig. 14 1. Sollevare il defl ettore superiore fi no al bordo posteriore. Questo si trova in una scanalatura del defl... - Page 34 ITALIANO Fig. 18 Fig. 20 Sostituire le piastre refrattarie laterali NOTA! Prima è necessario rimuovere la griglia della cenere. 1. Sollevare il defl ettore inferiore fi no al bordo posteriore. 2. Il defl ettore dei fumi si sgancia dai bulloni nella parte anteriore.
-
Page 35: Risoluzione Dei Problemi
Ø80 codice art 51047509 9.2 Coperchio aria esterna codice art 50061978 9.3 Gambe corte F 200 IT/F 205 IT 1 Pezzo F 200: Codice art: 12061805 - Vernice nera (BP) 1 Pezzo F 205: Codice.art: 12061808 - Vernice nera (BP) 4 Pezzi F 200: Codice.art: 51061804 - Vernice nera (BP) -
Page 36: Riciclaggio
ITALIANO 10.0 Riciclaggio Stufe a pellet, vetro, pietra, cemento, smalto e fi nitura a vernice (ad es., senza limitazione, scheggiatura, formazione di crepe, bolle o scolorimento e screpolatura) sono applicabili alle normative nazionali che disciplinano la vendita dei prodotti 10.1 Riciclaggio dell’imballo al consumo. - Page 37 ITALIANO...
- Page 38 Jøtul arbeider kontinuerlig for om mulig å forbedre sine produkter, og vi forbeholder oss retten til å endre spesifi kasjoner, farger og utstyr uten nærmere kunngjøring. Jøtul works continuously to improve its products if possible, and we reserve the right to change specifi...
Need help?
Do you have a question about the F 200 IT and is the answer not in the manual?
Questions and answers
Size of sealing rope on door