Table of Contents
Advertisement
Advertisement
Table of Contents

Related Manuals for Dynalink DL-WRX36


Summary of Contents for Dynalink DL-WRX36
-
Page 2: Table Of Contents
Create the Dynalink administrator account ......................8 Initialize your router and access the configuration utility ..................10 Upgrade your DL-WRX36 to the latest firmware ....................15 SPECIFY ROUTER SETTINGS VIA WEB BROWSER ............... 17 Logging into the configuration utility ........................17 Dashboard ................................ - Page 3 5.3.3 LAN ....................................... 42 5.3.3.1 IP Settings ..................................... 42 5.3.3.2 DHCP Server ..................................44 5.3.3.3 Device List ..................................... 46 5.3.3.4 Wake on LAN ..................................47 5.3.4 WiFi ....................................... 48 5.3.4.1 Basic ...................................... 48 5.3.4.2 WPS ....................................... 50 5.3.4.3 Radio ..................................... 51 5.3.4.4 Advanced ....................................
- Page 4 5.6.3.1 PPTP Server ..................................84 5.6.3.2 OpenVPN Server ................................... 86 5.6.3.3 VPN Client ..................................... 88 QoS ..................................92 5.7.1 Basic ......................................93 5.7.2 Airtime Fairness .................................... 95 Diagnostic ................................96 5.8.1 Diagnostic Tools .................................... 96 System Settings ..............................97 5.9.1 Password & Timezone .................................. 98 5.9.2 Reboot......................................
-
Page 5: Package Content
1. PACKAGE CONTENTS Package Content 1 Power Adaptor 1 Ethernet cable 1 Quick Start Guide DL-WRX36... -
Page 6: Device Description
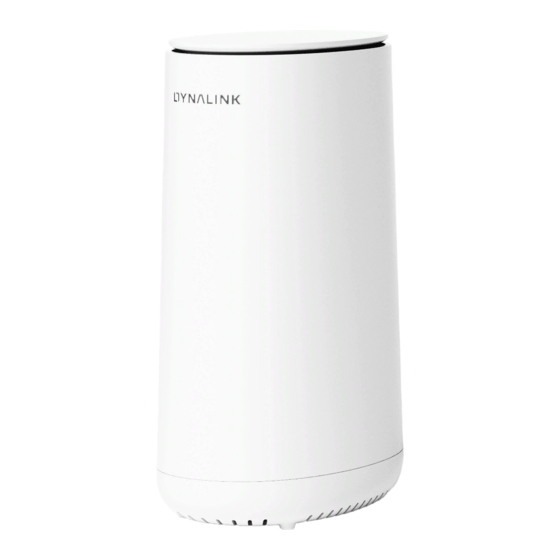
2. DEVICE DESCRIPTION Device description 2.1 Indicators / Connectors / Label * Please note the label is on the bottom of the unit. -
Page 7: Led Behavior
2. DEVICE DESCRIPTION 2.2 LED Behavior The LEDs indicate the WiFi router’s power and connection. LED Name Color status Time Description Press WPS button, LED start to blink magenta, until WPS pairing success or fail Magenta Blinking Every 0.5 sec. or 2 minute timeout. -
Page 8: Hardware Installation
3. HARDWARE INSTALLATION Hardware installation Insert the power adapter into the WiFi Router’s power connector and plug it into the power outlet. Use the provided Ethernet cable to connect your computer to the WiFi Router’s LAN port. Or, connect your mobile device to the Router via WiFi. Use the Ethernet cable to connect your modem to the WiFi Router's Internet (WAN) port. -
Page 9: Configure Router Settings Via Mobile App
Configure router settings via mobile APP 4.1 Create the Dynalink administrator account If you already have a Dynalink account, please go directly to chapter 4.2. Initialize your router and access the 2. Fill in your email and password. Then 3. A verification email will be sent to your mail box. If you 1. - Page 10 4. Click the verification link to complete 5. Then, you will see the message. 6. Back to the Dynalink App, the message the Dynalink account setup. The link will Account activated will be indicated. You "Congratulations! Your account has been be valid for 24 hours only.
-
Page 11: Initialize Your Router And Access The Configuration Utility
4. CONFIGURE ROUTER SETTINGS VIA MOBILE APP 4.2 Initialize your router and access the configuration utility 1. Launch Dynalink APP. Fill in your email 2. Select the model DL-WRX36 3. Tap Get started and start to follow the and password and tap the Log in button. - Page 12 4. CONFIGURE ROUTER SETTINGS VIA MOBILE APP 5. Connect your modem’s LAN port to your 6. Connect your Dynalink router’s WAN/LAN 4. Power off your Internet modem and disconnect Dynalink router’s WAN/LAN port. Power all the devices connected to it. Then tap Next.
- Page 13 4. CONFIGURE ROUTER SETTINGS VIA MOBILE APP 7. Power on the Dynalink router. Wait until the 8. Refer to the label and connect your device to router 9. Wait for the Dynalink router finish LED light of the front panel turns solid blue.
- Page 14 4. CONFIGURE ROUTER SETTINGS VIA MOBILE APP 12. Specify your 5G WiFi network 11. Specify your 2.4G WiFi network 10. Follow the APP to setup internet name and password. connection. name and password.
- Page 15 4. CONFIGURE ROUTER SETTINGS VIA MOBILE APP 13. After that, you will see the message 14. Now you can start manage "Awesome! Dynalink is now up and the router settings. ". Then tap running! Enjoy network.
-
Page 16: Upgrade Your Dl-Wrx36 To The Latest Firmware
4. CONFIGURE ROUTER SETTINGS VIA MOBILE APP 4.3 Upgrade your DL-WRX36 to the latest firmware We highly recommend you to upgrade to the latest firmware when you set up the first time. So as to achieve maximum performance and enable more features. Please use the settings page on the APP to upgrade the firmware. - Page 17 4. CONFIGURE ROUTER SETTINGS VIA MOBILE APP “Checking for 5. Click Download and install when you see 4. You will see the message 6. After the upgrading progress, you can update...” while your router is checking Update available. see the message "Update complete"...
-
Page 18: Specify Router Settings Via Web Browser
Launch your web browser and enter the router’s domain name or IP address: in the http://login.dynalink http://192.168.216.1 address bar. Enter the default username (admin) and password (check admin password on the label) to log in to your router’s management page. - Page 19 5. SPECIFY ROUTER SETTINGS VIA WEB BROWSER Your router comes with an intuitive Web User Interface (Web UI) that allows you to easily setup its feature. Menu Save Displays all the router functions. Remember to save your settings with the save button after making changes.
-
Page 20: Dashboard
5. SPECIFY ROUTER SETTINGS VIA WEB BROWSER 5.2 Dashboard The Dashboard shows a snapshot of your network status with quick links to key features of your router. - Page 21 5. SPECIFY ROUTER SETTINGS VIA WEB BROWSER Click any of the icons on the dashboard: Internet Status, Guest WiFi, WPS, Service, System Information, Status, System Settings, LAN, Connected Devices, Security, Quality of Service to access more information and navigate to the setting pages. Internet Status shows the WAN, LAN, Ethernet, USB, and WiFi connection status of Router.
-
Page 22: Network
5. SPECIFY ROUTER SETTINGS VIA WEB BROWSER 5.3 Network 5.3.1 Status The panel shows a visual overview of connection status between Internet, router, and devices. Click the WAN, LAN, Ethernet, USB, and WiFi icons to access more information and quickly navigate to the corresponding setting pages. - Page 23 5. SPECIFY ROUTER SETTINGS VIA WEB BROWSER WAN: Displays IP address, connection type, and navigation link of the Router’s Wide Area Network (WAN) configuration page. LAN: Displays IP address, subnet mask, DHCP status, and navigation link of the router’s Local Area Network (LAN) configuration page.
- Page 24 5. SPECIFY ROUTER SETTINGS VIA WEB BROWSER Ethernet: Displays the link up/down status and the capability of each LAN port. USB: Displays the status of USB device inserted into your router and the navigation link of storage configuration page.
- Page 25 5. SPECIFY ROUTER SETTINGS VIA WEB BROWSER WiFi: Displays on/off status, SSID name, password, and the navigation link of WiFi configuration page.
-
Page 26: Wan
5. SPECIFY ROUTER SETTINGS VIA WEB BROWSER 5.3.2 WAN 5.3.2.1 Internet The feature allows you to configure the settings of various WAN connection types. - Page 27 5. SPECIFY ROUTER SETTINGS VIA WEB BROWSER WAN Connection Type 1 - DHCP...
- Page 28 5. SPECIFY ROUTER SETTINGS VIA WEB BROWSER DHCP Network Address Translation (NAT) is a method to substitute the information of IP address space from private IP Enable NAT to public IP when the devices which connected to the router access to the Internet. The router records the source/destination address on table and maps the IP while receiving packages from Internet.
- Page 29 5. SPECIFY ROUTER SETTINGS VIA WEB BROWSER WAN Connection Type 2 - PPPoE...
- Page 30 5. SPECIFY ROUTER SETTINGS VIA WEB BROWSER PPPoE Network Address Translation (NAT) is a method to substitute the information of IP address space from private IP to public IP Enable NAT when the devices which connected to the router access to the Internet. The router records the source/destination address on table and maps the IP while receiving packages from Internet.
- Page 31 5. SPECIFY ROUTER SETTINGS VIA WEB BROWSER WAN Connection Type 3 - Static IP...
- Page 32 5. SPECIFY ROUTER SETTINGS VIA WEB BROWSER Static IP Network Address Translation (NAT) is a method to substitute the information of IP address space from private IP to public IP Enable NAT when the devices which connected to the router access to the Internet. The router records the source/destination address on table and maps the IP while receiving packages from Internet.
-
Page 33: Ddns
5. SPECIFY ROUTER SETTINGS VIA WEB BROWSER 5.3.2.2 DDNS Dynamic DNS (DDNS) feature allows network clients to access your router through a specific domain name. Despite the WAN public IP of the router assigned randomly, you can always use one domain name to access your router from Internet as long as the domain name of your router is successfully registered on DDNS server. - Page 34 5. SPECIFY ROUTER SETTINGS VIA WEB BROWSER Enable or disable DDNS Client by selecting the radio button. Enable/Disable DDNS Client The dropdown menu displays the vendors of DDNS Server. Clicking the hyperlink to access the website, then Server register a domain name for your router. Enter the domain name you registered on DDNS server.
-
Page 35: Upnp
5. SPECIFY ROUTER SETTINGS VIA WEB BROWSER 5.3.2.3 UPnP Universal plug-and-play (UPnP) allows network devices, such as computers, printers, mobile devices etc. to discover each other’s presence on network automatically. A UPnP-enabled device communicates directly with other connected UPnP devices and establishes functional network service. -
Page 36: Port Trigger
5. SPECIFY ROUTER SETTINGS VIA WEB BROWSER 5.3.2.4 Port Trigger Port trigger allows you to define the specific inbound and outbound TCP/UDP ports for LAN devices to communicate with Network devices unrestrictedly. The Incoming Ports are not activated until the corresponding Trigger Port is triggered by detecting packets transmission. - Page 37 5. SPECIFY ROUTER SETTINGS VIA WEB BROWSER Select the radio button to enable/disable port trigger. Click . Enter the parameters in accordance with your requirements. Click to have the rule created on port triggering list and then click to apply your changes. You can remove or edit any port Apply trigger rule by using the icons.
-
Page 38: Port Forward
5. SPECIFY ROUTER SETTINGS VIA WEB BROWSER 5.3.2.5 Port Forward Port forward allows you to set up an Internet service on a local computer, without exposing the local computer to the Internet. Internet traffic directed to a specific port or range of ports on this router is redirect to a device or devices on your local network. You can also build various sets of port redirection, to provide various Internet services on different local computers via a single Internet IP address. - Page 39 5. SPECIFY ROUTER SETTINGS VIA WEB BROWSER Click . Enter the parameters in accordance with your requirements to set up a port forwarding rule. Click to have the rule created on port forwarding list and then click to apply your changes. You can remove or edit any port Apply forwarding rule by using the icons.
-
Page 40: Dmz
5. SPECIFY ROUTER SETTINGS VIA WEB BROWSER 5.3.2.6 DMZ A Demilitarized Zone (DMZ) is an isolated device in your local network where a computer outside the firewall can access directly. This can provide an extra layer of security to the rest of the network but still provide service to devices outside firewall without problems due to NAT firewall. However, since it opens the device up to unrestricted two-way access, this device is vulnerable to outside attack. -
Page 41: Nat Passthrough
5. SPECIFY ROUTER SETTINGS VIA WEB BROWSER 5.3.2.7 NAT Passthrough NAT Passthrough allows an incoming Virtual Private Network (VPN) connection to pass through the router to the network clients. - Page 42 5. SPECIFY ROUTER SETTINGS VIA WEB BROWSER NAT Passthrough Point-to-Point Tunneling Protocol (PPTP) is a module for implementing virtual private networks. PPTP Passthrough Layer 2 Tunneling Protocol (L2TP) is a tunneling protocol used to support virtual private networks (VPNs) or as part L2TP Passthrough of the delivery of services by ISPs.
-
Page 43: Lan
5. SPECIFY ROUTER SETTINGS VIA WEB BROWSER 5.3.3 LAN 5.3.3.1 IP Settings Manage IP settings for your local area network. Network: Select Main Network or Guest Network to configure LAN settings. IP address: Specify an IP address. The default IP address of Main Network is “192.168.216.1” and “192.168.217.1” is for Guest Network. Subnet Mask: Modify the subnet mask or remain default settings “255.255.255.0”. - Page 44 When using some WiFi extender, user has to disable Dynalink’s LAN Security, otherwise the packets coming from clients connected to the extender will be blocked. This happens because the packet MAC address is replaced by the WiFi extenders MAC address during transmission and won’t match with the corresponding client’s IP.
-
Page 45: Dhcp Server
5. SPECIFY ROUTER SETTINGS VIA WEB BROWSER 5.3.3.2 DHCP Server This page allows you to configure your router as a DHCP server which automatically assigns IP addresses to the devices connecting your LAN. - Page 46 5. SPECIFY ROUTER SETTINGS VIA WEB BROWSER DHCP Server Select Main Network or Guest Network in the dropdown menu to configure DHCP server. Network Select the radio button to enable or disable DHCP server. Enable DHCP Server The domain name of the network. Domain Name Define the start and end of the IP address range that the DHCP server will assign to the LAN devices connecting to DHCP address Range...
-
Page 47: Device List
5. SPECIFY ROUTER SETTINGS VIA WEB BROWSER 5.3.3.3 Device List This page allows you to view all devices (clients) connected to your router, by Ethernet or WiFi, e.g. laptops, smartphones. More detailed information, such as device name, connection type, IP address, MAC address of each device are specified on the list. -
Page 48: Wake On Lan
5. SPECIFY ROUTER SETTINGS VIA WEB BROWSER 5.3.3.4 Wake on LAN Wake on LAN is a standard protocol that allows your computer to be turned on or awakened remotely whether it is hibernating, sleeping, or completely powered off. Click and enter the name/MAC of the computer. To turn on a specific computer, enter the MAC address in the text field and click button. -
Page 49: Wifi
5. SPECIFY ROUTER SETTINGS VIA WEB BROWSER 5.3.4 WiFi 5.3.4.1 Basic This page allows you to modify basic configuration of WiFi settings. Your router provides dual-band services (2.4GHz & 5GHz) that can be accessed by devices. Select a frequency, and then modify the corresponding settings. For further wireless performance improvement, go to advanced page and change the settings base on your requirements. - Page 50 5. SPECIFY ROUTER SETTINGS VIA WEB BROWSER Basic Select 2.4GHz or 5GHz. Frequency Setting Select Main Network or Guest Network. Network Enable or disable this WiFi band. WiFi Network ON/OFF This is the name of your WiFi network for identification, also sometimes referred to as “SSID”. The SSID can WiFi Network Name (SSID) consist of any combination of up to 32 alphanumerical characters.
-
Page 51: Wps
5. SPECIFY ROUTER SETTINGS VIA WEB BROWSER 5.3.4.2 WPS Use the WPS button to quickly establish wireless connections without configuring tedious parameters. With WPS Enabled, PC or smart phone can connect to your router without entering WiFi password. If the PC or smart phone is compliant with the WPS feature, activate the function. -
Page 52: Radio
5. SPECIFY ROUTER SETTINGS VIA WEB BROWSER 5.3.4.3 Radio The WiFi screen displays radio settings for your router’s WiFi. You can edit radio settings for 2.4GHz or 5GHz frequency bands by selecting the respective tab. - Page 53 5. SPECIFY ROUTER SETTINGS VIA WEB BROWSER Radio Select 2.4GHz or 5GHz. Frequency Setting 2.4GHz: Select the wireless mode used for the router’s WiFi. Include g, g/n, n, ax/n/g. Wireless Mode 5GHz: Select the wireless mode used for the router’s WiFi. Include a, n/a, ac, ac/n/a, ax/ac/n/a. Set the channel bandwidth: 20MHz (lower performance but less interference), 40MHz (better performance but Channel Bandwidth likely more interference), or Auto (automatically select based on interference level).
-
Page 54: Advanced
5. SPECIFY ROUTER SETTINGS VIA WEB BROWSER 5.3.4.4 Advanced The WiFi screen displays advanced settings for your router’s WiFi. You can edit AP Isolated settings for 2.4GHz or 5GHz frequency bands by selecting the respective tab. - Page 55 5. SPECIFY ROUTER SETTINGS VIA WEB BROWSER Advanced Select 2.4GHz or 5GHz. Frequency Setting Select Main Network or Guest Network. Network Displays the SSID name currently selected. WiFi Network Name (SSID) After it is enabled, all connected computers cannot be accessed by each other, and play a role of isolation to protect Set AP Isolated data security between different users.
-
Page 56: Band Steering
5. SPECIFY ROUTER SETTINGS VIA WEB BROWSER 5.3.4.5 Band Steering This feature intelligently moves your dual band devices to the less congested 5 GHz network for the best performance, and leave the 2.4GHz network less-crowded for those clients who support 2.4GHz only; therefore, to improve WiFi performance for all the clients. When Band Steering is enabled, you will only retain one WiFi network name and password. -
Page 57: Ipv6
5. SPECIFY ROUTER SETTINGS VIA WEB BROWSER 5.3.5 IPv6 5.3.5.1 IPv6 Settings IPv6 (Internet Protocol Version 6) is a next-generation IP protocol designed by the IETF (Internet Engineering Task Force) to replace the current version of the IP protocol (IPv4). With the shortage of IPv4 resources, IPv6 will become the standard of the next generation of Internet addresses in the near future. - Page 58 5. SPECIFY ROUTER SETTINGS VIA WEB BROWSER Connection Type 1 - Native...
- Page 59 5. SPECIFY ROUTER SETTINGS VIA WEB BROWSER Native Native. Connection Type IPv6 WAN Setting Enable or remain default. Auto Configuration IPv6 LAN Setting Toggle the switch to enable or disable IPv6 LAN. Enable LAN Internet Protocol Version 6 (IPv6) is a network layer protocol that enables data communications over a packet LAN IPv6 Address switched network.
- Page 60 5. SPECIFY ROUTER SETTINGS VIA WEB BROWSER Connection Type 2 - Static IPv6...
- Page 61 5. SPECIFY ROUTER SETTINGS VIA WEB BROWSER Static IPv6 Static IPv6 Connection Type IPv6 WAN Setting Enter Static IPv6 address. WAN IPv6 Address Enter IPv6 prefix length.IPv6 Prefix Length is used to identify how many bits of a Gobal Unicast IPv6 Address are there WAN Prefix Length in a network packet.
- Page 62 5. SPECIFY ROUTER SETTINGS VIA WEB BROWSER IPv6 DNS Setting Enter a DNS Server address manually. IPv6 DNS Server1 Enter a second DNS Server address manually. IPv6 DNS Server2 Enter a third DNS Server address manually. IPv6 DNS Server3...
-
Page 63: Ipv6 Information
5. SPECIFY ROUTER SETTINGS VIA WEB BROWSER 5.3.5.2 IPv6 Information The IPv6 status displayed as below:... -
Page 64: Multicast
5. SPECIFY ROUTER SETTINGS VIA WEB BROWSER 5.3.6 Multicast IPv4/IPv6 Multicast Route allows you to configure the router to deliver traffic flows with efficient method. -
Page 65: Routing
5. SPECIFY ROUTER SETTINGS VIA WEB BROWSER 5.3.7 Routing 5.3.7.1 Static Route You can change the default route settings on this page. Manage the static routing list to have the Internet service shared. -
Page 66: Service
5. SPECIFY ROUTER SETTINGS VIA WEB BROWSER 5.4 Service 5.4.1 Overview You can attach USB drives (including a thumb drive or a high-capacity external drive) to the USB port on your router. You can then use the drive as network storage, as a FTP server. You can also specify which users can access the content on the drive. -
Page 67: Ftp Server
5. SPECIFY ROUTER SETTINGS VIA WEB BROWSER 5.4.2 FTP Server Use FTP server to share the folder and files from USB disk with other devices on Network. 1. Enable FTP. 2. Run FTP client software in PC. 3. Access FTP server with anonymous or correct username and password to download/upload files. -
Page 68: Samba
5. SPECIFY ROUTER SETTINGS VIA WEB BROWSER 5.4.3 Samba Computers (through network shared directories, network neighborhoods) can securely and conveniently access data in USB storage devices and easily achieve file sharing. 1. Insert USB drive or thumb drive or a high-capacity external drive. 2. -
Page 69: Dlna
5. SPECIFY ROUTER SETTINGS VIA WEB BROWSER 5.4.4 DLNA DLNA (Digital Living Network Alliance) allows you to share audio, image and video to Windows Media Player, game console, and other compatible devices in the same local network. The DLNA service can provide easy access for multimedia data in the USB storage device attached to the WiFi router. - Page 70 5. SPECIFY ROUTER SETTINGS VIA WEB BROWSER 1. Insert thumb drive or a high-capacity external drive to your WiFi router. 2. Enable DLNA Media Server. 3. Specify the Media Server Name for the network devices to distinguish. 4. Select All Disks Shared to share the entire folders and skip to step 8 directly.
- Page 71 5. SPECIFY ROUTER SETTINGS VIA WEB BROWSER 6. Select the specific folder that includes the media you 7. Select the media type to be as Audio, Image, or Video. would like to share with the DLNA-supported devices in the Then click to continue or back to the Confirm...
- Page 72 5. SPECIFY ROUTER SETTINGS VIA WEB BROWSER 8. Click to activate the DLNA settings.
-
Page 73: Parental Control
5. SPECIFY ROUTER SETTINGS VIA WEB BROWSER Parental Control 5.5.1 Profile Parental control is a set of tools that allow parents to manage their child’s Internet use and restrict the access to certain content. - Page 74 5. SPECIFY ROUTER SETTINGS VIA WEB BROWSER 1. Create a profile, in order to use the parental control features, first you need to create a profile with one device or multiple devices. You add devices by selecting them from a list of connected devices. 1.2 Select the devices you would like to apply to this profile.
- Page 75 5. SPECIFY ROUTER SETTINGS VIA WEB BROWSER 4. Time schedule, we can pause the Internet access for a specific time of day, such as sleeping time. 5. Website block, using specific keywords of the website URL and block its access. 5.1 Enter the keyword contained in the website URL to 4.1 Configure the time schedule of a Profile to control the block the Profile device(s) from access any matching...
-
Page 76: Security
5. SPECIFY ROUTER SETTINGS VIA WEB BROWSER Security Use the Security menu to configure various security functions if needed, including IPv4 Firewall and IPv6 Firewall. 5.6.1 Firewall IPv4 5.6.1.1 Common Enable Firewall- Display the status of firewall function. Enable DoS Protection Denial-of-Service (DoS) is a common form ... -
Page 77: Net Service Filter
5. SPECIFY ROUTER SETTINGS VIA WEB BROWSER 5.6.1.2 Net Service Filter The Net Service filter blocks LAN to WAN packet exchanges by setting filter rules. Black List blocks the specified network service. White List limits access to only the specified network services. To specify a network service to filter, enter the Source IP, Destination IP, Port Range, and Protocol. -
Page 78: Client Acl
5. SPECIFY ROUTER SETTINGS VIA WEB BROWSER 5.6.1.3 Client ACL Client Access Control is a security feature that can help to prevent unauthorized users from connecting to your router. You can define a list of network devices permitted to connect to the router. Devices are each identified by their unique MAC address. - Page 79 5. SPECIFY ROUTER SETTINGS VIA WEB BROWSER 1. Select to enable Client ACL. 2. Click 3. Select a device from the Client menu or enter the MAC address manually. 4. Click to save the rule. 5. Click the icon beside any entry in your ACL list to remove or edit the entry. Device will work as "allow all"...
-
Page 80: Firewall Ipv6
5. SPECIFY ROUTER SETTINGS VIA WEB BROWSER 5.6.2 Firewall IPv6 5.6.2.1 Common Enable Firewall- Display the status of firewall function. Ping Request from WAN- When inactive the feature WiFi router will not answer IPv6 ping requests from the Internet. This can increase security as pinging is a common method used by hackers to test networks. -
Page 81: Ipv6 Firewall
5. SPECIFY ROUTER SETTINGS VIA WEB BROWSER 5.6.2.2 IPv6 Firewall Enable IPv6 Firewall Services will only allow IPv6 services specified in service rules list. - Page 82 5. SPECIFY ROUTER SETTINGS VIA WEB BROWSER Click on Allowed Service Rules (Maximum: 32). Select an IPv6 service rule from the well-known server list or input your own rule. Input service name, remote IP/prefix, local IP/prefix, port range and protocol. Click to save the allowed service rule.
- Page 83 5. SPECIFY ROUTER SETTINGS VIA WEB BROWSER Click on Allowed ICMPv6 Rules (Maximum: 16). Select the ICMPv6 message type from the list Input local host address. Click to save the allowed ICMPv6 rule.
-
Page 84: Vpn
5. SPECIFY ROUTER SETTINGS VIA WEB BROWSER 5.6.3 VPN VPN stands for Virtual Private Network. When you use a VPN, you can extend that Private Network, making it Virtual. Through a VPN, packets are sent over the Internet through an encrypted tunnel. This tunnel makes it appear as though you are directly connected to the private network. -
Page 85: Pptp Server
5. SPECIFY ROUTER SETTINGS VIA WEB BROWSER 5.6.3.1 PPTP Server PPTP VPN or point to point tunneling protocol is a legacy vpn protocol. It’s still commonly used and natively supported by a large scale of routers and clients. PPTP has a low data encryption compared to other VPN protocols. But it is quite safe to use for browsing activities and accessing blocked sites. - Page 86 5. SPECIFY ROUTER SETTINGS VIA WEB BROWSER PPTP Server Enable or disable the VPN Server. Enable VPN Server VPN Details Select General or Advanced settings. Select General and click the Add Rule button. Input the username and password to authenticate the devices to Username and Password the VPN server.
-
Page 87: Openvpn Server
5. SPECIFY ROUTER SETTINGS VIA WEB BROWSER 5.6.3.2 OpenVPN Server OpenVPN is a robust and highly flexible tunneling application that uses all of the encryption, authentication, and certification features of the OpenSSL library to securely tunnel IP networks over a single TCP/UDP port. Enable the VPN Server and then select General or Advance Settings from the VPN Details dropdown menu to configure the VPN settings. - Page 88 5. SPECIFY ROUTER SETTINGS VIA WEB BROWSER OpenVPN Server Enable VPN Server Enable or disable the VPN Server. VPN Details Select General or Advanced settings. Export OpenVPN Export the configuration file. Configuration File Select General and click the Add Rule button. Input the username and password to authenticate the devices to Username and Password the VPN server.
-
Page 89: Vpn Client
5. SPECIFY ROUTER SETTINGS VIA WEB BROWSER 5.6.3.3 VPN Client VPN clients are used to connect to a specific VPN server and access private resources securely over a public network. This feature routes all traffic from devices in the home network through the VPN, without having to install VPN software on each device. To start a VPN connection, please follow the steps below:... - Page 90 5. SPECIFY ROUTER SETTINGS VIA WEB BROWSER Click . Enter the parameters in accordance with your requirements. Click to have the rule created on VPN client list and then click to apply your changes. You can modify or remove the rules Apply by using the icons.
- Page 91 5. SPECIFY ROUTER SETTINGS VIA WEB BROWSER VPN Type - L2TP Select the VPN Type L2TP from the dropdown VPN Type menu. Enable default route if requires. Enable Default Route Specify the name. Description Enter the server name or server IP of the VPN VPN Server Server.
- Page 92 5. SPECIFY ROUTER SETTINGS VIA WEB BROWSER VPN Type - OpenVPN Select the VPN Type OpenVPN from the dropdown VPN Type menu. Enable default route if requires. Enable Default Route Specify the name. Description Enter the username. Username Enter the password. Password Select the file exported from the OpenVPN server.
-
Page 93: Qos
5. SPECIFY ROUTER SETTINGS VIA WEB BROWSER 5.7 QoS Quality of Service (QoS) is a feature that gives different priority to different traffic stream. So when you have a lot of family members using Internet at the same time, the person with QoS priority will have a guaranteed Internet experience. QoS does not really give you a bigger Internet bandwidth. -
Page 94: Basic
5.7.1 Basic To enable QoS feature in Dynalink router, you can configure from both, APP or Web UI. First you should enable the master QoS setting and specify maximum upload and download bandwidth. So the QoS logic can start to drop low priority traffic when total bandwidth is approaching the limit. If the maximum bandwidth number is set too high, QoS will not kick in, if the number is set too low, QoS logic will start to drop packets too early. - Page 95 5. SPECIFY ROUTER SETTINGS VIA WEB BROWSER After you enable the master QoS setting, you have to go to Parental Control profiles to choose which ones will be granted priority access to bandwidth. Slide on/off the priority switch for each profile. If you want to disable QoS and give everyone a fair priority, you simply need to disable the master QoS setting.
-
Page 96: Airtime Fairness
5. SPECIFY ROUTER SETTINGS VIA WEB BROWSER 5.7.2 Airtime Fairness Airtime Fairness is a feature that boost the overall network performance by sacrifice a little bit of network time on your slowest devices. The relatively “slow” WiFi speed devices can be slow from either long physical distance, weak signal strength, or simply being a legacy device Note: with older technology. -
Page 97: Diagnostic
5. SPECIFY ROUTER SETTINGS VIA WEB BROWSER 5.8 Diagnostic 5.8.1 Diagnostic Tools Diagnostic tools allows you to run a Ping, Traceroute, Nslookup and Ping6 tests with the router. Enter the IP address to use for the test and then click , results are displayed in the diagnostic box. -
Page 98: System Settings
5. SPECIFY ROUTER SETTINGS VIA WEB BROWSER 5.9 System Settings Various administrative functions of your router can be configured from the System Settings menu, including the Web UI login password, date & time settings, backup, firmware and system logs. -
Page 99: Password & Timezone
5. SPECIFY ROUTER SETTINGS VIA WEB BROWSER 5.9.1 Password & Timezone System Password- The password function allows you to change the login password for the router’s Web UI. It’s essential to change this password for the security of your router. Use hard-to-guess password which include combinations of numbers, letters and symbols, and change your password regularly. - Page 100 5. SPECIFY ROUTER SETTINGS VIA WEB BROWSER Time Zone- Set the time zone for your router. You can use a Network Time Protocol (NTP) which synchronizes the date and time with public time servers, or the router can get the date and time automatically based on your selected time zone.
-
Page 101: Reboot
5. SPECIFY ROUTER SETTINGS VIA WEB BROWSER 5.9.2 Reboot Reboot the router by pressing button. -
Page 102: Configuration & Reset
5. SPECIFY ROUTER SETTINGS VIA WEB BROWSER 5.9.3 Configuration & Reset The Configuration & Reset page enables you to save/upload the router’s current settings as a file to your local computer, or upload your router to previously saved settings by loading a backed up file. You can also reset the router back to factory default settings. If the router malfunctions or is not responding, then it is recommended that you first reboot the device (press the reset button for 1 second), and if still experiencing problems reset the device back to its factory default settings. - Page 103 5. SPECIFY ROUTER SETTINGS VIA WEB BROWSER Note: 1. Reboot the device – press the reset button for 1 second; 2. Reset the device back to its factory default settings – press and hold for 7+ seconds. Configuration Click the Save button to copy of your current settings and download configuration file to your local computer. Save to File Restore saved settings from a configuration file.
-
Page 104: Firmware
5. SPECIFY ROUTER SETTINGS VIA WEB BROWSER 5.9.4 Firmware The Firmware page displays your router’s firmware version and hardware version information and can upload firmware manually when select a valid firmware to update it. -
Page 105: Led Light
5. SPECIFY ROUTER SETTINGS VIA WEB BROWSER 5.9.5 LED Light This page allows you to enable or disable the LED on your router. -
Page 106: Status
5. SPECIFY ROUTER SETTINGS VIA WEB BROWSER 5.10 Status Network Status displays the status of the network across 8 categories: Wireless, DHCP Lease, Routing Table, Port Forwarding, Connection List, Snooping Table, Blocked Users, Traffic. Information is listed in Network Status for reference as described below:... -
Page 107: Wireless
5. SPECIFY ROUTER SETTINGS VIA WEB BROWSER 5.10.1 Wireless Displays your router’s WiFi information for both 2.4GHz & 5GHz frequencies. Includes network name (SSID) and radio & channel information. To edit these WiFi settings go to Network > WiFi Settings. -
Page 108: Dhcp Lease
5. SPECIFY ROUTER SETTINGS VIA WEB BROWSER 5.10.2 DHCP Lease Displays the DHCP address allocation, including MAC, IP and Hostname. -
Page 109: Routing Table
5. SPECIFY ROUTER SETTINGS VIA WEB BROWSER 5.10.3 Routing Table Displays the WiFi router’s routing table information including IPv4 and IPv6 routing table. -
Page 110: Port Forwarding
5. SPECIFY ROUTER SETTINGS VIA WEB BROWSER 5.10.4 Port Forwarding Displays the router’s Port Forwarding Rule including service, port range, local IP/port, protocol and status. To edit port forwarding settings, go to Network > WAN > Port Forwarding. -
Page 111: Connection List
5. SPECIFY ROUTER SETTINGS VIA WEB BROWSER 5.10.5 Connection List Displays Network, protocol, status, source and destination of the device connected to router. -
Page 112: Snooping Table
5. SPECIFY ROUTER SETTINGS VIA WEB BROWSER 5.10.6 Snooping Table Enable Multicast (Network > Multicast) first and see the status of delivering traffic flows. -
Page 113: Blocked Users
5. SPECIFY ROUTER SETTINGS VIA WEB BROWSER 5.10.7 Blocked Users Displays the router’s block users. -
Page 114: Traffic Usage
5. SPECIFY ROUTER SETTINGS VIA WEB BROWSER 5.10.8 Traffic Usage Displays the real time traffic of the router’s WAN, LAN, 2.4GHz WiFi, and 5GHz WiFi. -
Page 115: Voice Assistants
6. VOICE ASSISTANT Voice Assistants 1. Open app. If you have not 2. Use google account to log in to 3. Select on the Google Home Google Set up device installed this app yet, please go to and create a new home if you don’t page of Home Add and... - Page 116 6. VOICE ASSISTANT Enable it by signing in with your 4. Select 5. Search for Works with Google. Dynalink Life. Dynalink account.
- Page 117 Google Assistant 7. Tap to allow Google to sync 8. Once you complete syncing the account, Accept your signed in account. your Dynalink router will be linked to your Please use the same google Note: Google home. account as Google...
- Page 118 6. VOICE ASSISTANT 10. Try to query as follows to control your Dynalink router with Google Assistant. “Ok, Google. Enable the guest network.” “Ok, Google. Disable the guest network.”...
- Page 119 6. VOICE ASSISTANT Google Assistant commands for controlling your Dynalink DL-WRX36 router Google Assistant Response Voice Commands Enable my router guest Network. Sure, enabling the guest network on DL-WRX 36. Disable my router guest Network. Sure, disabling the guest network on DL-WRX 36.
-
Page 120: Faq
7. FAQ What is WiFi 6? WiFi 6 is also knows as 802.11ax. WFA (Wi-Fi Alliance) uses numbers to simplify the name of the standards. WiFi 6 (11ax) features 1024-QAM which provides high-throughput in both 2.4 GHz and 5 GHz bands, and supports MU-MIMO & Orthogonal Frequency Division Multiple Access (OFDMA) to improve the channel capacity and efficiency for enabling more clients to access the AP. - Page 121 In 802.11ax(WiFi 6) and 11ac(WiFi 5), MU-MIMO are introduced. Router or AP can transmit to multiple clients at the same time. How to reset DL-WRX36 router to factory default settings? A factory reset will restore all the settings to default status just like you firstly got the router. Make sure you have already backed up the configuration before using the process of reset to default to fix other issues.
- Page 122 When all the loading process is completed, log in to the web user interface again. You will see the firmware version is up to date. If you have problems resolving router issues by the solution described above, please contact Askey’s technical support via this website Note: https://dynalink.life/products/dynalink-wifi-6-ax3600-router-dl-wrx36.
-
Page 123: Troubleshooting
When you start to use Dynalink APP, the step-by-step instruction direct you to complete router setup including establishing WiFi connection between your mobile and router. For your convenience, Dynalink APP allows you to scan the QR code located at the bottom of Router to establishing WiFi connection without entering password. - Page 124 8. TROUBLESHOOTING Can’t access local network printer or file server by WiFi Click Network > WiFi > ADVANCED Please check the setting Set AP Isolated (The default is set to disable (No)) if it’s enable (Yes), If enabling this setting, this will block all traffic between devices on WiFi or LAN, the traffic is only allowed to go out to the Internet. After AP isolation is set, can a wireless terminal communicate to a wired terminal? Yes, AP isolation only restricts the communication between wireless devices, not the communication with wired terminals.
-
Page 125: Technical Specification
9. TECHNICAL SPECIFICATION Technical Specification Memory Button FLASH: NAND 256MB RAM: DDR4 1GB Power, Reset to default, WPS Interface Indication Wireless 2.4GHz and 5GHz Dual-Band Concurrent LED Indicators (2-color) Blue/Red 4 Gigabit LAN Port + One 2.5 Gigabit WAN Port Operating Voltage Standard 12V/2.5A DC adaptor (100V~240V, 50 Hz ~ 60 Hz)
Need help?
Do you have a question about the DL-WRX36 and is the answer not in the manual?
Questions and answers
The blue light on the DL-WRX36 does not turn solid blue. How do I fix this?
If the blue light on the Dynalink DL-WRX36 does not turn solid blue, it may be due to an incomplete reset process. To fix this:
1. Press and hold the reset button on the back of the router for at least 7 seconds.
2. The power LED should start flashing blue and then turn off briefly.
3. The LED will then become solid red (power cycle), blink blue for about 45 seconds, and finally turn solid blue when the system is ready.
If this LED sequence does not occur, try pressing and holding the reset button again, making sure the button is held long enough.
This answer is automatically generated
What if the blue light on the DL-WRX36 does not turn solid blue?
If the blue light on the Dynalink DL-WRX36 does not turn solid blue, it may mean that you did not press and hold the reset button long enough. You should try the reset process again.
This answer is automatically generated