Table of Contents
Advertisement
Quick Links
Advertisement
Table of Contents

Related Manuals for Onbon OVP-M2X


Summary of Contents for Onbon OVP-M2X
- Page 1 USER MANUAL ----OVP-M2X Date:V1.2 release time :2019.8.21...
- Page 2 Statement Any companies or privates cannot copy, transcribe or translate part or whole content of this file without our written permission. And cannot use it on any business or benefit filed with any forms. The specifications and information which are mentioned on the file is for reference only, if there’s update, we will not inform you.
-
Page 3: Table Of Contents
Instruction................................4 Safety notification............................4 Functions................................. 4 Description................................5 Features................................5 Panel..................................5 Front panel..............................5 Back panel..............................6 Basic steps................................7 Menu..................................8 Menu button operation..........................8 The initial state of the main interface......................9 Main menu..............................9 Output setup..............................10 Image quality..............................14 Crop menu.............................. -
Page 4: Instruction
Instruction Safety notification There are high voltages in this product. Non-professional maintenance personnel are not allowed to open the case or repair the device by themselves to avoid danger.The input voltage range of this product's AC power supply is 100 ~ 240V, 50/60Hz, please use the correct power supply. -
Page 5: Description
Description OVP-M2X is a video processing equipment developed for LED large screen, showing and rental, conference room, studio and other markets.This product adopts HD image processing technology which specially designed for small spacing LED display screen. It can realize point-to-point input and output for large HD resolution LED screen, so it can effectively eliminate the phenomenon of edge saw tooth caused by image amplification, and reduce the out-of-focus blur feeling of image after amplification. -
Page 6: Back Panel
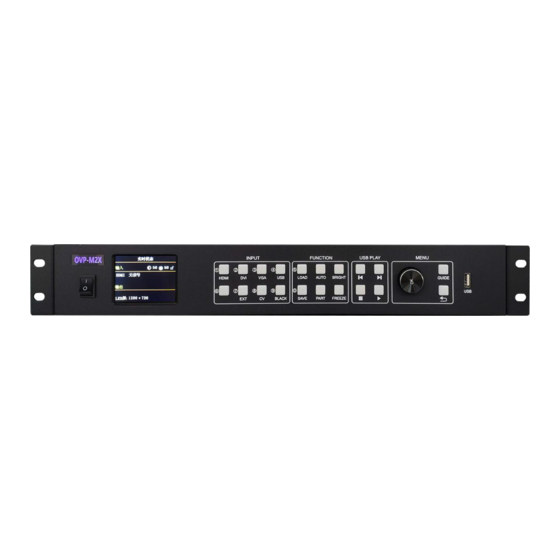
Interface instruction Power switch 2.8” full color LCD panel(320×240) Operation via LCD panel system INPUT AREA [DVII] ~ [USB] 8 buttons , 6 nos of input port button,mark:press “BLACK”then the LED indicate light is on ,then output the black screen status. -
Page 7: Basic Steps
DVI port HDMI HDMI port VGA port PAL\NTSC complex video signage input port Video output port MONITOR Synchronous multi-windows monitor DIV output port, connect with LCD display LED1~LED4 Send via network cable to LED screen Audio input/output port HDMI audio HDMI video input port built-in AUDIO_IN Analog audio input port... -
Page 8: Menu
Menu Menu button operation The key operation area related to the menu is the MENU area, including a knob, a confirmation key [OK], a return key [] and a [GUIDE] key. In the initial state of the system, short press [OK] to enter the main menu setting interface. -
Page 9: The Initial State Of The Main Interface
the adjustment is completed, short press [OK] to write the data and save it. To return to the previous menu, use the return key; until you return to the initial state. Press【GUIDE】 key to quickly switch out the "smart navigation" setting interface. Note: The [knob] cannot be turned too fast, otherwise the value adjustment will change very little and should be rotated at a constant speed. -
Page 10: Output Setup
Main menu and branch menu: The second and third menu Main menu Size of LED screen (total width and total height) LAN port output setting (LAN port LED1-LED2): horizontal width, vertical Output setup height, horizontal start, vertical start. Adjust display window(horizontal width, vertical height, horizontal start, vertical start) Brightness,contrast,saturation,sharpness,color temperature and Image... - Page 11 1. LED size Click【OK】as to enter into main menu, then choose “LED setting”, as below: After finish settings of LED size, system will be in reset status, users need to wait for a while here. Note: (1) After setting the "Accept Card Connection" of each network port of the LED screen through the PC control software, it will automatically calculate the size of the LED screen and update it to the controller synchronously.
- Page 12 (3) The width and height of each network port must be consistent with the local size of the LED screen covered by the interface card actually carried by each network port. By changing the starting position of each network port, any splicing of the LED screen can be achieved (that is, each gigabit The network port can display any part of the screen or repeat it);...
- Page 13 3. Image size Click ok then go to output setup ,then select the image size adjust: Horizontal width: adjustment range 256 ~ the maximum number of points can be set in the horizontal direction. Vertical height: Adjustable range 128 ~ The maximum number of points can be set in the vertical direction.
-
Page 14: Image Quality
the best display effect can be achieved. (4) When the point-to-point output is turned on, the image capture will be automatically turned off. Image quality Click【OK】as to enter into main menu--”IMAGE QUALITY”, as below: Brightness: adjust range 0-100, default is 50. ... - Page 15 Minimum is 128, maximum is “width of input signal”. Minimum is 128, maximum is “height of input signal”. Minimum is 0, maximum is “width of input signal”- “height of input signal”. Minimum is 0, maximum is “height of input signal”- “width of input signal”. Note: (1)Crop is for input source, so crop width and height cannot bigger than the resolution of present cropped signal source.
- Page 16 By “INPUT EDID”, users can get good resolution effect in the range of 4K*2K. As below: Width:adjust range 640-1920 Height:adjust range 480-2500 Refresh rate:adjust range 60 or 30 Note: (1)The real adjust range is limited by port type and input bandwidth, for this equipment, it can reach to the highest input EDID, cause input source HDMI adopts HDMI 1.4.
- Page 17 VGA X:adjust range 0-300. VGA Y:adjust range 0-300. Note: (1)Adjust range of VGA X and VGA Y is decided by system. (2) When there’s excursion of VGA input signal in display, users can click “Auto adjust” as to display correctly. And if“Auto adjust”is invalid, users can adjust“VGA horizontal start”...
- Page 18 Note: (1) The user must first calibrate the internal clock of the system before using the timing switch function. The calibration is done by the PC software. (2) When the timing switch is turned on, several tasks can be set, and different user modes can be called at different time periods (this user mode must be saved in advance), and the task settings are also completed by the PC software;...
-
Page 19: User Save And Load Mode
ADC correct:Usually, “VGA\CV correct” was done before selling in our factory. Language: ”Chinese”and “English”, default is Chinese. Factory reset:Reset to default value. Firmware version:Check present hardware version, factory date. USER SAVE AND LOAD MODE User save mode Press the front panel shortcut "SAVE"... -
Page 20: User Mode Switch
data already exists, and the open circle indicates that the currently selected mode data does not exist. (3) Up to 8 user modes can be saved. In addition to the size, position and status of the screen, the parameters saved in the user mode also include brightness and contrast (4) When the splicing method is changed, the saved user mode will be cleared. -
Page 21: Intelligent Guiding
During playback, when the USB key is pressed again, a menu for selecting the file type for playback will pop up: According to the selected play file type, the following play file list will pop When the cursor is selected by the panel knob to move to the playback file (or playback start file), then press [OK] to re-enter the U-disk playback interface. -
Page 22: Faq
very simple, convenient and useful. Press “【GUIDE】”, as below:: Users only need to choose “Yes”, and follow the steps. As long as the user selects "Yes" to confirm and follow the prompts on the panel step by step, the initial commissioning of the system can be completed. This is a professional equipment, users should be professional on it. -
Page 23: Technical Parameters
Please check that it is connecting input signal and There’s display on already switch to the relative signal source. LCD screen, but do Please check that the display terminal supports output not have image resolution and refresh rate of this equipment. output. - Page 24 EXT×1 Extend input port(DVI or SDI/ wireless screen cast is optional) CV×1 Support PAL \ NTSC complex video USB×1 USB2.0,support 1080p@30fps or 720p@60fps USB display USB support format: Video format: HEVC(H.265) 、 MPEG2_HD、 GAAC、 Miracast、 MPEG2、 MPEG4_HD、MPEG4、RM、MVC、VP9、DD、MPEG4_SD、H.264、 VC1、VP8、FLV Picture format:JPG、BMP、PNG Image output port Send program via Network cable to LED screen Each port control max 650000 pixels @60Hz...
- Page 25 Contact Us Shanghai ONBON Technology Co.,ltd (Headquarters) Address: 7 Floor, Tower 88, 1199#, North Qinzhou Road, Xuhui District, Shanghai City, China ONBON (Jiangsu) Optoelectronic Industrial Co.,LTD Address: 1299#, Fuchun Jiang Road, Kunshan City, Jiangsu Province, China Tel Phone: 086-0512-36912687 Website: www.onbonbx.com...
- Page 26 www.onbonbx.com 第 26 页...
Need help?
Do you have a question about the OVP-M2X and is the answer not in the manual?
Questions and answers