Table of Contents
Advertisement
Quick Links
Advertisement
Table of Contents

Related Manuals for Vicon IQeye Alliance-mini Series


Summary of Contents for Vicon IQeye Alliance-mini Series
- Page 1 IQeye Alliance-mini Series Installation and Operating Instructions...
-
Page 2: Table Of Contents
Contents Service Unpacking Description Installation Parts List Camera Connections Mounting Options Camera Positioning, FOV Setup and Focus PC Configuration of the Alliance-mini VLC for H.264 Stream... -
Page 3: Service
2. Qty (10) Screws - Two Per Pendant Mount 3. Installation & Operating Instructions 2 Service If the unit needs repair service or parts, the customer should contact Vicon for authorization to return, as well as shipping instructions. See Shipping Instructions at the end of this manual. -
Page 4: Description
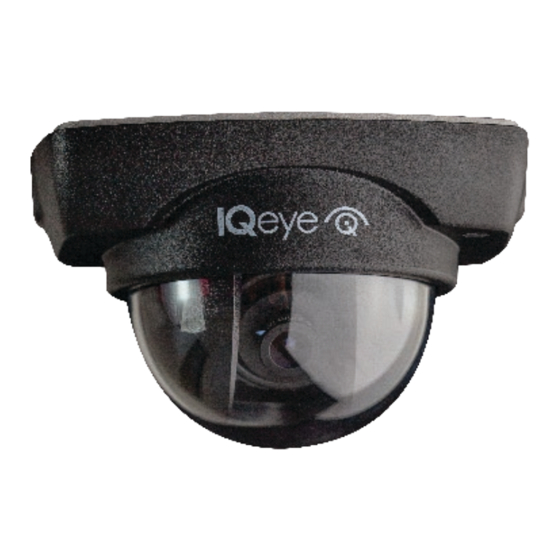
3 Description The Alliance-mini is a compact high-resolution mini-dome camera system that supports both H.264 and MJPEG video compression and is suitable for indoor vandal resistant installations via wall- or ceiling- mounting. Optional adapters allow the camera models to be surface, single-gang box wall-mounted as well as pendant-mounted. -
Page 5: Camera Connections
6 Camera Connections Remove the camera dome cover assembly; it is not secured with screws when shipped. The Alliance-mini camera provides the following connection options (Figure 6.1). 1. Ethernet (Power-over-Ethernet) connector. 2. Micro SD card slot (Micro SD card not included) 3. - Page 6 Optional IQA-CAB Cable Assembly for Audio In/Out, I/O Relay and Analog Video Output Figure 6.3 Cable Connections: Refer to Figure 6.3 Name Function Mic G/Mic Microphone line in and ground. Externally powered microphone is recommended for optimal quality. Line G/Line Audio line out and ground.
-
Page 7: Mounting Options
7 Mounting Options The Alliance-mini is designed to be used in one of the following configurations: 1. Surface mounted to any interior durable surface wall. 2. Surface mounted to a plenum or other durable ceiling surface. 3. Used in conjunction with a ¾” NPT threaded pipe (not included) as part of a pendant mount solution with the use of the Alliance-mini Pendant Mount Adapter Multi-Pack (modeIs IQD4-PB or IQD4-PG, black or beige, respectively). -
Page 8: Camera Positioning, Fov Setup And Focus
8 Camera Positioning, FOV Setup and Focus 1. Remove the camera shroud by placing your palm over the top of the shroud and gently squeeze the two tabs toward the front of the shroud toward the center of the camera. Pivot these tabs away from the camera, then pull the shroud off the camera as shown in Figure 8.1. -
Page 9: Pc Configuration Of The Alliance-Mini
3. Alliance-mini field-of-view and focus adjustment must be performed using a browser to view the camera image. A. Download and install IQfinder from the Vicon website. Launch IQfinder and scan for cameras on the network by clicking the Refresh button. The detected cameras will be displayed in the IQfinder window. - Page 10 B. The “Assign IP” window allows the IP Address, Subnet and Gateway of the camera to be changed, and alternatively the camera to be configured for DHCP operation. Click the “Apply” button after making the desired changes. Note: Changing between a static IP address and DHCP will require the camera to be rebooted.
-
Page 11: Vlc For H.264 Stream
“Play” button on the bottom right to expand the list. From the menu choose “Play”. The video player will open with the live H.264 video stream. RTSP Protocol For product warranty, additional documentation and technical information, please visit www.vicon-security.com/support H.264 Stream... - Page 12 Shipping Instructions Use the following procedure when returning a unit to the factory: 1. Call or write Vicon for a Return Authorization (R.A.) at one of the locations listed below. Record the name of the Vicon employee who issued the R.A.
- Page 13 Vicon Standard Equipment Warranty Vicon Industries Inc. (the “Company”) warrants your equipment to be free from defects in material and workmanship under Normal Use from the date of original retail purchase for a period of three years, with the following exceptions: 1.
- Page 14 (f) to consumables (such as storage media or batteries) (g) to products that have been purchased “as is” and Vicon the seller or the liquidator expressly disclaim their warranty obligation pertaining to the...
- Page 16 135 Fell Court Hauppauge, NY 11788 www.vicon-security.com 901-0381 Rev A...
Need help?
Do you have a question about the IQeye Alliance-mini Series and is the answer not in the manual?
Questions and answers