Advertisement
Your Blade Prescription Lens
Kit includes everything you
need to customize your new
AR smart glasses for maximum
utility and comfort:
INSTALLATION
TOOL
LENS
REMOVAL
TOOL
EXTENDED
NOSE BRIDGE
For Preordered Blade Smart Glasses already outfitted with retainers, skip to STEP C
IMPORTANT NOTE: Once your lens is mounted, please allow 48 hours for the
Retainer's adhesive to fully dry before removing the lens. Failure to wait could
allow Retainer to be removed and damage to Blade.
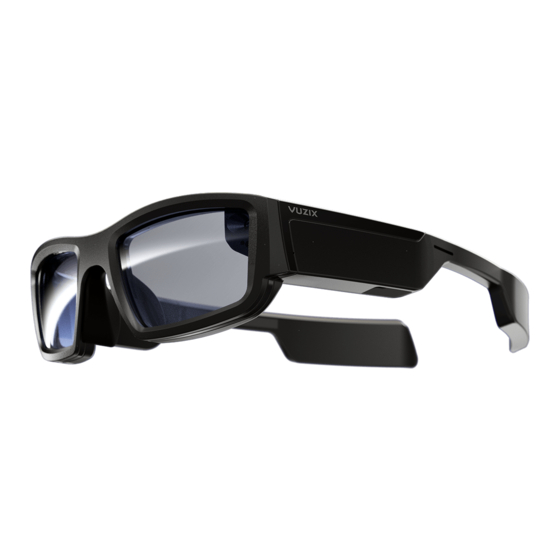
BLADE
PRESCRIPTION LENS
INSTALLATION GUIDE
LEFT RETAINER
LEFT LENS
BEFORE GETTING STARTED
• You'll need a Phillips-head screwdriver
• Make sure your workspace is clean
and dust-free
• Thoroughly clean your Blade Smart
Glasses with a microfiber cloth (for
more, see page 6 of Quick Start Guide)
A
INSTALLING LEFT RETAINER & LENS
Place the Left Retainer with its adhesive
backing face down on a clean surface.
Hold the Installation Tool with the "Left" side
up and position it on the Left Retainer, pressing
firmly until it properly fits.
Still holding the Installation Tool, carefully peel
off the adhesive backing from the Left Retainer.
Holding your Blade Smart Glasses in your other
hand, line up the Installation Tool to fit on the left
side of the frames. Firmly press the Installation
Tool with your thumb for 3–5 seconds.
Carefully remove the Installation tool. The
Retainer is now installed.
To mount your Left prescription lens into the
Retainer, carefully fit it on and snap it into place.
RIGHT RETAINER
RIGHT LENS
®
Advertisement
Table of Contents

Subscribe to Our Youtube Channel
Related Manuals for Vuzix BLADE


Summary of Contents for Vuzix BLADE
- Page 1 • Thoroughly clean your Blade Smart Glasses with a microfiber cloth (for more, see page 6 of Quick Start Guide) For Preordered Blade Smart Glasses already outfitted with retainers, skip to STEP C INSTALLING LEFT RETAINER & LENS Place the Left Retainer with its adhesive backing face down on a clean surface.
- Page 2 ADJUSTING THE NOSE BRIDGE Blade Smart Glasses can be adjusted to comfortably accommodate the addition of prescription lenses by modifying the frames with the Extended Nose Bridge. Using a small Phillips-head screwdriver, carefully remove the standard-size nose bridge from the frames.
Need help?
Do you have a question about the BLADE and is the answer not in the manual?
Questions and answers