Table of Contents
Advertisement
Quick Links
Advertisement
Table of Contents

Related Manuals for ADJ ENCORE FR PRO COLOR


Summary of Contents for ADJ ENCORE FR PRO COLOR
- Page 1 ENCORE FR PRO COLOR User Manual...
- Page 2 Products, LLC brands and product names are trademarks or registered trademarks of their respective companies. ADJ Products, LLC and all affiliated companies hereby disclaim any and all liabilities for property, equipment, building, and electrical damages, injuries to any persons, and direct or indirect economic...
-
Page 3: Table Of Contents
TABLE OF CONTENTS Introduction Limited Warranty (USA Only) Warranty Registration | Features Safety Guidelines Overview Installation Accessory Installation Remote Device Management (RDM) Control Panel System Menu DMX Setup DMX Traits Color Temperature Presets Virtual Colors Color Macros Chart Dim Modes Daisy Chain Power Linking | Cleaning and Maintenance Dimensional Drawings Specifications... -
Page 4: Introduction
INTRODUCTION Unpacking: Thank you for purchasing the Encore FR Pro Color by ADJ Products, LLC. Every device has been thoroughly tested and has been shipped in perfect operating condition. Carefully check the shipping carton for damage that may have occurred during shipping. If the carton appears to have been damaged, carefully inspect your fixture for any damage and be sure all accessories necessary to operate the unit have arrived intact. -
Page 5: Limited Warranty (Usa Only)
LIMITED WARRANTY (USA ONLY) A. ADJ Products, LLC hereby warrants, to the original purchaser, ADJ Products, LLC products to be free of manufacturing defects in material and workmanship for a prescribed period from the date of purchase (see specific warranty period on reverse). This warranty shall be valid only if the product is purchased within the United States of America, including possessions and territories. -
Page 6: Warranty Registration | Features
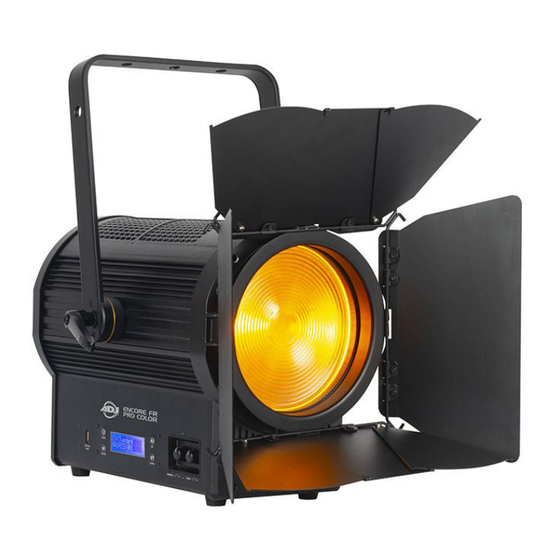
FEATURES The ADJ Encore FR Pro Color is a professional grade Fresnel fixture with a 7-inch lens powered by a 400W 6-IN-1 LED engine with red, green, blue, amber, lime and cyan LEDs. It offers a full spectrum of colors with CMY Color Mixing DMX modes, and tunable white color temperatures from 2400K to 8500K. -
Page 7: Safety Guidelines
THIS FIXTURE IS COMPOSED OF SOPHISTICATED ELECTRONIC COMPONENTS. TO GUARANTEE SMOOTH OPERATION, IT IS IMPORTANT TO FOLLOW ALL INSTRUCTIONS AND GUIDELINES IN THIS MANUAL. ADJ PRODUCTS, LLC IS NOT RESPONSIBLE FOR INJURY AND/OR DAMAGES RESULTING FROM THE MISUSE OF THIS FIXTURE DUE TO THE DISREGARD OF THE INFORMATION PRINTED IN THIS MANUAL. -
Page 8: Overview
OVERVIEW Bracket Mounting Adjustment Bracket Knob Safety Cable Loop Mode Button Button Update Port Zoom Knob Enter Display Down Dimming Button Screen Button Knob Carry Handle 3-pin DMX In Power 3-pin DMX Out Fuse 5-pin Power 5-pin DMX In DMX Out... -
Page 9: Installation
INSTALLATION FLAMMABLE MATERIAL WARNING Keep fixture minimum 5.0 feet (1.5m) away from flammable materials and/or pyrotech- nics. ELECTRICAL CONNECTIONS A qualified electrician should be used for all electrical connections and/or installations. MINIMUM DISTANCE TO OBJECTS/SURFACES IS 6.6 FEET (2 METERS). MINIMUM DISTANCE OF FLAMMABLE MATERIALS FROM THE SURFACE IS 1.6 FEET (0.5 METER) DO NOT INSTALL THE FIXTURE IF YOU ARE NOT QUALIFIED TO DO SO! - Page 10 INSTALLATION CLAMP INSTALLATION This fixture features an attachment point for a mounting clamp located at the top the mounting bracket. There is also a loop for the attachment of a safety cable located on the rear of the fixture, just above the carrying handle (see the illustration below). When mounting the fixture to a truss or any other suspended or overhead installation, be sure to secure an appropriately rated clamp (not included) to the mounting bracket, and attach a separate SAFETY CABLE of the appropriate weight rating to the safety cable loop.
- Page 11 INSTALLATION STAND MOUNTING This unit can also be installed atop a tripod stand. Simply insert the threaded bolt on the top of the tripod stand through the hole in the top of the mounting yoke. Tighten the nut onto the threaded bolt to secure the mounted device in place.
- Page 12 LEDs. This issue is not unique to ADJ lighting fixtures, but rather it is a common issue with lighting fixtures from all manufacturers. Although there is no true way to completely prevent this issue from occur- ring, the guidelines below can reduce the risk of any potential damage if followed.
-
Page 13: Accessory Installation
ACCESSORY INSTALLATION GEL FRAME In order to install the included gel frame, locate the latch on the top of the lens frame. Press and hold the button on the side of the latch to unlock it, then open the latch by swinging it upward. Slide the gel frame into place in the slot in front of the lens, then close the latch to secure the gel frame in place. - Page 14 ACCESSORY INSTALLATION BARNDOOR In order to install the optional barndoor, locate the latch at the top of the lens frame. Press and hold the button on the side of the latch to unlock it, then swing the latch upward. Slide the barndoor into place in front of the lens.
-
Page 15: Remote Device Management (Rdm)
REMOTE DEVICE MANAGEMENT (RDM) NOTE: In order for RDM to work properly, RDM enabled equipment must be used throughout the entire system, including DMX data splitters and wireless systems. Remote Device Management (RDM) is a protocol that sits on top of the DMX512 data standard for lighting, allowing the DMX systems of the fixtures to be modified and monitored remotely. -
Page 16: Control Panel
CONTROL PANEL The fixture includes an easy to navigate system menu control panel display where all necessary set- tings and adjustments are made. (See image below) • MODE: Cycles through the main menu options and/or return to previous menu without making changes. -
Page 17: System Menu
SYSTEM MENU 001 - XXX Address Set DMX address Basic 14ch Standard 17ch DMX Channel Extended 19ch Select DMX channel mode Mode CMY St. 13ch CMY Ext. 19ch DMX SET Hold last settings before Hold Last DMX signal was lost Blackout fixture in the event Fade to Black No DMX Status... - Page 18 SYSTEM MENU Effect Adjust Zoom (Calibration) 000 - 255 USB Port Power Off / On PERSONALITY Service Passcode = 050 Update Soft- (continued) Off / On ware Factory Restore Returns fixture to factory Off / On Passcode = 011 default settings 000 - 255 Green 000 - 255...
- Page 19 SYSTEM MENU xxx F / Current Current LED temp xxx C xxx F / Max LED temp since last LEDs Max Resettable xxx C reset, resettable Max Not Reset- xxx F / Max lifetime LED temp, not Fixture Temps table xxx C resettable Passcode =...
-
Page 20: Dmx Setup
DMX address of 1, the DMX controller knows to send DATA assigned to address 1 to that unit, no matter where it is located in the DMX chain. Data Cable (DMX Cable) Requirements (For DMX Operation):The Encore FR Pro Color can be controlled via DMX-512 protocol, and features multiple DMX channel modes. Your unit and your DMX controller can operate with either a 3-pin or 5-pin XLR connector for data input and data out- put. - Page 21 DMX SETUP DMX ADDRESSING All fixtures should be given a DMX starting address when operating with a DMX controller, in order to ensure that the correct fixture responds to the correct control signal. This digital starting address is the channel number from which the fixture starts to “listen” to the digital control signal sent out from the DMX controller.
-
Page 22: Dmx Traits
DMX TRAITS CHANNEL FUNCTION 14CH 17CH 19CH 13CH 19CH VALUE BASIC STD CMY EXT CMY Red, 0% to 100% 000 - 255 Green, 0% to 100% 000 - 255 Blue, 0% to 100% 000 - 255 000 - 255 Amber, 0% to 100% 000 - 255 Cyan, 0% to 100% 000 - 255... - Page 23 DMX TRAITS CHANNEL FUNCTION 14CH 17CH 19CH 13CH 19CH VALUES BASIC STD CMY EXT CMY Color Macros, see Color Macros Chart 000 - 255 section of this manual Shutter 000 - 031 LEDs Off 032 - 063 LEDs On 064 - 095 Strobe Effect, slow to fast 096 - 127 LEDs On...
- Page 24 DMX TRAITS CHANNEL FUNCTION 14CH 17CH 19CH 13CH 19CH VALUES BASIC STD CMY EXT CMY Dimming Speed (continued) 2.0 s 3.0 s 4.0 s 5.0 s 6.0 s 7.0 s 8.0 s 9.0 s 10.0 s 161 - 255 Default to unit setting Dim Curves 000 - 020 Square...
- Page 25 DMX TRAITS CHANNEL FUNCTION 14CH 17CH 19CH 13CH 19CH VALUES BASIC STD CMY EXT CMY Special Functions (continued) 1060 Hz 1070 Hz 1080 Hz 1090 Hz 1100 Hz 1110 Hz 1120 Hz 1130 Hz 1140 Hz 1150 Hz 1160 Hz 1170 Hz 1180 Hz 1190 Hz...
- Page 26 DMX TRAITS CHANNEL FUNCTION 14CH 17CH 19CH 13CH 19CH VALUES BASIC STD CMY EXT CMY Special Functions (continued) 1410 Hz 1420 Hz 1430 Hz 1440 Hz 1450 Hz 1460 Hz 1470 Hz 1480 Hz 1490 Hz 1500 Hz 2500 Hz 4000 Hz 5000 Hz 6000 Hz...
-
Page 27: Color Temperature Presets
COLOR TEMPERATURE PRESETS DMX VALUE COLOR TEMP DMX VALUE COLOR TEMP 2400 K 5500 K 2500 K 5600 K 2600 K 5700 K 2700 K 5800 K 2800 K 5900 K 2900 K 6000 K 3000 K 6100 K 3100 K 6200 K 3200 K 6300 K... -
Page 28: Virtual Colors
VIRTUAL COLORS Virtual Swatch Colors Value Filter Number Name Pale Yellow Straw Gold Tint Spring Yellow Medium Yellow Yellow Deep Amber Deep Straw Loving Amber Gold Amber Orange Deep Orange Dark Amber Millennium Gold Deep Golden Amber Scarlet Primary Red Bright Red Medium Red Fire... - Page 29 VIRTUAL COLORS Virtual Swatch Colors Value Filter Number Name Deep Blue Daylight Blue Slate Blue Light Blue Sky Blue Pale Navy Blue Marine Blue Peacock Blue Lagoon Blue Medium Blue Green Dark Yellow Green Primary Green Fern Green Moss Green Dark Green Lime Green Pale Green...
-
Page 30: Color Macros Chart
COLOR MACROS CHART COLOR DMX VALUE GREEN BLUE AMBER MACRO NO. 001 - 004 005 - 008 009 - 012 013 - 016 017 - 020 021 - 024 025 - 028 029 - 032 033 - 036 037 - 040 041 - 044 045 - 048 049 - 052... - Page 31 COLOR MACROS CHART COLOR DMX VALUE GREEN BLUE LIME MACRO NO. 145 - 148 149 - 152 153 - 156 157 - 160 161 - 164 165 - 168 169 - 172 173 - 176 177 - 180 181 - 184 185 - 188 189 - 192 193 - 196...
-
Page 32: Dim Modes
DIM MODES... -
Page 33: Daisy Chain Power Linking | Cleaning And Maintenance
Regular inspections are recommended to ensure proper function and extended life. There are no user serviceable parts inside this fixture. Please refer all other service issues to an authorized ADJ service technician. Should you need any spare parts, please order genuine parts from your local ADJ dealer. -
Page 34: Dimensional Drawings
DIMENSIONAL DRAWINGS FIXTURE ONLY 10.7in (270.5mm) 6.9in (175.7mm) 10.8in (274.5mm) 13.4in (341.0mm) 14.2in (360.1mm) 16.6in (421.9mm) 20.0in (506.9mm) BARNDOOR INSTALLED (dimensions are the same as above, unless otherwise noted) 23.2in (589.0mm) -
Page 35: Specifications
SPECIFICATIONS SOURCE • 1X400W 6-IN-1 LED (Red, Green, Blue, Amber, Lime and Cyan) • 50,000 Hour Average LED Life* *May vary depending on several factors including but not limited to: Environmental Conditions, Power/Voltage, Usage Patterns (On-Off Cycling), Control and Dimming. PHOTOMETRIC DATA •...
Need help?
Do you have a question about the ENCORE FR PRO COLOR and is the answer not in the manual?
Questions and answers