Table of Contents
Advertisement
Available languages
Available languages
Quick Links
Advertisement
Table of Contents

Related Manuals for Bosch DWW063461


Summary of Contents for Bosch DWW063461
- Page 1 s for installation and use . ..17...
- Page 2 > 50 cm > 65 cm electric cookers gas or combined cookers электр пештер газ немесе аралас пештер...
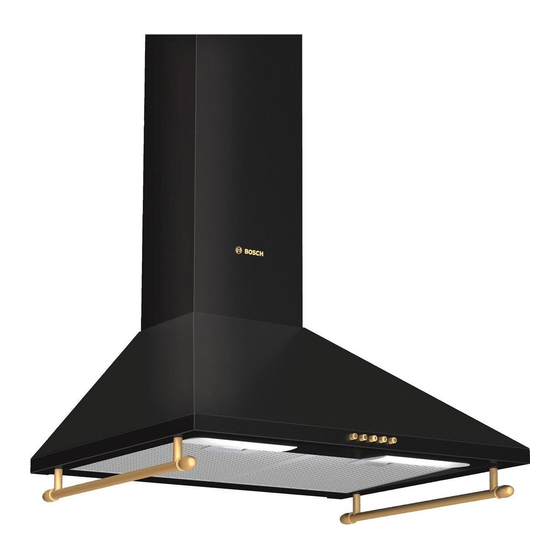
- Page 3 Operating and maintenance instructions Cooker hood description Cooker hood usage Evacuation mode • The cooker hood blower sucks up vapors, which then pass through metal grease filters, and then conveys the filtered air from the kitchen to the outside. Light/motor buttons •...
- Page 4 Before turning on the hood Attention: ❑ These operating instructions refer to different versions of Children should be supervised and should not have access to the product. As a consequence, you might read a the device. description concerning some product characteristics which are not related to the product you have purchased.
- Page 5 Regularly clean the cooker hood inside and outside (AT LEAST, ONCE A MONTH, in any case, in compliance with the maintenance instructions given in this manual). Failure in observing the instructions concerning filters cleaning and replacement may cause a fire. Gas and electric cookers Do not use the gas cooker with all hobs at maximum power for more than 15 minutes, as the cooker hood surface...
-
Page 6: Filters And Maintenance
Cooker hood usage Filters and maintenance The most effective way to clean the air while Attention! Before carrying out any maintenance or cleaning cooking is the following: operations, disconnect the hood from power supply – unplug the ❑ Turn on the hood motor once you start cooking. hood or turn off the main switch. -
Page 7: Charcoal Filter
Filters and maintenance Installation and removal of metal filters: Push inwards the locking handles of the filter and pull it down. Removal: Remove the filter by reversing the above described operation. ❑ The charcoal filter lasts for a long time, depeding on the type of cooking and the frequency of metal filter cleaning. - Page 8 Cooker hood cleaning and maintenance Unplug the appliance. Aluminium and plastic surfaces: ❑ When the filters are cleaned and replaced (see chapter «Filters and filter maintenance »), clean the accessable ❑ Use soft a cloth specific for glass as it doesn’t leave fibres, or parts of the hood to avoid inflammation and keep the a microfiber cloth.
-
Page 9: Troubleshooting
Lamps replacement Troubleshooting Attention! Make sure the lamps are not hot before For any issues regarding the cooker hood operation or malfunctioning, touching them. please contact the technical service center (see the list of technical service 1. Unplug the appliance. centers). - Page 10 Installation instructions Recommendations Old electrical appliances are not waste. Materials used for Kindly request the information on waste disposal rules in the appliances can be recycled. store where you have purchased the appliance, or in local Disable electrical appliances before usage. authorities The applianbce is marked according to the European Directive 2002/96/EC Waste Electrical and Electronic Equipment...
-
Page 11: Before The Installation
Before the installation External evacuation mode Max 345,5 Min. 235 Max 1014 415,5 Min. 903 599,5 ❑ There should be a minimum number of bends in the pipe. Kitchen vapors are evacuated through the ducting pipe upwards ❑ The biggest pipe diameter possible and no bends. or outside the building through the wall. -
Page 12: Wall Preparation
Internal recirculation mode ❑ If it is impossible to use the hood in the evacuation mode, use it in the recirculation mode with charcoal filters. Max 345,5 Min. 235 415,5 Max 1014 Min. 903 599,5 The installation kit is available in specialized stores. Accessories codes for order placement can be found at the end of the manual. -
Page 13: Electrical Connection
Electrical connection Mains voltage should correspond to the voltage indicated on the rating plate found inside the hood. If the hood is equipped with a plug, connect it to a plug connector which meets the applicable regulations and is easily accessible. If the plug is not applicable (direct connection to power supply), or if the plug connector is not accessibile –... -
Page 14: Installation
Installation Attention! Do not connect the appliance to the power supply until installation is complete. The cooker hood is designed to be wall-mounted . Note: Special accessories may be required for the installation. • To make mounting operations easier, draw the central line on the wall (1), put the paper template in such a way that its central line coincides with the one on the wall, and the bottom of the template corresponds to the bottom of the hood when... - Page 15 Installation • Remove the hood from the wall (9). • Drill 4 Ø 8mm. holes and place 4 rawplugs (10). • Fix the hood on the wall again (11) • Fasten the hood with 4 screws 5x45 mm. (12). • Make all the electrical connections, but leave the hood disconnected from home mains supply.
- Page 16 Installation 14 14 • Place the decorative chimney above the hood. Lower the upper part and fix it with 2 screws 2,9x6,5 mm. to the support bracket (14). Screw up 4 dowels to fix the ladle holder. • • Insert the ladle holder and block it with 2 dowels. •...
- Page 17 Пайдалану және техникалық қызмет көрсету нұсқаулары Ас үй сорып шығарғышы Ас үй сорып шығарғышын пайдалану Тартып шығару режимі • Ас үй сорып шығарғышының желдеткіші металл май сүзгілері арқылы өтіп, содан кейін сүзгіленген Жарық/мотор ауаны ас үйден сыртқа шығаратын түймешікте буларды сорады. •...
-
Page 18: Назар Аударыңыз
Сорып шығарғышты қоспас бұрын оны пайдалана алады. Назар аударыңыз: Осы пайдалану нұсқаулары өнімнің түрлі ❑ Балалар бақылауда болуы және құрылғыға нұсқаларына қатысты болып табылады. қатынаспауы тиіс. Сәйкесінше, сіз сатып алған өнімге қатысы жоқ кейбір өнім сипаттарына қатысты Тор дұрыс орнатылмаған жағдайда ас сипаттаманы... - Page 19 Ас үй сорып шығарғышының ішін және сыртын жүйелі түрде тазалап тұрыңыз (КЕМІНДЕ, АЙЫНА БІР РЕТ, кез келген жағдайда осы нұсқаулықта берілген техникалық қызмет көрсету нұсқауларына сәйкес тазалаңыз). Сүзгілерді тазалау және ауыстыруға қатысты нұсқауларды орындамау өрттің орын алуына алып келуі мүмкін. Газ...
- Page 20 Ас үй сорып шығарғышын Сүзгілер және оларға пайдалану техникалық қызмет көрсету Назар аударыңыз! Қандай да бір техникалық қызмет Ас әзірлеу кезінде ауаны тазалаудың ең тиімді жолы келесідей: көрсету немесе тазалау жұмыстарын орындамас бұрын, ❑ Ас әзірлей бастаған кезде сорып сорып шығарғышты қуат көзінен ажыратыңыз – сорып шығарғыш...
- Page 21 Сүзгілер және оларға техникалық қызмет көрсету Орнату: Металл сүзгілерді орнату және алып Сүзгіні мотор саңылауын жабатындай тастау: етіп орналастырыңыз. Сүзгінің тұтқасын құлыптайтын ішкі бөліктерін R істіктері S науаларымен сәйкес болуы керек, итеріңіз және оны астыға қарай тартыңыз. одан кейін ерекше шырт еткізген дауыс естілгенше...
- Page 22 Ас үй сорып шығарғышын тазалау және оған техникалық қызмет көрсету Бетті жылтыратылған бағытта сүртіңіз. Құрылғыны розеткадан ажыратыңыз. ❑ Сүзгілерді тазалағанда және Тот баспайтын болатты тазалау үшін келесі ауыстырғанда («Сүзгілер және сүзгіге техникалық қызмет көрсету» тарауын материалдардың ешқайсысын пайдаланбаңыз:: қараңыз), тұтануды болдырмау үшін сорып...
-
Page 23: Ақауларды Жою
Шамдарды ауыстыру Ақауларды жою Назар аударыңыз! Шамдарды ұстамас бұрын, Ас үй сорып шығарғышының жұмысына немесе олардың қызып тұрмағанына көз ақаулығына қатысты сұрақтар туындаса, жеткізіңіз. техникалық қызмет көрсету орталығына Құрылғыны розеткадан ажыратыңыз. (техниалық қызмет көрсету орталықтарының тізімін қараңыз) хабарласыңыз. 2. Май сүзгілерін немесе металл торды... - Page 24 Орнату нұсқаулары Ұсыныстар: ортаны қорғау бойынша ережелерге сай тастау арқылы Ескі тұрмыстық электр аспаптарын тастамаңыз. қоршаған ортаны тазалықта сақтауға Аспаптар үшін пайдаланылған материалдарды кәдеге жаратуға болады. өз үлесіңізді қосыңыз. Пайдаланбас бұрын тұрмыстық электр аспаптарын ажыратыңыз. Қалдықты кәдеге жарату ережелері бойынша мәліметтерді...
- Page 25 Орнатпас бұрын Сыртқы шығару режимі Ең көбі 345,5 Ең азы Ең көбі 1014 415,5 Ең азы 599,5 Ас үйдегі булар жоғары қаратылған ауа өткізгішінің ❑ Құбыр диаметрі үлкен болғанымен, иілімдер болмауы қажет. құбыры арқылы немесе қабырға арқылы ғимарат Беткі жағы тегіс емес, иілімдері көп және диаметрі сыртына...
- Page 26 Ішкі қайта айналу режимі Cорып шығарғышты шығару режимінде пайдалану ❑ мүмкін болмаса, оны көмірлі сүзгілермен қайта айналу режимінде пайдаланыңыз. Ең көбі 345,5 Ең азы 235 415,5 Ең көбі 1014 Ең азы 903 599,5 Орнату жинағы арнайы дүкендерде қолжетімді. Тапсырысты орналастыру үшін, қосалқы жабдықтарды нұсқаулықтың...
- Page 27 Электр байланысы Қуат кернеуі сорып шығарғыштың төлқұжат тақтасында көрсетілген кернеуге сәйкес болуы тиіс. Егер сорып шығарғышында аша болса, оны қолданыстағы ережелерге сай келетін және оңай қолжетімді істікшелі қосқышқа қосыңыз. Егер аша сәйкес болмаса (қуат көзіне тікелей қосу), немесе істікшелі қосқыш қолжетімді болмаса, орнату...
- Page 28 Орнату Назар аударыңыз! Орнату толық аяқталмайынша құрылғыны қуат көзіне қоспаңыз. Ас үй сорып шығарғышы қабырғаға орнатылуға арналған. Ескертпе: Орнату үшін арнайы қосалқы жабдықтар қажет болуы мүмкін. . Орнату операциясын оңайлату үшін, қабырғаға орталық сызық сызыңыз да (1), қағаз үлгіні орталық сызығы...
- Page 29 Орнату • Сорып шығарғышты қабырғадан алыңыз (9). 4 Ø 8 мм тесіктерді бұрғылап тесіп, істіктерді орнатыңыз • (10). • Сорып шығарғышты қабырғаға қайта бекітіңіз (11) • Сорып шығарғышты 5x45 мм 4 бұрандамен бекітіңіз (12). • Барлық электр байланыстарын қосыңыз, бірақ сорып шығарғышты...
- Page 30 Орнату • Декоративтік түтіндікті сорып шығарғыштың үстіңгі жағына орналастырыңыз. Жоғарғы бөлігін төмен түсіріп, оны 2,9x6,5 мм 2 бұрандамен тірек кронштейніне бекітіңіз (14). • Шөміш тұтқышын бекіту үшін 4 істікті бұрап кіргізіңіз. • Шөміш тұтқышын кірістіріп, оны 2 істікпен қағып кіргізіңіз. •...
- Page 32 Robert Bosch Hausgeräte GmbH Carl-Wery-Straße 34 81739 München Germany www.bosch-home.com *9001157490* 951015 9001158048...
Need help?
Do you have a question about the DWW063461 and is the answer not in the manual?
Questions and answers