Table of Contents
Advertisement
A b o u t T h i s M a n u a l
This Manual provides instructions for the installation, setup, use, maintenance and
repair of this product. The main purpose of this manual is to provide instructions for
operating the cabinet and safeguard personnel's safety during their operation so as to
guarantee correct operation of this product. Users must abide by all safety guidelines
and pay attention to warning labels to avoid injuries to personnel and damage to the
cabinet.
Non-technicians should not maintain or repair this product. Technicians refer to
personnel with a high school degree or above in mechanical engineering or electrical
engineering, or workers equipped with similar working skills and engage in the
maintenance, management and repair of game cabinets on a daily basis.
Keep this manual for your future references. Moreover, when assigning others to move,
install, maintain and repair the cabinet, all store owners should first read the related
content stated in this manual, and instruct related personnel to follow corresponding
rules.
Disclaimer
IGS does not warrant the correctness and completeness of this manual either in direct
or indirect ways, nor does it warrant the commercial or general applications for specific
purposes. IGS reserves the right to modify or change this manual and no prior notice
will be given.
Trademarks
IGS® is the registered trademark of International Games System Co., Ltd.
© Copyright owned 2018, International Games System Co., Ltd.
Without prior written permission, copying any content of this manual in any format is
prohibited.
All trademarks and business identity icons used in this document are the property of
their legal owners.
1
Advertisement
Table of Contents

Related Manuals for IGS OVERTAKE VR


Summary of Contents for IGS OVERTAKE VR
- Page 1 IGS does not warrant the correctness and completeness of this manual either in direct or indirect ways, nor does it warrant the commercial or general applications for specific purposes. IGS reserves the right to modify or change this manual and no prior notice will be given.
-
Page 2: Safety Precautions
S a f e t y P r e c a u t i o n s Ordinary Without the permission from our designated personnel, do not dissemble, C a u t i o n change or remodel our products. Be sure to operate this product according to the instructions of this manual. - Page 3 Power Before plugging in the cabinet, first make sure the voltage is as require C a u t i o n 1 10V or 220V , or fires and electric shocks might occur. ( ) When plugging in the cabinet, use an outlet with ground wire. Do not expose electrical cords and ground wires on the hallway, or damage, electric shocks and short circuit might occur.
- Page 4 Moving Before moving the cabinet, first unplug it to avoid accidents. C a u t i o n When moving the cabinet, pay attention to the obstacles ahead and check if the surface of the ground is flat to avoid accidents and damage to the cabinet. When moving the cabinet, at least two personnel should work together to avoid accidents and injuries.
-
Page 5: Table Of Contents
T a b l e o f C o n t e n t s About This Manual 3.3.7 Speaker test Safety Precautions 3.3.8 Vibration seat test 3.3.9 Counter test 3.3.10 Air spring test VR Instruction Manual 3.3.11 Fan speed test 1.1 Important Notes about Cabinet 3.3.12 Drain valve test... -
Page 6: Vr Instruction Manual
1、 、 、 、 VR Instruction Manual 1.1 Important Notes about Cabinet Installation After purchasing the product, please move the cabinet to the location where it will be used before connecting any wires. Please follow the instructions below during installation. In order to ensure that each cabinet operates normally, please line up the cabinets side-by-side or position them by facing the screens radially outward. - Page 7 To prevent interference between cabinets which may cause problems for the base station to detect the VR headset properly, when placing cabinets, please do not position them with front/rear gaps and do not place the cabinets with their screens facing radially inward.
- Page 8 To prevent interference between two <OVERTAKE VR> cabinets, please do not face other base station models toward the cabinet. The base station of other VR products should be at least 5m away from the cabinet of <OVERTAKE VR>.
- Page 9 To facilitate the smooth operation of the VR headset's calibration process, please fasten the cabinet with the tail before turning on the machine: Counterclockwise turn the tail till a distance of at least 5 mm is kept between the caster and the floor.
-
Page 10: Important Notes About Turning The Machine On/Off
1.2 Important Notes about Turning the Machine On/Off Turning On the Machine To facilitate the smooth operation of the motion platform as well as the VR headset's calibration process, please follow the steps below to turn on the cabinet: Use the key to open the storage door behind the seat and take out the VR headset. - Page 11 Switch on the power on the back of the machine. During machine startup, if the screen shows 【 【 【 【 HMD Detecting 】 】 】 】 in Note: red letters, please pick up the VR headset from the headset stand and shake it gently.
- Page 12 Please ensure that the game is in idle status and no player is sitting on the cabinet. Shut off the power on the back of the machine. Use the key to open the storage door behind the seat and carefully place the VR headset back in storage.
-
Page 13: Quick Installation
1.3 Quick Installation 1.3.1 Connection settings You can enter 【 【 【 【 Connection settings】 】 】 】 to set up the group number and ID of the cabinet. Enter 【 【 【 【 Operator settings】 】 】 】 → 【 【 【 【 2.System settings】 】 】 】 → 【 【 【 【 2-2.Connection settings】... - Page 14 to set up the location and name of the store. Enter 【 【 【 【 Operator settings】 】 】 】 →【 【 【 【 3.Game settings】 】 】 】 →【 【 【 【 3-2.Volume setting】 】 】 】 , to set up 【 【 【 【 3-2-1.Daytime volume setting】 】 】 】 and 【...
-
Page 15: Vr Headset Calibration And Wearing Instructions
1.4 VR Headset Calibration and Wearing Instructions If the screen of the VR headset during play is too different from the correct screen, perform a manual calibration procedure to adjust the VR headset. Note: If the message 【 【 【 【 Please ask the staff to calibrate the VR device 】 】 】 】 is displayed on the screen or if the 【... - Page 16 Manual calibration for the VR headset is now complete. Note: If the VR headset icon displayed on the screen's upper-right corner is shown in gray (detection failed), please pick up the VR headset from the headset stand and shake it gently until the VR headset icon becomes green (detection successful).
- Page 17 Instructions for wearing the VR headset: Turn the knob on the back of the VR headset in the counterclockwise direction to loosen the head strap. Hold the VR headset on both sides and place it over the player's eyes, allowing the VR headset to surround the player's eyes. Note: If a player wears glasses, it is recommended that the player continue to wear them while playing.
- Page 18 Pull down the head strap on the back and turn the knob in the clockwise direction to tighten the head strap for a comfortable fit. Note: The knob must be tightened so that the VR headset will not shake when the player moves his/her head; however, do not make it too tight as it will cause discomfort around the player's eyes.
- Page 19 Once the player has worn the VR headset, press down lightly on the earphones so they are closer to the player's ears. The height of the earphones can also be adjusted to match the player's ear position.
-
Page 20: Important Notes For Staff
1.5 Important Notes for Staff In order to maintain the VR headset's view position in a normal operating condition, please do not place the VR headset in an area where it cannot be detected by the base station, such as: on the seat and outside of the cabinet. - Page 21 In order to maintain the VR headset's view position in a normal operating condition, please do not place the VR headset facing down or facing the opposite direction. There is a monitoring window in the upper right corner of the coin page. When the VR headset is placed on the headset stand, it can be confirmed whether the VR headset is positioned correctly.
- Page 22 To provide players with a more comfortable gaming experience, it is recommended that when powering on the machine each day, turn the lower-right knob located on the VR headset to set the recommended interpupillary distance (IPD) value for your region: Race of Recommended IPD Players...
- Page 23 Enter 【 【 【 【 Operator Settings 】 】 】 】 → 【 【 【 【 2. System Settings 】 】 】 】 → 【 【 【 【 2-6. Air Spring 】 】 】 】 to perform motion platform adjustment (please refer to Adjustment section 3.4.5 Air Spring Adjustment for more details).
-
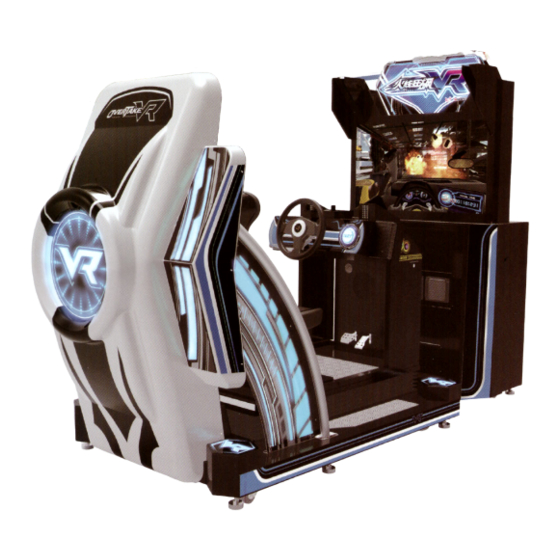
Page 24: Game Description
2、 、 、 、 Game Description 2.1 Game introduction <OVERTAKE VR> is a brand-new VR entertainment machine racing game. By putting on the VR headset, players can experience the adrenalin rush of speeding through all kinds of racetracks in the VR setting. The incorporation of a navigator in the game not only guides players through the game, but also interacts with players in the process. -
Page 25: Game Control
2.3 Game control Except the basic operations such as speeding and steeping on the brake, other operations are as follows: During the tutorial, turn the steering wheel left / right to select options. You can use to start the game, toggle the options and skip parts of the tutorial. - Page 26 Instructions of the control buttons Emergency Stop button Stop the motion platform during the game Steering wheel Control the car turning Ready button Complete the preparation of VR Calibrate View button Calibrate VR headset view Start button Confirm and skip the tutorial Throttle &...
-
Page 27: Instruction Of The Game Display
Instruction of the game display There is a monitoring window in the coin page. VR device status Rank Total time Credits Distance line Current gear / RPM / KPH Player position... - Page 28 3、 、 、 、 Operator Settings 3.1 Framework of the menu...
-
Page 29: Operator Settings
3.2 Main Menu Operation Make sure the cabinet is turned on and the game is displayed on the screen. and press the 【 【 【 【 Test】 button to Open the door below the calibrate view button enter operator settings, the screen will display as below: Enter the menu and follow the instructions: Use the 【... -
Page 30: Hardware Test
3.3 Hardware test You can enter 【Hardware test】 to test if all hardware is normally functioning or not. Enter 【Operator Settings】 → 【1.Hardware test】 and the screen will display as below: Use the 【Calibrate View】 button and 【Ready】 button move the cursor and press the 【Start】... -
Page 31: Vr Device Status
3.3.1 VR device status In the page of 【VR device status】, you can check the VR device status of this cabinet. Enter 【Operator Settings】→【1.Hardware test】→【1-1.VR device status】 and the screen will display as below: Move the cursor to 【1-1-1.Back】 , and press the 【Start】 button to return to 【Hardware test】. -
Page 32: Connection Test
3.3.2 Connection test In the page of 【Connection test】, you can test whether each cabinet of the same group is normally connected. Enter 【Operator Settings】→【1.Hardware test】→【1-2.Connection test】 and the screen will display as below: Possible connection status includes: connection succeeded, connection failed. -
Page 33: I/O Test
3.3.3 I/O test In the page of 【I/O test】 , you can run the testing of specific application to see if it is normally functioning or not. Well-sensed devices will be show with a corresponding picture, value or "on" icon. Enter 【Operator Settings】... -
Page 34: Force Feedback Test
When the throttle is release the corresponding status and value will be Accelerator Step on the throttle 0, and when being stepped on it, the value will be around 1. When the brake is release the corresponding status and value will be Brake Step on the brake 0, and when being stepped on it, the... -
Page 35: Lamp Test
3.3.5 Lamp test In the page of 【Lamp test】, you can test if each light is normally function or not. Enter 【Operator Settings】→【1.Hardware test】→【1-5.Lamp test】, and the screen will display as below: Move the cursor, and choose the lamp to be test, then press the 【Start】 button to run testing. - Page 36 In the page of 【Screen test】, press the 【Start】 button to change the displayed picture. After the testing is completed, leave this page and return to the 【Hardware test】.
-
Page 37: Speaker Test
3.3.7 Speaker test In the page of 【Speaker test】, you can test whether the loudspeaker is normally functioning or not. Enter 【Operator Settings】 → 【1.Hardware test】 → 【1-7.Speaker test】 and the screen will display as below: Move the cursor, and choose the soundtrack to be tested, then press the 【Start】... -
Page 38: Vibration Seat Test
3.3.8 Vibration seat test In the page of 【Vibration seat test】 , you can test whether the vibration chair is normally function or not. Enter 【Operator Settings】 → 【1.Hardware test】 → 【1-8.Vibration seat test】, and the screen will display as below: Move the cursor, and choose the 【Vibration seat】, then press the 【Start】... -
Page 39: Counter Test
3.3.9 Counter test In the page of 【Counter test】, you can test whether the counter is normally functioning or not. Enter 【Operator Settings】 → 【1.Hardware test】 → 【1-9.Counter test】 and the screen will display as below: After you enter the page of 【Counter test】, insert coins to the coin slow, and the number on the right will goes up as more coins are inserted. -
Page 40: Air Spring Test
3.3.10 Air spring test In the page of 【Air spring test】, you can test whether the air spring is function or not. Enter 【Operator Settings】→【1.Hardware test】→【1-10.Air spring test】, and the screen will display as below: Move the cursor and then press the 【Start】 button to test the air spring on the cursor you have selected. -
Page 41: Fan Speed Test
3.3.11 Fan speed test In the page of 【Fan speed test】, you can test whether the fan is normally function or not. Enter 【Operator Settings】→【1.Hardware test】→【1-11.Fan speed test】, and the screen will display as below: Move the cursor, and choose the 【Fan speed test】, then press the 【Start】... -
Page 42: Drain Valve Test
3.3.12 Drain valve test In the page of 【Drain valve test】, you can test whether the drain valve is normally function or not. Enter 【Operator Settings】→【1.Hardware test】→【1-12.Drain valve test】, and the screen will display as below: Move the cursor, and choose the 【Drain valve test】, then press the 【Start】... -
Page 43: System Settings
3.3 System settings In the page of 【System settings】, you can set up the system. Enter 【Operator Settings】→【2.System settings】, and the screen will display as below: Use the 【Calibrate View】 button and 【Ready】 button to choose the item, then press the 【Start】 button to enter the sub menu. When the setting is completed, move the cursor to 【2-10.Back】,... -
Page 44: Time Settings
3.4.1 Time settings page of 【Time settings】, you can set up your local time. In the Note: 【Time settings】 will be automatically synchronized with the server's time when connected to the server. Enter 【Operator Settings】→【2.System settings】→【2-1.Time settings】, and the screen will display as below: Choose the item to set up, and press the 【Start】... -
Page 45: Connection Settings
3.4.2 Connection Settings In the page of 【Connection Settings】,you can set the group and the ID of the cabinet. Note: To connect to the machine, please set up the same group in the settings. The recommended ID value settings for the machine, from left to right, are: 1P, 2P, 3P, 4P. -
Page 46: I/O Adjustment
3.4.3 I/O adjustment In the page of 【I/O adjustment】 , you can adjust the minimum and maximum value of the throttle, brake and steering wheel. Enter 【Operator Settings】→【2.System settings】→【2-3.I/O adjustment】, and the screen will display as below: Move the cursor to 【Start adjustment】 , then press the 【Start】 button to start the process. -
Page 47: Country
3.4.4 Country In the page of 【Country】, you can set your current location. Enter 【Operator Settings】→【2.System settings】→【2-4.Country】, and the screen will display as below: Use the 【Calibrate View】 button, 【ready】 button, 【Steering wheel】 functions to move the cursor, and the item where the cursor is pointed to will appear in red. - Page 48 When completed, move the cursor to 【OK】, then press the【Start】 button to return to the page of 【System settings】. The country and the store name you selected will be show next to the 【Country】.
-
Page 49: Password Setting
3.4.5 Password setting In the page of 【Password setting】, you can reset your password. Enter 【Operator Settings】→【2.System settings】→【2-5.Password setting】, and the screen will display as below: Press the 【Start】 button to enter origin password. To change, use the 【 【 【 【 Calibrate View】 】 】 】 and 【 【 【 【 Ready】 】 】 】 buttons. Then press the 【Start】... -
Page 50: Air Spring Adjustment
3.4.6 Air spring adjustment In the page of 【Air spring adjustment】, you can adjust the minimum and maximum value of the air spring when the motion platform not in function right or malfunction. Enter 【Operator Settings】→【2.System settings】→【2-6.Air spring adjustment】, and the screen will display as below: Move the cursor to the 【Adjustment】... -
Page 51: Seatbelt Setting
3.4.7 Seatbelt setting In the page of 【Seatbelt setting】, you can set the seatbelt on or off. Note: When the setting is on, player must fasten seat belt to actives the motion platform during the game. Enter 【Operator Settings】→【2.System settings】→【2-7.Seatbelt setting】, and the screen will display as below: Move the cursor to choose the item. -
Page 52: Height Sensor Modify
3.4.8 Height sensor modify In the page of 【Height sensor modify】 , you can set the height sensor modify on or off. Enter 【Operator Settings】→【2.System settings】→【2-8. Height sensor modify】, and the screen will display as below: Move the cursor to choose the item. After your preferred setting is chosen, press the 【Start】... -
Page 53: Fan Mode Setting
3.4.9 Fan mode setting In the page of 【Fan mode setting】, you can configure how the fan works in the game. Enter 【Operator Settings】→【2.System settings】→【2-9.Fan mode setting】, and the screen will display as below: Move the cursor to choose the item. After your preferred setting is chosen, press the 【Start】... -
Page 54: Game Settings
3.5 Game settings In the page of 【Game settings】, you can set up all related features of the game. Enter 【Operator Settings】 → 【3.Game settings】 , and the screen will display as below: Use the 【Calibrate View】 button and the 【Ready】 button to move the cursor, then press the 【Start】... -
Page 55: Charge Mode Setting
3.5.1 Charge mode setting In the page of 【Charge mode setting】, you can select Free play, Coin, or Non-coin. Enter 【Operator Settings】 → 【3.Game settings】 → 【3-1.Charge mode setting】, and the screen will display as below: Move the cursor to choose the 【Charge mode】 , then press the 【Start】 button to start the process. -
Page 56: Volume Setting
3.5.2 Volume setting In the page of 【Volume setting】 , you can determine the start time of daytime and evenings and the corresponding volume. Enter 【Operator Settings】→【3.Game settings】→【3-2.Volume setting】, and the screen will display as below: Move the cursor to choose the 【Daily(Evening) Volume setting】, then press the 【Start】... -
Page 57: Headset Calibration
3.5.3 Headset calibration settings In the page of 【Headset calibration settings】, you can determine whether or not to allow the player to manually adjust the VR headset before each game. Enter 【Operator Settings】→【3.Game settings】→【3-3. Headset calibration settings】, and the screen will display as below: Move the cursor to choose the 【Headset calibration setting】, then press the 【Start】... -
Page 58: Game Display Setting
3.5.4 Game Display setting In the page of 【Game Display setting】, you can set up the screen of the cabinet to display part of the game or all game content when the player is playing. Enter 【Operator Settings】 → 【3.Game settings】 → 【3-4. Game Display setting】, and the screen will display as below: Move the cursor to choose the item. -
Page 59: Track Length Setting
3.5.5 Track Length setting In the page of 【Track length setting】, you can determine the track's length. Enter 【Operator Settings】 → 【3.Game settings】 → 【3-5. Track length setting】, and the screen will display as below: Move the cursor to choose the item. After your preferred setting is chosen, press the 【Start】... -
Page 60: Steering Wheel Teaching
3.5.6 Steering wheel teaching setting In the page of 【Steering wheel teaching setting】, you can determine whether or not to enable the tutorial of steering wheel, brake and throttle in the game. Enter 【Operator Settings】 → 【3.Game settings】 → 【3-6. Steering wheel teaching setting】, and the screen will display as below: Move the cursor to choose the item. -
Page 61: Assistant Costume
3.5.7 Assistant costume setting 【Assistant costume In the page of setting】, you can determine the assistant's clothing. Enter 【Operator Settings】→【3.Game settings】→【3-7. Assistant costume setting】, and the screen will display as below: Move the cursor to choose the item. After your preferred setting is chosen, press the 【Start】 button, and 【Game return to settings】. -
Page 62: Income Data
3.6 Income data In the page of 【Income data】, you can check the daily, monthly and total revenue. Enter 【Operator Settings】→【4.Income data】, and the screen will display as below: Use the 【Calibrate View】 button and 【Ready】 button to move the cursor, then press the 【Start】... -
Page 63: Daily Income
3.6.1 Daily income In the page of 【Daily income】, you can check the daily revenue of each cabinet. Enter 【Operator Settings】 → 【4.Income data】 → 【4-1.Daily income】 , and the screen will display as below: Descriptions of each items: Item Descriptions Date Date of data... -
Page 64: Monthly Income
Use the 【Calibrate View】 button and 【Ready】 button to move the page, and press the 【Start】 button to return to 【Income data】. 3.6.2 Monthly income In the page of 【Monthly income】, you can check the monthly revenue of each cabinet. Enter 【Operator Settings】... -
Page 65: Total Income
time month. The average play time of the month. Avg. game time Formula:Game time ÷ Total game Use the 【Calibrate View】 button and 【Ready】 button to move the page, and press the 【Start】 button to return to 【Income data】. 3.6.3 Total income In the page of 【Total income】, you can check the total revenue of each cabinet. - Page 66 Game time The entire duration of play time. Avg. VR teaching The average VR headset teaching time. time The average play time. Avg. game time Formula:Game time ÷ Total game The amount of idle time (business time - game time) among the entire period when the cabinet Percentage of idle is turned on.
-
Page 67: System Reset
3.7 System reset In the page of 【System reset】 , you can delete the income data or set the system to the default setting. Enter 【Operator Settings】→【5.System reset】, and the screen will display as below: Use the 【Calibrate View】 button and the 【Ready】 button to move the cursor, then press the 【Start】... -
Page 68: Income Data Reset
3.7.1 Income Data Reset In the page of 【Income Data Reset】 , you can delete the data of daily income and monthly income. Enter 【Operator Settings】→【5.System reset】→【5-1.Income Data Reset】, and the screen will display as below: Move the cursor to choose 【Enter password】, and press the 【Start】 button to start entering the set password. -
Page 69: System Reset
When done, an icon of 【Reset completed】 will pop up, then press the 【Start】 button to return to 【5.System reset】. Note: This function cannot delete the data of 【Total income】. When 【5-1-1-2.No】 is selected, the screen will automatically direct to the page of 【5.System reset】. -
Page 70: Ranking Board Reset
Move the cursor to choose 【5-2-1-1.Yes】 , and press the 【Start】 button to reset system settings。 After the resetting process, an icon of 【Reset completed】 will pop up, then press the 【Start】 button to return to 【5.System reset】. When 【5-2-1-2.No】 is chosen, then the screen will automatically direct to the page of 【5.System reset】. - Page 71 To change, use the 【 【 【 【 Calibrate View】 】 】 】 button and the 【 【 【 【 Ready】 】 】 】 buttons. Then press the 【Start】 button to enter the selected numbers. After the password has been entered, the following screen will be displayed: Move the cursor to choose 【5-3-1-1.Yes】...
-
Page 72: Game Setting Defaults
3.8 Game setting defaults Default Name of the Setting Available Setting Setting Enable Enable Seatbelt, Seatbelt setting Seatbelt Disable Seatbelt Height Sensor Modify Enable Enable Modify, Disable Modify Setting Modify Fan mode setting Variable Variable, Constant Charge Mode Coin Free play, Coin, Non-Coin Charge Mode →... - Page 73 Volume setting 00%、10%、20%、30%、40%、 →Daytime volume setting 50%、60%、70%、80%、100% →Scene volume Volume setting 00%、10%、20%、30%、40%、 →Daytime volume setting 50%、60%、70%、80%、100% →Voice volume Volume setting 00%、10%、20%、30%、40%、 →Daytime volume setting 50%、60%、70%、80%、100% →Bullettime volume Volume setting 00%、10%、20%、30%、40%、 →Daytime volume setting 50%、60%、70%、80%、100% →Earphone volume Volume setting →Evening volume setting 20:00 00:00~23:59 →Evening start at...
- Page 74 Volume setting 00%、10%、20%、30%、40%、 →Evening volume setting 50%、60%、70%、80%、100% →Voice volume Volume setting 00%、10%、20%、30%、40%、 →Evening volume setting 50%、60%、70%、80%、100% →bullettime volume Volume setting 00%、10%、20%、30%、40%、 →Evening volume setting 50%、60%、70%、80%、100% → Earphone volume Headset calibration setting Disable Enable, Disable Headset calibration setting →Press start button to start Disable Enable, Disable game...
Need help?
Do you have a question about the OVERTAKE VR and is the answer not in the manual?
Questions and answers