Advertisement
Quick Links
Thank you for purchasing Décor Star product from Modern Designer Shop. Please read the
information below and keep it for future reference. If you require assistance, please contact us by
email at moderndesignershop@gmail.com.
Limited Warranty
Provided that the conditions for warranty eligibilities are met, this product is warranted to the
original purchaser for two (2) years from the date of purchase to be free of structural and
mechanical defects due to faulty materials or workmanship. This warranty does not cover any labor
or service charges associated with the removal, repair, or reinstallation of Décor Star product.
This express warranty does not apply to products that have been damaged as a result of misuse,
abuse, negligence, accident, faulty installation or maintenance practice and/or used in any manner
contrary to those recommended by the manufacturer. If a structural or mechanical defect occurs
during the warranty period, Modern Designer Shop will, as its option, (1) repair or replace the
defective part(s) or product at no charge; (2) issue a refund of the purchase price paid for the
product (Valid within 30 days from the date of purchase); or (3) issue a credit to be applied toward
the purchase of a new Décor Star product. Shipping/delivery charges may apply and are in Modern
Designer Shop's sole discretion. Warranty is only valid for Décor Star products purchased from
Modern Designer Shop. To be eligible for warranty coverage, the original purchaser must provide
valid copy of the invoice from Modern Designer Shop.
For Warranty Service
To obtain service under the Limited Warranty, please contact the Modern Designer Shop Customer
Care Department by email at moderndesignershop@gmail.com. Do not ship your product back
to Modern Designer Shop. The Modern Designer Shop Customer Care Department will decide
whether to repair or replace your product, issue a refund, or issue a credit. Modern Designer
Shop is dedicated to providing the best customer service. All emails will be replied within one (1)
business day
Attention
• Please READ ALL the instructions completely before installation.
• Always take extra precautions and wear appropriate safety equipment when installing this product.
• Proper water pressure needs to be maintained to prevent possible scalding.
You may also need the following tools
1. Thread Sealant Tape, (PTFE Tape)
2. Silicon Sealant
3. Phillips Screw Driver
4. Drill with ¼" Drill bit
Preparation
1. Please make sure the water supply is shut off to the installation area. If necessary, shut off the
water to the entire house.
2. Close the water valve and turn off the power to the water heater.
3. Open the hot and cold water at a bathroom faucet to relieve the pressure in the plumbing
system.
Decor Star
5. Pencil or Marker
6. Level
7. Hammer
1
Package Content
1.
160 mm / 6.3"
1,100 mm
43.3"
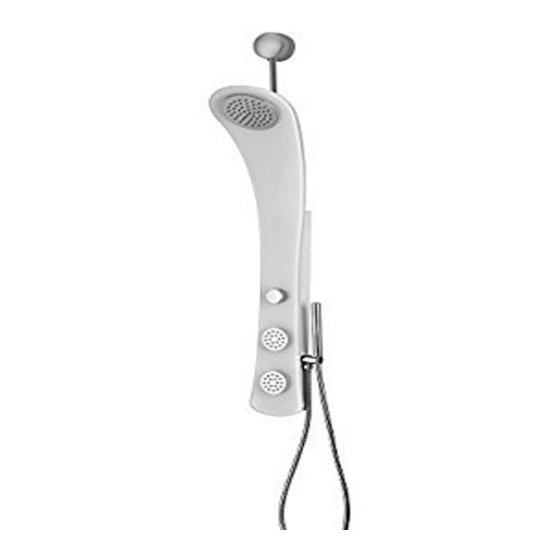
1. Shower Panel
2. Hand Shower Hose
3. Hand Shower
4. Hand Shower Connector with Holder
5. Wall Mounting Brackets
6. Wall Anchors and Screws
7. Rubber Washers / Screen Washers
2.
3.
4.
5.
6.
7.
2
PL-011-GS Rev. A
082013
Advertisement

Subscribe to Our Youtube Channel
Related Manuals for Decor Star PL-011-GS


Summary of Contents for Decor Star PL-011-GS
- Page 1 2. Close the water valve and turn off the power to the water heater. 6. Wall Anchors and Screws 3. Open the hot and cold water at a bathroom faucet to relieve the pressure in the plumbing 7. Rubber Washers / Screen Washers system. Decor Star PL-011-GS Rev. A 082013...
-
Page 2: Installation
Leaving about 1” of the connector outside the wall. (NOTE: Apply some PTFE tape on Technical Data both end of the connector.) Recommended Operating Pressure: 50 - 80 PSI Te on (PTFE) Tape Decor Star PL-011-GS Rev. A 082013... - Page 3 (NOTE: Before installing the wall anchors, use a small piece of painters tape or masking tape over the drill area. This will prevent dam- 1” ages to the tile) Decor Star PL-011-GS Rev. A 082013...
- Page 4 (NOTE: Do not over tighten the nut as it may damage the seal and causes leaks) Once the connection is made, in- stall the cover over the elbow connector. Decor Star PL-011-GS Rev. A 082013...
-
Page 5: Operation
Operation 1. To use your new Decor Star shower panel, first turn on the water supply at the existing valve (B) divert the water to the shower panel. 2. Use the control knob (A) to select the desired shower function.
Need help?
Do you have a question about the PL-011-GS and is the answer not in the manual?
Questions and answers