Advertisement
Available languages
Available languages
Quick Links
Please give us a chance to make it right and do better !
Contact our friendly customer service department for help first.
Replacements for missing or damaged parts will be shipped ASAP !
US office: Fontana
UK office: Ipswich
DE office: Hamburg
FR office: Saint Vigor d'Ymonville
Contact Us !
Do NOT return this item.
AU office: Truganina
PL office: Gdańsk
US:cs.us@costway.com
UK:cs.uk@costway.com
AU:cs.au@costway.com
EN
FR
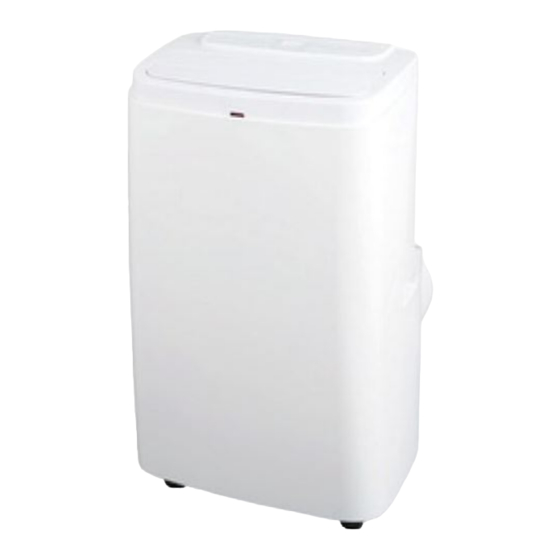
Portable Air Conditioner
ES10115US-WH/ES10115CA-WH
THIS INSTRUCTION BOOKLET CONTAINS IMPORTANT SAFETY INFORMATION. PLEASE READ AND KEEP FOR FUTURE REFERENCE.
USER'S MANUAL
Advertisement

Subscribe to Our Youtube Channel
Related Manuals for Costway ES10115US-WH


Summary of Contents for Costway ES10115US-WH
- Page 1 DE office: Hamburg FR office: Saint Vigor d'Ymonville PL office: Gdańsk USER’S MANUAL Contact Us ! Portable Air Conditioner Do NOT return this item. ES10115US-WH/ES10115CA-WH US:cs.us@costway.com UK:cs.uk@costway.com AU:cs.au@costway.com THIS INSTRUCTION BOOKLET CONTAINS IMPORTANT SAFETY INFORMATION. PLEASE READ AND KEEP FOR FUTURE REFERENCE.
- Page 2 CONTENTS Safety Instructions Features and Components Installation Before You Start Control Setting Drainage Instructions Maintenance Please read all instructions carefully. Troubleshooting Retain instructions for future reference. Separate and count all parts and hardware. Warranty Read through each step carefully and follow the proper order. Service We recommend that, where possible, all items are assembled near to the area in which they will be placed in use, to avoid...
- Page 3 IMPORTANT SAFETY INSTRUCTIONS 16.For proper operation, air conditioner should be placed on a smooth, noncombustible surface. Always place this air conditioner on a level surface at least 20w (50 cm) away from any wall or object. WARNING! When using electrical appliances, basic safety precautions should be 17.This appliance is not intended for use by persons (including children) with reduced followed, including the following: physical, sensory or mental capabilities, or lack of experience and knowledge, unless...
- Page 4 SAVE THESE The unit features thermostatic operation. The thermostat senses the temperature of the air surrounding the unit. When the air reaches the set cooling temperature, the INSTRUCTIONS compressor shuts off and the fan continues to run at low speed. When the surrounding air temperature increases by approximately 2℉/-17℃...
- Page 5 Position Unit Near Window INSTALLATION AND ADJUSTMENT IMPORTANT! Before using the air conditioner, keep it upright for at least two hours. The four casters on the air conditioner base allow it to be easily pushed in an upright position across a level floor. There are handles on each side of the unit to allow it to be Air Exhaust Hose Installation lifted straight up if necessary.
- Page 6 NOTE: To cancel Timer settings press the Timer key twice in quick succession. The Hr You may use one of the supplied L brackets indicator will turn off. to secure the window closed (see figure to the right). Also, you may use the two supplied straight brackets The Timer can be set from 1 to 24 hours and the amount of time is adjustable by to secure the top side of the slider kit to the window, one-hour increments.
- Page 7 Continuous drainage Peotective Functions Unscrew the drain cap and remove the water Frost Protection - In Cool and Dry modes, if the temperature of the compressor becomes too low, the unit will automatically enter protection status. Once coil rises to plug from the drainage tube port in the middle a sufficient temperature, the unit will automatically revert to normal operation.
- Page 8 TROUBLESHOOTING To clean upper filter screen Remove Remote Control from storage slot If problems not listed in the table occur or recommended solutions do not work, contact in upper filter grille. a qualified technician for repair. Do not disassemble the air conditioner. Unqualified repair Insert fingertips beneath PULL tab at top of will cause injury to users or damage to property.
- Page 9 PL office: Gdańsk MANUEL DE L’UTILISATEUR Contactez-nous ! Climatiseur Portatif ES10115US-WH/ES10115CA-WH Ne retournez pas cet article. FR:cs.fr@costway.com Contactez notre service à la clientèle pour obtenir de l’aide. CE MANUEL CONTIENT DES INFORMATIONS IMPORTANTES SUR LA SÉCURITÉ. VEUILLEZ LE LIRE ET LE CONSERVER POUR TOUTE RÉFÉRENCE FUTURE.
- Page 10 CONTENU Consignes de Sécurité Caractéristiques et Composants Avant de Commencer Installation Réglage de Contrôle Instructions de Vidange Veuillez lire attentivement toutes les instructions. Maintenance Conservez les instructions pour vous y référer ultérieurement. Dépannage Vérifiez toutes les pièces et les accessoires. Lisez attentivement chaque étape et suivez l’ordre correct.
- Page 11 CONSIGNES DE SÉCURITÉ IMPORTANTES 16. Pour un bon fonctionnement, le climatiseur doit être placé sur une surface lisse et incombustible. Placez toujours ce climatiseur sur une surface plane à au moins 20" (50 cm) de tout mur ou objet. ATTENTION! Lors de l'utilisation d'appareils électriques, des précautions de sécurité de 17.
- Page 12 CONSERVEZ CES Le mode déshumidification combine le fonctionnement du compresseur et une faible vitesse du ventilateur pour réduire l'humidité dans les pièces humides. Gardez les INSTRUCTIONS portes et les fenêtres fermées pour une déshumidification efficace. La vitesse du ventilateur ne peut pas être modifiée lorsque l'unité est réglée pour déshumidifier. L'écran d'affichage n'affichera pas le pourcentage d'humidité...
- Page 13 Positionner l'unité près de la fenêtre INSTALLATION ET RÉGLAGE IMPORTANT! Avant d'utiliser le climatiseur, maintenez-le debout pendant au moins deux heures. Les quatre roulettes sur la base du climatiseur permettent de le pousser facilement en Installation du tuyau d'échappement d'air position verticale sur un sol plat.
- Page 14 REMARQUE : Pour annuler les réglages de la minuterie, appuyez deux fois rapidement sur la touche Vous pouvez utiliser l'un des supports en Minuterie. L'indicateur Hr s'éteindra. L fournis pour verrouiller la fenêtre fermée (voir la figure à La minuterie peut être réglée de 1 à 24 heures et la durée est réglable par droite).
- Page 15 Drainage continu Fonctions de protection Protection contre le gel -En modes Cool et Dry, si la température du compresseur Dévissez le bouchon de vidange et retirez le devient trop basse, l'unité entrera automatiquement en état de protection. Une fois bouchon d'eau de l'orifice du tube de vidange au que la bobine atteint une température suffisante, l'unité...
- Page 16 DÉPANNAGE Pour nettoyer le tamis supérieur du filtre Retirez la télécommande de l'emplacement Si des problèmes non répertoriés dans le tableau surviennent ou si les solutions de stockage n grille de filtre supérieure. recommandées ne fonctionnent pas, contactez un technicien qualifié pour la réparation. Insérez le bout des doigts sous la Ne démontez pas le climatiseur.
Need help?
Do you have a question about the ES10115US-WH and is the answer not in the manual?
Questions and answers