
Subscribe to Our Youtube Channel
Related Manuals for Dahua Technology DH-PFS4210-8GT-150


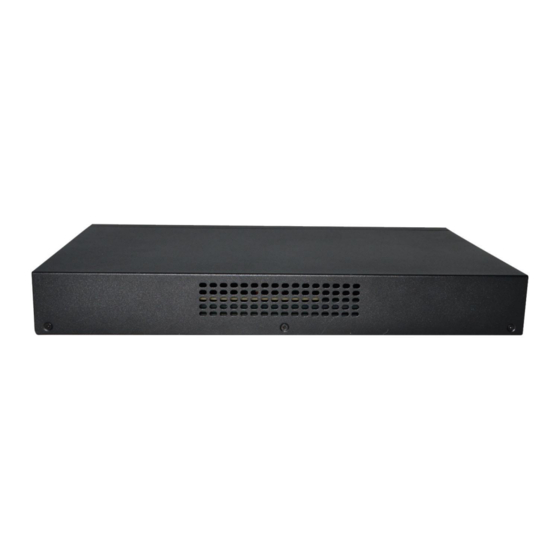
Summary of Contents for Dahua Technology DH-PFS4210-8GT-150
- Page 1 8-Port Gigabit + 2-Port Gigabit SFP L2 Managed PoE Switch User’s Manual V1.0.1 ZHEJIANG DAHUA VISION TECHNOLOGY CO., LTD.
-
Page 2: Foreword
General This user’s manual introduces the functions and operations of 8-Port Gigabit + 2-Port Gigabit SFP L2 Managed PoE Switch devices. Models DH-PFS4210-8GT-150 Safety Instructions The following categorized signal words with defined meaning might appear in the Manual. Signal Words... - Page 3 providing clear and visible identification to inform data subject the existence of surveillance area and providing related contact. About the Manual The Manual is for reference only. If there is inconsistency between the Manual and the actual product, the actual product shall govern. We are not liable for any loss caused by the operations that do not comply with the Manual.
-
Page 4: Important Safeguards And Warnings
Important Safeguards and Warnings Electrical safety All installation and operation here should conform to your local electrical safety codes. The product must be grounded to reduce the risk of electric shock. We assume no liability or responsibility for all the fires or electrical shock caused by ... -
Page 5: Table Of Contents
Table of Contents Foreword ..............................I Important Safeguards and Warnings ....................III Table of Contents ............................ IV 1 Introduction ............................1 1.1 Overview ............................1 1.2 Features ............................1 1.3 External Component Description ....................2 1.3.1 Front Panel ......................... 2 1.3.2 Rear Panel .......................... - Page 6 4.6 STP ............................. 38 4.6.1 MSTP Region ........................39 4.6.2 STP Bridge........................40 4.7 DHCP Relay ..........................42 4.7.1 DHCP Relay ........................43 4.7.2 Option82 ........................... 43 4.8 QoS ............................. 45 4.8.1 Queue Config ........................45 4.8.2 Mapping the Queue ......................46 4.9 Address Table ..........................
-
Page 7: Introduction
Introduction Overview The Switch is a new generation designed for high security and high performance network the second layer switch. With eight 10/100/1000Mbps self-adaption RJ45 port, and two 100/1000Mbps SFP ports, all ports support wire-speed forwarding, and provide you with larger network flexibility. -
Page 8: External Component Description
External Component Description 1.3.1 Front Panel The front panel of the Switch consists of AC power connector, one marker, 1 x Reset button, a series of LED indicators, 8 x 10/100/1000Mbps RJ-45 ports, 2 x SFP ports and 1x Console port as shown as below. -
Page 9: Rear Panel
Faceplate Status Indication Indicator Marker System not started System System is starting or the system indicator Blinking green starts successfully 10/100/10 The port is NOT connected. Solid green The port is connected at 1000Mbps. BASE-T adaptive Link/Act Solid orange The port is connected at 100/10Mbps Ethernet /Speed port... -
Page 10: Packing List
Packing List Before installing the Switch, make sure that the following the packing list is OK. If any part is lost and damaged, please contact your local agent immediately. In addition, make sure that you have the tools to install switches and cables by your hands. One PoE Web Smart Ethernet Switch ... -
Page 11: Installation And Connection
Installation and Connection This part describes how to install your PoE Ethernet Switch and make connections to it. Please read the following topics and perform the procedures in the order being presented. Installation Please follow the following instructions to avoid incorrect installation causing device damage and security threat. -
Page 12: Power On The Switch
Figure 2-1 Bracket installation Step 2 Use the screws provided with the equipment rack to mount the Switch on the rack and tighten it. Figure 2-2 Rack installation 2.1.3 Power on the Switch The Switch is powered on by the AC 100-240V 50/60Hz internal high-performance power supply. -
Page 13: Connect Switch To The Pd
Connect Switch to the PD 1-8 ports of the Switch have PoE power supply function, the maximum output power up to 30W each port, it can make PD devices, such as internet phone, network camera, and wireless access point work. You only need to connect the Switch PoE port directly connected to the PD port by network cable. -
Page 14: Log In The Switch
Log in the Switch Switch to End Node Use standard Cat.5/5e Ethernet cable (UTP/STP) to connect the Switch to end nodes as described below. Switch ports will automatically adjust to the characteristics (MDI/MDI-X, speed, duplex) of the device to which is connected. Figure 3-1 Connect PC to switch Log in the Switch... - Page 15 Figure 3-2 Login windows Step 5 Switching language to English. Enter the Username and Password (The factory default Username is admin and Password is admin123), and then click LOGIN to log in the Switch configuration window. Figure 3-3 Switch configuration window Log in the Switch 9...
-
Page 16: Switch Configuration
Switch Configuration The Web Smart Ethernet Switch Managed switch software provides rich layer 2 functionality for switches in your networks. This chapter describes how to use Web-based management interface (Web UI) of this switch to configure managed switch software features. In the Web UI, the left column shows the configuration menu. - Page 17 Parameter Description VLAN ID VLAN number VLAN Name VLAN mark Manage the IP address of the VLAN IP VLAN Device Name Switch name Switch’s management in use of Management VLAN the VLAN [Instructions] Native VLAN: as a Trunk, the mouth will belong to a Native VLAN. The so-called Native VLAN refers to UNTAG send or receive a message on the interface, and it is considered to belong to the VLAN.
- Page 18 Figure 4-3 VLAN setting I Figure 4-4 VLAN setting II Step 2 Click Next button, into other settings, such as: manage IP address set as 192.168.1.11, device name set as switch-123, default gateway with the DNS server set as 172.16.1.241. Switch Configuration 12...
-
Page 19: Port
Figure 4-5 Save Step 3 Use 192.168.1.11 to log in, set a new password for admin1234. Figure 4-6 Finish Port In the navigation bar, select PORT, you may conduct Basic config, Port aggregation, Port mirroring, Port limit and port isolation. Figure 4-7 Port 4.2.1 Basic Config... - Page 20 Figure 4-8 Basic settings I [Parameter Description] Parameter Description Select the current configuration Port port number Status Choose whether to close link port Flow Control Whether open flow control Can choose the following kinds: Auto Port Speed 10 M 100 M 1000 M Can choose the following kinds: Auto...
-
Page 21: Port Aggregation
[Configuration Example] Such as: The port is set to 10 M, half duplex, open flow control and cross line sequence and port state. Figure 4-9 Basic settings II 4.2.2 Port Aggregation In the navigation bar, select PORT > port aggregation, In order to expand the port bandwidth or achieve the bandwidth of the redundancy backup, the following picture: Figure 4-10 Port aggregation... -
Page 22: Port Mirroring
Such as: set the port 7, 8, for aggregation port 1, connect this aggregation port 1 to other switch aggregation port 1 to build switch links. Figure 4-11 Configuration example 4.2.3 Port Mirroring In the navigation bar, select PORT > port mirroring, Open port mirror feature, All packets on the source port are copied and forwarded to the destination port, Destination port is usually connected to a packet analyzer to analyze the source port, Multiple ports can be mirrored to a destination port, the following picture:... -
Page 23: Port Rate-Limit
The port of the aggregate port cannot be used as a destination port and the source port, destination port and source port cannot be the same. [Configuration Example] Such as: set a mirror group for port 3 regulatory port 4, 5, 6 on and out flow conditions. Figure 4-13 Configuration example 4.2.4 Port Rate-limit... -
Page 24: Storm Control
Parameter Description Output speed limit Set port output speed [Instructions] 1 Mbit/s = 1000 Kbit/s = 1000 / 8 KB/s = 125 KB/s. That is, the theoretical rate of 1M bandwidth is 125KB/s. [Configuration Example] Such as: the port 5 input rate is set to 6400 KB/s, the output rate is set to 3200 KB/s. Figure 4-15 Configuration example 4.2.5 Storm Control... -
Page 25: Port Isolation
Parameter Description Unicast Limit Storm suppression value of the unicast packets [Instructions] 1 Mbit/s = 1000 Kbit/s = 1000 / 8 KB/s = 125 KB/s. That is, the theoretical rate of 1M bandwidth is 125KB/s. [Configuration Example] Such as: should be forwarded to the port 1-8 of all kinds of packet forwarding rate is 5000 KB/s. Figure 4-17 Configuration example 4.2.6 Port Isolation... -
Page 26: Port Information
[Configuration Example] Such as: the port 3, 4, 5, and 6 ports isolated. Figure 4-19 Configuration example I Figure 4-20 Configuration example II 4.2.7 Port Information In the navigation bar, select PORT > Port Information, the following picture: Figure 4-21 Port information [Parameter Description] Parameter... -
Page 27: Vlan
Show port input and output streams information port connection status, belongs to VLAN. [Configuration Example] Enter port number 8 for the query. Figure 4-22 Configuration example VLAN In the navigation bar, select VLAN, you can manage the VLAN config, Trunk Settings and Hybrid Settings, the following picture: Figure 4-23 VLAN settings... -
Page 28: Access Port Settings
Figure 4-25 Configuration example 4.3.2 Access Port Settings In the navigation bar, select VLAN config > Access-port setting, can set port to Access port, the following picture: Figure 4-26 Access port settings [Parameter Description] Parameter Description Native VLAN Only set one [Instructions] Native VLAN: Refers to the default Access VLAN, must be the same as the end of the VLAN Native port, otherwise it can’t work. -
Page 29: Trunk-Port Setting
Figure 4-27 Configuration example I Figure 4-28 Configuration example II 4.3.3 Trunk-port Setting In the navigation bar, select VLAN config > trunk-port setting, can set port to Trunk port, the following picture: Figure 4-29 Trunk port [Parameter Description] Parameter Description Native VLAN Only set one Allowing VLAN... -
Page 30: Hybrid-Port Setting
PC1:192.168.1.122, port 8, access VLAN2 PC2:192.168.1.123, port 7, Trunk allowed VLAN 1-2 PC3:192.168.1.124, port 6, access VLAN1 (The default port belongs to VLAN1) Can let the PC2 PING PC1, cannot PING PC3 Figure 4-30 Configuration example I Figure 4-31 Configuration example II 4.3.4 Hybrid-port Setting In the navigation bar, select VLAN config >... - Page 31 Such as: create vlans 10, 20, VLAN sets the Native VLAN port 1 to 10, to tag VLAN for 10, 20, sets the Native VLAN port 2 to 20, to tag VLAN for 10, 20. Figure 4-33 Configuration example I Figure 4-34 Configuration example II Figure 4-35...
-
Page 32: Fault/Safety
Figure 4-36 Configuration example IV This system e0/1 and the receive system e0/2 PC can be exchanged, but when each data taken from a VLAN is different Data from the pc1, by inter0/1 pvid VLAN10 encapsulation VLAN10 labeled into switches, switch found system e0/2 allows 10 data through the VLAN, so the data is forwarded to the system e0/2, because the system e0/2 VLAN is untagged 10, then switches at this time to remove packet VLAN10 tag, in the form of ordinary package sent to pc2, pc1 - >... - Page 33 Figure 4-38 DHCP [Instructions] DHCP trusted port configuration, select the port as a trusted port. Prohibit DHCP for address, select the port and save, you can disable this feature for the port. Open DHCP attack prevention function, need to set the DHCP protective vlan simultaneously, other functions to take effect.
- Page 34 Figure 4-41 Set trusted router Figure 4-42 Set restricted ports Step 4 Verify source mac F0:DE:F1:12:98:D2, set server IP address to 192.168.1.110. Figure 4-43 Verify MAC address Step 5 Set option82 information. Figure 4-44 Set option82 information Switch Configuration 28...
- Page 35 Figure 4-45 IP address Step 6 Set port 7 for binding. Figure 4-46 Binding table 4.4.1.2 In the navigation bar, select Fault/safety > Anti attack > DOS, Open the anti DOS attack function, intercept Land attack packets, illegal TCP packets, to ensure that the device or server to provide normal service to legitimate users, the following picture: Figure 4-47 [Instructions]...
- Page 36 message through the port, thereby limiting the illegal use of network resources, improve the safety of the port, the following picture: Figure 4-49 IP source guard [Instructions] Add the port that is currently being used as a IP source protection enable port, the port will not be able to use.
- Page 37 Figure 4-51 Configuration example II 4.4.1.4 IP/Mac/Port In the navigation bar, select Fault/safety > Anti attack > IP/Mac/Port, automatically detect the port based IP address, MAC address of the mapping relationship, and then realize the function of a key binding, the following picture: Figure 4-52 IP/Mac/Port [Instructions]...
-
Page 38: Channel Detection
Figure 4-53 Configuration example I Figure 4-54 Configuration example II Figure 4-55 Configuration example IV Check the delete option. 4.4.2 Channel Detection 4.4.2.1 Ping In the navigation bar, select Fault/safety > Channel Detection > Ping. Use ping function to test internet connect and host whether to arrive. The following picture: Figure 4-56 Ping Switch Configuration 32... - Page 39 [Parameter Description] Parameter Description Fill in the IP address of the need Destination IP address to detect Timeout in Seconds Range of 1 to 10 Ping Count Testing number [Instructions] Use ping function to test internet connect and host whether to arrive. [Configuration Example] Such as: PING connects the IP address of the PC.
- Page 40 Such as: Tracert connect the IP address of the PC. Figure 4-59 Configuration example 4.4.2.3 Cable test In the navigation bar, select Fault/safety > Channel Detection > Cable Test, detect connection device status, the following picture: Figure 4-60 Cable test [Configuration Example] Switch Configuration 34...
-
Page 41: Acl
Figure 4-61 Configuration example 4.4.3 ACL In the navigation bar, select Fault/safety > ACL, be applied to port ACL rules and Settings to take effect in time. Figure 4-62 [Instruction] The ACL rules are sequenced, row in front of the match will be priority rule. Many, if the strategy items operating time is relatively longer. - Page 42 Figure 4-63 Configuration example I Figure 4-64 Configuration example II Figure 4-65 Configuration example III Figure 4-66 Configuration example IV Switch Configuration 36...
-
Page 43: Poe
Figure 4-67 Configuration example V In the navigation bar, select PoE, you can set the PoE Port Config configuration. Figure 4-68 4.5.1 PoE Port Config 4.5.1.1 Poe Port Config In the navigation bar, select POE > POE Port Config > Poe Port Config, you can set Poe Port, As follows. -
Page 44: Stp
[Parameter Description] Parameter Description port enabled You can enable or disable PoE function Configure port priority, when the load Power supply priority exceeds the maximum power POE, low priority port equipment will be dropped threshold You can specify threshold Port power You can configure max power of port [Configuration Example] Such as: The PoE function of port 8 can be enabled, the maximum Port power is 23 W,... -
Page 45: Mstp Region
Figure 4-72 4.6.1 MSTP Region In the navigation bar, select STP > MSTP Region, modify the domain and domain name, add instance is mapped to a VLAN. The following picture: Figure 4-73 MSTP region [Parameter Description] Parameter Description Region Name Configure the region name Revision Level Parameter configuration revision level... -
Page 46: Stp Bridge
Figure 4-74 Configuration example I Figure 4-75 Configuration example II 4.6.2 STP Bridge In the navigation bar, select STP > STP bridge, be related to bridge, port configuration, the following picture: Figure 4-76 STP bridge [Parameter Description] Parameter Description Instance Priority Whether open instance priority setting Instance ID Select the created instance id is configured... - Page 47 Parameter Description Priority setting bridge example, the default Bridge Priority instance bridge priority for 32768 Enable Whether to open the STP bridge function Mode The model is divided into: the STP, RSTP, MSTP Hello Time Switches sends bpdu in packet interval Ports are not yet received a message in the time, Max Age will initiate topology changes...
-
Page 48: Dhcp Relay
Figure 4-77 Configuration example I Figure 4-78 Configuration example II Step 2 Set MSTP has launched port configuration, select the created instance, set priority (port configuration is not online, on-line configuration will only take effect, can click on the view the current configuration button to view the configured completed). DHCP Relay In the navigation bar, select DHCP Relay, you can set to the DHCP relay and option82. -
Page 49: Dhcp Relay
Figure 4-79 DHCP relay 4.7.1 DHCP Relay In the navigation bar, select DHCP Relay > DHCP Relay. Open the DHCP relay function, set up and view the relay server IP address and its status. The following picture: Figure 4-80 Enable [Parameter Description] Parameter Description... - Page 50 Figure 4-82 Option82 [Parameter Description] Parameter Description the DHCP request message in the VLAN, VLAN ID value range is 1 – 4094. Circuit ID to populate the user custom Circuit Control content, scope of string length is 3 – 63. Configuration ASCII remote id string Proxy Remote value, the length of the range of 1 –...
-
Page 51: Qos
Figure 4-85 Configuration example III In the navigation bar, select QoS, you can set to the Remark, Queue Config and Mapping the Queue. Figure 4-86 4.8.1 Queue Config In the navigation bar, select QoS > Queue Setting, set up queue scheduling policy. The following picture: Figure 4-87 Queue setting... -
Page 52: Mapping The Queue
[Instruction] Queue 7 cannot for 0. [Configuration Example] Such as: set the scheduling strategy for WRR, weight value respectively, 10, 11, 12, 12, 14, 15, 16, 17. Figure 4-88 Configuration example 4.8.2 Mapping the Queue 4.8.2.1 COS Queue Map In the navigation bar, select QoS > Mapping the Queue > COS Queue Map. Service category can be mapped to the corresponding queue. - Page 53 Figure 4-90 Configuration example I Figure 4-91 Configuration example II 4.8.2.2 DSCP COS Map In the navigation bar, select QoS > Mapping the Queue > DSCP COS Map, Differential service can be mapped to the corresponding service categories. The following picture: Figure 4-92 DSCP COS map [Parameter Description]...
- Page 54 Cos priority is greater than the DSCP, DSCP priority is greater than the port. [Configuration Example] Such as: the DSCP value of 3, 12, 23 mapping to cos 5. Figure 4-93 Configuration example 4.8.2.3 Port COS Map In the navigation bar, select QoS > Mapping the Queue > Port COS Map, Port can be mapped to the corresponding service categories.
-
Page 55: Address Table
[Configuration Example] Such as: port 4, 5, 6 respectively cos4, cos5, cos6. Figure 4-95 Configuration example I Figure 4-96 Configuration example II Figure 4-97 Configuration example III Figure 4-98 Configuration example IV Address Table In the navigation bar, select Address Table, you can set to MAC Management, MAC Learning and Aging and MAC Filter. -
Page 56: Mac Management
Figure 4-99 MAC management 4.9.1 MAC Management In the navigation bar, select Address Table > MAC Management, you can add static Mac and delete Mac and view to the current of the Mac address table. The following picture: Figure 4-100 MAC management [Parameter Description] Parameter... -
Page 57: Mac Learning And Aging
Step 1 The port 6 Mac set to static Mac. Figure 4-101 Configuration example I Step 2 Clear port 6 static Mac addresses. Figure 4-102 Configuration example II 4.9.2 MAC Learning and Aging In the navigation bar, select Address Table > MAC Learning and Aging, Can be set up port Mac address study limit and Mac address aging time. -
Page 58: Mac Filter
[Parameter Description] Parameter Description Mac address Range 0-8191,default 8191 Mac address study limit Default 300 [Configuration Example] Step 1 Setting port 2, 3, 4, 5 address study limit for 2000. Figure 4-104 Configuration example I Step 2 Will be dropped or learn the Mac address of the port equipment after 2 minutes disappear automatically from the Mac address table. -
Page 59: Snmp
Figure 4-107 Configuration example I 4.10 SNMP In the navigation bar, select SNMP, you can set to the Snmp config and Rmon config. Figure 4-108 SNMP 4.10.1 SNMP Config 4.10.1.1 SNMP Config In the navigation bar, select Snmp > Snmp Config, you can Snmp function enable. The following picture: Figure 4-109 SNMP Config... - Page 60 Figure 4-110 Configuration example 4.10.1.2 Community Config In the navigation bar, select Snmp > Snmp Config > Community Config, Can specify group access. The following picture: Figure 4-111 Community Config [Parameter Description] Parameter Description Community string, is equal to the NMS and group Snmp agent communication between the password.
- Page 61 Figure 4-112 Configuration example 4.10.1.3 View Config In the navigation bar, select Snmp > Snmp Config > View Config. Set the view the rules to allow or disable access to some of the MIB object. The following picture: Figure 4-113 View Config [Parameter Description] Parameter...
- Page 62 Figure 4-114 Configuration example I Figure 4-115 Configuration example II 4.10.1.4 Group Config In the navigation bar, select Snmp > Snmp Config > Group Config, setting Snmp group. The following picture: Figure 4-116 Group Config [Parameter Description] Parameter Description Group name Group name Attestation not only encryption: this group of users transmission of the message need to...
- Page 63 [Instruction] Before the cap on the number set of configuration of 8, the new group needs a new view to create a group. [Configuration Example] Such as: firstly, new view 123, then new group of goup1. Figure 4-117 Configuration example I Figure 4-118 Configuration example II 4.10.1.5...
- Page 64 Parameter Description Both authentication and encryption: this group of users needs to verify the news of transmission and transmission of data needs to be kept secret. Specified authentication Authentication Mode protocol or SHA authentication protocol Authentication Password Range 8-10 Specified using AES encryption protocol Encrypt Mode or DES encryption protocol Group Name...
-
Page 65: Rmon Config
Figure 4-121 Trap Config [Parameter Description] Parameter Description Destination IP address Snmp host ipv4 address Security name Snmp user name Version V1,V2,V3 Specified using AES encryption Security mode protocol or DES encryption protocol Group name User group name [Instruction] The Trap cap on the number configuration of 8, you can configure a number of different Snmp Trap host used to receive messages. - Page 66 Figure 4-123 Statistics group [Parameter Description] Parameter Description The index number, the value Index range of statistical information table is 1 – 65535. Interface Name To monitor the source port Set the table creator, range: 1 – owner 30 characters of a string. [Instruction] At the time of configuration Rmon Snmp functions must be open;...
- Page 67 4.10.2.2 History Group In the navigation bar, select Snmp > Rmon Config > History Group. Record the history of an Ethernet interface information. The following picture: Figure 4-126 History group [Parameter Description] Parameter Description Historical control table item index Index number, value range is 1 –...
- Page 68 Figure 4-127 Configuration example 4.10.2.3 Event Group In the navigation bar, select Snmp > Rmon Config > Event Group. The way in which define events trigger and record them. The following picture: Figure 4-128 Event group [Parameter Description] Parameter Description The index number, the value range of the Index event table is 1 –...
- Page 69 Figure 4-129 Configuration example 4.10.2.4 Alarm Group In the navigation bar, select Snmp > Rmon Config > Alarm Group to define alarm group. The following picture: Figure 4-130 Alarm group [Parameter Description] Parameter Description The alarm list items index number, Index value range is 1 –...
-
Page 70: Lacp
Parameter Description Sampling type change value sampling, extraction of the arrival of the Last Sample Count sampling time is variable in the change of the sampling interval value. Set the upper limit the Parameter Upper Alarm threshold Limit values. Lower Alarm threshold Limit Set the lower limit Parameter values. Upper Alarm/Lower Alarm Upper/lower limit reached, for each threshold Limit Events... -
Page 71: Lacp Config
Figure 4-132 LACP 4.11.1 LACP Config In the navigation bar, select LACP > Lacp Config. The following picture: Figure 4-133 LACP settings 4.11.1.1 LACP Setting In the navigation bar, select LACP > Lacp Config > LACP Setting. The following picture: Switch Configuration 65... - Page 72 Figure 4-134 LACP setting LACP status Figure 4-135 LACP status Open or close LACP. LACP public parameter settings Figure 4-136 LACP public parameter settings You can set to System settings, range 1 – 65535. LACP activation port parameter settings Switch Configuration 66...
-
Page 73: System
Figure 4-137 LACP activation port parameter settings Port priority: You can set to Port priority. Rang 1-65535 Aggregate port number: You can select the Aggregate port number. Aggregate model: You can select the Aggregate port number. Include active and passive. 4.11.1.2 LACP Display In the navigation bar, select LACP >... -
Page 74: System Config
4.12.1 System Config 4.12.1.1 System Settings In the navigation bar, select SYSTEM > System Config > System Settings, Basic information set switch. The following picture: Figure 4-140 System settings [Parameter Description] Parameter Description Device Name Switch name Management VLAN Switches use VLAN management Management IP Switch IP address management Don't use more than login timeout... - Page 75 Figure 4-141 Configuration example I Figure 4-142 Configuration example II Figure 4-143 Configuration example III Step 2 Insert the PC interface 9 or 10 ports, set up the management IP for 192.168.2.12, device name is yoyo, timeout for 20 minutes, Jumbo frame for 5000. Switch Configuration 69...
- Page 76 Figure 4-144 Configuration example IV Step 3 Use 192.168.2.12 logging in, sets the system time. Figure 4-145 Configuration example V 4.12.1.2 System Restart In the navigation bar, select SYSTEM > System Config > System Restart, equipment can be restarted. The following picture: Figure 4-146 System restart Switch Configuration 70...
- Page 77 [Instruction] Click the button to restart the switch. The restart process may take 1 minute. Please wait patiently. The page will be refreshed automatically after device restart. [Configuration Example] Such as: click restart button. Figure 4-147 Configuration example 4.12.1.3 EEE Enable In the navigation bar, select SYSTEM >...
- Page 78 Confirm Password: 3456 [Configuration Example] Such as: amend the password to 1234. Figure 4-150 Configuration example 4.12.1.5 SSH Login In the navigation bar, select SYSTEM > System Config > SSH Login, SSH open. The following picture: Figure 4-151 SSH login [Instruction] Configure the user to be able to switch through the SSH login device.
- Page 79 Figure 4-153 Telnet login [Instruction] Configure the user to be able to switch through the Telnet login device. [Configuration Example] Such as: Telnet open, PC Telnet function open, you can log in. Figure 4-154 Configuration example 4.12.1.7 System log In the navigation bar, select SYSTEM > Password Change > System Log, to view the log and set up the log server.
-
Page 80: System Upgrade
Parameter Description Enter the required query of Keyword characters [Instruction] Open log switch, set up the syslog server, system log will automatically be pushed to the server. [Configuration Example] Step 1 The error log information in 192.168.1.110 pushed to the server. Figure 4-156 Log config Step 2... -
Page 81: Config Management
Figure 4-158 System upgrade [Instruction] Step 1 Please confirm that the upgraded version of the same model and the same model. Step 2 In the upgrade process, you may encounter flash to make the page is temporarily unable to respond to the page, this time cannot power off or restart the device, until prompted to upgrade successfully! 4.12.3 Config Management 4.12.3.1... - Page 82 Figure 4-160 Configuration example I Step 2 Import configuration. Figure 4-161 Configuration example II Figure 4-162 Configuration example III Step 3 Backup. Switch Configuration 76...
- Page 83 Figure 4-163 Configuration example IV 4.12.3.2 Restore Config In the navigation bar, select SYSTEM > Config Management > Restore Config, and you can configure backup file. The following picture: Figure 4-164 Restore Config [Instruction] Operating this page should be in the current configuration page first, the backup file. [Configuration Example] Such as: restore backup.
-
Page 84: Config Save
Figure 4-166 Factory reset [Instruction] Restore the factory configuration, will delete all the current configuration. If you have any useful configuration, the current system can lead the factory configuration again after the current configuration. [Configuration Example] Such as: restore configuration can be the guide before they leave the current configuration. Figure 4-167 Configuration example 4.12.4 Config Save... -
Page 85: Info Collect
Figure 4-170 Administrator settings [Instruction] Only the admin of the super administrator can access this page is used to manage users and visitors. The user can log in the Web management system of equipment for routine maintenance. In addition to the admin and user, you can add up to five users. Ordinary users can only access information system home page. -
Page 86: Appendix 1 Cybersecurity Recommendations
Appendix 1 Cybersecurity Recommendations Cybersecurity is more than just a buzzword: it’s something that pertains to every device that is connected to the internet. IP video surveillance is not immune to cyber risks, but taking basic steps toward protecting and strengthening networks and networked appliances will make them less susceptible to attacks. - Page 87 Change Default HTTP and Other Service Ports We suggest you to change default HTTP and other service ports into any set of numbers between 1024~65535, reducing the risk of outsiders being able to guess which ports you are using. Enable HTTPS We suggest you to enable HTTPS, so that you visit Web service through a secure communication channel.
- Page 88 The network should be partitioned and isolated according to the actual network needs. If there are no communication requirements between two sub networks, it is suggested to use VLAN, network GAP and other technologies to partition the network, so as to achieve the network isolation effect. ...
Need help?
Do you have a question about the DH-PFS4210-8GT-150 and is the answer not in the manual?
Questions and answers