
Related Manuals for Prusa Research ORIGINAL i3 MK3S+ KIT


Summary of Contents for Prusa Research ORIGINAL i3 MK3S+ KIT
- Page 1 3D PRINTING HANDBOOK USER MANUAL FOR 3D PRINTERS: – ORIGINAL PRUSA i3 MK3S+ KIT – ORIGINAL PRUSA i3 MK3S+ Prusa Research a.s. Partyzánská 188/7A 170 00 Praha www.prusa3d.com info@prusa3d.com...
- Page 2 PRUSAMENT® are registered trademarks of Prusa Development a.s. in the United States and the European Union used under the license by Prusa Research a.s. | JOSEF PRUSA, ORIGINAL PRUSA, and PRUSAMENT are registered trademarks (or registration pending) of Prusa Development a.s. in Australia, New Zealand, Israel, Mexico, South Korea, Turkey, Ukraine, Russia, Kazachstan, Switzerland, China, Columbia, Uzbekistan, Philippines, and Norway used under the license by Prusa Research a.s.
- Page 3 About the author Josef Prusa (born Feb 23 , 1990) became interested in the 3D printing phenomenon before joining Prague’s University of Economics in 2009 - at first, it was a hobby, a new technology open to changes and improvements. The hobby soon became a passion and Josef grew into one of the leading developers of Adrien Bowyer’s international, open-source, RepRap project.
-
Page 4: Table Of Contents
Table of contents 2 Product details 3 Introduction - Glossary, Disclaimer, Safety instructions, Licenses 4 Original Prusa i3 MK3S+ printer 5 Original Prusa i3 MK3S+ printer kit 6 First steps 6.1 Printer unpacking and proper handling 6.2 Printer assembly 6.3 Setup before printing 6.3.1 Calibration flow and wizard 6.3.2 Preparation of the spring steel sheet 6.3.3 Increasing the adhesion... - Page 5 8.3 PID tuning for Hotend (Optional) 8.4 PINDA probe calibration / Temp. calibration (Experimental/Optional) 8.5 View XYZ calibration details (Optional) 8.6 Linear Advance 8.7 Extruder info 8.8 Sensor info 8.9 Display brightness 9 Printer drivers 10 Creating and printing your own models 10.1 Where can you get the 3D models? 10.1.1 PrusaPrinters 10.1.2 Bundled 3D models...
-
Page 6: Product Details
2 Product details Title: Original Prusa i3 MK3S+ / Original Prusa i3 MK3S+ (kit), Filament: 1.75 mm Manufacturer: Prusa Research a.s., Partyzánská 188/7A, Prague, 170 00, Czech Republic E-mail: info@prusa3d.com EEE group: 3 (IT and/or telecommunication equipment), Device use: indoor only Power supply: 90-135 VAC, 3.6 A / 180-264 VAC, 1.8 A (50-60 Hz) - Page 7 the contents of the Manual. We cannot control the conditions in which you assemble the Original Prusa i3. For this, and other reasons, we do not assume responsibility, and expressly disclaim liability for loss, injuries, damage, or expense arising out of, or in any way connected with, the assembly, handling, storage, use or disposal of the product.
-
Page 8: Original Prusa I3 Mk3S+ Printer
4 Original Prusa i3 MK3S+ printer Unlike the printer kit, the printer comes completely assembled and almost ready to print. After plugging in, and running the necessary calibration, you can print a 3D object in a matter of minutes after unpacking the printer. Keep in mind, you can use our support email or live chat when you purchase the assembled printer. -
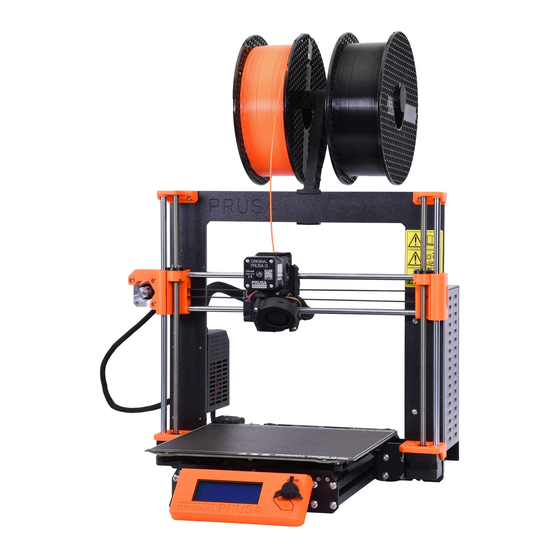
Page 9: Original Prusa I3 Mk3S+ Printer Kit
5 Original Prusa i3 MK3S+ printer kit Original Prusa i3 MK3S+ kit is shown in pict. 2. Detailed information and assembly instructions can be found in chapter 6.2 Printer assembly. Keep in mind, you can use our support email or live chat when you purchase the kit. Do not hesitate to write to us if you need any advice or help. -
Page 10: First Steps
6 First steps 6.1 Printer unpacking and proper handling While holding the upper frame, take the printer and pull it out from the box. Be careful when handling the printer not to damage the electronics and thus the proper printer functionality. Any time you move the printer, always hold the upper frame with the heatbed horizontal to the ground, pointing away from you as pictured in pict. -
Page 11: Printer Assembly
properly. No need to apply this lubricant during the first assembly of the kit, all parts are greased by the manufacturer. Tools and Spare parts - Includes needle-nose pliers, a Phillips screwdriver, Allen keys and a package of the small spare parts (fasteners, magnets, PTFE tube). IPA pads - Several IPA pads to clean your print sheet. -
Page 12: Calibration Flow And Wizard
6.3.1 Calibration flow and wizard With the first start-up of your freshly-assembled printer, it will guide you through all the tests and calibrations you need to do to get started printing. The Wizard can be also started manually from LCD menu - Calibration - Wizard. Do not forget to read chapter 6.3.2 Preparation of the spring steel sheet before running the Wizard. -
Page 13: Preparation Of The Spring Steel Sheet
It follows the calibration flow and helps you with the following steps: ● Selftest - Chapter 6.3.4 ● Calibrate XYZ - Chapter 6.3.5 ● Loading the filament - Chapter 6.3.8 ● First layer calibration - Chapter 6.3.9 It is not mandatory to use it, and you can cancel the Wizard at the beginning. Then you should just follow the calibration flow manually. - Page 14 Pict. 5 - HeatBed MK52 base and powder coated steel sheet surface To achieve the best adhesion on the new surface, it is important to keep the surface clean. Cleaning the surface is very easy. The best option is Isopropyl alcohol available in drugstores which is the best for ABS, PLA, and others.
- Page 15 Pict. 6 - Steel print sheets - smooth, satin and textured powder-coated PEI sheet All original print surfaces by Prusa Research are coated from both sides. Pict. 7 - Smooth PEI sheet (left), Satin powder coated sheet (middle), textured powder...
- Page 16 6.3.2.1 Double-sided textured PEI powder-coated spring steel sheet Scratchproof, hard to damage PLA prints with a small contact area may need a brim Transfers texture to prints PLA prints with a huge footprint (one side 18cm+) may warp Live Adjust Z value needs to be More forgiving Live Adjust Z setting changed if you switch sheets No need for Windex with PETG...
- Page 17 6.3.2.2 Spring steel sheet with smooth double-sided PEI Perfect for PLA Do not clean with IPA before PETG Release agent might be necessary Great adhesion with almost all You must apply glue stick when materials printing Flex Live Adjust Z value needs to be Smooth bottom of prints changed if you switch sheets Tiny details will stick great...
-
Page 18: Increasing The Adhesion
Polycarbonate - prints better on satin (compared to smooth and textured sheets) - when printing with PC often, glue stick layer is recommended to prevent possible damage to the sheet. Never clean the satin powder coated sheet with acetone! Doing so will create microfractures in the PEI coating and cause the surface to deteriorate. - Page 19 This routine consists of a series of tests. The progress and results of each step are displayed on the LCD. In case errors are found, the selftest is interrupted and the reason for the error is shown to guide users in troubleshooting. The selftest is just a diagnostic tool, the printer will still attempt to print even after the test fails.
-
Page 20: Calibrate Xyz (Kit Only)
Endstops - Wiring error - Z: Check the proper cabling of the SuperPINDA probe. Routine indicates the SuperPINDA probe has a malfunction or is not properly responding. Check for the proper connection in the EINSY electronics. Endstop not hit - Motor Z: Check if the print head can be moved all the way down the Z-axis to trigger the SuperPINDA probe over the bed. - Page 21 Place a sheet of a regular office paper (for example, the checklist shipped with every order) and hold it under the nozzle during the first round (first 4 points being checked) of calibration. If the nozzle catches on the paper during the process, power off the printer and lower the SuperPINDA probe slightly.
- Page 22 6.3.5.1 Calibrate XYZ error messages and resolution (kit only) 1) XYZ calibration failed. Bed calibration point was not found. The calibration routine did not find a bed sensor point. The printer stops close to the bed point, which it failed to detect. Please verify that the printer is assembled correctly, that all axes move freely, the pulleys do not slip, and the print nozzle is clean.
-
Page 23: Calibrate Z
memory. During normal bed leveling, it is expected that the SuperPINDA probe triggers no more than 1 mm from the reference value, therefore the nozzle is not allowed to move more than 1 mm below the reference value during the bed calibration. -
Page 24: Mesh Bed Leveling
6.3.7 Mesh bed leveling Mesh bed leveling can be found in LCD Menu - Calibration. This procedure is performed before every print. It is also the same procedure that happens in the second round of XYZ calibration. The SuperPINDA probe goes through a number of points in a grid pattern spread across the sheet plate (whether it is a powder coated or smooth PEI does not matter) and measures the distance to the sheet. -
Page 25: Loading The Filament Into The Extruder
6.3.8 Loading the filament into the extruder Before you can load the filament, the printer must be preheated for the correct filament type. If you have the filament sensor or autoloading disabled in the settings, you can manually start the loading process from the LCD menu. 1. -
Page 26: First Layer Calibration (Kit Only)
pause, the print head will go out of the print area, unload the old filament, and the LCD will guide you on what to do. You can even insert filament of a different color and make your prints more colorful. Check out chapter 11.3 Printing in color with ColorPrint to find out how to make more intricate color models. - Page 27 Pict. 10 - How to tune the nozzle height live during the test print. Note: -0.640 mm is only for illustration. Your setting will be different! Observe the line which is being extruded on the print surface. A new menu will automatically show up where you can tune the nozzle height in real time by turning the knob.
- Page 28 Pict. 11 - The properly-tuned first layer When printing the extruder motor can reach up to 55°C, that is completely fine, they are designed to run up to 100 °C. 6.3.9.1 Bed level correction (kit only) Bed level correction is an advanced feature that is designed to allow advanced users to correct for the slightest imperfections in the first layer.
-
Page 29: Fine Tuning The First Layer
6.3.10 Fine tuning the first layer 6.3.10.1 Print Prusa logo After finishing the calibration g-code, it is a good idea to print a simple object. The Prusa logo from the supplied SD card is a great example. The Live adjust Z function (described in 6.3.9. -
Page 30: Printing
7 Printing Make sure that the nozzle and the bed are heated to the desired temperature. If you forget to preheat the printing nozzle and the bed before printing, the printer will automatically check the temperatures of the nozzle and the bed; printing will start when the desired temperature is reached - that can take several minutes. -
Page 31: Printer Control
If the prints still do not want to get loose or you need to bend the sheet too much (which you should not do), try to bend the sheet inwards. 7.2 Printer Control There are two ways to control the printer. You can use the LCD panel integrated with the printer, or you can connect your computer via the USB cable. -
Page 32: Print Statistics
By single pressing the control button on the information screen, you enter the main menu. The reset button is placed directly under the control knob. Pressing the reset button equates to quickly toggling the power switch. It is useful when the printer exhibits weird behavior or you see a failed print that requires immediate cancellation. -
Page 33: Normal Vs. Stealth Mode
7.2.5 Normal vs. Stealth mode The printer offers two print modes. Normal mode is required for the detection of lost steps (shifted layers) while still being quieter than silent mode on MK2/S. The second is called Stealth mode and utilizes Trinamic StealthChop technology, making the printer almost inaudible with the print cooling fan being the noisiest part of the printer. -
Page 34: Sd Card Sorting
7.2.7 SD card sorting The list of the files on the SD card can be sorted; you can change the sorting type in LCD - Settings - Sort: [Type] you can select to sort by name, by date or no sorting. The best is by time where the newest files will be shown on top. -
Page 35: Lcd Layout
7.2.9 LCD layout Items not mentioned below are not used for the common print setup - you should not change any of the unmentioned items unless you are absolutely sure what you are doing. ❏ Info screen ❏ Live adjust Z (during the printing process only) ❏... - Page 36 ❏ Nozzle - warn / strict / none ❏ Model - warn / strict / none ❏ Firmware - warn / strict / none ❏ FS Action - Pause / Continue ❏ Fsensor Detection ❏ Mesh bed leveling ❏ Mesh 3x3 / 7x7 ❏...
-
Page 37: Print Speed Versus Print Quality
7.2.10 Print speed versus print quality Printing a small object takes a few minutes, but larger models are more time-consuming. There are prints that take dozens of hours to complete. The overall printing time can be changed using various methods. The first way is to change the layer height in PrusaSlicer using the Print settings option in the upper right corner. -
Page 38: Usb Cable And Pronterface
If the model shows a lower quality than desired, you can decrease the printing speed - turn the LCD-knob counterclockwise. The minimum usable printing speed is around 20 % of the nominal speed. 7.2.11 USB cable and Pronterface We strongly recommend using the LCD panel / SD card while printing on the Original Prusa i3 MK3S+ - Pronterface doesn’t support all functions of the new firmware (e.g. -
Page 39: Power Panic
up immediately. Always check that the temperatures set in Pronterface are correct according to our material guide! ● You can check the actual temperatures of the nozzle and the bed in Pronterface. ● When the model is loaded, the right column shows the estimated print duration: Estimated duration (pessimistic) Pict. -
Page 40: Crash Detection
position and lift the print head away from the print. In case of a very short power failure, the printer will attempt to continue printing immediately without waiting for user interaction. The printer can recover from consecutive power outages or even very short power outages (<50 ms). -
Page 41: Safety Timer
7.2.16 Safety timer This feature turns off the nozzle and bed heaters if the printer is idle for more than 30 minutes. 7.2.17 Beeper settings There are 4 levels of acoustic signalization: Loud, Once, Silent and Assist. The user is able to choose between each level in the printer's LCD Menu ->... -
Page 42: Printer Addons
7.3 Printer addons 7.3.1 Different nozzles You have to use proper preset settings for different nozzles in PrusaSlicer. Please, check out how to change the nozzle in section 13.6 Replacing / changing the nozzle. Pict. 22 - Different nozzle sizes have big impact on print speed 7.3.1.1 0.6 and 0.8 nozzles by E3D E3D, a UK-based company, that supplies hotends for the Original Prusa i3 MK3S+, has a whole ecosystem of upgrades and addons. -
Page 43: Original Prusa Multi Material Upgrade 2S
7.3.1.3 Hardened steel nozzle by E3D Hardened steel nozzles are a must for highly abrasive materials. Regular brass nozzles will degrade very quickly and lose their properties. Most of the abrasive materials are composites, plastics with additives. Some examples are ColorFabb XT CF20, ColorFabb Bronzefill, ColorFabb Brassfill and some glow-in-the-dark filaments. -
Page 44: Connecting Raspberry Pi Zero W
Pict. 23 - Multi Material Upgrade 2S mounted on the Original Prusa i3 MK3S+ 7.3.3 Connecting Raspberry Pi Zero W Raspberry Pi Zero W can be connected to the accessory header of the printer motherboard (EINSY) which will provide power and a serial data line for communication. After the connection, you can run applications like OctoPrint (octoprint.org) or Repetier Server (www.repetier-server.com/) to control the printer via a web browser interface. -
Page 45: Advanced Calibration
8 Advanced Calibration Additional calibration tools and settings for advanced users are available, but they are entirely optional and some of them are even experimental. 8.1 Steel sheet profiles The Smooth PEI sheet, Satin powder coated sheet and the Textured PEI powder coated sheet all have their advantages, as explained in 6.3.2 Preparation of spring steel sheet. -
Page 46: Pinda Probe Calibration / Temp. Calibration (Experimental/Optional)
the nozzle will heat up to the set temperature in 5 cycles. During the cycles it is mastering the amount of power needed to reach the temperature and maintain it. Do not touch the nozzle during this process until the process is fully finished as it will reach high temperatures! Be aware that PID tuning is not a solution to all of the temperature fluctuation issues. -
Page 47: Linear Advance
Pict. 24 - Distance of the front calibration point from the axis start. Pressing the button will get you to the 2nd screen. This screen will identify how far you are from the perfect perpendicularity. It is measuring the skew of your X/Y axis. Up to 0.25°... -
Page 48: Display Brightness
FINDA - [0, 1, N/A] Induction sensor used on the MMU unit selector. Value 1 means that the presence of filament is detected. If MMU2S is not connected, the status value is N/A. IR - [0, 1] Infrared filament sensor placed on the extruder body. Value 0 means that filament is not detected. -
Page 49: Prusaprinters
3D models are generally free to download under the Creative Commons - Attribution - Non Commercial (models cannot be used commercially, credit the author when you share the model). We have selected the most interesting sites with high-quality models: https://www.prusaprinters.org/ http://www.thingiverse.com/ https://www.myminifactory.com/ https://pinshape.com/... -
Page 50: Modeling With 3D Printing In Mind
Another popular tool for creating models is Fusion 360 (https://www.autodesk.com/products/fusion-360/) for PC, Mac and iPad. The website provides a quick guide along with detailed video tutorials so it is an ideal choice for novice enthusiasts. There is a great deal of 3D programs - free or paid - your choice depends more on your personal taste and preferences. -
Page 51: Fillet Vs Chamfer
10.3.2 Fillet vs chamfer If oriented towards the print bed, fillets create a very steep overhang, which negatively affects the surface of the object. For this reason, use chamfer instead if perfect part finish is the priority. Pict. 28 - Fillet (left) vs chamfer (right) 10.3.3 Thin walls and minimum feature size Another limitation is the nozzle diameter. -
Page 52: Tolerances
Pict. 29 - A sphere printed in two seperate parts glued together 10.3.5 Tolerances When you design multiple parts that are supposed to fit into each other, you have to add a small tolerance (a gap). For example, if you want a cylinder to fit inside a circular hole, the cylinder’s diameter needs to be at least 0,1 mm smaller. -
Page 53: Prusaslicer
11.1 PrusaSlicer As the name suggests, PrusaSlicer is our own in house developed slicer based on the open-source project Slic3r. It has many useful features such as: Ready to print, auto-updating profiles for over 3 dozen filaments Variable layer height Custom supports and modifier meshes Differential print settings Firmware flasher... -
Page 54: Printing Of Non-Standard Models
11.2 Printing of non-standard models PrusaSlicer has built-in tools for printing non-standard models such as models with overhangs and/or models larger than the printing bed. 11.2.1 Printing with support material If you print an object with a gradient lower than 45°, the resulting overhang would be preventing the object to be printed correctly. - Page 55 The in-depth and up-to-date documentation of the PrusaSlicer, including a glossary and advanced tips, can be found at help.prusa3d.com/prusaslicer You can also change the size of a model along one of the axes by dragging the corresponding gizmo handles. Alternatively, you can use the object manipulation window in the bottom right corner to type in an exact scale value.
-
Page 56: Print In Color With Colorprint
11.3 Print in color with ColorPrint There is a simple way to create layer-based multi-colored 3D prints either directly in PrusaSlicer or with our simple online ColorPrint app. Pict. 34 - Multicolored object printed with ColorPrint Color change in PrusaSlicer 1. - Page 57 Color change using the ColorPrint web app 1. First of all, you need to prepare regular G-code with common print and filament settings. Save the file. 2. Then go to blog.prusaprinters.org/color-print/ 3. Drag the G-code to the frame and click on Add change button. 4.
-
Page 58: Materials
12 Materials Materials in this chapter are sorted from the most to the least commonly used. If you’re new to 3D printing, your first filament should definitely be PLA. Only when you are limited by some of PLA’s disadvantages, it’s time to try other filaments like PETG or ASA. Other materials listed here are very specific to a particular application. - Page 59 only soluble in chemicals like chloroform or hot benzene. So when connecting multiple pieces, you’re better off using superglue or acetone. ● Nozzle temperature: 215 °C ● Bed temperature: 50 - 60 °C ● Heatbed: Make sure the surface is clean, as described in 6.3.2 Preparation of spring steel sheet 12.2 PET/PETG...
- Page 60 ● Nozzle temperature: 240 °C ● Bed temperature: 80 - 100 °C ● Heatbed: Make sure the surface is clean, as described in 6.3.2 Preparation of spring steel sheet chapter (extra important with PETG, risk of damage to the Smooth PEI sheet if treated incorrectly) 12.3 ASA/ABS ASA and ABS are very similar materials.
- Page 61 ● Nozzle temperature: 245 - 265 °C ● Bed temperature: 90 - 110 °C. (a larger object requires a higher temperature) ● Heatbed: Make sure the surface is clean, as described in 6.3.2 Preparation of spring steel sheet chapter. Apply a thin layer of glue stick when using the Textured PEI powder coated sheet.
- Page 62 12.5 Flex Flex is a very strong and elastic material. In many cases, classic hard plastics may not be suitable for printing a specific model. Whether you are printing a phone cover, an action camera case, or an RC car wheel, it is better to use a flexible material. Before you print from Flex, clean the nozzle from any previous material.
- Page 63 ● Nozzle temperature: 255 - 275 °C ● Bed temperature: 70 - 90 °C (a larger object requires a higher temperature) ● Heatbed: Make sure the surface is clean, as described in 6.3.2 Preparation of spring steel sheet chapter. Apply a thin layer of glue stick when using the Smooth PEI sheet.
- Page 64 ● Heatbed: Make sure the surface is clean, as described in 6.3.2 Preparation of spring steel sheet chapter. Apply a thin layer of glue stick when using the Smooth PEI sheet. 12.9 HT (ColorFabb) HT filament, Amphora copolyester is suitable for demanding users who require durability and high thermal resistance of the material up to 100 °...
- Page 65 ● Bed temperature: 50 - 70 °C (a larger object requires a higher temperature) ● Heatbed: Make sure the surface is clean, as described in 6.3.2 Preparation of spring steel sheet chapter. 12.11 HIPS HIPS is most commonly used as a support material in conjunction with ASA or ABS. HIPS material dissolves with lemonesol and leaves a smooth print with no marks after removing the supports.
- Page 66 12.13 nGen NGen was developed by Eastman Chemical Company and colorFabb. It is very similar to classic PETG. It does not contain styrene. Advantages Disadvantages Smooth surface Brittle Good layer adhesion Slight warping ● Nozzle temperature: 240 °C ● Bed temperature: 80 - 100 °C (a larger object requires a higher temperature) ●...
-
Page 67: Creating Profiles For New Materials
12.15 T-Glase (Taulman) T-Glase is a high-strength printing material. It’s temperature resistant up to 78 °C. Small shrinkage allows for printing of large objects. Advantages Disadvantages Great layer adhesion Higher price Strong Minimal warping Odorless ● Nozzle temperature: 230 - 240 °C ●... -
Page 68: Faq - Printer Maintenance And Print Issues
13 FAQ - Printer maintenance and print issues 13.1 Regular maintenance 13.1.1 Bearings Every couple hundred hours, the smooth rods should be cleaned with a paper towel. Then look for the white tube in the package and apply a little bit of the included lubricant on the smooth rods and move the axis back and forth a couple of times. -
Page 69: Print Surface Preparation
Pict. 37 - Fan error You can turn off the monitoring in LCD menu - Settings - Check fans for example if you replaced one of the fans with a replacement not supporting RPM sensing. 13.1.3 Extruder drive gear The Bondtech Extruder gears on the extruder motor shaft can have build-up of filament shavings in the grooves and cause under-extrusion. -
Page 70: Filament Sensor
13.3 Filament sensor The new mechanical IR based sensor is more reliable than the optical filament sensor in the previous version Original Prusa i3 MK3. The filament sensor can detect running out of filament and is used for filament AutoLoad. 13.3.1 Running out of filament Running out of filament will no longer cause a print failure. -
Page 71: Clogged / Jammed Extruder
13.3.2.2 Incorrectly seated IR sensor Filament sensor should be seated as depicted in the picture above. For detailed information, please see the assembly manual. 13.3.2.3 Dust on the sensor - how to clean This is not a common cause, but as a last measure, try to unscrew the filament cover and filament sensor itself. -
Page 72: Nozzle Cleaning
● The next step is to clean the extruder. There is a service hole on the right side of the extruder where you can access the hobbed pulley (pict. 41). ● Clean the hobbed pulley, then heat the nozzle before reloading the filament. ●... -
Page 73: Replacing / Changing The Nozzle
2. Choose Load filament option from the LCD menu and check if filament is extruded properly. 3. Push the acupuncture needle into the nozzle again and remove it. Repeat these steps a few times more. When the filament is extruded properly, the nozzle is clear. None of the filament is going through the nozzle If none of the filament is going through, then most likely, your hotend got clogged. - Page 74 Be careful, the nozzle is hot during this whole process and can cause burns! Be careful around the hotend thermistor leads, you can break them easily. Be careful, you can bend the heatbreak easily. It is a good practice to run 6.3.9 First layer calibration after changing the nozzle! When the nozzle is fully screwed into the heater block, there is still a small gap between...
-
Page 75: Printing Problems
13.7 Printing problems 13.7.1 Layers break and split when printing from ABS material ABS material has a higher thermal expansion than other materials. We suggest other materials like PET, HIPS or PLA when you print larger models. 13.7.2 Models contain either too much or not enough of the filament You can manage the filament flow during the print. -
Page 76: Updating Printer Firmware
13.9 Updating printer firmware Flashing the printer’s firmware brings various benefits. New firmware releases come with new features or bugfixes, so running the latest firmware is highly recommended. The flashing procedure is simple: it requires a USB 2.0 Type B cable, PrusaSlicer and the correct firmware file. -
Page 77: Linearity Correction
13.10 Linearity correction Linearity correction is based on the Trinamic stepper driver feature that allows the definition of custom current-waveform. Go to LCD Menu - Settings - Linearity correction to adjust any of the three axes based on our tutorial article ‘Extruder linearity correction calibration’ at https://help.prusa3d.com 14 FAQ - common issues when assembling the printer 14.1 Printer is rocking - YZ frame - geometry check... -
Page 78: Printer Stops Printing Soon After Start
14.2 Printer stops printing soon after start Extruder is likely to be overheated. Make sure the nozzle fan is working properly. If not, please inspect its connection according to the assembly manual. Pict. 46 - Proper wiring of the connectors 14.3 Printer can’t read the SD card First, make sure that the file name on the SD card does not contain special characters - otherwise the file could not be displayed on the LCD. -
Page 79: Cables Detached From The Heatbed
You can check the belt status under LCD Menu - Support - Belt status after successfully running a selftest. You can also refresh the values by running an independent Belt test. The values should not be under 240 and above 300, but there is no single ideal value. -
Page 80: Faq - Error Messages
15 FAQ - Error messages You can find more info about error messages and their solutions at help.prusa3d.com. 15.1 Printer has not been calibrated yet This error message appears after the assembly of your printer or after factory resetting all data. - Page 81 15.7 File incomplete. Continue anyway? This error message occurs when there is a problem with the generated G-code and it could potentially fail the whole print. The most common cause is removing the SD card too early from your PC while the G-code was still exporting. The printer automatically looks for the command M84 (disable motors) in the end section of a g-code file.
- Page 82 Print and share! Do not forget to tag your prints with #prusai3MK3S+ while sharing so we can find, pin and showcase them with our http://www.prusa3d.com/original-prusa-i3-prints/ Happy Printing :)
Need help?
Do you have a question about the ORIGINAL i3 MK3S+ KIT and is the answer not in the manual?
Questions and answers