Prusa Research PRUSA MMU3 Printing Handbook
Hide thumbs
Also See for PRUSA MMU3:
- Original assembly instructions (160 pages) ,
- Assembly instructions manual (212 pages)
Table of Contents
Advertisement
Advertisement
Table of Contents

Related Manuals for Prusa Research PRUSA MMU3


Summary of Contents for Prusa Research PRUSA MMU3
- Page 1 3D PRINTING HANDBOOK FOR THE ORIGINAL PRUSA MMU3...
- Page 2 JOSEF PRUSA®, PRUSA RESEARCH®, PRUSA POLYMERS®, PRUSA ORANGE®, ORIGINAL PRUSA®, PRUSA 3D®, and PRUSAMENT® are registered trademarks of Prusa Development a.s. used by Prusa Research a.s. under license from Prusa Development a.s. | JOSEF PRUSA, ORIGINAL PRUSA, and PRUSAMENT are registered trademarks (or trademark applications) of Prusa Development a.s. and are used by Prusa Research a.s. under license from Prusa Development a.s.
- Page 3 About the Author Josef Průša (*23. 2. 1990) became interested in 3D printing when he began studying at the University of Economics in 2009 - it started off as a hobby, a new technology open to modifications and improvements. The hobby quickly became his passion, and Josef became one of the main developers of the international open-source (all works are freely available for any use) RepRap project by Adrian Bowyer.
-
Page 4: Table Of Contents
Table of contents 1. Before You Begin ..............................1.1. Placement and Setup ..........................1.2. Flashing the Firmware ..........................1.2.1. Flashing firmware on Windows ....................1.2.2. Flashing the firmware on MacOS and Linux ..............1.2.3. Initialization procedure ....................... 2. Filament Operations (Loading, Unloading and more) .............. - Page 5 9.2. Idler Cannot Move / Home ........................9.3. Pulley Cannot Move Error ........................9.4. Filament not extruded during the print (missing layers) ............9.5. FINDA Filament Stuck Error ....................... 9.6. FINDA Didn't Trigger / Inspect FINDA ..................9.7. Error Descriptions Online ........................
- Page 6 Safety symbols and their meaning Careful: mechanical parts. Take care to avoid injury to hands when in close proximity to the device with mechanical parts. Further information regarding function and service can be found in this user manual or online at help.prusa3d.com. Before any service intervention, it is necessary to first disconnect the 3D printer from the power source and familiarize with the instructions.
- Page 7 Warranty The Original Prusa MMU3 is covered by a 24-month warranty for end customers in the EU, and a 12-month warranty for business customers and end customers in the rest of the world. Consumables and parts subject to wear and tear are excluded from this warranty. The warranty period starts on the day the customer receives the goods.
- Page 8 Do not use any other power cables or power units, custom electronics or anything of this nature to power the Original Prusa MMU3. Do not use the Original Prusa MMU3 if the power cord is damaged in any way – damaged cords can lead to electric shock.
- Page 9 Mechanical Risk Moving mechanical parts of the device can cause injury. Never interfere with the inner components of the printer when it is connected to the power supply or running – there is a risk of injury from mechanical parts or electric shock. Prevent children from manipulating the printer without the supervision of an adult –...
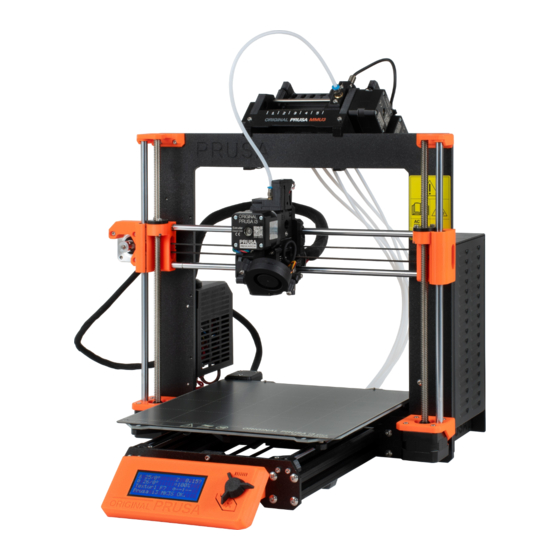
- Page 10 About the product Original Prusa MMU3 (Multi-Material Upgrade 3) is the latest revision of our unique multi- material printing solution. It is compatible with the Original Prusa i3 MK3S+ and Original Prusa MK4. Compared to the previous MMU2 unit, the new one features reworked hardware and brand new firmware built from the ground up.
- Page 11 Original Prusa MMU3 Description See the picture below to learn the official names for each MMU3 part. We will be referring to these names in our guide. Idler motor - rotates the idler. Idler - contains five pulleys. By rotating the idler, a single pulley gets in direct contact with the filament and applies pressure on it.
- Page 12 Reset button - triggers reset of the MMU3 unit only MicroUSB port - for flashing MMU3 firmware via PC Pulley motor - rotates the pulleys that move the filament inside the MMU3 unit Selector motor - moves the Selector left and right How the MMU3 Works The MMU3 is designed to be pre-loaded with up to five filaments.
-
Page 13: Before You Begin
1. Before You Begin This handbook picks up where the Assembly Manual ends, and explains the basic usage of the Original Prusa MMU3. It is absolutely essential to assemble, attach and initialize the MMU3 unit exactly as described in the assembly manual. -
Page 14: Flashing The Firmware
1.2. Flashing the Firmware Before you start using the MMU3, the printer’s firmware should be updated, otherwise, the printer won’t communicate with the new unit. Always use the latest available firmware (v3.13 or newer) to ensure compatibility with the MMU3 and take advantage of the latest (safety) features and other improvements. - Page 15 Start PrusaSlicer and select Configuration -> Flash Printer Firmware (blue arrow). A new window will appear. Your printer should be detected in the ‘Serial Port’ box. Open the drop-down menu in case it's not automatically selected (green arrow). Click Browse to select the downloaded firmware file (orange arrow). Press Flash! and wait for the process to finish (yellow arrow).
-
Page 16: Flashing The Firmware On Macos And Linux
1.2.2. Flashing the firmware on MacOS and Linux To flash the firmware on MacOS or Linux, please download the latest version of PrusaSlicer for your system, then download the firmware files and follow the procedure described above. Downloading and installing USB drivers is not necessary. Firmware files for the lineup of our printers and devices are updated regularly. -
Page 17: Preparing The Filament
You don’t need to preheat the nozzle as filament loading pushes the filament only to the MMU3 unit. Insertion of the filament into the extruder is done automatically during print. 2.1. Preparing the filament Just like with the stock printer, it's necessary to make sure that the filament you are about to load is correctly prepared - the tip is sharp, and there are no bumps or bends which could negatively affect the movement of the filament strand. - Page 18 Pull the first cassette out of the buffer. All cassettes are numbered so you can easily tell which cassette corresponds to which filament slot in the MMU3. Insert the tip of the filament into the bottom PTFE tube attached to the spoolholder. Keep pushing the filament into the PTFE tube until it appears in the cassette you pulled out.
-
Page 19: Loading All Five Filaments At Once
2.3. Loading all five filaments at once Go to LCD Menu - Preload to MMU - Load All. The selector will move to the first position, the first LED will start blinking green. Push the filament to the first PTFE tube until it’s caught by the drive gear. The filament will be pushed until it’s detected by the FINDA, then it will be retracted from the selector, ready to be extruded when needed. -
Page 20: Loading One Of The Filaments Using The Mmu Control Buttons
2.5. Loading one of the filaments using the MMU control buttons Using the left and right control buttons, move the selector to the position corresponding with the filament number you’d like to load. Insert the filament inside the white PTFE tube and continue pushing it until it’s not possible to push it any further. -
Page 21: Load To The Nozzle / Unload
2.7. Load to the nozzle / Unload It is possible to load the filament not only to the MMU3 unit but also all the way to the printer’s nozzle. This is useful when printing older single-color G-codes on a printer with the MMU3 unit attached. -
Page 22: Calibration
3. Calibration If you have already performed these calibrations during the assembly process (by following the instructions in the assembly manual), you don't have to run them again! We're including the information here as a quick reference and for troubleshooting purposes. If you have already completed the necessary calibrations (IR sensor, Z-Axis, First layer), you can skip this chapter and proceed to the next one (First Print). -
Page 24: Calibrate The Z-Axis
3.2. Calibrate the Z-axis In your printer’s LCD menu, go to Menu - Calibration - Calibrate Z and let the printer run the calibration procedure. The procedure consists of raising and lowering the Z-Axis and measuring 9 points on the print bed. Alternatively, you can run a “manual”... - Page 25 Observe the line which is being extruded on the print surface. A new menu will automatically show up, with an option to tune the nozzle height in real-time by turning the knob. The aim is to adjust the nozzle height until the extruded plastic sticks nicely to the bed and you can see that it is being slightly squished.
-
Page 26: First Print
4. First Print First Print checklist: MMU3 Unit attached Running up-to-date printer and MMU3 firmware versions Spool holders and the filament buffer are correctly placed Filaments loaded Performed IR filament sensor, Z-Axis, and First Layer calibrations For your first print, we recommend using one of our G-codes. These are pre-sliced and factory- tested. -
Page 27: Printing In Multi-Material Mode
5. Printing in Multi-Material Mode With the MMU3 unit mounted you can print in two different modes: Multi-material mode and Single mode (which works as a regular 3D printer). To print in the Multi-Material mode, at least two filaments have to be loaded. Both modes have the same set of features as the standard Original Prusa i3 MK3S+, such as variable layer height and many others. - Page 28 Recommended infill values are between 5-20 % but it heavily depends on the model and how durable it needs to be. More infill means a more durable model, however, it will take longer to print and more material will be consumed. For general use, there is no point in going above 40% infill, unless your project really requires it.
- Page 29 In the picture above, you can see a correctly imported multi-material object (Garfield model by reddadsteve at printables.com). The green object in the back is the Wipe Tower, a necessary addition to stabilize nozzle pressure and purge excess material from the nozzle during filament changes.
-
Page 30: Setting Up Colors
5.1.1. Setting up Colors In PrusaSlicer, you can assign materials to specific filament positions and also to individual model parts. We'll take it step by step. First of all, make sure you have Original Prusa MK3S & MK3S+ MMU3 selected as your printer. Only then you will see the list of up to five filaments. - Page 31 Now, let's take a look at the picture below. It depicts the PrusaSlicer interface, where you select individual filaments and assign them to extruders. First, focus on the "Filament" section. This is where you should select which materials you're planning to load into the MMU3. In our case, all five extruders will have PLA loaded. This section affects only the type of material (temperatures and other settings) it does not affect color! Small colored rectangles next to filament names are merely visual indicators! In other words, even if you have a yellow indicator next to the filament in slot 2, you can load black PLA filament in...
- Page 32 In the picture below, you can see the color picker tool. You can use it to match the filament colors pre-loaded to the MMU3 with the colors in PrusaSlicer. Always make sure that the filaments loaded correspond to filaments selected in PrusaSlicer - printing with incorrect material settings may lead to various issues.
-
Page 33: Coloring An Object
5.1.2. Coloring an Object Of course, not all objects on the internet are ready for multi-material printing, i.e. they are not divided into easily selectable parts. What now? The solution is easy: PrusaSlicer gives you three powerful options for virtual painting. You can see a work-in-progress screenshot of PrusaSlicer's paint process directly below. - Page 34 The Multimaterial printing menu is very self-explanatory. You can assign two quick-selection extruders (materials) to the left and right mouse buttons. The First color is set to the left mouse button, the Second color to the right mouse button. Of course, you can change the assigned materials at any time and continue working.
-
Page 35: Smart Wipe Tower
5.2. Smart wipe tower The smart wipe tower ensures sharp color transitions and stable filament flow after a color change while aiming to waste as little filament as possible. There is always only one wipe tower no matter how many objects are being printed at once. The size of the wipe tower is independent of the size of the object being printed. -
Page 36: Purging Volumes
5.2.2. Purging volumes In the panel on the right side, you’ll find a Purging volumes button, which opens the Purging volume adjustment window. This is where you can adjust how much filament is purged into the wipe tower. In the Simplified settings, you can simply set how much filament will be purged when a filament is being unloaded or loaded. -
Page 37: Wipe To Infill
we suggest using at least 100 mm3. In the table below you can see suggested values for some of the commonly used colors/filaments. Color Unloaded Loaded Black White Yellow Silver High gloss filaments PVA/BVOH The Advanced settings let you set the purging values for each combination of filaments in a matrix view. -
Page 38: Wipe Object
5.4. Wipe object To further decrease the amount of material used for the smart wipe tower, you can choose to wipe residual filament into an object. The ‘wipe object’ will be used during the color transition to wipe the nozzle. As a result, the colors of the object will be mixed - this is handy in case you don’t care about the surface color (e.g. -
Page 39: Supported Materials
5.5. Supported Materials MMU3 supports the most common materials (such as PLA, PETG, ASA and others) along with soluble materials (PVA/BVOH) from the start. Keep in mind that mixing different types of materials is not recommended due to different temperatures for bed and nozzle. Also, not every two materials can bind together. 5.5.1. -
Page 40: Soluble Support Interface Only
5.5.2. Soluble support interface only The water-soluble filament is usually fairly expensive. In order to greatly reduce the amount of water-soluble filament needed, you can choose to print a soluble support interface only. With this option turned on, only the last few layers in contact with the model with being printed using a soluble filament. -
Page 41: Completely Soluble Supports
5.5.3. Completely soluble supports When removing soluble supports, try to break away as much material as possible while the object is still dry. Then continue peeling the material under running warm water. The last bits can be removed by letting the print soak in warm water. Water-soluble filaments must be always stored in dry conditions. -
Page 42: Slicing And Exporting
5.6. Slicing and Exporting One of the most important phases of the slicing process is the final check of the sliced object in the Preview. Using the slider on the right, you can review all the print layers of the object one by one. -
Page 43: Handling
7. Handling 7.1. Mounting/Unmounting the MMU3 unit Follow these steps: Unscrew the Festo coupling from the extruder body. Unplug the two connectors from the MMU3 board that transfer power and data from the EINSY board. Tilt the MMU3 unit forward to unclip it from the frame. If you wish to print without the MMU3 unit installed, there are two possible options: The easiest way is to use the printer as it is. -
Page 44: Menu Structure
8. Menu structure Info Screen Live Adjust Z (during the printing process only) Tune (during the printing process only) Speed Nozzle Fan speed Flow Change filament Mode Pause print (during the printing process only) Stop print (during the printing process only) Preheat PLA - 215/60 PET - 230/85... - Page 45 Eject from MMU (only when MMU3 is connected - ejects filament through the front of the MMU3) Eject filament 1 Eject filament 2 Eject filament 3 Eject filament 4 Eject filament 5 Settings Temperature Nozzle Fan speed Move axis Move X Move Y Move Z Extruder...
- Page 46 Sound - mute / loud / once / silent Brightness Level Bright Level Dimmed Mode Auto / Bright / Dim Timeout HBed on Load Yes / No - toggles whether the heatbed should be preheated when you're loading a new filament Calibration Wizard First layer calibration...
-
Page 47: Explanation Of Advanced Features
8.1. Explanation of Advanced Features 8.1.1. Preload to MMU This is a procedure that will go through all five ports of the MMU and makes sure the filament is loaded (preloaded) inside the MMU unit. The selector will move to position 1 and the motors will rotate until a strand of filament is detected by the FINDA sensor inside the selector. -
Page 48: Troubleshooting
9. Troubleshooting In case you encounter any problems with the MMU3 unit, first make sure that you have the unit properly assembled and positioned as described in the assembly instructions and this manual. The MMU3 features two-way communication between the MMU unit and the printer, so once any non-standard behavior is detected, the printer shows a proper error message on the screen along with a URL that leads to our Knowledge base. - Page 49 Excessive tightening of the idler screws Tighten the two idler screws with springs, so the heads of the screws are approximately 0.1 mm to 0.4 mm above the body level of the MMU3 in the initial state. Insufficiently tightened the screw on the extruder Bondtech gear A loose screw in the Bondtech gear on the extruder motor shaft can cause several problems like issues with loading/unloading of filament or missing layers.
-
Page 50: Selector Cannot Home / Move Error
9.1. Selector Cannot Home / Move Error If the selector is not moving smoothly or if it cannot reach a certain position, the cause is usually one of the following issues: The selector motor isn’t working - first, try powering the printer off and moving the selector by hand (rotate the threaded rod with your fingers). -
Page 51: Filament Not Extruded During The Print (Missing Layers)
9.4. Filament not extruded during the print (missing layers) If the extruder keeps moving across the heatbed (following the instructions from a G-code), but the filament is not extruded at all. Solution 1: The hotend in the extruder might be jammed, please head to the MK3S+ / MK3S 3D Printing Handbook - chapter Clogged / jammed extruder Solution 2: Filament IR sensor triggered (IR value is “1”), but the filament didn't reach Bondtech... -
Page 52: Error Descriptions Online
Solution: Unscrew the Festo fitting from the MMU3 selector. Use compressed air to blow out the filament dust in the area under FINDA sensor. Check the correct functioning of FINDA sensor. Open LCD menu - Support - Sensor info. If there is no filament below the sensor, FINDA will show the value of “0”. -
Page 53: Can Not Update The Mmu3 Firmware
9.10. Can not update the MMU3 firmware Make sure, that you have the last version of PrusaSlicer from www.prusaslicer.com. Make sure you have the MMU3 board connected to your computer via a microUSB cable - not the printer's mainboard (Einsy) These are two different boards. For a detailed procedure, see chapter Flashing the firmware. - Page 54 PRINT AND SHARE! JOIN OUR COMMUNITY! Download 3D models for free printables.com and participate in design contests! Follow us for tips, guides, inspiring videos and amazing 3D prints!
Need help?
Do you have a question about the PRUSA MMU3 and is the answer not in the manual?
Questions and answers