Table of Contents
Advertisement
Table of Contents
......................................................................................................................
Step 8 - We are here for you!
Step 24 - Mounting the MINI-Y-rear-plate
Step 32 - MINI-Z-bottom: parts preparation
.....................................................................................................
.................................................................................
.........................................................................................................
.........................................................................
.......................................................................................
...........................................................................
............................................................................................
........................................................................................................
.......................................................................
................................................................................
................................................................................
..........................................................................
...........................................................................
.......................................................................
.......................................................................
.......................................................................
........................................................................
...........................................................................
...............................................................................
...............................................................................
...........................................................................................
...................................................................................
.............................................................................
........................................................................................
................................................................
.....................................................................
......................................................
................................................................
...............................................................
.................................................
..................................................................
...............................................
.........................................................
...........................................................
....................................................................
...................................................................
.............................................................
...................................................................
................................................................
....................................................
....................................................................
..............................................................
...................................................
................................................................
............................................................
...........................................................
...............................................................
...............................................................
...............................................................
5
6
6
6
7
7
8
8
9
9
10
11
11
12
14
15
15
15
16
16
17
17
18
18
19
19
20
20
21
21
22
22
23
23
24
24
25
25
26
26
27
27
28
28
29
29
30
31
31
32
1
Advertisement
Table of Contents

Related Manuals for Prusa Research Original Prusa MINI


Summary of Contents for Prusa Research Original Prusa MINI
-
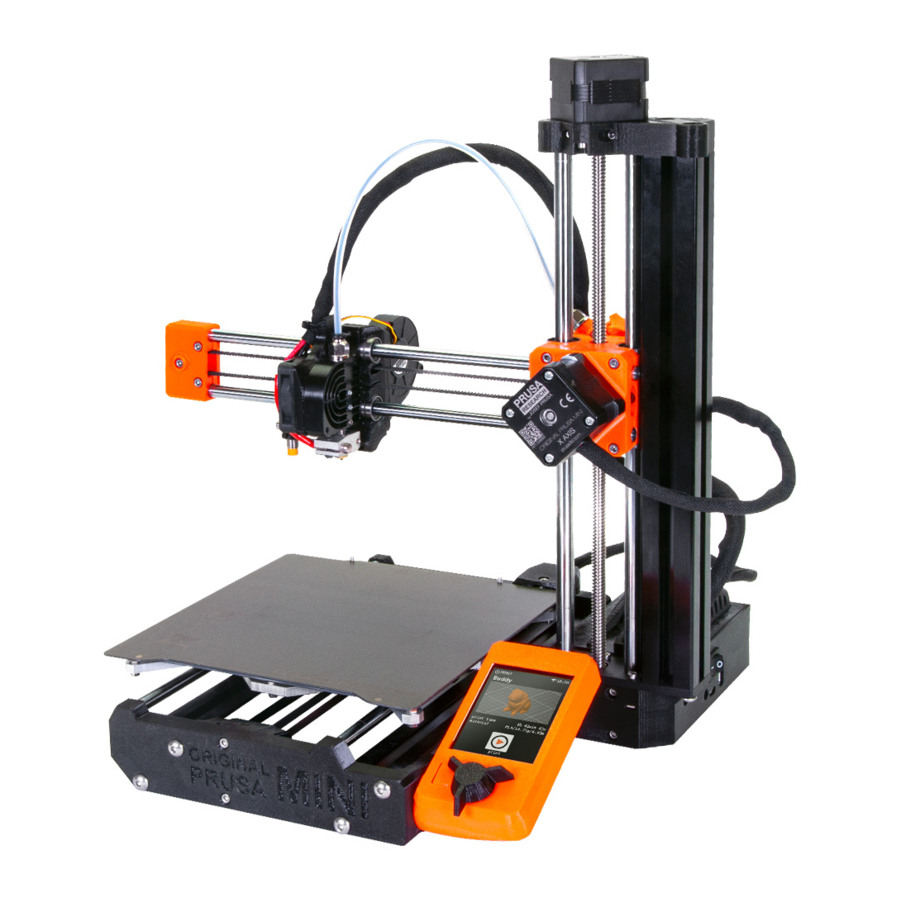
Page 1: Table Of Contents
Table of Contents 1. Introduction ...................................... Step 1 - All the required tools are included ..............Step 2 - Universal wrench - description ............Step 3 - Tools required for lubricating bearings ..................... Step 4 - Labels guide ................. Step 5 - Use labels for reference ...................... - Page 2 ............... Step 36 - Mounting the Buddy board ..............Step 37 - LCD cable: parts preparation ................ Step 38 - Connecting the LCD cable ................... Step 39 - LCD cable guidance ................Step 40 - Z-axis: parts preparation ................Step 41 - Assembling the Z-axis ................
- Page 3 ............... Step 27 - Plastic cover: parts preparation ..............Step 28 - Guiding the X-axis motor cable ..............Step 29 - Connecting the X-axis motor ................Step 30 - X-axis belt tensioning ..................Step 31 - Securing the X-end ............Step 32 - Extruder motor: parts preparation ...............
- Page 4 ..............Step 1 - Tools necessary for this chapter .............. Step 2 - LCD assembly: parts preparation ..................Step 3 - Mounting the LCD ..................Step 4 - Connecting the LCD ..................Step 5 - LCD cable guidance ..............Step 6 - LCD assembly: reward yourself! ..............
-
Page 5: Introduction
1. Introduction Original Prusa MINI+ kit assembly... -
Page 6: Step 1 All The Required Tools Are Included
STEP 2 Universal wrench - description The universal wrench is designed for tightening all these fasteners used on the MINI+ printer: 1. Brass nut 2. M3nN nyloc nut 3. Brass nut 4. Nozzle 5. Heatbed spacer Original Prusa MINI+ kit assembly... -
Page 7: Step 3 Tools Required For Lubricating Bearings
Prusa lubricant applicator (1x) Prusa lubricant (1x) STEP 4 Labels guide All the boxes and bags including parts for the build are labelled. Each bag (or box) label describes in which chapter you will need it. Original Prusa MINI+ kit assembly... -
Page 8: Step 5 Use Labels For Reference
Print it at 100 %, don't rescale it, otherwise, it won't work. STEP 6 Spare bag Every type of fastener is included in a separate special bag. If you lose a screw during assembly, use one from this bag. Original Prusa MINI+ kit assembly... -
Page 9: Step 7 View High Resolution Images
Lost in the instructions, missing screw or cracked printed part? Let us know! You can contact us using following channels: Using comments under each step. Using our 24/7 live chat at shop.prusa3d.com Writing an email to info@prusa3d.com Original Prusa MINI+ kit assembly... -
Page 10: Step 9 Important: Electronics Protection
Be extra cautious in rooms with carpets, which are a source of electrostatic energy. Clothes made of wool and certain synthetic fabrics can easily gather static electricity. It is safer to wear cotton clothing. Original Prusa MINI+ kit assembly... -
Page 11: Step 10 Pro Tip: Inserting The Nuts
Use a 2.0mm Allen key for easier insertion into the hole. Check the hole alignment by using a 2.0mm Allen key. Check visually if the hole in the nut is aligned with the hole in the printed part. Original Prusa MINI+ kit assembly... -
Page 12: Step 12 Reward Yourself
Hide the Haribo for now! From our experience, an unattended bag with sweets tends to suddenly disappear. We are still investigating this phenomenon. All information provided in this step is based on a long-term very serious research study ;) Original Prusa MINI+ kit assembly... -
Page 13: Step 13 How To Successfully Finish The Assembly
Most important: Enjoy the build, have fun. Cooperate with your kids, friends or partners. However, we take no responsibility for possible fights ;) Ready for more? Let's move to the next chapter: 2. YZ - axis assembly Original Prusa MINI+ kit assembly... -
Page 14: Yz - Axis Assembly
2. YZ - axis assembly Original Prusa MINI+ kit assembly... -
Page 15: Step 1 Tools Necessary For This Chapter
YZ & X-axis For the following steps, please prepare: Y-carriage (1x) M3nN nyloc nut (6x) M3x10r screw (6x) Bearing clip (3x) Linear bearing LM8UU (3x) included in the Rods package The list continues in the next step... Original Prusa MINI+ kit assembly... -
Page 16: Step 3 Y-Carriage: Parts Preparation (Lubricating)
It is necessary to lubricate all 4 rows of balls inside the bearing. Open the lubricant and pierce the hole in the tube with the tip in the cap. Screw the tube into the applicator. Carefully slide the entire bearing onto the applicator. Original Prusa MINI+ kit assembly... -
Page 17: Step 6 Correct Bearing Orientation
The incorrect orientation: Avoid placing the bearing like in the last picture! This orientation with a single row of balls in the center of the hole will later increase the wear of the smooth rod, possibly creating a groove in it. Original Prusa MINI+ kit assembly... -
Page 18: Step 7 Installing Bearings On The Y-Carriage
Tighten both nuts by using the 2 mm Allen key and the universal wrench. Repeat these steps for the remaining two linear bearings. STEP 8 Heatbed spacers: parts preparation For the following steps, please prepare: Heatbed spacer (9x) M3x8 screw (9x) MINI-Y-belt-holder (1x) M3x12 screw (2x) Original Prusa MINI+ kit assembly... -
Page 19: Step 9 Installing The Heatbed Spacers
Double-check the MINI-Y-belt holder orientation!!! Secure it with two M3x12 screws. STEP 10 Y-axis front: parts preparation For the following steps, please prepare: MINI-Y-plate-front (1x) with Original Prusa MINI logo on the front M5x20r (4x) Original Prusa MINI+ kit assembly... -
Page 20: Step 11 - Comparison Of Extrusions
There must be a gap. See the picture. Slide the extrusion onto the plastic part so that the protrusion fits in the extrusion. Secure both parts with two M5x20r screws. When tightening the M5x20r screws, push on the extrusion from above. Original Prusa MINI+ kit assembly... -
Page 21: Step 13 Mounting The Mini-Y-Plate-Front
Secure both parts with two M5x20r screws. When tightening the M5x20r screws, push on the extrusion from above. STEP 14 Y-belt-idler: parts preparation For the following steps, please prepare: MINI-Y-idler (1x) Pulley 623 2Z (1x) M3nN nyloc nut (1x) M3nS nut (2x) M3x20 screw (3x) Original Prusa MINI+ kit assembly... -
Page 22: Step 15 Preparing Mini-Y-Belt-Idler
Insert the pulley in the MINI-Y-belt-idler. The orientation of the pulley doesn't matter. Secure the bearing with the M3x20 screw. Don't fully tighten the screw. Place your finger on the bearing and ensure it can rotate freely. If needed, adjust the screw. Original Prusa MINI+ kit assembly... -
Page 23: Step 17 Mounting The Mini-Y-Belt-Idler
Smooth rods (2x) There are two sizes of the smooth rods. Prepare two rods with the smaller diameter (8 mm) now. Smooth rods with a larger diameter (10 mm) will be used later. M3nE nut (3x) Original Prusa MINI+ kit assembly... -
Page 24: Step 19 Assembling The Y-Carriage
Before proceeding to the next step, make sure you have inserted all three M3nE nuts. Later insertion is difficult. Don't forget to wipe off the residue of the grease on the smooth rods with a paper towel. Original Prusa MINI+ kit assembly... -
Page 25: Step 21 Y-Axis Rear: Parts Preparation
Slightly tighten the first screw. Turn the shaft and slightly tighten the second screw. Ensure you have the correct orientation of the pulley on the shaft. It can be placed both ways, but only one is correct. Original Prusa MINI+ kit assembly... -
Page 26: Step 23 Mounting The Y-Motor
Secure both parts with two M5x20r screws. When tightening the M5x20r screws, push on the extrusion from above. To prevent damage to the Y-axis motor cable during the assembly, place the cable into the extrusion. Original Prusa MINI+ kit assembly... -
Page 27: Step 25 Anti-Vibration Pads: Parts Preparation
Rotate the Y-axis so that the Y-carriage is facing down and glue four pads on the extrusions like in the picture. Pay careful attention to the correct orientation. It is recommended to place the Y-carriage on a piece of fabric. Heatbed spacers can scratch your workbench. Original Prusa MINI+ kit assembly... -
Page 28: Step 27 Y-Axis Belt Parts
Guide the belt around the Y-axis motor pulley. Insert the second end of the belt into the upper groove of the MINI-Y-belt-holder. Secure both ends of the belts by squeezing them into the groove with the 1.5mm Allen key. Original Prusa MINI+ kit assembly... -
Page 29: Step 29 Aligning The Y-Axis Belt
If the belt is stretched properly, you should feel a resistance and the Y-carriage won't move at all. If the belt is too loose, it will deform (create a "wave") and jump over the teeth on the pulley. Original Prusa MINI+ kit assembly... -
Page 30: Step 31 Y-Axis Assembly: Reward Yourself
;). Keep the correct number of the bears in separate rows. That is crucial! Eat the first part of the first row. Original Prusa MINI+ kit assembly... -
Page 31: Step 33 - Assembling The Mini-Z-Bottom
Insert one M3nS nut into the hole on the side. Insert one M3nS nut from the front side of the part. Always make sure that all M3nS nuts are inserted all the way down into the holes. Original Prusa MINI+ kit assembly... -
Page 32: Step 35 Buddy Board: Parts Preparation
(ESD). Always unpack the electronics right before you need them! Buddy board (1x) Keep the silver label for later! Note that the anti-static bag will be opened upon arrival. Each board is taken out and tested before shipping. M3x8 screw (4x) Original Prusa MINI+ kit assembly... -
Page 33: Step 36 Mounting The Buddy Board
For the following steps, please prepare: LCD cable (1x) The cable is included with the LCD in the HARIBO & LCD box. The LCD cable is not symmetrical. Carefully read the instructions for the correct connection. Original Prusa MINI+ kit assembly... -
Page 34: Step 38 Connecting The Lcd Cable
In order to protect the cable, please follow the instructions below. Also, don't try any other orientation, because it will complicate the assembly. Wrap the LCD cable around the box. Don't stretch the cable. Fold the second end of the cable inside the MINI-Z-bottom. Original Prusa MINI+ kit assembly... -
Page 35: Step 40 Z-Axis: Parts Preparation
M3x12 screw (2x) M3x20 screw (3x) M3x40 screw (1x) STEP 41 Assembling the Z-axis Place the Z plate bottom part on the front of the extrusion like in the picture. Secure it with two M5x20r screws. Original Prusa MINI+ kit assembly... -
Page 36: Step 42 Assembling The Z-Axis
Insert the M3x40 screw into the hole in the MINI-Z-bottom. Using the 2.5mm Allen key insert the screw through the entire part so that a tip of the screw is visible on the other side. Original Prusa MINI+ kit assembly... -
Page 37: Step 45 Joining The Y And Z-Axis Together
Allen key and gently push it in. There is a notch inside, which will align it properly for the second screw. Use the M3x20 screw and again tighten it just slightly, but ensure you have reached the nut. DON'T tighten the screw fully yet! Original Prusa MINI+ kit assembly... -
Page 38: Step 47 Aligning The Yz-Axis Assembly
Rotate the back of the printer towards you and push the Y-carriage all the way to the "front". Hold the Y-axis assembly. Move the Z-axis assembly to the back. There is a notch, which indicates the correct mutual position of both parts. Original Prusa MINI+ kit assembly... -
Page 39: Step 48 Securing The Yz-Axis Assembly
Guide the Y-axis motor cable through the hole in the MINI-Z-bottom. Pushing the connector through the hole is tight, be careful not to damage the connector. Do not stretch the cable. Leave a small slack. Original Prusa MINI+ kit assembly... -
Page 40: Step 50 Y-Axis Motor Cable Guidance
Do not pull on the cable! STEP 51 Z-top: parts preparation For the following steps, please prepare: MINI-Z-top (1x) Trapezoidal nut (1x) Z-axis motor (1x) M3nS nut (2x) M3x12 screw (2x) Original Prusa MINI+ kit assembly... -
Page 41: Step 52 Assembling The Mini-Z-Top
Place the MINI-Z-top on the Z-axis with the longest part on the right. Secure the MINI-Z-top with two M3x12 screws. Screw back the trapezoidal nut up to 2/3 of the Z-axis motor length. See the proper orientation of the nut. Double-check the orientation of the parts! Original Prusa MINI+ kit assembly... -
Page 42: Step 54 Z-Axis Smooth Rods: Parts Preparation
Look at the MINI-Z-bottom from below and make sure that both smooth rods are fully inserted all the way down and touching the bottom. Secure smooth rods with four M3x20 screws. Original Prusa MINI+ kit assembly... -
Page 43: Step 56 Installing The Z-Axis Bearings
Do not tilt the motor when fitting! Insert straight, the threaded rod of the motor must fit into the hole in the Z plate bottom. Check that the plastic part is seated correctly. There must be no gap between the plastic part and the extrusion. Original Prusa MINI+ kit assembly... -
Page 44: Step 59 Plastic Cover: Parts Preparation
Guide the Z-motor cable down through groove in the MINI-Z-top and extrusion. Connect the Z-motor cable to the Buddy control board - first connector from the left. STEP 59 Plastic cover: parts preparation For the following steps, please prepare: Plastic cover (1x) M3x20 screw (2x) Original Prusa MINI+ kit assembly... -
Page 45: Step 60 Securing The Mini-Z-Top Assembly
Insert and tighten M3x20 screws into the MINI-Z-top part from the opposite side of the YZ-axis assembly. STEP 61 YZ-axis assembly: reward yourself! You just finished the YZ-axis assembly. It was a little challenging. Reward yourself! Eat the second part of the first row. Original Prusa MINI+ kit assembly... - Page 46 2. YZ - axis assembly STEP 62 YZ-axis is finished! Check the final look, compare it to the picture. Checked everything? Continue with the chapter 3. X-axis & Extruder assembly. Original Prusa MINI+ kit assembly...
-
Page 47: X-Axis & Extruder Assembly
3. X-axis & Extruder assembly Original Prusa MINI+ kit assembly... -
Page 48: Step 1 Tools Necessary For This Chapter
All the printed parts and fasteners needed for this chapter are included in the box: YZ & X-axis For the following steps, please prepare: MINI-Z-carriage-front (1x) M3nS nut (9x) M3x12 screw (4x) Smooth rod (2x) 8 mm diameter Original Prusa MINI+ kit assembly... -
Page 49: Step 3 Assembling The Z-Carriage
Look sideways on the MINI-Z-carriage-front through the inspection hole and check that the smooth rod is fully inserted into the plastic part. Secure all parts together with four M3x12 screws. Original Prusa MINI+ kit assembly... -
Page 50: Step 5 X-End: Parts Preparation
Prusa lubricant (1x) Several paper towels to wipe oil and grease from the bearing surface. Permanent marker (1x) not included in the kit Each bearing must be lubricated before mounting on the printer. Follow these instructions carefully. Original Prusa MINI+ kit assembly... -
Page 51: Step 7 Lubricating The Bearings
Take a closer look at the last picture. Wipe off excess grease on the outside of the bearing with a paper towel. Use this procedure for both bearings. Original Prusa MINI+ kit assembly... -
Page 52: Step 9 Marking The Bearings
Insert two M3nS nuts in the X-end. Always make sure that all M3nS nuts are inserted all the way down into the holes. Insert the M3nN nut into the X-end. Use the screw pulling technique. Original Prusa MINI+ kit assembly... -
Page 53: Step 12 Assembling The X-Axis
Check the correct orientation of the part. The screw holes on the MINI-X-end must face up and the screws on the MINI-Z-carriage-front must face up. Insert and slightly tighten two M3x12 screws into the X-end. We'll completely tighten them later. Original Prusa MINI+ kit assembly... -
Page 54: Step 14 X-Carriage: Parts Preparation
Turn the X-axis and use the same procedure for the second smooth rod. STEP 14 X-carriage: parts preparation For the following steps, please prepare: MINI-x-carriage (1x) M3n nut (1x) M3nS nut(1x) Original Prusa MINI+ kit assembly... -
Page 55: Step 15 Assembling The X-Carriage
Align the cutouts in the part against the bearings. Push the MINI-X-carriage onto the bearings Ensure the bearings are properly seated and they are centered in the X-carriage. Original Prusa MINI+ kit assembly... -
Page 56: Step 17 X-Axis Motor: Parts Preparation
Slightly tighten the first screw. Turn the shaft and slightly tighten the second screw. Ensure you have the correct orientation of the pulley on the shaft. It can be placed both ways, but only one is correct. Original Prusa MINI+ kit assembly... -
Page 57: Step 19 Mounting The X-Axis Motor
Insert the belt along the entire length of the upper groove in the X-carriage. Take the second end of the belt and guide it around the pulley in the X-end and throught the hole in X-carriage. Original Prusa MINI+ kit assembly... -
Page 58: Step 22 X-Axis Assembly: Reward Yourself
The belt may seem too loose. We will adjust the correct tension later. STEP 22 X-axis assembly: reward yourself! You just finished the X-axis assembly. Now, it's time to reward yourself. Eat the first part of the second row. Original Prusa MINI+ kit assembly... -
Page 59: Step 23 Z-Carriage: Parts Preparation
Preparing the Z-carriage Insert two M3n nuts in the MINI-Z-carriage. Make sure the nuts are properly seated and don't fall out. Use the screw pulling technique. Insert the M3nS nut into the hole on the bottom side. Original Prusa MINI+ kit assembly... -
Page 60: Step 25 - Mounting The X-Axis
Insert and tighten two M3x30 screws into the remaining holes. Look from below and align two holes in the trapezoidal nut against the holes in the plastic parts. Secure the trapezoidal nut to the X-axis with two M3x20 screws. Original Prusa MINI+ kit assembly... -
Page 61: Step 27 Plastic Cover: Parts Preparation
Cut the remaining part of the zip tie using pliers as closest to its head as possible. Wrap the entire textile sleeve around the X-axis motor cable and guide it into the extrusion. Cover the extrusion with the plastic cover. Original Prusa MINI+ kit assembly... -
Page 62: Step 29 Connecting The X-Axis Motor
Adjust it by releasing or tightening both screws on the X-end. Release the screws, bring the X-end closer to rods and thus decrease the overall tension. Tighten the screws, X-end will move apart, the overall tension will increase. Original Prusa MINI+ kit assembly... -
Page 63: Step 31 Securing The X-End
Securing the X-end by tightening both screws on the front side of the plastic part. After tightening, check once more the X-end is parallel with the Z-axis. STEP 32 Extruder motor: parts preparation For the following steps, please prepare: Extruder motor (1x) Motor pinion (1x) Original Prusa MINI+ kit assembly... -
Page 64: Step 33 Assembling The Extruder Motor
Ensure you have the correct orientation of the pulley on the shaft. It can be placed both ways, but only one is correct. STEP 34 Extruder-front: parts preparation For the following steps, please prepare: MINI-Extruder-front (1x) M3n nut (3x) Bearing 625 2Z (1x) Original Prusa MINI+ kit assembly... -
Page 65: Step 35 Assembling The Extruder-Front
Turn the part upside down and insert the bearing into the part. STEP 36 Extruder-rear: parts preparation For the following steps, please prepare: MINI-Extruder-rear (1x) M3n nut (1x) M3nN nyloc nut (1x) Bearing 625 2Z (1x) Original Prusa MINI+ kit assembly... -
Page 66: Step 37 Assembling The Extruder-Rear
Make sure the bearing is aligned with the top surface of the printed part. STEP 38 Extruder-idler: parts preparation For the following steps, please prepare: MINI-Extruder-idler (1x) Bearing 625 2Z (1x) Shaft 5x12 mm (1x) M3nS nut (1x) Original Prusa MINI+ kit assembly... -
Page 67: Step 40 Extruder Assembly: Parts Preparation
STEP 40 Extruder assembly: parts preparation For the following steps, please prepare: Spring 5x15 mm (1x) M3x12 screw (3x) M3x25 screw (4x) M3x40 screw (1x) Filament Spur (1x) PTFE tube 4x2x150 mm (1x) Original Prusa MINI+ kit assembly... -
Page 68: Step 41 Assembling The Extruder
Place the filament spur into the bearing. The longer part with the jagged groove must face up. See the picture. Make sure that both gears fit together. Rotate with one pulley to ensure the second is moving as well. Original Prusa MINI+ kit assembly... -
Page 69: Step 44 Mounting The Mini-Extruder-Idler
Place the spring on the M3x40 screw. Hold the extruder and idler with your hand. Insert and tighten the screw with the spring into the Extruder. Stop tightening when the screw head is aligned with the edge of the plastic part. Original Prusa MINI+ kit assembly... -
Page 70: Step 45 Inserting The Ptfe Tube
Check the correct insertion according to the marking on the tube. Secure the tube with the M3x12 screw. STEP 46 Inspection-door: parts preparation For the following steps, please prepare: MINI-Inspection-door (1x) M3x25 screw (2x) Original Prusa MINI+ kit assembly... -
Page 71: Step 47 Mounting The Extruder
Secure it with the M3x25 screw in the lower hole. STEP 48 Mounting the Extruder Place the MINI-Inspection-door to the extruder and align the holes. Secure it with the M3x25 screw. Do not overtighten. Make sure the MINI- Inspection-door can move freely. Original Prusa MINI+ kit assembly... -
Page 72: Step 49 Extruder Assembly: Reward Yourself
Reward yourself, it was a little difficult. Eat the second part of the second row. STEP 50 X-axis is finished! Compare your assembly with the picture. Now it's time to the next chapter: 4. Printhead & Heatbed assembly Original Prusa MINI+ kit assembly... -
Page 73: Print Head & Heatbed Assembly
4. Print head & Heatbed assembly Original Prusa MINI+ kit assembly... -
Page 74: Step 1 Tools Necessary For This Chapter
All the printed parts and fasteners needed for this chapter are included in the box: Print head & Heatbed For the following steps, please prepare: MINI Hotend assembly (1x) Print fan (1x) M3x20 screw (3x) Original Prusa MINI+ kit assembly... -
Page 75: Step 3 Mounting The Hotend
Insert the fan into the x-carriage. Align the screw hole in the fan with the hole in the X-carriage. Insert and tighten the M3x20 screw. Original Prusa MINI+ kit assembly... -
Page 76: Step 5 Hotend Fan: Parts Preparation
Place the hotend fan with MINI-fan-spacer on the heatsink. Align the holes for the screws on the fan with the holes on the heatsink. Secure the hotend fan and the spacer with the M3x20 screw in the upper left hole. Original Prusa MINI+ kit assembly... -
Page 77: Step 7 Minda-Holder: Parts Preparation
Place the MINI-minda-holder on the hotend fan. Secure with the M3x12 screw. Make sure the hotend cables are not pinched. Guide the hotend cables as shown in the picture. Secure the MINI-minda-holder with the M3x20 screw. Original Prusa MINI+ kit assembly... -
Page 78: Step 10 Superpinda Sensor: Parts Preparation
Adjust the SuperPINDA sensor position, there should be about 4-5 threads below the MINI-minda-holder. This a temporary position for now. We will set the proper one later on. Tighten the screw on the MINI-minda-holder. Do not use excessive force, you can damage the MINI-minda-holder! Original Prusa MINI+ kit assembly... -
Page 79: Step 12 Fan-Spacer-Clip: Parts Preparation
Wrap the textile sleeve around the cable bundle and slide it into the MINI-fan- spacer-clip so that it extends over the 2-5mm textile sleeve from the other side. Guide the textile sleeve to the extruder. Original Prusa MINI+ kit assembly... -
Page 80: Step 15 - Guiding The Hotend Cables
Make sure you have rotated the heads to the left, otherwise you might have issues during the print! Slightly twist the sleeve (not the cables inside). The sleeve will evenly wrap all around the cable bundle. Original Prusa MINI+ kit assembly... -
Page 81: Step 16 Ptfe Tube - Parts Preparation
Use the same procedure to mount the other end of the PTFE tube on the print head. STEP 18 Print head: reward yourself! You just finished the Print head assembly. It was an easy part of the chapter. Eat the first part of the third row. Original Prusa MINI+ kit assembly... -
Page 82: Step 19 Heatbed: Parts Preparation
Textile sleeve 5x350 mm (1x) M3x4b Countersunk screw (9x) The list continues in the next step... STEP 20 Heatbed: parts preparation For the following steps, please prepare: M3x12 screw (1x) M3x8 screw (2x) M3nN nyloc nut (3x) Original Prusa MINI+ kit assembly... -
Page 83: Step 21 Assembling The Heatbed
Improper wiring can fatally damage the electronics. STEP 22 Guiding the heatbed cables Guide the black thermistor cable between the heatbed cables. Wrap the thermistor cable a few times around the heatbed cables (see the photo). Original Prusa MINI+ kit assembly... -
Page 84: Step 23 - Covering The Heatbed Cables
Covering the heatbed cables Slightly tilt the MINI-heatbed-cable-cover-top and slide it over the screw heads on the connectors. Push the cover to fit properly the bottom part of the cover. Secure it with the M3x12 screw. Original Prusa MINI+ kit assembly... -
Page 85: Step 26 Mounting The Heatbed Assembly
Insert the M3x4b screws in the holes. DON'T fully tighten the screws. After all screws are in place, use the torx key to tighten them in the following order: Center screw First four screws (edges) Last four screws (corners) Original Prusa MINI+ kit assembly... -
Page 86: Step 27 Heatbed: Reward Yourself
Leave the remaining M3x12 and M3x20 screws in the Print head, HB, ELE package for the next chapter. Keep the remaining Spool Holder packages for later. Ready for the next chapter? Let's jump into: 5. LCD assembly & Electronics Original Prusa MINI+ kit assembly... -
Page 87: Lcd Assembly & Electronics
5. LCD assembly & Electronics Original Prusa MINI+ kit assembly... -
Page 88: Step 1 Tools Necessary For This Chapter
All the printed parts and fasteners needed for this chapter are included in the box: HARIBO & LCD For the following steps, please prepare: LCD assembly (1x) M3x20 screw (1x) leftover from the previous chapter Original Prusa MINI+ kit assembly... -
Page 89: Step 3 Mounting The Lcd
Connect the cable to the board on the LCD. Mind the correct orientation of the connector. Use the notch as a guide. Insert the connector in the socket on the board. Make sure it is all the way in. Original Prusa MINI+ kit assembly... -
Page 90: Step 5 Lcd Cable Guidance
So, reward yourself and replenish your energy Eat the first part of the fourth row. STEP 7 Power switch: parts preparation For the following steps, please prepare: Power switch assembly (1x) Original Prusa MINI+ kit assembly... -
Page 91: Step 8 Mounting The Power Switch
Buddy board should be approximately 1-2 mm. Make sure the connectors are not loose and do not wobble. This can cause fatal destruction of the electronics. Carefully push the cables down so that they don't protrude from the MINI-Z- bottom. Original Prusa MINI+ kit assembly... -
Page 92: Step 10 Filament Sensor: Parts Preparation (Optional)
Some of the following steps are marked as optional. If you have a printer without the filament sensor, please skip to the step Connecting the electronics. For the following steps, please prepare: MINI-fsenzor-lever (1x) MINI-fsenzor-box (1x) MINI-fsenzor-cover (1x) PTFE tube 4x2x15 (1x) The list continues in the next step... Original Prusa MINI+ kit assembly... -
Page 93: Step 12 Filament Sensor Assembling (Optional)
See the clip on the connector and the notch on the sensor for better orientation. Guide the cable under the IR sensor like in the picture. Insert the IR sensor to the MINI-fsenzor-box. Make sure the cable is still under the sensor. Original Prusa MINI+ kit assembly... -
Page 94: Step 13 Filament Sensor Assembling (Optional)
Filament sensor assembling (optional) Wrap the textile sleeve around the filament sensor cable and slide it into the box as far as possible. Place the MINI-fsenzor-cover to the filament sensor assembly. Secure it with two M3x12 screws. Original Prusa MINI+ kit assembly... -
Page 95: Step 15 Filament Sensor Assembling (Optional)
Now, tighten the screw gently to ensure the sensor won't slide from the PTFE tube. Use a piece of filament and slide it through the filament sensor to ensure the proper functioning of the tube. In case of any resistance, release the screw slightly. Original Prusa MINI+ kit assembly... -
Page 96: Step 17 Connecting The Filament Sensor (Optional)
Start from the top and proceed "clockwise" according to the instructions: E-axis motor cable (labeled E) SuperPINDA sensor cable Print fan cable Hotend fan cable Hotend thermistor Hotend cables Continue in the next step... Original Prusa MINI+ kit assembly... -
Page 97: Step 20 Covering The Electronics: Parts Preparation
Connecting the electronics Heatbed thermistor (labeled H) Heatbed cable Check the wiring connection according to the picture. STEP 20 Covering the electronics: parts preparation For the following steps, please prepare: MINI-Z-bottom-cover (1x) MINI-Z-bottom-cable-cover (1x) M3x12 screw (1x) Original Prusa MINI+ kit assembly... -
Page 98: Step 21 Covering The Electronics
Carefully peel off the protective layer and glue the label on the side of the extrusion. Ensure there is no air trapped below the label. The orientation of the sticker doesn't matter. Original Prusa MINI+ kit assembly... -
Page 99: Step 24 Lcd Assembly & Electronics Are Finished
STEP 24 LCD assembly & Electronics are finished! Congratulations, you've just assembled the Original Prusa MINI+! Check the final look, compare it to the picture. Checked everything? Jump to the next chapter: 6. Spool holder assembly Original Prusa MINI+ kit assembly... -
Page 100: Spool Holder Assembly
6. Spool holder assembly Original Prusa MINI+ kit assembly... -
Page 101: Step 1 Tools Necessary For This Chapter
All the printed parts and fasteners needed for this chapter are included in the box: Print head & Heatbed For the next steps, please prepare: MINI-base-spool-holder (4x) MINI-rail-spool-holder (2x) M3x12 screw (4x) M3x8 screw (4x) M3n nut (4x) The list continues in the next step... Original Prusa MINI+ kit assembly... -
Page 102: Step 4 Assembling The Spool Holder Base(S)
Insert the M3x12 screw from the top and tighten it. Flip the base assembly over and do the same. Make sure both bearings can rotate freely. If not, release the screw(s) slightly. Repeat this step for the second base assembly. Original Prusa MINI+ kit assembly... -
Page 103: Step 5 Adding The Spool Holder Rails
We are using a spool of Prusament as an example. Once the holder is aligned, remove the spool, insert two M3x8 screws and tighten them to prevent the parts from moving. Original Prusa MINI+ kit assembly... -
Page 104: Step 7 Attaching Anti-Slip Pads
Eat the fifth row. STEP 9 Spool holder is assembled! Check the final look, compare it to the picture. That was easy, wasn't it? ;) Now it's finally time for the last chapter: 7. Preflight check Original Prusa MINI+ kit assembly... -
Page 105: Preflight Check
7. Preflight check Original Prusa MINI+ kit assembly... -
Page 106: Step 1 Superpinda Sensor Height Adjustment
Rotate the lead screw manually in the opposite direction to move the axis at least 5 mm up. STEP 2 Finalising the assembly For the following step, please prepare: MINI+ power supply (1x) PEI MINI+ sheet (1x) Original Prusa MINI+ kit assembly... -
Page 107: Step 3 Connecting The Power Supply
Printing Handbook. Congratulations! You should be ready to print by now ;-) You can start by printing some of our test objects bundled on the included USB stick - you can check them out here prusa3d.com/printable-3d-models Original Prusa MINI+ kit assembly... -
Page 108: Step 6 Prusa Knowledge Base
7. Preflight check STEP 6 Prusa knowledge base If you encounter any problems at all, don't forget you can always check out our knowledge base at help.prusa3d.com We're adding new topics every day! STEP 7 It works! Reward yourself. You did a great job! Now you can relax, take your last dose of sweets and plunge into the endless fun of 3D printing :). - Page 109 Notes:...
- Page 111 Notes:...
- Page 113 Notes:...
- Page 115 Notes:...
Need help?
Do you have a question about the Original Prusa MINI and is the answer not in the manual?
Questions and answers