Table of Contents
Advertisement
Quick Links
O P E R A T I O N M A N U A L
•
This operation manual describes precautions that are important for preventing accidents as well as
procedures used to handle the product.
•
Read this operation manual and the attached warranty thoroughly before use, and use the product
correctly.
•
After reading this operation manual and the warranty, keep them handy for future reference.
— Communication Software —
Thank you for purchasing this product.
CODE 080170-22
Advertisement
Table of Contents

Related Manuals for Sibata LD-6N2


Summary of Contents for Sibata LD-6N2
- Page 1 CODE 080170-22 O P E R A T I O N M A N U A L — Communication Software — Thank you for purchasing this product. • This operation manual describes precautions that are important for preventing accidents as well as procedures used to handle the product.
-
Page 3: Table Of Contents
5 Installing the Software ............7 Installing the Software ............7 Installing the USB Drivers............. 10 Connecting the LD-6N/LD-6N2 and PC ....... 13 Checking the Communication Port ........14 6 Uninstalling the Software ..........16 7 Starting Up the Software ..........18 Connecting the LD-6N/LD-6N2 and PC ....... -
Page 4: Precautions
If you do not accept the terms of this User Acceptance Agreement, you may not use this software. Promptly return all software items (if included in a set, all items included in the set) to SIBATA SCIENTIFIC TECHNOLOGY LTD., or the distributor where you purchased the product, and delete any preloaded or embedded software. - Page 5 This software has been inspected and has no functional defects. However, this software may not operate in all personal computer and peripheral environments. In this case, SIBATA SCIENTIFIC TECHNOLOGY LTD. will do our utmost to help use the software on your computer by providing revised versions that address any problems that may arise.
-
Page 6: Functions
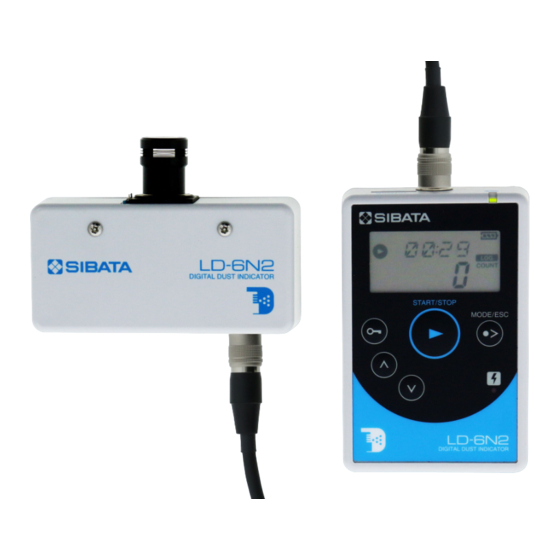
Using this software will enable setup information to be forwarded from the PC to the LD-6N/LD-6N2 or data collected on the LD-6N/LD-6N2 to be forwarded to the PC. The PC and LD-6N/LD-6N2 system are connected using the provided or a commercially available USB cable (A-miniB type). -
Page 7: Installing The Software
Installation automatically starts when the "Communication Software for the LD-6N/ LD-6N2" CD-ROM is inserted into the CD drive of the PC. If it is not automatically installed due to the setting on your PC, follow the following procedures to install the software. - Page 8 (4) The installation program starts up. Click [Communication Software]. (5) Installation starts, and the Wizard screen appears. (6) Click [Next >].
- Page 9 (7) Click [Next >] to install to the displayed default folder, or click [Change…] to install to a different folder. (8) Installation starts. (9) When the following screen is displayed, installation is complete. Click [Finish].
-
Page 10: Installing The Usb Drivers
In case that the USB driver has been installed, remove the CD-ROM and keep it in a safe place. Do not connect the LD-6N/LD-6N2 to a PC before the USB drivers are installed. Make sure that the USB drivers have been installed before the LD-6N/LD-6N2 is connected to the PC. - Page 11 (2) Click [Next >]. (3) When the following screen is displayed, check that the verified publisher is "SIBATA SCIENTIFIC TECHNOLOGY LTD.", then click [Install] to continue installation. LD-6N Bus/D2XX Driver The procedure is the same for the LD-6N VCP Driver.
- Page 12 (5) When installation is complete, the following screen is displayed. Click [Finish] to complete the installation process. The following two USB drivers are installed: • SIBATA LD-6N Bus/D2XX Driver • SIBATA LD-6N VCP Driver (6) In the installation program screen, click [Exit].
-
Page 13: Connecting The Ld-6N/Ld-6N2 And Pc
The following procedures are for Windows 10. Display may be different depending on your PC settings or OS. Connect the PC and LD-6N/LD-6N2 using the USB cable, and turn ON the LD-6N/ LD-6N2. At this point, the final step in the installation of the device drivers will be performed and completed by the PC. -
Page 14: Checking The Communication Port
The following procedures are for Windows 10. Display may be different depending on your PC settings or OS. (1) Connect the PC and LD-6N/LD-6N2 using the USB cable, and turn ON the LD- 6N/LD-6N2. (2) On the Start menu, click [Control Panel] - [Hardware and Sound]. - Page 15 ● The COM port number may change if the PC environmental settings are changed. Therefore, it is recommended that you check it each time the LD-6N/LD-6N2 is connected. (The COM port number cannot be checked unless the LD-6N/LD-6N2 is connected.)
-
Page 16: Uninstalling The Software
6 Uninstalling the Software If you need to uninstall (delete) the Software for the LD-6N/LD-6N2 due to upgrades etc., use the following procedures. The following procedures are for Windows 10. Display may be different depending on your PC settings or OS. - Page 17 (4) If the screen for user account control is displayed, click [Yes]. (5) When the [LD6NE] screen closes, uninstallation is complete.
-
Page 18: Starting Up The Software
(1) Click [Start], point to [All Programs] - [SIBATA] - [LD6NE], and click [LD6NE]. (2) If [LD6NE] is not listed when you click [Start] - [All Programs] - [SIBATA] - [LD6NE], then start up the program as per the following procedures. - Page 19 The USB cable can be removed/inserted while the Software for the LD- 6N/6N2 is running. Wait at least 5 seconds however before inserting it. Also, it may take 30 seconds or longer for the LD-6N/LD-6N2 to be recognized, depending on the PC environment.
- Page 20 While the LD-6N/LD-6N2 is measuring, or while carrying out basic settings or function settings, or when there is a communication error, the setting values are blank. When the measurements or settings are complete, or when communications are restored, the setting values will be displayed.
-
Page 21: Operations After The Software Starts Up
8 Operations After the Software Starts Up Logging Data [LOG] Tab Page On this tab page, you can check the measurement data stored in the LD-6N/LD- 6N2 internal memory, read it in (transfer it to the PC), or delete it. Reading In Data (1) Click ... - Page 22 Five files are created. The following message is displayed if the USB cable is removed or the LD- 6N/LD-6N2 is turned OFF before you click [Save]. Check the connection/instrument. Then repeat the procedure starting from the [Save As] dialog box.
- Page 23 (8) The content of the saved data is as follows: Start time: 2013/09/10 12:18:07 Measurement time: 1 hour 00 min. 00 sec. Logging cycle: 1 min. 00 sec. Data points: 1,2013/9/10,12:19:07,36 2,2013/9/10,12:20:07,37 3,2013/9/10,12:21:07,36 Data No. Y/M/D HH:MM:SS CPM (count per minute) Example: This example shows the screen when saved data is opened in Microsoft Excel.
-
Page 24: Deleting Data
(4) Click [Yes] to start deletion. The following message is displayed if a communication error occurs, such as the USB cable is removed or the LD-6N/LD-6N2 is turned OFF before you click [Yes]. Check the connection/instrument and then repeat the deletion procedure. -
Page 25: Basic Settings
Basic Settings [OPTion] Tab Page On this tab page, you can check and change the basic LD-6N/LD-6N2 settings. The content displayed corresponds to the current settings for the LD-6N/LD-6N2. Immediately after changing numbers or settings, the changes are reflected in the LD-6N/LD-6N2. - Page 26 This configures the USB output for the measurement results. Click , and on the pull-down menu, click the desired setting. OFF: No output SOUT Output (Serial out Next, set the log cycle (for [ON]) in minutes and Mode) seconds. Click , and on the pull-down menu, click the desired value.
-
Page 27: System Settings
System Settings [SYStem] Tab Page On this tab page, you can check and change the LD-6N/LD-6N2 functional settings and check the hour meter. The content displayed corresponds to the current settings for the LD-6N/LD-6N2. Immediately after changing numbers or settings, the changes are reflected in the LD-6N/LD-6N2. - Page 28 The LCD backlight time can be changed. Click , and on the pull-down menu, click the desired setting. OFF: Always OFF Lit for the set time (Back Light) Next, set the time (for [ON]) in seconds. Click , and on the pull-down menu, click the desired value.
- Page 29 This is an auxiliary function setting. This setting does not need to be specified for normal operation. Set this to [ON] to enable signal output to a dedicated LD-6N/ LD-6N2 external signal unit, and to set the transmission interval. OFF: Disabled...
-
Page 30: Closing The Software
(1) Click the close icon (x) at the top left of the screen. (2) [Close the program. Continue?] dialog box is displayed. Click [OK] to close the program. (3) Remove the USB cable from the PC, and turn OFF the LD-6N/LD-6N2. -
Page 31: Warranty
9 Warranty If a Sibata product fails within one year from date of purchase, it will be repaired free of charge. To request repairs, contact the distributor where you purchased the product. Be sure to provide the item code, product name, model number, serial number, a description of the problem, and other relevant information. - Page 32 Note) Shape, dimensions, specifications, and other product information are subject to change without notice in the interest of product improvement to the extent that product functions and applications will not be impaired.
Need help?
Do you have a question about the LD-6N2 and is the answer not in the manual?
Questions and answers