Table of Contents
Advertisement
Quick Links
EN
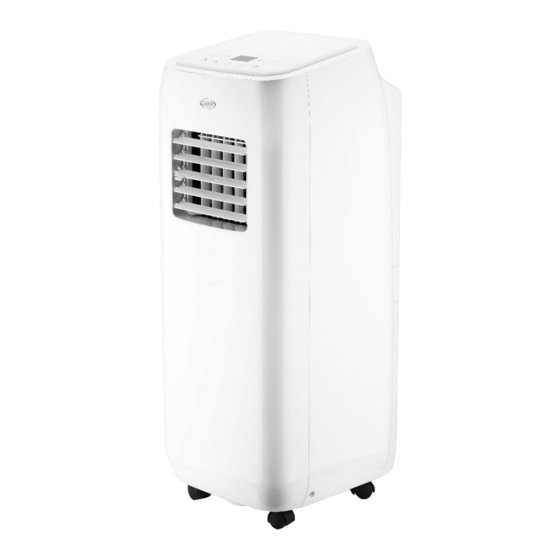
PORTABLE AIR CONDITIONER (LOCAL)
ALTEA
OPERATING INSTRUCTIONS
Read the instructions carefully before operating the appliance or carrying out maintenance work.
Observe all the safety instructions; failure to observe the instructions may lead to accidents and/or
damage. Store these instructions in a safe place for future reference.
V 11/21
23
Advertisement
Table of Contents

Related Manuals for Argo ALTEA


Summary of Contents for Argo ALTEA
- Page 1 PORTABLE AIR CONDITIONER (LOCAL) ALTEA OPERATING INSTRUCTIONS Read the instructions carefully before operating the appliance or carrying out maintenance work. Observe all the safety instructions; failure to observe the instructions may lead to accidents and/or damage. Store these instructions in a safe place for future reference.
- Page 2 Appliance is filled with flammable gas R290. Before installing and using the appliance, read the owner manual. Before installing the appliance, read the installation manual. Any repairs you need, contact the nearest authorized Service Centre and strictly follow manufacturer’s Service Manual. The Refrigerant R290 ...
- Page 3 GENERAL OPERATING AND SAFETY INSTRUCTIONS This appliance is a local air conditioner designed for domestic use. Only use this air-conditioner as described in this manual. Ensure that the required voltage and frequency (220-240V/50 Hz) match the available power source. ...
- Page 4 Do not install the air conditioner in rooms where it may receive water splashes (e.g. laundry rooms). Before moving or cleaning the device, ensure that it is unplugged from the socket. Do not move the air conditioner while it is operating; first turn the appliance off, check for any condensate build-up and empty it if necessary.
- Page 5 WARNING! The air conditioner must be positioned at least 50 cm from the wall or any other obstacles, on a flat and stable surface so as to avoid water leaks. The air conditioner is fitted with a system for protecting the compressor from overload.
-
Page 6: Description Of The Appliance
DESCRIPTION OF THE APPLIANCE FRONT VIEW REAR VIEW CONTROL PANEL AND FUNCTION BUTTONS AIR EXPULSION HOSE WITHOUT REMOTE CONTROL JOINT HORIZONTAL FINS AND AIR INTAKE END FITTING FOR WINDOW VERTICAL FINS AND AIR INTAKE 10) WINDOW ACCESSORY WHEELS 11) CORD CABLE CLAMP AIR FILTER 12) REMOTE CONTROL AIR EXPULSION HOSE END FITTING... -
Page 7: Appliance Start-Up
PRE-OPERATING CHECKS AND OPERATIONS The following space must be maintained to ensure the operating efficiency of the portable air conditioner. APPLIANCE START-UP Open the packaging and remove the box from above. Remove the product and the other elements supplied (illustrated in the box below). Type AAA batteries for the LCD remote control remote control... - Page 8 INSTALLATION OF CORD WINDER HOOKS 1. Hook 2. Screw Install the cord winder hooks to the back of the unit using the When the appliance is not being used, wind the power screws, as shown in the figure. cord around the hooks. The hooks must be positioned facing upwards and Wind the cord around the hook.
- Page 9 USE WITH WINDOW UNIT KIT To make the hole in the glass it is advisable to take 2. Insert the window unit into the window. the porthole kit accessory to the glazier 3. Insert the round fitting onto the flexible pipe. 4.
-
Page 10: How To Use The Appliance
8. If the air conditioner is not used for prolonged periods, disconnect the pipe and plug the window unit. Connect the power cord to a suitable electric socket (220–240 V). Insert the supplied batteries into the remote control and make sure the poles match. Select the desired operating mode from the remote control. HOW TO USE THE APPLIANCE This appliance can be used for cooling, dehumidifying and ventilating. - Page 11 NOTE The air conditioner does not cool the room when it is used as a dehumidifier. When the appliance is used as a dehumidifier, the flexible hose must not be connected. For maximum dehumidification efficiency, leave the rear discharge attachment free to discharge directly into the environment.
- Page 12 Cooling When the unit operates in the cooling mode, ensure that the rubber cap closing the drainage opening on the back of the appliance is properly positioned. To empty the container, switch the air conditioner off and unplug the cord. Remove the cap from the rear drainage opening and place its end over a normal drain.
-
Page 13: Remote Control Operation
REMOTE CONTROL OPERATION 1. Swipe to open the cover in the direction indicated by the arrow. 2. Insert the batteries (AAA, LR03, 1,5V - not supplied) into the remote control, respecting the polarity indicated. 3. Put the cover back on. 4. - Page 14 REMOTE CONTROL DISPLAY Signal receiver Display A. Cooling B. Dehumidification C. Ventilation D. Temperature setting E. Timer setting F. Speed setting G. Lock H. Sleep mode setting X-FAN function L. Signal transmission N. T-OFF off timer BUTTONS ON REMOTE CONTROL T-ON on timer ON / OFF BUTTON MODE BUTTON...
- Page 15 ON/OFF BUTTON Press this button to switch the unit on or off. MODE SELECTION BUTTON (MODE) (on remote control and on the unit) Press this button to select the various operating modes, according to the following sequence: In the COOL mode the display lights up. In the DRY and FAN modes the display does not light up. The LEDs on the control panel will light up according to the selected mode FAN SPEED ADJUSTMENT BUTTON (on remote control and on the unit)
-
Page 16: Safety Functions
X-FAN BUTTON (only on remote control) In cooling and dehumidification mode it is possible to activate the X-FAN function. After pressing the X-FAN button on the remote control, with the unit off, the unit's internal fan continues to operate for a short time at minimum speed, to allow any residual water in the air pipe to dry. - Page 17 2. Cleaning the casing. Use a soft damp cloth to clean the outer surface of the air conditioner. Do not use excessively hot water, solvents, petrol or other aggressive chemical compounds, talcum powder and brushes: they may damage the surface or colour of the casing.
- Page 18 TIPS FOR MAXIMISING COMFORT AND MINIMISING CONSUMPTION CHECK that: the unit's extraction and delivery grilles are always unobstructed; the air filters are always clean: a dirty filter will decrease the passage of air and thus reduce the unit performance;...
- Page 19 Specialist’s Manual Aptitude requirement for maintenance man (repairs. should be done only be specialists). a) Any person who is involved with working on or breaking into a refrigerant circuit should hold a current valid certificate from an industry-accredited assessment authority, which authorises their competence to handle refrigerants safely in accordance with an industry recognised assessment specifìcation.
- Page 20 ---lf an indirect refrigerating circuit is being used, the secondary circuit shall be checked for the presence of refrigerant; ---Marking to the equipment continues to be visible and legible. Markings and signs that are illegible shall be corrected; ---Refrigeration pipe or components are installed in a position where they are unlikely to be exposed to any substance which may corrode refrigerant containing components, unless the components are constructed of materials which are inherently resistant to being corroded or are suitably protected against being so corroded.
- Page 21 If a leakage of refrigerant is found which requires brazing, all of the refrigerant shall be recovered from the system, or isolated (by means of shut off valves) in a part of the system remote from the leak. For appliances containing flammable refrigerants, oxygen free nitrogen (OFN) shall then be purged through the system both before and during the brazing process.
- Page 22 Labelling Equipment shall be labelled stating that it has been de-commissioned and emptied of refrigerant. The label shall be dated and signed. For appliances containing flammable refrigerants, ensure that there are labels on the equipment stating the equipment contains flammable refrigerant. Recovery When removing refrigerant from a system, either for servicing or decommissioning, it is recommended good practice that all refrigerants are removed safely.
Need help?
Do you have a question about the ALTEA and is the answer not in the manual?
Questions and answers