Argo APOLLO Operating Instructions Manual
Without outdoor unit
Hide thumbs
Also See for APOLLO:
- Installation instructions manual (12 pages) ,
- Service manual (17 pages) ,
- Manual (16 pages)
Table of Contents
Advertisement
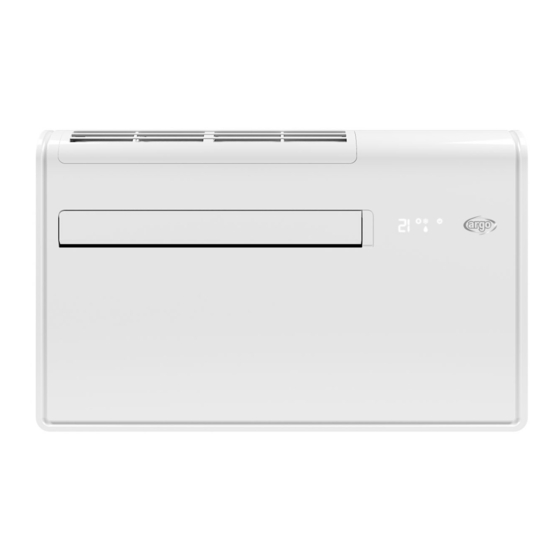
APOLLO
Air conditioner without outdoor unit
Climatizzatore senza unità esterna
Acondicionador de aire sin unidad exterior
Ar condicionado sem unidade externa
Climatiseur sans unité extérieure
Klimagerät ohne Ausseneinheit
37.4254.097.01
06/2020
OPERATING
EN
INSTRUCTIONS
ISTRUZIONI
IT
D'USO
MODE
FR
D'EMPLOI
BEDIENUNGS-
DE
ANLEITUNG
INSTRUCCIONES
ES
DE USO
MANUAL
PT
DE INSTRUÇÕES
Advertisement
Table of Contents

Related Manuals for Argo APOLLO


Summary of Contents for Argo APOLLO
- Page 1 OPERATING INSTRUCTIONS ISTRUZIONI D’USO MODE D’EMPLOI BEDIENUNGS- ANLEITUNG INSTRUCCIONES APOLLO DE USO MANUAL DE INSTRUÇÕES Air conditioner without outdoor unit Climatizzatore senza unità esterna Climatiseur sans unité extérieure Klimagerät ohne Ausseneinheit Acondicionador de aire sin unidad exterior Ar condicionado sem unidade externa 37.4254.097.01...
-
Page 2: Table Of Contents
TROUBLESHOOTING HOW TO DISCHARGE THE CONDENSATE WATER CARE AND CLEANING APP DOWNLOAD AND SETTING UP APOLLO IN Wi-Fi MODE Wi-Fi GUIDE (English / Italian) SAFETY INSTRUCTIONS Read this booklet carefully before using this air conditioner. If you still have any difficulties or ●... -
Page 3: Signaling Leds
This air conditioner can be used by children aged from 8 years and above and persons with reduced ● physical, sensory or mental capabilities or lack of experience and knowledge if they have been given supervision or instruction concerning use of the air conditioner in a safe way and understand the hazards involved. -
Page 4: Using The Remote Control Unit
If there are curtains, doors or other objects that block ● USING THE REMOTE CONTROL UNIT the signal from the remote control to the air condi- HOW TO INSTALL BATTERIES tioner, the air conditioner will not be controlled by the Remove the lid in the rear part of the remote control ●... -
Page 5: Remote Control Unit
REMOTE CONTROL UNIT Fan speed DISPLAY Operation mode Automatic Displayed when Cooling transmitting data Dehumidification Temperature indication Heating Sleep mode Timer Temperature symbol Flap Not real, it is always indoor temperature MODE SELECTOR BUTTON ON/OFF BUTTON Press this button to modify the air conditioner mode. -
Page 6: Cooling
AUTOMATIC OPERATION COOLING 1. Set the MODE selector to AUTO mode (symbol on the NOTE display Verify that the unit is connected to the 2. Press the +/- buttons (temperature selection) to set the main power. desired temperature (the temperature range is between 1. -
Page 7: Adjusting The Fan Speed
ADJUSTING THE FAN SPEED TURBO MODE AUTOMATIC You can select TURBO only during cooling or heating Simply set the FAN selector to the position. A mode and not during automatic, dehumidifying (dry) and microcomputer automatically controls the fan speed when fan mode. -
Page 8: Setting The Timer
SETTING THE TIMER CAUTION A) HOW TO SET THE ON TIMER • Use the FLAP button on the remote control to adjust 1. In the standby state, press the the position of the flap. If you move the flap by hand, TIMER button once to enter the the factual flap position and the flap position on the timed power-on setting state:... -
Page 9: Tips For Energy Saving
Trouble: Clicking sound is heard from the air conditioner. TIPS FOR ENERGY SAVING Possible cause: DO NOT: 1. During operation, any plastic parts may expand or ● Block the air intake and outlet of the unit. shrink due to a sudden temperature change. In this If they are obstructed, the unit will not work well, and event, a clicking sound may occur. - Page 10 AUTO-DIAGNOSIS TABLE...
-
Page 13: How To Discharge The Condensate Water
HOW TO DISCHARGE THE CONDENSATE WATER The Humidity removed by the unit is collected and discharged automatically, but in special conditions some condensate water could remain inside the unit. If you are not going to make use of the air conditioner for a long period, it is necessary to discharge the eventual condensate water through the service cap for condensate discharge placed under the bottom panel of the unit:... -
Page 14: App Download And Setting Up Apollo In Wi-Fi Mode
4.4 or higher for Android, version iOS 9.0 or higher for Apple. NOTE For Apollo connection to Tuyasmart App and use of Apollo via Tuyasmart App, see section at the end of this manual (Wi-Fi GUIDE). - Page 15 INFORMATION FOR CORRECT DISPOSAL OF THE PRODUCT IN ACCORDANCE WITH THE EUROPEAN DIRECTIVE 2012/19/EU At the end of its working life this equipment must not be disposed of as an household waste. It must be taken to special local community waste collection centres or to a dealer providing this service. Disposing of an electrical and electronic equipment separately avoids possible negative effects on the environment and human health deriving from an inappropriate disposal and enables its components to be recovered and recycled to obtain significant savings in energy and resources.
-
Page 16: Wi-Fi Guide (English / Italian)
Wi-Fi GUIDE (English / Italian) GUIDA Wi-Fi (Inglese / Italiano) GUIDE Wi-Fi (Anglais / Italien) LEITFADEN ZU Wi-Fi (Englisch / Italienisch) GUÍA Wi-Fi (Inglés / Italiano) GUIA DE Wi-Fi (Inglês / Italiano) - Page 17 CONNECT APOLLO TO TUYASMART APP 1. Click on 2. In the left bar select 3. In the right area select “” “Add device” “Large Home Appliance” “Air Conditioner” 4. After allowing the App to access the position according to the...
- Page 18 5. After checking that the Wi-Fi light on Apollo is blinking 6. Wait for the pairing process between the Smartphone rapidly, click on “” and the unit Apollo to end successfully and click on “Done” “Confirm indicator rapidly blink” Once everything is set, the Wi-Fi light on the unit will remain fixed and the Smartphone can be used for all available...
- Page 19 USE APOLLO VIA TUYASMART APP Open the app and use the available controls for the unit Apollo. FIRST SCREEN AFTER THE HEATING MODE SETTING (HOT) TEMPERATURE SETTING CONNECTING PROCEDURE + and - FLAP POSITION FAN SPEED (AUTO)
- Page 20 COOLING MODE SETTING (COLD) FAN MODE SETTING (WIND) AUTOMATIC MODE SETTING (AUTO) UNIT IN STAND-BY TIMER: If you use the Timer to turn the unit on/off (Power ON/Power OFF) at the desired IT IS POSSIBLE TO SELECT THE hours and days, remember that the system works according to to the previous settings. TIMER...
- Page 21 ATTENTION: Once the timer is set, you can decide to activate or deactivate it, if necessary, or to delete the setting. ACTIVATE / DEACTIVATE CLICK ON THE TIME TO BE DELETED THEN CONFIRM CLICK HERE TO ENTER THE SPECIAL FUNCTIONS (SETTING) SPECIAL FUNCTIONS CORRISPONDENTI A TASTI TELECOMANDO:...
- Page 22 Via Alfeno Varo, 35 - 25020 Alfianello - BS - Italy Tel. +39 0331 755111 - Fax +39 0331 755501 www.argoclima.com...
Need help?
Do you have a question about the APOLLO and is the answer not in the manual?
Questions and answers