Advertisement
Advertisement

Subscribe to Our Youtube Channel
Summary of Contents for Ryobi R18HLTR38
- Page 1 R18HLTR38...
- Page 2 falling objects, head protection must be worn. IMPORTANT! ■ Hearing protection may restrict the operator’s ability It is essential that you read the instructions in this manual to hear warning sounds. Pay particular attention to before assembling, operating, and maintaining the potential hazards around and inside the working area.
- Page 3 ■ Beware of objects thrown by the cutting means. Clear TRANSPORTATION AND STORAGE debris like small stones, gravel, and other foreign objects ■ Turn off the product, remove the battery pack, and allow from the work area before starting the operation. Wires both to cool down before storing or transporting.
- Page 4 SYMBOLS ON THE PRODUCT Read and understand all instructions before operating the product. Follow all warnings and safety instructions. Do not expose the product to rain or damp condition. Wear head, eye, and ear protection. Do not use metal blade(s) on the product. Keep hands away from cut-off blade.
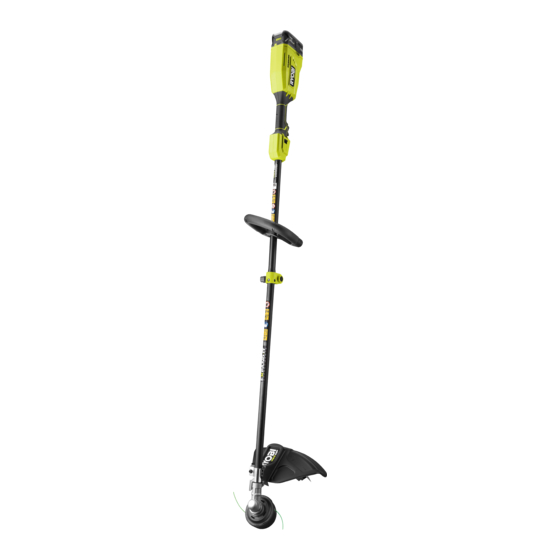
- Page 5 R18HLTR38 Battery port Rear handle Trigger switch Lock-out trigger Speed selector Front handle Adjustment knob Lower shaft Speed winder Clamp Safety guard Cut-off blade Cutting line String head R18HLTR14 Operator’s manual Battery pack Charger Know your product...
- Page 6 Always wear safety goggles or safety Turn the screw on the safety guard Align the clamp and the safety guard on glasses with side shields when counterclockwise to release the clamp. the edge of the lower shaft. operating the product. Wear non-slip, heavy-duty protective gloves.
-
Page 7: Table Of Contents
Operating the product Adjusting the p.11 cutting line 38 cm 33 cm Replacing the Cleaning the Storing the product Replacing the line p.12 p.14 p.15 p.16 string head product... -
Page 8: Operating The Product
OPERATING THE PRODUCT WARNING: For safety reasons, the product must be adequately controlled by a two- handed operation. Hold the product with the right hand on the rear handle and the left hand on the front handle. WARNING: Consider the environment in which you are working. - Page 9 3. Push the lock-out trigger and squeeze the variable speed trigger to operate the product. 4. Tap the bump knob on the ground to advance the line. The line advances each time the head is tapped. Do not hold the bump knob onto the ground.
- Page 10 NOTE: Cut tall grass from the top down. This prevents grass from wrapping around the shaft housing and bump head, which may cause damage from overheating. NOTE: Cut grass from the right side to the left side for cutting ease and safety. Operation...
- Page 11 38 cm 33 cm ADJUSTING THE CUTTING LINE 1. Remove the battery pack. 2. Remove the screws on the line cut-off blade. Remove the blade. Rotate the blade 180º. NOTE: The cutting width of the line trimmer can be adjusted according to preference. A cutting width of 38 cm gets the job done faster but results in a lesser runtine.
-
Page 12: Replacing The Line
REPLACING THE LINE 1. Press the battery latch button, and remove the battery pack. 2. Rotate the bump knob on the string head until the line on the centre of the bump knob aligns with the arrows on the outer spool. - Page 13 5. Insert the battery pack until the latches click into place. 6. Push the lock-out trigger and squeeze the trigger switch to operate the product. 7. Tap the bump knob on the ground to advance the line. The line advances each time the head is tapped.
-
Page 14: Replacing The String Head
REPLACING THE STRING HEAD 1. Remove the battery pack. 2. Insert an allen wrench into the slot underneath the string head. Loosen and remove the trimmer head. 3. Install the new string head. Tighten the string head to secure. 4. Remove the allen wrench. Maintenance... -
Page 15: Cleaning The Product
CLEANING THE PRODUCT 1. Remove the battery pack. WARNING: The small blade fitted to the cutting attachment guard is designed to trim the new extended line to the correct length for safe and optimum performance. The blade is very sharp. Do not touch the blade, particularly when cleaning the product. -
Page 16: Storing The Product
STORING THE PRODUCT NOTE: Clean the product before storing. 1. Remove the battery pack. 2. Turn the knob counterclockwise to loosen and remove the lower shaft from the upper shaft. 3. Store the product in a cool, dry, and well-ventilated place that is inaccessible to children. - Page 17 Voltage 18V d.c. Replacement 2.0 mm trimming line PWFTL2050T No-load speed (high) 5200±10%/min NOTE: Visit your local special orders desk or contact RYOBI No-load speed (low) 4800±10%/min Customer Service for replacement parts. Cutting capacity 33 cm / 38 cm Cutting line diameter 2.0 mm...
- Page 20 31 Gilby Road, Mount Waverley, VIC 3149 Melbourne, Australia Techtronic Industries N.Z. Limited Unit C, 70 Business Parade South, Highbrook, Auckland 2013, New Zealand RYOBI is a trade mark of Ryobi Limited, and is used under license. © 2021 Techtronic Cordless GP 961068242-01...


Need help?
Do you have a question about the R18HLTR38 and is the answer not in the manual?
Questions and answers