Table of Contents
Advertisement
Quick Links
Advertisement
Chapters
Table of Contents

Related Manuals for King-Meter J-LCD


Summary of Contents for King-Meter J-LCD
- Page 1 All manuals and user guides at all-guides.com K K K K ING-METER ING-METER ING-METER ING-METER USERS USERS GUIDE GUIDE USERS USERS GUIDE GUIDE 中文 1-15 1-15 页 English 1-15 English English P P P P /16-32 /16-32 1-15 English /16-32 /16-32 J-LCD J-LCD J-LCD J-LCD...
-
Page 2: Table Of Contents
All manuals and user guides at all-guides.com 目录 1、 前言…………………………………………………… 3 2、 外观尺寸……………………………………………… 4 2.1 主要材质及颜色………………………………… 4 2.2 显示尺寸与安装尺寸…………………………… 4 3、 功能概述及按钮定义………………………………… 5 3.1 用户设置概述 …………………………………… 5 3.2 正常显示区域…………………………………… 3.3 按钮定义………………………………………… 5 4、 安装说明……………………………………………… 7 5、 设置…………………………………………………… 7 5.1 开机前准备……………………………………… 5.2 开机与进入设置…………………………………... - Page 3 All manuals and user guides at all-guides.com 6.7 电量显示 ……………………………………………12 6.8 故障代码显示………………………………………13 7、 使用注意与更换电池……………………………………13 8、 常见问题解答……………………………………………14 9、 质量承诺…………………………………………………14 10、电路框图与引线…………………………………………14 11、版本变更…………………………………………………15...
-
Page 4: 1、 前言
All manuals and user guides at all-guides.com 1、 前 言 尊敬的用户, 为了让您更好地操作电动车, 请在使用前仔 细阅读 J—LCD 仪表的说明书。我们将以最简洁的语言告诉您 仪表使用的每一个环节, 包括从硬件的安装、 设置到仪表的正 常使用。同时帮助您解决有可能出现的困惑与障碍。... -
Page 5: 2、外观尺寸
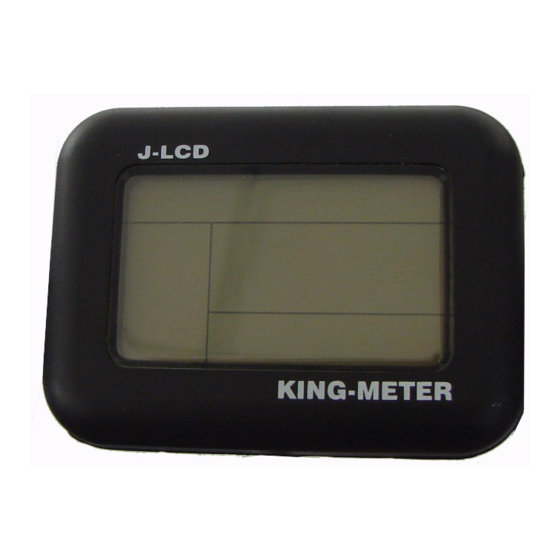
All manuals and user guides at all-guides.com 2、外观尺寸 2.1 主要材质及颜色 J—LCD 产品采用黑色 PC 材料。 外壳的材料允许在 -20℃到 60℃温度中正常使用,并且能保证很好的机 械性能。 2.2 显示尺寸及安装尺寸(单位:mm)... -
Page 6: 3、功能概述及按钮定义
All manuals and user guides at all-guides.com 3、功能概述及按钮定义 3.1 用户设置概述 J—LCD 的用户设置项目有:设置当地时间,设置最高 骑行速度, 公制/英制单位选择 (MPH 和 Km/H, Mile 和 Km) , 车轮直径选择(18—28inch) ,LCD 背光亮度选择。 正常显示区域 J—LCD 显示的内容有:电量显示,时间显示,电机功 率比例显示,骑行速度显示,骑行里程显示,6Km/h 助力 推行显示,电控系统故障代码显示。 3.3 按钮定义 J—LCD 匹配有专用的 30 组合按钮,组合按钮可以安装在 车把的左边,也可以安装在车把的右边。其形状如下:... - Page 7 All manuals and user guides at all-guides.com 30 按键有线缆连接在仪表底部。 在后续的说明中, 按键用文字“MODE”替代。 按键用文字“UP”替代, 按键用文字 “ ” DOWN 替代。...
-
Page 8: 4、安装说明
All manuals and user guides at all-guides.com 4、安装说明 将仪表和 30 组合按钮固定在车把上, 调整好合适的视角。 仪表的接插件与控制器对应的接插件对插即可完成安装。 5、设置 5.1 开机前准备 确保接插件对接牢靠,并打开电动车电源。 5.2 开机与进入设置 按 MODE 键即可开机。 开机后,同时按住 UP 和 DOWN 后,3 秒钟进入 LCD 设 定状态。 5.3 设置时间 在进入设定状态后,首先是设定小时,通过 UP 和 DOWN 选择小时的数值,按 MODE 键确认小时数值并进入分钟设置。 通过... -
Page 9: 选择显示单位
All manuals and user guides at all-guides.com 更改此数值, 可以设定电动车的最高骑行速度, 当电动车 超过设定值时, 控制器会停止对电机的供电, 以保护骑行者的 安全行驶。 最高速度设定值的可选范围是 10km/h-25km/h 之间。 具体情况以实物为准。 选择好最高骑行速度数值后,按 MODE 确认,并进入显示 单位选择。 速度设定界面 5.5 选择显示单位(公制/英制) 用户可以按 UP 和 DOWN,选择显示单位。 单位可以是 Mile 和 Km。在选择速度显示单位的同时,里程单 位 Mile 和 Km 也跟随一起改变。 英制单位选择 公制单位选择... -
Page 10: 设置轮径
All manuals and user guides at all-guides.com 5.6 设置轮径 按 MODE 键确认选择显示单位,并进入轮径选择。 通过 UP 和 DOWN 选择车辆对应的轮径, 以确保仪表速度显 示和里程显示的准确性。其界面如下: 按 MODE 确认轮径数值。进入 LCD 背光亮度选择。J—LCD 的出厂默认轮径数值是 26inch。 5.7 设置背光亮度 通过 UP 和 DOWN 调节背光亮度。背光的亮度在 1—3 之间 选择,1 是最低亮度,3 是最高亮度。 J—LCD 的背光亮度出厂默认数值是 1. 5.8 退出设置... -
Page 11: 切换显示"当前速度/平均速度/最大速度
All manuals and user guides at all-guides.com 定状态)5 分钟,可以关闭电动车电源。在关机状态下,仪表 和控制器不再使用电池的电源,仪表和控制器的耗电是零。 建议:如果超过 4 小时不使用电动车,请把电动车的电 池从车上取下来,合理存放电池。 6.2 切换显示“当前速度/平均速度/最大速度” 电动车开机后,仪表默认显示当前速度。 长按 UP 显示本次骑行的最高速度(MAX),再长按 UP,显 示本次骑行的平均速度(AVG),再次长按 UP 回到当前速度显 示,如此循环。 切换速度界面... -
Page 12: 切换助力或转把档位
All manuals and user guides at all-guides.com 6.3 切换助力或转把档位 单独按 UP 或者单独按 DOWN,改变电机输出功率,功率范 围是 1—5 档,1 档是最低功率,5 档是最高功率。 开机默认档位是 1 档。 电机功率比例选择 6.4 电助力推行 长按 DOWN 进入电助力推行模式,电动车以每小时 6 公里 的速度匀速行驶。 电助力推行界面... -
Page 13: 背光的开启和关闭
All manuals and user guides at all-guides.com 警告: 6Km/h 助力推行功能只能在使用者推行电动车时使 用,请勿在骑行状态使用。 6.5 背光的开启和关闭 同时按 UP 和 MODE 延时 3 秒钟开启 J—LCD 背光。当外部 光线不足或者夜晚行车的时候, 可以开启 LCD 背光。 再次同时 按 UP 和 MODE 延时 3 秒钟,可以关闭 LCD 背光。 6.6 切换显示“单次骑行里程及时间/累计骑行里程及时间” 按 MODE 切换单次骑行里程及时间/累计骑行里程及时。 方 便使用者查看当次的骑行里程及时间... -
Page 14: 故障代码显示
All manuals and user guides at all-guides.com 6.8 故障代码显示 当电动车电控系统出现故障时,仪表将自动显示错误代 码,以下是错误代码的定义 显示值 定义 电流异常 转把异常 电机缺相 电机霍尔信号异常 刹车异常 通讯异常 错误代码定义表 错误代码显示 只有故障被排除时才能退出故障显示界面, 出现故障后电 动车将不能继续行驶。 7、使用注意与更换电池 使用中注意安全行驶, 避免仪表磕碰。 更换电池时将仪表 从车把上拆下来,拧下电池盖更换新的电池。 仪表电池的型号是 CR2032,此仪表电池是专供仪表内部 电子表使用的,电池寿命不低于 2 年。... -
Page 15: 8、 常见问题解答
All manuals and user guides at all-guides.com 注意:更换电池后,请设置仪表时间。 8、常见问题及解答 问:为什么不能开机? 解决办法:检查仪表线束与控制器的接插件接触可靠。 问:为什么时间显示不正常? 答:请更换仪表内部电池,型号 CR2032. 问:仪表显示故障代码应如何处理? 答:及时到维修电动车的维修点修理。 9、质量承诺与包修范围 仪表出厂后,外壳划伤或外壳破损不包修。 引线划伤或断裂不包修。 电路功能丢失,质保期:自用户开始使用计算 18 个月以 内。 仪表内部电池寿命:自仪表出厂之日起 24 个月以内。 10、电路框图与引线... -
Page 16: 11、版本变更
All manuals and user guides at all-guides.com 红色:电池正极,蓝色:控制器锁线,黑色:电池负极,绿色 /黄色:与控制器通讯线。 注:部分产品的引线采用防水接插件,用户无法看到线束内 部的引线颜色。 11、版本变更 本仪表的使用说明书是天津嘉特机电技术有限公司通用 软件版本(V2.0 版本)的操作说明书。部分整车上使用的仪 表软件版本有可能与本说明书略有差异, 均以实际使用版本为 准。... - Page 17 All manuals and user guides at all-guides.com Contents Contents Contents Contents 1、Preface …………………………………………….18 2、Appearance and Size……………………………….19 2.1 Material and color……………………………19 2.2 Display Size and Installation Size …………19 3、 Function Summary and Button Definition …………20 3.1 Brief Introduction of User Setting………… 20 3.2 Normal Display Area ………………………20 3.3 Button definition…………………………..…21 4、Installation Instruction……………………………..22...
- Page 18 All manuals and user guides at all-guides.com 6.5 Turn On and Turn Off the backlight……28 6.6 Distance Display (Riding Distance and Time/Total Distance Time) ……………….….28 6.7 Battery Capacity Display …………29 …………… 6.8 Malfunction Code Display …………………...30 7、Button Battery Replacement…………….……….30 8、FAQ Answers……………………………………31 9、Quality Warranty……………………….………..31 10、Circuit Block Diagram…........32 11、Software Version ………………………………32...
-
Page 19: 1、Preface
Preface Dear users, To ensure better performance of your e-bike, please read through the J-LCD product introduction carefully before using it. We will use the most concise words to inform you of all the details ( including hardware installation, setting and normal use of the display ) when using our display. -
Page 20: 2、Appearance And Size
All manuals and user guides at all-guides.com 2 2 2 2 、Outlook Outlook Outlook Size Size Outlook and and Size Size 2.1 Material and Color J—LCD products are made of black PC material. Under the temperature of -20 to 60 ℃ , the shell material can ensure normal usage and good mechanical performance of the products. -
Page 21: 3、 Function Summary And Button Definition
All manuals and user guides at all-guides.com 3 3 3 3 、Function Function Function Summary Summary Butto Butto Button n n n Definition Definition Definition Function Summary Summary and and Butto Definition 3.1 Brief Introduction of User Setting J—LCD user settings include local time setting, top riding speed setting, metric system/English system setting (MPH and Km/H,Mile and Km),wheel size setting (18—28inch), LCD backlight brightness setting. -
Page 22: Button Definition
All manuals and user guides at all-guides.com 3.3 Button Definition J—LCD is equipped with special 30 button. The button can be installed either on the left side or on the right side of the handlebar. Its shape is as follows: 30 button is connected to the bottom of the display through wire cable. -
Page 23: 4、Installation Instruction
All manuals and user guides at all-guides.com 4 4 4 4 、Installation Installation Installation Instruction Instruction Installation Instruction Instruction Fix the display and 30 button onto the handlebar and adjust to an appropriate visual angle. Match display connectors with controller connectors. 5 5 5 5 、Setting Setting Setting... -
Page 24: Top-Speed Setting
All manuals and user guides at all-guides.com Setting HOUR Setting MINUTE 5.4 Top-speed Setting The default figure of the top riding speed in the display is 25 Km/h. You can change this figure and re-set a new top riding speed. If the e-bike speed exceeds this new figure, the controller will limit the speed and return to the max speed to ensure the rider’s safety. -
Page 25: Choice Of Display Unit
All manuals and user guides at all-guides.com Speed Setting Interface 5.5 Choice of Display Unit (Metric system/ English system) Press UP UP or DOWN DOWN DOWN DOWN to choose a display unit. The unit could be MPH and Km/h. The range unit is changing accordingly with the speed unit. -
Page 26: Backlight Brightness Setting
All manuals and user guides at all-guides.com Press MODE MODE MODE MODE to confirm the wheel size and enter into the LCD backlight brightness setting. The default value of the wheel size is 26 inch. 5.7 Backlight Brightness Setting Press UP UP or DOWN DOWN DOWN... -
Page 27: Speed Display (Current Speed/Average Speed/Max Speed)
All manuals and user guides at all-guides.com In the Power On State, hold MODE MODE MODE MODE or lay aside (the sate is no speed and no setting) for five minutes, to cut off the e-bike power supply. In the Power Off state, the display and the controller don’t use the battery power supply. -
Page 28: Assisted Power Select Or Throttle Level Select
All manuals and user guides at all-guides.com The interface of switching speeds 6.3 Assisted Power Select or Throttle Level Select DOWN Press UP UP or DOWN DOWN DOWN change motor output power of the motor. The power ranges from level 1 to level 5. Level 1 is the minimum power. -
Page 29: Power Assist Walk
All manuals and user guides at all-guides.com 6.4 Power Assist Walk DOWN Hold DOWN DOWN DOWN and enter into the mode of power assist walk. The e-bike will go on at a uniform speed of 6 Km/h. Interface of power assist walk Warning Warning 6Km/h... - Page 30 All manuals and user guides at all-guides.com The riding time is indicated by hours and minutes. The total time is indicated by minutes. 10 seconds to run before turning back to the clock interface. Range Interface 6.7 Capacity Display When the battery capacity is high, the five battery segments are all right.
-
Page 31: Malfunction Code Display
All manuals and user guides at all-guides.com 6.8 Malfunction Code Display If there is something wrong with the electronic control system, the display will show error code automatically. The following are some definition of malfunction codes. Display Value Definition Current Abnormality Throttle Abnormality Motor Open- phase Motor Hall signal Abnormality... -
Page 32: 8、Faq Answers
All manuals and user guides at all-guides.com The model of the display battery is CR2032. This button battery is used exclusively for the timer IC inside the display. The life of the button battery is more than 2 years. Attention: After replacement button... -
Page 33: 10、Circuit Block Diagram
All manuals and user guides at all-guides.com 10 10 10 10、Circuit Circuit Circuit Block Block Diagram Diagram Circuit Block Block Diagram Diagram Red: 24V/36V, Blue: lock wire, Black: GND, Green/Yellow: RX/TX wire. If using the water proof connector, Users cannot see the leads color of the internal wiring.
Need help?
Do you have a question about the J-LCD and is the answer not in the manual?
Questions and answers