Table of Contents
Advertisement
Advertisement
Table of Contents

Subscribe to Our Youtube Channel
Summary of Contents for King-Meter JK-LCD
- Page 1 KING-METER USERS GUIDE JK-LCD...
-
Page 2: Table Of Contents
Content Preface..............1 Appearance and dimensions ........1 Product summary..............2 Display content..............3 Precautions..............3 Installation................4 Operation................4 7.1 Power on/off..............4 7.2 Selecting speed mode (current/average/speed)..4 7.3Distance (Trip/ODO/Trip time)....5 7.4 Toggle headlight...............6 7.5 Push assistance 6km/h...........6 7.6 PAS Level..............7 7.7 Battery capacity and power..........7 7.8 Error code..............8 Setting................9 8.1 Wheel size...............9... -
Page 3: Preface
Dear User, To ensure the best performance of your e-bike, please read through the JK-LCD product introduction carefully before use. This user manual covers: Hardware installation, set up and normal operation. It will also help to limit any confusion and assist in you to resolve any malfunctions. -
Page 4: Product Summary
The N3-button is connected to the bottom of the JK-LCD via a cable. In the following introduction, is “M”, is “UP”, is “DOWN” and is “P”. 3. Functions Summary Functions: ◆ Battery indication ◆Speed indication (Real time, Max and Average);... -
Page 5: Display Content
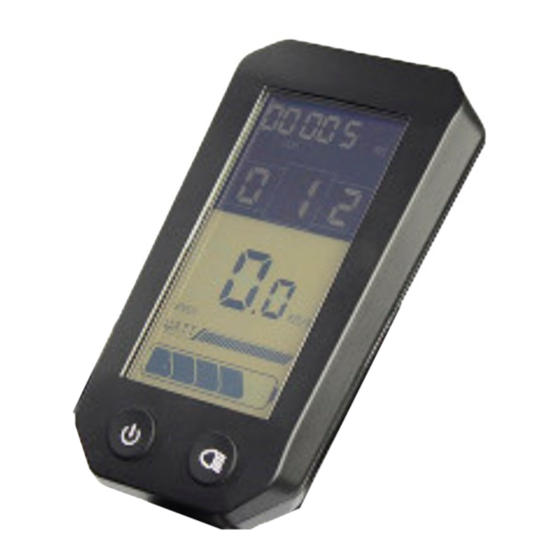
4. Display Content JK-LCD interface 5. Precautions Take care when using the display and do not connect/disconnect it with power on Avoid striking or knocking the display Do not remove the waterproof film attached to the display as this may impair its waterproofing. -
Page 6: Installation
6. Installation Fix the display and N3-button unit on the handlebar and adjust to an appropriate visual angle. Ensuring the power is off, match display connector with controller connector. 7. Operation 7.1 Power On/Off Press and hold P for several seconds to toggle the power on or off to both the display and controller. -
Page 7: Distance (Trip/Odo/Trip Time)
cycle through the other speed modes in the order of: current speed→max speed→average speed. Current speed Max speed Average speed 7.3 Distance (Trip/ODO/Trip Time) On turning on the display the default distance mode is Trip Distance. Pressing and holding M for 3 seconds will cycle through the other distance modes in the order of: Trip Distance→ODO→Trip Time Reset either the Trip Distance or Time by pressing both... -
Page 8: Toggle Headlight
7.4 Toggle Headlight Press and hold for short time to toggle on/off the headlight. Illustration 7.5 Push Assistance 6km/h Press and hold D to enable the push assistance mode. The motor will cause the bike to travel at 6km/h. 6km/h illustration - 6 -... -
Page 9: Pas Level
7.6 PAS Level Press U and D to alter the PAS level, changing the output power of the motor. The range of PAS levels is 1-5. Level 1 is being the lowest and level 5 the highest. The default level is level 1. Level 1 level 2 level 5... -
Page 10: Error Code
Power showing 7.8 Error code When the system encounters an error, the display would show the relevant error code. Only once the problem/s has been resolved will the display return to normal functionality. The e-Bike will cease functioning so long as an error code is shown. -
Page 11: Setting
Controllers without hall sensors: Check Abnormal Hall that the phase wire is normal signal Controller with hall sensors: check if the hall wire is normal Check that the brake is not being 25 Abnormal Brake applied Abnormal Check if the display and controller are Communication connected properly 8.Setting... -
Page 12: Speed Limit
8.2 Speed Limit Using the Speed Limit setting the max speed at which the motor will work to can be set. When the bike’s speed increases past the max speed the controller will cut down the output power of the motor to protect rider. The speed limit range is from 12km/h to 40km/h. -
Page 13: Units
B. the Headlight is off There are 3 options for brightness, level 1 being the lowest and level 3 being the highest. The default value is level 1. Pressing U and D will alter the brightness and pressing M will confirm. A. -
Page 14: Wire Sequence
9.Wire sequences Terminals Make connector. Female Connector Wire sequence of standard connectors Wire Colours Function Red(VCC) Power cable of display Blue(K) Power cable of controller Black(GND) Green(RX) Data In Yellow(TX) Data Out Remarks: Display may use waterproof connector; in this case the wires cannot be seen. -
Page 15: Faq
5001 indicates the customer code, 012 indicates the item code of JK-LCD 01 indicates the version number for the current customer Row 2: 2016-07-1301 2016-07 indicates the production date 1301 indicates the default software version of the display 11. FAQ Q:Why can’t I turn on the display? -
Page 16: Version
13. Version This manual has been based on the general-purpose software (version V1.0) by Tianjin KING-METER Electronic Co., Ltd. Some versions of the LCD may appear and behave slightly different depending on the hardware and software versions. - 14 -...


Need help?
Do you have a question about the JK-LCD and is the answer not in the manual?
Questions and answers