Table of Contents
Advertisement
Advertisement
Table of Contents

Subscribe to Our Youtube Channel
Related Manuals for Hyundai H-CDM8047


Summary of Contents for Hyundai H-CDM8047
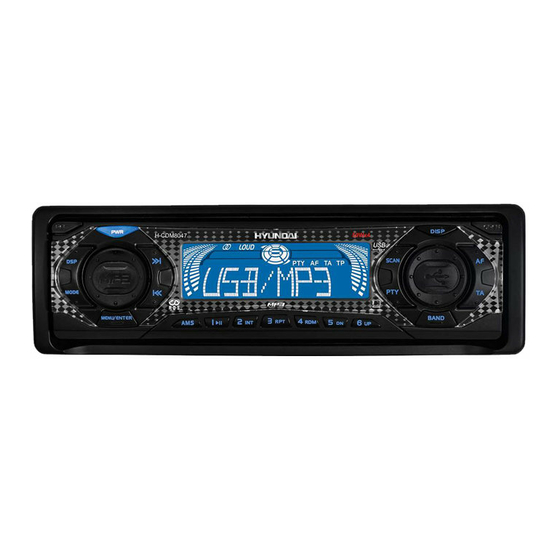
- Page 1 H- CDM8047 CD/MP3-RECEIVER CD/MP3- Instruction manual...
-
Page 2: Table Of Contents
Thank you for purchasing our product. For safety, it is strongly recommended to read this manual carefully before connecting, operating and/or adjusting the product and keep the manual for reference in the future. Table of contents Table of contents ... 2 Important safeguards... -
Page 3: Important Safeguards
Important safeguards Read carefully through this manual to familiarize yourself with this high-quality sound system. Use only in a 12-volt DC negative-ground electrical system. Disconnect the vehicle's negative battery terminal while mounting and connecting the unit. When replacing the fuse, be sure to use one with an identical amperage rating. Using a fuse with a higher amperage rating may cause serious damage to the unit. -
Page 4: Installation/ Connections
Installation/ Connections Attention: REMOVE THE TRANSPORT CD STOPPER (2 SCREWS) BEFORE USE. Din front-mount (method 1) After inserting the holder into the dashboard, select the appropriate tab and bend them inwards to secure the holder in place. Insert fingers into the groove in the front of frame and remove it. - Page 5 Removing the unit Frame Insert fingers into the groove in the front of frame and pull out to remove the frame. (When reattaching the frame, point the side with a groove down wards and attach it.) Insert the levers supplied with the unit into the grooves at both sides of the unit as shown in figure until they click.
- Page 6 Detachable control panel Detaching the control panel Turn the Power off. Press the Panel release button. Remove the control panel. Attaching the control panel Insert the right side of the control panel into the main unit. Note: the control panel must be attached into the T-Joint. Press the control panel on to the left side of middle of it until a click sound is heard.
- Page 7 Electrical connections...
-
Page 9: Panel Controls
Panel controls Panel release button DSP (preset equalizer) button Power button Volume level control Tuning seek up, down/ Track up, down buttons LCD display Scan button DISP button AF (Alternative Frequencies) button Open button Mode button Menu button/ MP3 enter button AMS (Auto Memory Store) button/ MP3 search button Play/ Pause button... -
Page 10: General Operations
General operations Power button [3] Press Power button to turn on/ off the unit. Encoder volume knob [4] When the Menu function is not activated, rotate this knob to change the volume level. When Menu function is activated, rotate this knob to navigate through different menu items. Mode button [11] Press this button to select different mode, sequence as follow: - Tuner mode (radio) - Page 11 VOLUME (VOL) > BASS (BAS) > TREBLE (TRE) > BALANCE (BAL) > FADER (FAD). Rotate Volume control to adjust desired level within 5 seconds. Note: bass and treble will be skipped if DSP mode is activated. 2. Other operations Press Menu button for more than 2 seconds to open another set of menu. Press Menu button repeatedly to navigate through the menu items, while the desired menu item is displayed.
- Page 12 - MASK ALL To mask both PI and strong signal non-RDS station. Retune L, retune S To determine the initial time of automatic TA There are 2 modes: RETUNE L and RETUNE L. - RETUNE L:180 seconds. RETUNE S: 45 seconds. d.
- Page 13 Press and hold the Tuning up/ down button to seek the band in up or down direction and stop when a station is received. SEEK2: Press the Tuning up/ down button briefly to increase or decrease the frequency by 1 step size. Press and hold the Tuning up/ down button increase or decrease the frequency rapidly until the button is released, the different between the same operation at Seek 1 mode is that this time the radio will not stop at any station.
-
Page 14: Rds (Radio Data System)
Tuning up/ down button [5] Press this button to search for radio stations. Depends on whether SEEK1 or SEEK 2 mode is selected, different operations can be performed, refer to Seek mode paragraph for detail. Reset button In case of abnormal operation, use a pencil tip or other non-metallic object to press the Reset button located behind the front panel. - Page 15 Station preset buttons (1-6) [20] You can store and recall six preset radio stations by pressing 1-6 buttons. To store a station: Select a band (if needed) Select a station by Tuning up/ down button Hold a Preset button which you want store the station for at least 2 seconds. The preset number will appear on the display accompanied by a beeps sound.
- Page 16 current program. When region mode is on, the radio will only switch to a program carrying the exact same PI code. Note: When AF switch is on, at this moment use tuning up/ down to search station will only stop at station which has RDS broadcasting.
-
Page 17: Mp3 Playback
MP3 playback Notes on MP3 MP3 is short for MPEG Audio Layer 3 and refers to an audio compression technology standard. This product allows playback of MP3 files on CD-ROM, CD-R or CD-RW discs. The unit can read MP3 files written in the format compliant with ISO 9660. However it does not support the MP3 data written by the method of packet write. - Page 18 With some CD-R or CD-RW media, data may not be properly written depending on their manufacturing quality. In this case, data may not be reproduced correctly. High quality CD-R or CD-RW disc is recommended. Up to 16 characters are displayed for the name of an Album or a Track. ID3TAG version 1.x and 2.x is required. Note: the unit may not play tracks in the order that you wrote them to the disc.
- Page 19 Random play button [17] When random play mode is selected, the tracks will be played in random order, press this key one more time to cancel random play mode. Track up and track down buttons [18, 19] Under normal play mode, press the Track up button for less than 1 second to skip the playback to the next track, or press the Track down button for less than 0.5 seconds to return to the beginning of the current track, press this button one more time to skip to the previous track.
- Page 20 After selecting the desired track number, press Enter button for more than 1 second to confirm, playback will start. Digit and 3-Digit track number Enter the left-most digit first (for example, if the track number is 123, enter button for less than 1 second to shift the number by one digit, repeat this procedure until all digits has been entered. Long press Enter button for more than 1 seconds to start playing.
-
Page 21: Usb/Sd/Mmc Mp3 Playback
USB/SD/MMC MP3 playback Loading SD/MMC ard Insert the SD/MMC card into the slot, with the front side at right. The unit will display the music automatically and the LCD will show MEM-CARD. Take out SD/MMC ard Push SRC button and switch to non MEM-CARD mode, then push SD/MMC card, take out the card when part of the card flip up. Loading USB equipment Open the rubber cap, put the USB into the connector the head unit will display the music, stored in the USB equipment, and the LCD will show USB-DRIV. -
Page 22: Anti-Theft System
Note: SD cards brands: Canon, Fujifilm, Palm, Motolora, Microsoft, IBM, HP, Compaq, Sharp, Samsung, etc. Capacity: 8MB ~ 2Gb. MMC cards brands: Ericsson, Nokia, Motolora, HP, Palm, Sanyo, Microsystems, etc. Capacity: 16MB ~ 2Gb. Anti-theft system This unit is equipped with a slide-down detachable panel. Removing this panel makes the radio totally inoperable. Place the detachable panel into the case. -
Page 23: Handling Compact Discs
Handling compact discs Dirty, scratched or warped discs may cause skip ping or noise. Handle the disc only by the edges. To keep clean do not touch its surface. Discs should be stored in their cases after use to avoid scratches. Do not expose discs to direct sunlight, high humidity, high temperature or dust. -
Page 24: Components
Components 1. Mounting collar 2. Tapping screws M5x6 mm M4x6 mm 3. Mounting bolt (50 mm) 4. Wire connector 5. Removable face plate case 6. Trim plate 7. T-key 8. Operating instructions 9. Rubber cushion 1 pc. 4 pcs. 4 pcs. 1 pc. -
Page 25: Troubleshooting Guide
Troubleshooting guide General Car engine switch is not on. Turn your car's key to ACC or ON. No power or no sound Cable is not correctly connected. Check connection. Fuse is burnt. Replace fuse. Check volume or mute on/ off. Disc Disc is upside down. -
Page 26: Specification
Specification General. Power supply: Maximum power output: Rated power output (RMS): Suitable speaker impedance: Pre-Amp output voltage: Fuse: Dimensions (WxHxD)/ Weight: ESP: FM Stereo Radio. Frequency range: Frequency response: Stereo separation: Image response ratio/ IF response ratio: Signal/ noise ratio: AM Radio. - Page 27 ... 27 ... 28 ... 29 ... 35 ... 36 RDS ( )... 41 3 ... 44 USB/SD/MMC MP3 ... 48 ... 50 ... 51 ... 52 ... 52 ... 53 ... 54...
- Page 28 12 .
- Page 29 (5 x 25...
- Page 30 (5 8 (4 8...
- Page 31 . 1). . 2). .3). . 4).
- Page 34 ISO (4...
- Page 35 DSP ( SCAN DISP OPEN MODE MENU/ ENTER AMS/ RPT ( RDM ( PTY ( 22. USB BAND TA (...
- Page 36 MODE ( ) [11] CD/MP3 ( USB ( SD/MMC ( SD/MMC, SD/MMC MENU ( ) [12] MENU, MENU VOLUME (VOL) > BASS (BAS) > TREBLE (TRE) > BALANCE (BAL) > FADER (FAD) PWR [3] - CD SD/MMC...
- Page 37 MENU MENU TA SEEK TA ALARM TP ( TA SEEK: ALARM: BASS TREBLE RDS, PI ( "NO TP, TA". TP (Traffic Program...
- Page 38 MASK MASK PI: MASK ALL: PI " RDS. (AF), ".
- Page 39 . Retune R, Retune S Retune-S Retune-L Retune-S: Retune-L: Retune LOUD ESP ( ESP 12 ESP 45 BEEP BEEP ON: BEEP OFF: SEEK 1: SEEK 2: TA SEEK 45 TA SEEK 180 TA Seek. TA Seek.
- Page 40 DSP ( DISP ( ) [8] (PTY). SCAN ( ) [7] RESET ( LOCAL DISTANCE (DX) ( ) [2] : POP > ROCK > CLASSIC > FLAT > DSP OFF (DSP BASS/ TREBLE ) [5]...
- Page 41 RDS ( AMS [13] BAND ( ) [23] BAND 3 FM (FM1, FM2, FM3(OIRT)). (1-6) [20] (MW1, MW2). CD).
- Page 42 AF ( TA ( ) [9] ) [24]...
- Page 43 PTY ( ) [21] RDS, PTY Music Group > PTY Speech Group > PTY Off.
- Page 44 MPEG 3 CD-ROM, CD-R CD-RW. ISO 9660. .mp3 . .mp3 , 1000. . VBR: CD-R CD-RW, 44,1 1000 , 2000 USB (FAT 12/16). ISO 9660, CD-R...
- Page 45 MP3 CD-R CD-RW CD-R CD-RW CD-R CD-RW 2. ID3TAG. ID3 TAG ( Open [10], EJECT [14]...
- Page 46 INTRO ( RPT ( ) [16] RDM ( ) [15] Intro. ) [17] [18, 19] 3 CD , USB/SD/MMC TRACK SCH . 001 . ID3 TAG ( BAND...
- Page 47 « » 100, 100, FILE SCH . .RDS ( «CHAR SCH» ( « ». « ».
- Page 48 USB/SD/MMC MP3 SD/MMC SD/MMC SD/MMC USB/SD/MMC SD/MMC ( 2 1 (SD/MMC) FAT 12/FAT16/FAT32 FAT 12/16 ( FAT 32 ( : 32 USB-DRIV. , 500 , 500 : 32 MEM-CARD.
- Page 49 (id3tagver2.0) USB 1.1 USB 2.0 : Canon, Fujifilm, Palm, Motolora, Microsoft, IBM, HP, Compaq, Sharp, Samsung, : 8 M ~ 2 : 16 M ~ 2 USB 2.0 ( USB 2.0 USB 1.1) : Ericsson, Nokia, Motolora, HP, Palm, Sanyo, Microsystems, .
- Page 50 POWER...
- Page 53 RESET. ERROR 1: ERROR 2: 30 , RESET. RESET.
- Page 54 11-14 , (RMS) 178 50 166 CD (45 ), MP3 (120 ) 65.0 108.0 / 25 / 70 522-1620 = 40 - 20 > 80 / > 55 0.2 % (1 10 % .D.) CD: 1 , 10 / 1.7...
Need help?
Do you have a question about the H-CDM8047 and is the answer not in the manual?
Questions and answers