
Subscribe to Our Youtube Channel
Related Manuals for Next Level Racing GTELITE


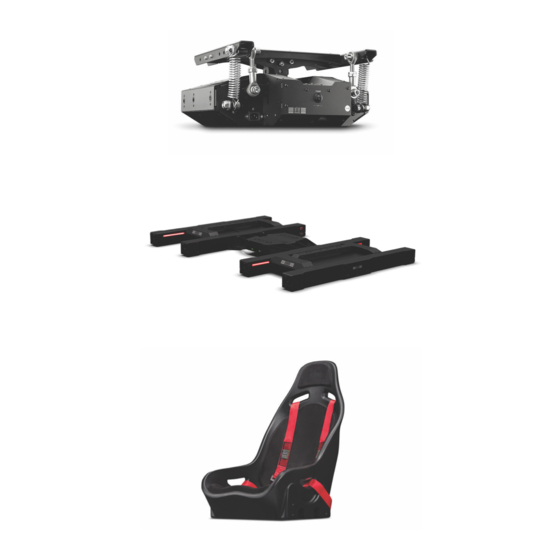
Summary of Contents for Next Level Racing GTELITE
- Page 1 T A K E R A C I N G T O T H E N E X T L E V E L® Video Instruction: bit.ly/nlrbuild GTELITE MOTION KIT INSTRUCTION MANUAL...
- Page 2 T O T H E N E X T L E V E L® instruction booklet to fully optimize your product. N E X T L E V E L R A C I N G . C O M ASSEMBLY VIDEO bit.ly/nlrbuild @next_level_racing @nextlevelracingOfficial @nextlvlracing Next Level Racing support@nextlevelracing.com...
- Page 3 Video Instruction: bit.ly/nlrbuild support@nextlevelracing.com PRE-RACE IN THE CHECKS *NOT TO SCALE WARNING • Please do not use power tools for assembly as over tightening can damage parts. FRONT • If in doubt consult the installation video or contact us on support@nextlevelracing.com •...
- Page 4 TABLE OF CONTENTS PARTS: • • NIL NLR MOTION V3 SETUP PAGES: 07 - 15 Uninstall the Bolts securing the GTELITE Seat Brackets to the Seat Sliders. PARTS: • • NIL NLR TRACTION PLUS SETUP PAGES: 15 - 19 Remove the GTELITE Seat Brackets.
- Page 5 Video Instruction: bit.ly/nlrbuild support@nextlevelracing.com PARTS: PARTS: • • NIL • • 4 x STEEL END CAPS Remove the Seat Slider Assemblies and uninstall the Bolts securing the Buttkicker Pole to the Align the holes on the Steel End Caps with the threaded holes on the ends of the Seat Slider Assembly.
-
Page 6: Installation
Video Instruction: bit.ly/nlrbuild support@nextlevelracing.com PARTS: PARTS: RECOMMENDED V3 MOTION SETUP • • 4 x FULL WIDTH T-NUTS • • MOTION BRACKETS A) Install 2 x T-Nuts into the top channel of both Base Members Align the countersunk holes on the Motion Brackets with the NLR Motion V3 mounting holes. B) Re-install End Caps previously uninstalled in Step 09. - Page 7 Video Instruction: bit.ly/nlrbuild support@nextlevelracing.com PARTS: PARTS: • • NIL • • 6 x M8 20mm COUNTERSUNK INVERTED MOTION V3 SETUP BOLTS MOUNTED VIEW Bolt through and secure with 3 x M8 Countersunk Bolts. Repeat on the other side. Skip to Step 14. Align the Motion V3 assembly with the T-Nuts previously installed in Step 10.
- Page 8 Bolt through and secure the Front Seat Slider Assembly with 2 x M8 Bolts and Washers. Your Setup is complete. TRACTION PLUS PLATFORM PARTS: • • 4 x FULL WIDTH T-NUTS SETUP Align the slots on the GTELITE Seat Brackets with the T-Nuts previously installed in Step 06.
- Page 9 Video Instruction: bit.ly/nlrbuild support@nextlevelracing.com PARTS: PARTS: • • NIL • • MOTION SAFETY STEP T-NUTS LOCATION Slide the T-Nuts previously installed in step 24 to the marked location and align them with the holes Uninstall the bolts securing the Rear and Front Base Member. on the Motion Safety Step.
- Page 10 Video Instruction: bit.ly/nlrbuild support@nextlevelracing.com PARTS: PARTS: • • NIL • • 12 x M8 85mm BOLTS Repeat • • 12 x M8 WASHERS on Back Side Bolt through and secure with M8 Bolts and Washers previously uninstalled in Step 22. Bolt through and secure with M8 Bolts and Washers.
- Page 11 Loosen the Ratchet Handles securing the NLR Motion V3 assembly to the frame. Adjust the assembly Align the threaded inserts on the Seat with the GTELITE Seat Bracket slots and holes. to your desired position and tighten the Ratchet Handles to lock in position.
- Page 12 Video Instruction: bit.ly/nlrbuild support@nextlevelracing.com NOTES WARNING Please do not use power tools for assembly as over tightening can damage your frame. If in doubt consult the installation video or contact us on support@nextlevelracing.com T-Nuts can not be installed mid channel. Must be installed from the extrusion ends. Plan the placement of cable management clips at the start of your build.
- Page 13 • Planifiez l’emplacement des clips de gestion des câbles au début de votre construction. Étape 19 - Reportez-vous à l’image. Alignez les fentes des supports de siège GTELITE avec les écrous en T précédemment installés à l’étape 06. Pièces : 4x écrous en T pleine largeur •...
- Page 14 • Plan de plaatsing van kabelbeheerclips aan het begin van uw bouw. Stap 19 - Raadpleeg de afbeelding. Lijn de sleuven op de GTELITE-stoelbeugels uit met de T-moeren die eerder in stap 06 zijn geïnstalleerd. Onderdelen: 4x T-moeren over de volledige breedte •...
- Page 15 • Pianificare il posizionamento delle clip di gestione dei cavi all’inizio della costruzione. all’immagine. Allineare le fessure sulle staffe del sedile GTELITE con i dadi a T precedentemente installati nel passaggio 06. Parti: 4 dadi a T a larghezza intera •...
- Page 16 • Planifique la ubicación de los clips de administración de cables al comienzo de su construcción. Paso 19: consulte la imagen. Alinee las ranuras de los soportes del asiento GTELITE con las tuercas en T instaladas previamente en el paso 06. Piezas: 4 tuercas en T de ancho completo •...
- Page 17 • Planen Sie die Platzierung der Kabelführungsclips zu Beginn Ihres Baus. Schritt 19 - Siehe Bild. Richten Sie die Schlitze an den GTELITE-Sitzhalterungen mit den zuvor in Schritt 06 installierten T-Muttern aus. Teile: 4x T-Muttern in voller Breite • Bitte stellen Sie sicher, dass die T-Muttern richtig in der Extrusion platziert sind.
- Page 18 ステップ15-画像を参照してください。 ステップ03で以前にアンインストールした4つのワッシャーとラチェットハンドルをボルトで固定します。 •締めすぎると部品が損傷する可能性があるため、 組み立てに電動工具を使用しないでください。 ステップ16-画像を参照してください。 手順06でシートスライダーアセンブリに以前に取り付けたTナットを、 NLRモーションV3の取り付け穴に合わせます。 •疑問がある場合は、 インストールビデオを参照するか、 support @ nextlevelracing.comまでお問い合わせください。 ステップ17-画像を参照してください。 後部座席スライダーアセンブリを2xM8ボルトとワッシャーでボルトで固定します。 部品:2x M816mmボルト。 2xM8ワッシャー。 •Tナットはチャンネルの途中に取り付けることはできません。 押し出しの端から取り付ける必要があります。 ステップ18-画像を参照してください。 2 xM8ボルトとワッシャーでフロントシートスライダーアセンブリをボルトで固定します。 部品:2x M816mmボルト。 2xM8ワッシャー。 •ビルドの開始時にケーブル管理クリップの配置を計画します。 ステップ19-画像を参照してください。 GTELITEシートブラケットのスロットを、 前に手順06で取り付けたTナットに合わせます。 部品:4x全幅Tナット •Tナットが押し出し内に正しく配置されていることを確認してください。 ステップ20-画像を参照してください。 ステップ01で以前にアンインストールしたM8ボルトとワッシャーでボルトで固定します。 •平らな面にレイアウトして構築します。 ステップ21-画像を参照してください。 セットアップが完了しました。 •押し出し成形品の鋭いエッジに注意してください。 •部品を無理に押し込まないでください。 TRACTIONPLUSプラットフォームのセットアップ •クロススレッドボルトは避けてください。...
- Page 19 • Planeje a colocação de clipes de gerenciamento de cabo no início de sua construção. Etapa 19 - Consulte a imagem. Alinhe as ranhuras nos suportes de assento GTELITE com as porcas T previamente instaladas na etapa 06. Peças: 4 porcas T de largura total •...
- Page 20 • Спланируйте размещение зажимов для управления кабелями в начале сборки. Шаг 19 - Обратитесь к изображению. Совместите прорези на кронштейнах сиденья GTELITE с Т-образными гайками, ранее установленными на шаге 06. Детали: 4 Т-образных гайки полной ширины • Убедитесь, что Т-образные гайки правильно размещены внутри экструзии.
- Page 21 Adım 18 - Resme bakın. Ön Koltuk Kaydırıcı Tertibatını 2 x M8 Cıvata ve Pullarla cıvatalayın ve sabitleyin. Parçalar: 2x M8 16mm Cıvata. 2x M8 Pullar. • Kablo yönetim klipslerinin yerleşimini yapınızın başlangıcında planlayın. Adım 19 - Resme bakın. GTELITE Yuva Braketlerindeki yuvaları, Adım 06’da önceden takılmış T-Somunlarla hizalayın. Parçalar: 4x Tam Genişlik T-Somunlar • Lütfen T-Somunların ekstrüzyon içerisine doğru yerleştirildiğinden emin olun.
- Page 22 • Naplánujte si umístění svorek pro vedení kabelů na začátku stavby. Krok 19 – viz obrázek. Zarovnejte drážky na držáku sedadel GTELITE s T-maticemi dříve nainstalovanými v kroku 06. Díly: 4x T-matice plné šířky • Ujistěte se, že jsou T-matice správně umístěny ve výlisku.
- Page 23 • Zaplanuj rozmieszczenie zacisków do zarządzania kablami na początku budowy. Krok 19 - Zobacz zdjęcie. Dopasuj szczeliny na wspornikach siedziska GTELITE do nakrętek teowych zainstalowanych wcześniej w kroku 06. Części: 4 nakrętki teowe o pełnej szerokości • Upewnij się, że nakrętki teowe są prawidłowo umieszczone w profilu.
- Page 24 • ليماوص عضو نم دكأتلا ىجريT .قثبلا زاهج لخاد حيحص لكشب دعقم لماوح ىلع ةدوجوملا تاحتفلا ةاذاحمب مق .ةروصلا ىلإ عوجرلا - 91 ةوطخلاGTELITE ليماوص عمT 4 :ءازجألا .60 ةوطخلا يف ا ًقبسم ةتبثملاx Full Width T-Nuts •...
- Page 25 第 18 步 - 参考图片。用 2 个 M8 螺栓和垫圈拧紧并固定前座椅滑块组件。零件:2 个 M8 16 毫米螺栓。 2 个 M8 垫圈。 • 请确保T 型螺母正确放置在挤压件内。 步骤 19 - 参考图像。将 GTELITE 座椅支架上的槽与先前在步骤 06 中安装的 T 形螺母对齐。零件:4x 全宽 T 形螺母 • 在水平表面上布置和建造。 第 20 步 - 参考图片。使用先前在步骤 01 中卸载的 M8 螺栓和垫圈进行螺栓连接和固定。...
- Page 26 support@nextlevelracing.com support@nextlevelracing.com...
Need help?
Do you have a question about the GTELITE and is the answer not in the manual?
Questions and answers