Table of Contents
Advertisement
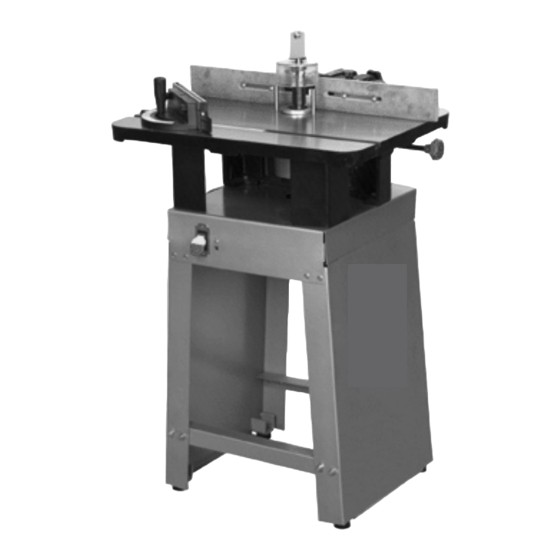
SHAPER/ROUTER
SET UP AND OPERATINg INSTRUcTIONS
Visit our website at: http://www.harborfreight.com
Read this material before using this product.
Failure to do so can result in serious injury.
SAVE THIS MANUAL.
Copyright
2007 by Harbor Freight Tools
©
contained herein may be reproduced in any shape or form without the express written consent of Harbor
Freight Tools. Diagrams within this manual may not be drawn proportionally. Due to continuing improve-
ments, actual product may differ slightly from the product described herein. Tools required for assembly
and service may not be included.
For technical questions or replacement parts, please call 1-800-444-3353.
Revised Manual 10d
INDUSTRIAL
Model
. All rights reserved. No portion of this manual or any artwork
®
95668
Advertisement
Table of Contents

Summary of Contents for Central Machinery CENTRAL MACHINERY 95668
- Page 1 Failure to do so can result in serious injury. SAVE THIS MANUAL. Copyright 2007 by Harbor Freight Tools © contained herein may be reproduced in any shape or form without the express written consent of Harbor Freight Tools. Diagrams within this manual may not be drawn proportionally. Due to continuing improve- ments, actual product may differ slightly from the product described herein.
-
Page 2: Product Specifications
Electrical Requirements Spindle Diameter Spindle Thread Spindle Travel Router Collets Maximum Cutting Diameter Table Size Footprint Miter Guide Fence Dimensions Overall Dimensions Gross Weight You will need this manual for the safety warnings and precautions, assembly, operating, inspection, maintenance and cleaning procedures, parts list and assembly diagram. -
Page 3: Electrical Safety
area from debris such as chips and sparks. Provide barriers or shields as needed. Children and visitors should never be in the work area. grounded tools must be plugged into an outlet properly installed and grounded in accordance with all codes and ordinances. Never remove the grounding prong or modify the plug in any way. - Page 4 in. Plugging in power equipment with the Power Switch on, invites accidents. Remove adjusting keys or wrenches before turning the power tool on. A wrench or a key that is left attached to a rotating part of the Wood Shaper may result in personal injury.
-
Page 5: Specific Safety Rules
Maintain labels and nameplates on the Wood Shaper. These carry important information. If unreadable or missing, contact Harbor Freight Tools for a replacement. Avoid unintentional starting. Make sure you are prepared to begin work before turning on the Wood Shaper. - Page 6 Keep the cutters on the underside of the workpiece whenever possible. This provides a distance guard for the operator. Unplug the Wood Shaper, and always rotate the Spindle by hand to test any new setup to ensure proper cutter clearance before starting the Wood Shaper.
- Page 7 Use the right tool for the job. Do not attempt to force a small tool or attachment to do the work of a larger industrial tool. There are certain applications for which this tool was designed. It will do the job better and more safely at the rate for which it was intended.
-
Page 8: Grounded Tools: Tools With Three Prong Plugs
grounded Tools: Tools with Three Prong Plugs Tools marked with “Grounding Required” have a three wire cord and three prong grounding plug. The plug must be connected to a properly grounded outlet. If the tool should electrically malfunction or break down, grounding provides a low resistance path to carry electricity away from the user, reducing the risk of electric shock. -
Page 9: Stand Assembly
When unpacking, check to make sure all the parts shown on the Parts Lists on pages 27 and 28 are included. If any parts are missing or broken, please call Harbor Freight Tools at the number shown on the cover of this manual as soon as possible. - Page 10 Your shaper comes with a Table Spacer Installation Kit that will enable you to make shallow cuts and utilize the upper blade area of most router bits with shanderd-length shanks. This is an optional feature that is not required for most applications.
- Page 11 Carefully place the Table (52) over the Table Legs (28). Secure the Table (52) using two Short Bolts (152) and washers (65) in the front of the shaper, and five Long Hex Bolts (151) and Washer (65) for the rear corners and for the spindle housing.
- Page 12 Thread one end of the Draw Bar (121) into the bottom end of the Spindle (105) approximately 10 to 15 turns until tight. (See Figure J.) Insert the Spindle/Draw Bar assembly into the Spindle Housing (110) from the top side of the Work Table (52). (See Figure K.) Thread the tapered Draw Bar Hex Nut (122) onto the end of the Draw Bar (121) under the Work Table (52), making sure the tapered side of the Hex Nut is facing upward.
-
Page 13: Adjustments Instructions
WARNINg! When using a Router Bit (103, 104), operate the Wood Shaper only in a counterclockwise direction. Router Bits are designed to cut in the counterclockwise direction only. DO NOT operate the Wood Shaper in the clock- wise direction. -
Page 14: Fence Alignment
shaping tasks. The Fences (60) can be set at different positions to remove material from the entire edge of the wood stock or set at the same position to shape part of the edge. Loosen the Lock Handle (61). (See Figure P.) Adjust the position of the Fence (60) by turning the Knob (64). -
Page 15: Belt Adjustment
Table Inserts: Table Inserts (53, 53A) are used to reduce wood chips falling into the machine which could cause flying debris. Using the smallest Table Insert also covers any unused portion of the bit below the surface of the Work Table (52). (See Figure R.) Position, and snap in the Table Insert (53, 53A) you wish to use. -
Page 16: Cutter Installation
Cutter Direction: The Wood Shaper is capable of operating in two directions by the use of the Forward/Reverse Switch (144). It is very important that the workpiece be fed against the direction of the cutter rotation. (cutter not included) (See Figure T.) When the Forward/Reverse Switch (144) is pointing to the FWD position, the Spindle (105) and Cutter rotate counterclockwise. - Page 17 Place the required spacers, also called Rub Collars (98, 99, 100), onto the Spindle (105). (See Figure V.) SPINDLE (105) RUB cOLLARS (98, 99, 100) cUTTER (NOT INcLUDED) Install the Safety Washer (97) and Upper Spindle Nut (96) securely. Tighten the Upper Spindle Nut with an open-end wrench while holding the Spindle (105) at the top with the provided Arbor Wrench (146).
-
Page 18: Rub Collars
the left to lower the Spindle (105). (See Figure Z.) Retighten the Spindle Hand Knob (92) on the side of the Wood Shaper. DO NOT overtighten the Knob. Only a small amount of tension is needed to keep the Spindle (105) from moving during operation. (See Figure Y.) Rub Collars: When shaping workpieces that have irregular shapes, Rub Collars (98, 99, 100) are a necessity. -
Page 19: Operating Instructions
B. Between two cutters: This set-up has the advantage of making two profile cuts in a single pass. Although there is a Rub Collar (98, 99, 100) beneath a Cutter, this set-up is safer than the previous set-up. Any lifting of the workpiece will still cause the Cutter to make an uneven cut. - Page 20 Wood Shaper operates as intended. Make sure the Fences (60), any accessories, jigs, Spindle Cutter, or Router Bit Collet Nut (102) being used are tight and no loose items are on the Work Table (52).
- Page 21 Tighten the Lock Handle (61) to lock the infeed Fence (60) in position. (See Figure DD.) LOcK HANDLE Adjust the outfeed Fence (60) so that it is located as far back from the front of the Work Table (52) as possible. (See Figure DD.) Turn on the Wood Shaper.
- Page 22 To Set Up The Aluminum Fences For Partial Edge Removal: WARNINg! ALWAYS use the aid of a jig (not included) when shaping small or narrow workpieces. A jig will reduce the chance of your hands coming into contact with the Cutter. Loosen the Lock Handle (61).
- Page 23 To reduce this tendency, use a Taper Pin (56). The Taper Pin allows you to anchor and slowly pivot the workpiece into the Cutter as the cut is started. Thus, shaping freehand is more stable and safer. (See Figures HH). WARNINg! ALWAYS use an auxiliary jig (not included) and extreme care when shaping with the Fences (60) removed.
- Page 24 Pattern Shaping: Sometimes the location of the Taper Pin (56) holes on the Work Table (52) will not always be in the safest position. You can clamp a piece of scrap wood to the Work Table so the edge of the scrap wood can be used as the starting support. (See Figure JJ.) The use of patterns (templates) allows identical parts to be cut with speed and accuracy.
-
Page 25: Inspection, Maintenance, And Cleaning
INSPEcTION, MAINTENANcE, AND cLEANINg cAUTION! Always make sure the Power Switch (5) of the Wood Shaper is in its “OFF” position and the unit is unplugged from its electrical outlet prior to performing any inspection, maintenance, or cleaning procedures. Before each use, inspect the general condition of the Wood Shaper. Check for misalignment or binding of moving parts, cracked or broken parts, damaged electrical wiring, and any other condition that may affect the safe operation of the machine. -
Page 26: Troubleshooting
Problem The Wood Shaper does not start or the circuit breaker trips. The Wood Shaper runs slow. The Wood Shaper vibrates. The Spindle is loose. Or the Cutter “chatters”. The Forward/Reverse Switch does not operate properly. The Power Switch does not turn off Machine. -
Page 27: Parts List
Part # Side Panel Tie Bar Rubber Foot Philips Head Screw (M4-0.7x25) Power Switch Switch Lamella Flat Washer (5mm) Hex Nut (M4-0.7) Carriage Bolt (M8-1.25 x 12) Flat Washer (3/8”) Hex Nut (M8-1.25) Philips Head Screw (M5-0.8 x 12) Exterior Tooth Washer (5mm) Hex Nut (M5-0.8) Shelf Electricity Label... -
Page 28: Wiring Diagram
Part # Stud Knob Draw Bar (M8-1.0) Draw Bar Hex Nut (M8-1.0) Belt (690 x 10mm) Hex Bolt (M8-1.25 x 12) Flat Washer (3/8”) Belt Guard Motor Pulley Set Screw (M6-1 x 10) Motor 129-1 Start Capacitor 129-2 Capacitor Cover 129-3 Wiring Box 129-4... -
Page 29: Assembly Diagram
ASSEMBLY DIAgRAM NOTE: Some parts are listed and shown for illustration purposes only, and are not available individually as replacement parts. SKU 95668 For technical questions, please call 1-800-444-3353 PAGE 29... -
Page 30: Limited 1 Year / 90 Day Warranty
LIMITED 1 YEAR / 90 DAY WARRANTY Harbor Freight Tools Co. makes every effort to assure that its products meet high quality and durability standards, and warrants to the original purchaser that for a period of ninety days from date of purchase that the engine/motor, the belts (if so equipped), and the blades (if so equipped) are free of defects in materials and workmanship.
Need help?
Do you have a question about the CENTRAL MACHINERY 95668 and is the answer not in the manual?
Questions and answers