
Subscribe to Our Youtube Channel
Related Manuals for Gaggenau BS47.112


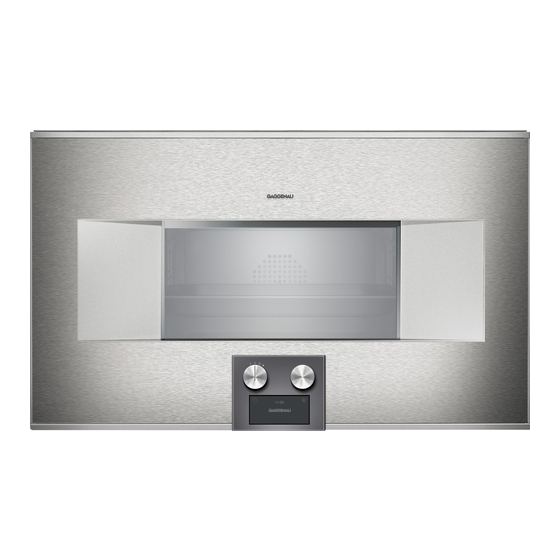
Summary of Contents for Gaggenau BS47.112
- Page 1 Gaggenau en User manual and installation instructions BS47.112, BS48.112 Combi steam oven...
-
Page 2: Table Of Contents
en Safety 1.2 Intended use Table of contents This appliance is designed only to be built into kitchen units. Read the special installation instructions. USER MANUAL Only a licensed professional may connect ap- Safety .............. 2 pliances without plugs. Damage caused by in- correct connection is not covered under the Preventing material damage ....... -
Page 3: Safety
Safety en Opening the appliance door creates a The appliance and its parts that can be draught. Greaseproof paper may come into touched may have sharp edges. contact with the heating element and catch ▶ Take care when handling and cleaning fire. -
Page 4: Preventing Material Damage
en Preventing material damage 1.7 Cleaning WARNING ‒ Risk of suffocation! Follow these safety instructions when cleaning Children may put packaging material over the appliance. their heads or wrap themselves up in it and suffocate. WARNING ‒ Risk of chemical burns! ▶ Keep packaging material away from chil- The cleaning agent solution may cause chem- dren. -
Page 5: Environmental Protection And Saving En- Ergy
Environmental protection and saving energy en Chloride and acids may damage the stainless steel sur- Leaving the appliance to cool down with the door open face. will damage the front of neighbouring kitchen units over Remove any residues of salt, hot sauces, e.g. time. - Page 6 en Environmental protection and saving energy Open the appliance door as little as possible during operation. ¡ This maintains the temperature in the cooking com- partment and eliminates the need for the appliance to reheat. Remove any accessories that are not being used from the cooking compartment.
-
Page 7: Familiarising Yourself With Your Appliance
Familiarising yourself with your appliance en 4 Familiarising yourself with your appliance for taller baking tins, use level 1. For very small baked 4.1 Appliance goods, you can also use two levels, e.g. level 1 and You can find an overview of the parts of your appliance level 3. - Page 8 en Familiarising yourself with your appliance Use the function selector to select Function Symbol Function the type of heating, cleaning or selector Core temperature probe → Page 19 the basic settings. Start steam injection Use the rotary selector to select Rotary se- End steam injection the temperature and change addi- lector tional settings.
- Page 9 Familiarising yourself with your appliance en Position Function/type of heating Temperature Light Switch on the interior lighting Access to other functions, e.g. automatic programmes, indi- vidual recipes, remote start via Home Connect 30-230 °C Steaming at 70 °C to 100 °C: Default temperature For vegetables, fish and side Hot air + 100% humidity...
- Page 10 The appliance switches to standby mode if no function is set or the childproof lock is activated. The standby screen appears if you do not implement any settings for a long time. Different displays can be shown in standby mode. The GAGGENAU logo and the time are preset.
-
Page 11: Accessories
Accessories en When the door is open, the interior lighting switches off 4.5 Cooling fan after a short time. The cooling fan switches on when the appliance is in operation. The hot air escapes above the door. After removing your food from the appliance, keep the door closed until the appliance has cooled down. - Page 12 You will find a comprehensive range of products for your appliance in our brochures and online: Cast aluminium roaster GN340230 www.gaggenau.com Accessories vary from one appliance to another. When 5.2 Locking function purchasing accessories, always quote the exact product number (E no.) of your appliance.
-
Page 13: Before Using For The First Time
The appliance must be installed and connected. After connecting the appliance to the power supply, the Requirement: The display shows the possible units °C GAGGENAU logo appears for approx. 30 seconds and and °F. The unit °C is preset. then the appliance displays the "Initial settings" menu. -
Page 14: Basic Operation
en Basic operation 7 Basic operation Cancelling steam injection 7.1 Activating the appliance Press . ▶ To exit standby mode, open the door and turn the function selector or touch a control panel. 7.6 Steam removal Set the required function. Note: The appliance rinses automatically before each During the steam removal process, the appliance intro- cooking process if it has not been operated for more duces cold water into the cooking compartment. -
Page 15: Timer Functions
Timer functions en Remove food residues and/or dirt from the cooking If necessary, wipe dry any condensation on units or compartment as soon as the appliance has cooled handles. down. Burnt-on food residue and/or dirt will be much 7.8 Switching on the appliance after a safety harder to remove later. -
Page 16: Long-Term Timer
en Long-term timer 8.6 Cooking time 8.7 Cooking time end When you set the cooking time for your food, the appli- You can move the cooking time end to a later time. ance automatically switches off after this time. You can Example: It is 14:00. The dish requires a cooking time set a cooking time of between 1 minute and of 40 minutes. -
Page 17: Childproof Lock
Childproof lock en a Once the time has elapsed, the appliance no longer 9.2 Switching off the long-term timer heats up and the display goes out. Turn the function selector to . ▶ Turn the function selector to . 10 ... -
Page 18: Individual Recipes
en Individual recipes Select a single or double cooking time as required. 11.3 Calling up the last automatic Press to start. programmes used If the "Continue cooking" function has ended, turn The appliance saves the last 5 dishes with the settings the function selector to ... -
Page 19: Core Temperature Probe
Core temperature probe en Press and hold to switch to umlauts and spe- 12.5 Changing a recipe cial characters. You can change the settings for a recorded or pro- Press twice to insert a break. grammed recipe. Briefly press ... - Page 20 en Core temperature probe If you set programmes with the core temperature probe Food Core temperature and the cooking timer at the same time, the appliance guideline value in switches off whichever programme reaches the entered °C value first. Leg of lamb, medium rare 60-65 Leg of lamb, well done 70-80...
- Page 21 Core temperature probe en Inserting the core temperature probe into If you pull out the core temperature probe during operation, the appliance resets all settings. You poultry must reset the settings. Insert the core temperature probe as far as it will go Turn the food.
-
Page 22: Home Connect
en Home Connect 14 Home Connect This appliance is network-capable. Connecting your ap- ¡ In networked standby mode, the appliance requires pliance to a mobile device lets you control its functions a maximum of 2 W. via the Home Connect app, adjust its basic settings and monitor its operating status. 14.1 Setting up Home Connect The Home Connect services are not available in every Requirements... -
Page 23: Basic Settings
Standby screen Appearance of the standby screen ¡ Clock Off: No display. You can use this setting to reduce ¡ Clock + GAGGENAU the standby energy con- logo ¡ Date sumption of your appliance. On: Multiple screens can ¡ Date + GAGGENAU be adjusted. - Page 24 en Basic settings Display Basic setting Selection Description Display screen Reduced "Reduced": After a short Standard time, the display shows only the most important in- formation. Touch field colour Grey Select the colour of the White symbols on the touch fields Touch field tone type Tone 1 Press a touch field to select...
- Page 25 Basic settings en Display Basic setting Selection Description Demo mode The demo mode is used for demonstration purposes only. The appliance does not heat up in demo mode. All other functions are avail- able. The "Off" setting must be activated for normal opera- tion.
- Page 26 en Cleaning and servicing 16 Cleaning and servicing To keep your appliance working efficiently for a long WARNING ‒ Risk of injury! time, it is important to clean and maintain it carefully. Scratched glass in the appliance door may develop into a crack. 16.1 Cleaning agents Do not use any harsh or abrasive cleaners or sharp ▶...
- Page 27 Cleaning and servicing en Area Suitable cleaning agents Information Very dirty cooking ¡ Cleaning programme The cleaning programme → Page 28 removes stubborn dirt. compartment Glass ceramic ¡ Glass ceramic cleaner Regularly clean with glass ceramic cleaner. grilling surface Do not use a glass scraper. Glass cover for ¡...
- Page 28 en Cleaning and servicing Selecting the switch-off time 16.4 Cleaning programme Set the function selector to . The cleaning programme removes stubborn dirt using a The display shows . a cleaning cartridge, and cleans, rinses and dries the Press ...
-
Page 29: Cleaning And Servicing
Cleaning and servicing en Remove the locking cap from the cleaning cart- Turn the drain filter in the cooking compartment ridge. floor anticlockwise and remove it . Do not remove the wax plug from the opening of ‒... - Page 30 en Cleaning and servicing The descaling tablets can be obtained from customer Possible cause Solution service, our website or the online shop. The drain filter is missing. Ensure that the drain filter If you descale the appliance regularly, your appliance remains inserted in the will be in a good condition.
- Page 31 Cleaning and servicing en Place the descaling tablet in the compartment at the Press to confirm. back of the water tank. Press to start the rinsing process. Drying the cooking compartment After descaling the cooking compartment, use the drying programme → Page 30 to dry it.
-
Page 32: Troubleshooting
en Troubleshooting 17 Troubleshooting You can rectify minor faults on your appliance yourself. WARNING ‒ Risk of electric shock! Read the troubleshooting information before contacting Incorrect repairs are dangerous. after-sales service. This will avoid unnecessary costs. Repairs to the appliance should only be carried out ▶... - Page 33 Troubleshooting en Fault Cause and troubleshooting The appliance does The appliance is in demo mode. not heat up; the dis- Deactivate the demo mode in the basic settings → Page 23. ▶ play shows the sym- bol for demo mode . The appliance cannot No water at the appliance.
-
Page 34: Disposal
en Disposal Fault Cause and troubleshooting Water drips out when The collecting channel on the underside of the door panel is full. you open the appli- Dry the collecting channel with a sponge. ▶ ance door. An unpleasant smell The appliance is new. occurs during heat- Before using it for the first time, heat the appliance at 60% humidity ... - Page 35 How it works en 19 How it works Here, you can find the ideal settings for various types ¡ The appliance door must shut properly. Keep the of food as well as the best accessories and cookware. seal surfaces clean at all times. We have perfectly tailored these recommendations to ¡...
- Page 36 en How it works Food Accessory/cookware Temperat- Type of Humidity Cooking Comments ure in °C heating in % time in min. Peas, fresh Unperforated steam 25-30 Cover with water container Fennel, sliced Perforated steaming 20-25 tray Vegetable terrine Perforated steaming 50-60 tray Terrine mould Peas, frozen, in ac- Perforated steaming...
- Page 37 How it works en ¡ When using the perforated cooking container: You 19.3 Fish can grease the container if the fish sticks too much. Take note of the recommended settings for fish. ¡ Slide the unperforated cooking insert into the first ¡ Steaming is a cooking method that does not use level from the bottom to avoid getting fish stock on any fat and does not allow the fish to dry out.
- Page 38 en How it works Fish Food Accessory/cookware Temperat- Type of Humidity Cooking Comments ure in °C heating in % time in min. Oysters, 10 pcs Unperforated steam 80-90 7-10 In stock container Tilapia, 150 g each Perforated steaming 80-90 15-17 tray Sea bream, 200 g Perforated steaming 80-90 17-20...
- Page 39 How it works en Meat Food Accessory/cookware Temperat- Type of Humidity Cooking Comments ure in °C heating in % time in min. Entrecôte, seared, Unperforated steam 170-180 10-20 medium rare, 350 g container each Fillet, seared, me- Unperforated steam 1. 210 1. 1.
- Page 40 en How it works Food Accessory/cookware Temperat- Type of Humidity Cooking Comments ure in °C heating in % time in min. Joint of pork, neck or 1. Wire rack 1. 200-220 1. 100 1. 15 If you have added li- shoulder, well done, 2.
- Page 41 How it works en Food Accessory/cookware Temperat- Type of Humidity Cooking Comments ure in °C heating in % time in min. Fillet of beef, medium Unperforated steam 70-80 120-180 rare, 1 kg container Beef steaks, medium Unperforated steam 70-80 30-60 rare, 175 g each container Sirloin, medium rare, Unperforated steam...
- Page 42 en How it works Food Accessory/cookware Temperat- Type of Humidity Cooking Comments ure in °C heating in % time in min. Pigeon, steamed, Perforated steaming 25-35 300 g each tray Pigeon, 300 g each Unperforated steam 180-200 25-30 container sealing bag in which you bought the food, e.g. por- 19.8 Sous-vide cooking tioned fish.
- Page 43 How it works en Do not place the vacuum-sealed food items on top of ¡ Fish: Season and coat with hot butter. Since many one another or too close together in the cooking con- types of fish fall apart easily after cooking using the tainers.
- Page 44 en How it works Food Accessory/cookware Temperat- Heating Cooking Comments ure in °C func- time in tion min. Beef steaks, medium Perforated steaming Once the meat is cooked, sear it rare, 180 g each tray on a teppan yaki or grill it briefly at a high temperature on both sides.
- Page 45 How it works en Food Accessory/cookware Temperat- Heating Cooking Comments ure in °C func- time in tion min. Salmon fillet, 140 g Perforated steaming If you wish, you can flash fry the each tray salmon fillet in a hot frying pan once it is cooked. Pikeperch, 140 g Perforated steaming each...
- Page 46 en How it works Food Accessory/cookware Temperat- Heating Cooking Comments ure in °C func- time in tion min. Apples, peeled, in Perforated steaming 10-15 Recipe tip: Vacuum-seal along 0.5 cm slices, tray with some caramel sauce. 2-4 pcs Bananas, whole, Perforated steaming 15-20 Recipe tip: Vacuum-seal along 2-4 pcs tray...
- Page 47 How it works en Food Accessory/cook- Shelf posi- Tem- Type of Humidity Cooking Comments ware tion perat- heating in % time in ure in min. °C Grilled veget- Unperforated 20-25 E.g. courgettes ables, 700 g steam container Vegetable bake Unperforated 30-35 E.g. with broccoli steam container and cauliflower Vegetable skew-...
- Page 48 en How it works Food Accessory/cookware Temperat- Type of Humidity Cooking Comments ure in °C heating in % time in min. Polenta, 250 g + Unperforated steam 10-15 625 ml water for hard container polenta, 250 g + 1125 ml water for soft polenta Quinoa, Unperforated steam 30-40 250 g + 500 ml water container...
- Page 49 How it works en Food Accessory/cookware Temperat- Type of Humidity Cooking Comments ure in °C heating in % time in min. Sweet bake Unperforated steam 180-200 20-40 Preheat. container E.g. semolina, quark or pre-cooked rice pudding Sweet soufflé Unperforated steam With fruit, chocolate, container vanilla 19.12 Other...
- Page 50 en How it works ¡ If you only bake on one level, use level 2. If you 19.13 Baked items bake on two levels at the same time, use levels Note the recommended settings for baked items. 1 and 3. Slide the unperforated cooking insert into ¡...
- Page 51 How it works en Food Accessory/cook- Shelf pos- Temperat- Type of Humidity Cooking Comments ware ition ure in °C heating in % time in min. Yeast tray bakes Unperforated 160-170 , or 0, 30 or 30-45 For yeast tray steam container ...
- Page 52 en How it works ¡ You do not have to cover the bowl with a damp 19.14 Dough proving – leaving to rise cloth. Proving only takes half as long as it usually Your appliance provides the ideal conditions for prov- does. ing dough and dough mixtures or raw pastries without ¡...
- Page 53 How it works en ¡ To do this, use the "Defrost" operating mode. 19.16 Defrosting ¡ With this operating mode, no preheating is neces- In your appliance, you can defrost frozen food gently sary. and faster than in the refrigerator and more evenly than ¡...
- Page 54 en How it works Preserving food Food Accessory/cookware Temperat- Type of Humidity Cooking Comments ure in °C heating in % time in min. Fruit, vegetables, in Perforated steaming 35-40 sealed 0.75 l pre- tray serving jars Beans, peas, in Perforated steaming sealed 0.75 l pre- tray serving jars ¡...
-
Page 55: Customer Service
Service telephone number to find them again website. quickly. 21 Declaration of Conformity Gaggenau Hausgeräte GmbH hereby declares that the Hereby, Gaggenau Hausgeräte GmbH declares that appliance with Home Connect functionality conforms to the appliance with Home Connect functionality is in the basic requirements and other relevant provisions of compliance with relevant statutory requirements. -
Page 56: Installation Instructions
en Installation instructions 5 GHz band (5150–5350 MHz + 5470–5725 MHz): Max. 100 mW UK (NI) 5 GHz WLAN (Wi-Fi): For indoor use only. 5 GHz WLAN (Wi-Fi): For indoor use only. 22 Installation instructions Observe this information when installing the appliance. ¡ Installation behind cabinet doors: Suitable measures should be taken to ensure these types of doors cannot close during opera- tion. - Page 57 Installation instructions en 22.3 Appliance dimensions 22.4 Position of connections You will find the dimensions of the appliance here Here, you can find the position of the connections on the appliance. BS470/BS471 BS470/BS471/BS474/BS475 BS474/BS475 BS484/BS485 BS484/BS485 22.5 Preparing the units Requirement: Fitted units must be heat-resistant up to 90 °C, and adjacent unit fronts up to 70 °C.
- Page 58 en Installation instructions ¡ The appliance must only be connected using the Inlet hose: Connection thread ISO228 - ‒ power cable provided. Plug the power cable fully G 3/4'' (26.4 mm) into the back of the appliance. Water pressure: 2-10 bar (0.2-1.0 MPa) ‒ ¡ The power cable must only be replaced with a cable Flow rate: At least 10 litres per minute ‒...
- Page 59 Installation instructions en Do not place the outlet hose higher than the bottom Observe the clearances when installing in a tall unit. edge of the appliance at any point. ≥ 100 ≥ 550 ≥ 458 ≥ 3 Do not kink the outlet hose. BS 47.
- Page 60 en Installation instructions When installing 2 appliances on top of each other, Push the appliance all the way into the built-in unit. observe the clearances. Do not kink or trap the connection cable, the in- ‒ let hose or the outlet hose. Centre the appliance.
- Page 61 Installation instructions en Remove the cover cap. Tighten both screws. Undo the two screws a little, but do not completely Fit the cover cap. remove them. Slide the appliance into the built-in recess. Adjust the appliance door using the side screw; to do this, open the appliance door and then close it 22.12 Combining the appliance with an oven again if necessary.
- Page 62 en Installation instructions 22.14 Combining the appliance with a warming drawer (76 cm) When installing BO/BS (width 76 cm), provide a ▶ perfectly stable intermediate floor above the warm- ing drawer. 22.15 Removing the appliance Disconnect the appliance from the power supply Undo the fastening screws. Lift the appliance slightly and pull it out completely.
- Page 64 BSH Hausgeräte GmbH Carl-Wery-Straße 34 81739 München, GERMANY www.gaggenau.com Valid within Great Britain: Imported to Great Britain by BSH Home Appliances Ltd. Grand Union House Old Wolverton Road Wolverton, Milton Keynes MK12 5PT United Kingdom...
Need help?
Do you have a question about the BS47.112 and is the answer not in the manual?
Questions and answers