Advertisement
Quick Links
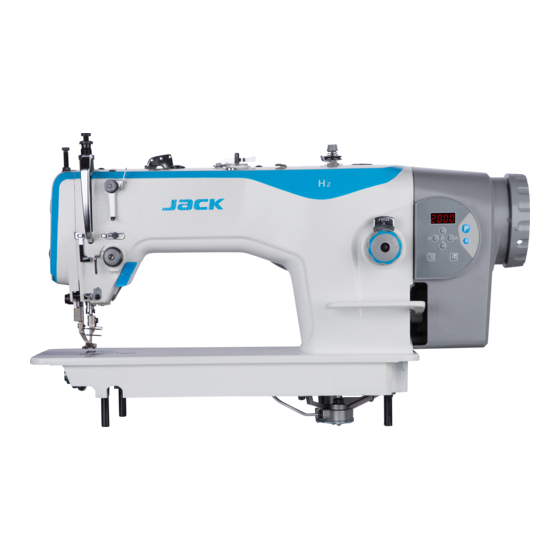
简易款厚料机系列电控使用说明书
安全事项
· 在使用本产品之前,请先阅读《使用说明书》及所搭配的缝纫机机械说明书。
· 本产品必须由接受过专业培训的人员来安装或操作。
· 请尽量远离电弧焊接设备,以免产生的电磁波干扰本控制器而发生误动作。
· 请不要在室温 45°以上或者 0°以下的场所使用。
· 请不要在湿度 30%以下或者 95%以上或者有露水和酸雾的场所使用。
· 安装控制箱及其他部件时,请先关闭电源并拔掉电源插头。
· 为防止干扰或漏电事故,请做好接地工程,电源线的接地线必须牢固的与大地有效连接。
· 所有维修用的零部件,须由本公司提供或认可,方可使用。
· 在进行任何保养维修动作前,必须关闭电源并拔掉电源插头。控制箱里有高压危险,必须关闭电源五分
钟后方可打开控制箱。
· Safety Precautions
· Before using this product, please read the User's Guide and the manual of the machine attached with it.
· This product must be installed or operated by professionally trained personnel.
· Please keep away from the arc welding equipment to avoid the electromagnetic wave from interfering with the
controller.
· Please do not use it at room temperature above 45°or below 0°。
· Please do not use it in places with humidity below 30% or above 95% or where there is dew and acid mist.
· When installing the control box and other parts, turn off the power and unplug the power plug.
· To prevent interference or electric leakage accidents, make a good grounding work. The grounding wire of the
power cord must be firmly connected to the earth.
· All parts for maintenance must be supplied or approved by the Company before they can be used.
· The power must be turned off and the plug unplugged before any maintenance action is performed.There is a
high-voltage danger in the control box. You must shut down the power for 5 minutes before opening the control
box.
·
1 产品安装 Product installation
1.1 产品规格 Product specification
电源电压
supply voltage
电源频率 supply
frequency
最大输出功率
Maximum power
output
1.2 接口插头的连接 Connection of interface plug
将脚踏板及机头的各连接插头安插到控制器后面对应的插座上,各插座名称如图 1-2-2 所示。连接
好,请检查插头是否插牢。
Plug the pedals and heads into the corresponding receptacle behind the controller, as shown in figure
1-2-2.After connection, check that the plug is plugged in.
Simple electric control box manual
AC 220±20% V
50Hz/60Hz
750W
1 / 14
Advertisement

Related Manuals for Jack H2


Summary of Contents for Jack H2
- Page 1 简易款厚料机系列电控使用说明书 Simple electric control box manual 安全事项 · 在使用本产品之前,请先阅读《使用说明书》及所搭配的缝纫机机械说明书。 · 本产品必须由接受过专业培训的人员来安装或操作。 · 请尽量远离电弧焊接设备,以免产生的电磁波干扰本控制器而发生误动作。 · 请不要在室温 45°以上或者 0°以下的场所使用。 · 请不要在湿度 30%以下或者 95%以上或者有露水和酸雾的场所使用。 · 安装控制箱及其他部件时,请先关闭电源并拔掉电源插头。 · 为防止干扰或漏电事故,请做好接地工程,电源线的接地线必须牢固的与大地有效连接。 · 所有维修用的零部件,须由本公司提供或认可,方可使用。 · 在进行任何保养维修动作前,必须关闭电源并拔掉电源插头。控制箱里有高压危险,必须关闭电源五分 钟后方可打开控制箱。 · Safety Precautions · Before using this product, please read the User's Guide and the manual of the machine attached with it. ·...
- Page 2 图 0B 控制器图 1-2-1 E6380 ①脚踏板 板&升级插座 座;②LED 灯 灯及机头按键 键插座。 Figure 1-2 2-1 E6380B B controller dia agram ①Foot ;②LED lam plate &Upgr raded socket mp and head button sock k et. 2 / 14 ...
- Page 3 Headlights s&Supplemen ntary pin Pedal&Upgr raded interfac witch interface 5V Digitally y ground Communi ication GND(+5V Headlight in nput negative recepti communi ication Compleme entary switch transmis ssion Pedal Pedal analog g signal Headlig ght input 图 1-2- -2 控制器接 接口定义...
- Page 4 and reliable grounding o of the input te erminal of th he power outl let AC.The g ground wire o of the system m is yellowish-gr reen wire. Th he ground wi ire must be r reliably conn nected to the grounding o of power grid d safety...
- Page 5 参数 数查看保存键 键 对所 所选参数号 内容进行查 查看和保存 存 View w and save th ew and save e the parame eter number para meter numb 参数 数加键(速度 度加) 在进 进入参数功 能参数号/值 值加,初始 始待机下速度 度加 Up b button ed increase 参数 数减键(速度 度减)...
- Page 6 3.2 进入技 技术员参 参数模式及 及保存 Enter int to the tech hnician pa arameter mode an d save 长按 键开机 机进入技术 员参数模式 式。参数调节 节方式同技术 术员参数调节 节方式。 Long press nter into the technician p parameter mo ode . 3.3 速度调 调节 Spe eed adjust tment 在空闲...
- Page 7 注:上停 停针位置设置 置:进入监控参 参数项 24,将 将手轮调整至 至上停针(参数 数会随着手轮 轮位置而变化 化),短按 键进入上停针 针位置值显示 示,再次长按 键保存参 参数(保存后 ,下针位会自 自动进行相应 应调整),按 键退出监 监 控模式。 Note: T The up/down n needle pos sition setting g: enter the m monitoring p parameter 24 4, adjust the e handwhee to the up ne eedle positio...
- Page 8 参数项 初始值 中文说明 范围 内容值名称说明与备注 param Initial illustrations Range Remarks eter value 起缝速度(r/min) 缝纫时的最低速度设定 100-800 Starting speed(r/min) Lowest speed during sewing 0:按时间补针 1:补半针 2:补一 针 补针方式 0: adding stitch by time Adding stitch way 1: half stitch 2: one stitch 脚踏板控速曲线模式...
- Page 9 参数项 初始值 中文说明 范围 内容值名称说明与备注 param Initial Illustrations range Remarks eter value 老化运行时间(s) Aging running time(s) 1-255 0: 正常 1:简易缝 2:初始角测试 电机停止时按 S 键退出 3:自动测试模式( 0:normal 运行模式 1:simple sewing Running mode 2:initial angle test 3:automatic test mode(press S to exit when motors stop) 老化停止时间(s) 1-255...
- Page 10 参数项 初始值 中文说明 范围 内容值名称说明与备注 param Initial Illustrations range Remarks eter value 踏板回中位置设定 Back place setting of the 1650 0-4095 pedal 0:正转 1:反转 电机方向 0: position Motor’s direction 1:negative 安全开关报警确认时间 (ms) 1-500 安全开关报警恢复时间 (ms) 1-200 Recovery time for safety switch alarm(ms) 两段斜率转折点速度...
- Page 11 待机界面,长按 P 键+停针位键,进入监控模式 Standby mode, press P+stop position and then enters into monitoring mode 参数项 中文说明 内容值名称说明与备注 paramet Illustration Remarks 踏板回中模拟量采样值 显示踏板回中 AD 值 Monitoring sample value when the pedal is back to AD value when the pedal is back the middle place 踏板倒踩模拟量采样值...
- Page 12 运行时过压 Power off and check input voltage is higher than 264V or not. Over voltage Please restart when voltage is normal if the input voltage is higher than normal one. Err-05 during Please replace control box and inform the supplier if it can’t work. operation 关闭系统电源,30 秒后重新接通电源观察是否能正常工作。重试几次,若该故障频...
- Page 13 5 脚踏板灵敏度调整 adjustment of pedal sensitivity 1) 脚踏板动作由初始位置①(75 号参数)开始,缓慢向前踩至②(72+75 号参数)开始低速缝纫, 继续前踩至③(75+73 号参数)开始加速,再深踩至④(74 号参数)达到最高速度。 ②③段之间维持 起缝速度,③④段之间为无级调速过程; Press the pedal from initial position ①(P75)and to ②(P72+75)slowly and start to low speed sewing, and press ③ (P75+73) continuously to accelerate and then to ④ (P74) thus can get maximum speed. It maintains starting speed between ②③, and ③④...
- Page 14 14 / 14 ...
Need help?
Do you have a question about the H2 and is the answer not in the manual?
Questions and answers
Здравствуйте, попала нитка в челночный механизм и полностью заклинило. Выдаёт ошибку е08
Error E08 indicates a "Motor stuck" condition. This means the motor cannot rotate properly, possibly due to a blockage such as a thread stuck in the shuttle mechanism. To resolve it, turn off the power, check if the input plug is loose, broken, or obstructed, and remove any thread or debris from the shuttle area. If the issue persists, replace the control box and notify the supplier.
This answer is automatically generated
@Mr. Anderson нить оборвалась и часть осталась в челночном механизме
@Mr. Anderson можно ли снять челночный механизм, чтобы найти нитку, так как не видно, где она застряла
I have a new H2 model and I’m trying to reduce the speed to 100 like the old model and I can’t, can you please tell me how can I do it in my model?