Table of Contents
Advertisement
Advertisement
Table of Contents

Related Manuals for Jack A4


Summary of Contents for Jack A4
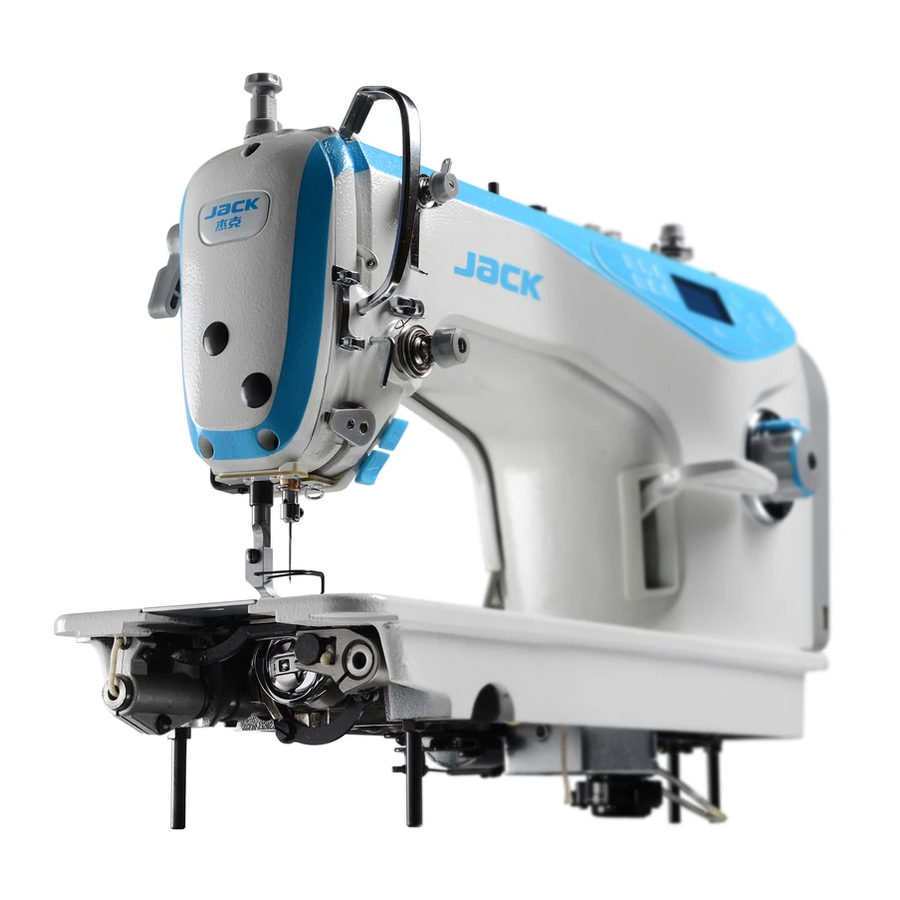
- Page 1 A4 COMPUTERIZED LOCKSTITCH MACHINE...
- Page 2 Product introduction- Followed by A2, A2S, A5, A6, etc.
- Page 3 Product introduction-A Voice Reminder Little reminder,big sweetness Each botton has Each operation voice reminder has voice guide USB Port For charging cell phone CONFIDENTIA 项目名称 | 日 PROJECT NAME | date 期...
- Page 4 operating instructions- Factory Reset Reset with one button P165-0000 change to P165-2115 Reset Operation steps: On the condition of power on, using a sharp objective for 3 seconds to insert into the hole restore the factory default. When the screen shows take out sharp and the...
- Page 5 02operating instructions- before and after backstitch operating steps: In standby mode, press 、 key,Set the number of before and after backstitch number of before number of after backstitch backstitch...
- Page 6 02operating instructions- Free sewing and thread trimming setting.mp4 Free sewing and Free sewing: Press the button and the icon thread trimming display, means it’s free sewing mode at present. switch Trimming switch: Press the button longer, the icon display up, means the thread trimming is on. Press the button longer again, the icon LED screen area...
- Page 7 operating instructions- W sewing settings.mp4 D refers to sewing W sewing /several segment sewing times A/B refers to the stitch numbers button of initial and final sewing W sewing: Press the button ,and the icon Press the button to the corresponding number flicking, then we can to adjust.
- Page 8 operating instructions- Multi-segment sewing setting.mp4 Press the button longer Multi-segment sewing setting: Several segment sewing button display on the LED screen, longer, and icon (Press longer) means that it's multi-segment sewing mode. And press to move, the number is flicking, then you can use to set.
- Page 9 operating instructions- Electronic tension device setting2.mp4 Button for thread tension / Thread tension device setting : Press the button presser foot lifter sensor and the icon display on the LED screen, means the tension device is on . Press the button again, the icon not display, means the tension device is off.
- Page 10 operating instructions-Automatic presser foot lifter settings .mp4 Switch of press foot The switch of press foot lifter after trimming: lifter Press , the icon display, means that the press foot lifter after trimming is on. Press again, the icon not display, means that the press foot lifter after trimming is off.
- Page 11 operating instructions- Electronic Parameter In the standby state, press key “P” to enter the parameter mode; 1、 Press key and key to adjust the corresponding parameter; 2、 When the parameter have changed, parameter interface will flash. Short press 3、 key “P” to keep the modified parameters. Long press key “P” to exit parameter interface, return to standby state.
- Page 12 operating instructions- Electronic Parameter P 1 7 0~99 Automatic presser foot sensor sensitivity setting (between the maximum and minimum value of the 02C parameter display) P 1 8 1~120 Stitch balance for start back tacking No.1 (Pull in compensation) P 1 9 1~120 Stitch balance for start back tacking No.2 (Release of compensation) P 2 2...
- Page 13 operating instructions- Electronic Parameter P 3 3 1~100 Clip line electromagnet per cycle closing time (ms) P 3 7 1~100 Clip line electromagnet per cycle opening time (ms) the force of Clip line P 4 5 1~100 Back stitch electromagnet per cycle opening time (ms) P 4 6 1~100 Back stitch electromagnet per cycle closing time (ms)
- Page 14 operating instructions- Electronic Parameter P 6 2 0/1/2/3 Special mode: 0: Normal mode 1: Simply sewing mode 2: Motor initial angle measurement 3: Automatically setting the pulley ratio by the CPU. 4: Automatic test modle (It has needle stop position of automatic test, running 5s and stopping P 6 6 2: safety switch function is on 0: off...
- Page 15 operating instructions-Monitoring parameter (P+ button “presser foot lifter “ to enter) Parameter Parameter No. Parameter No. Parameter Description Description 0 1 0 0 2 6 stitch counter The ratio between motor and machine 0 1 1 0 2 7 Counter for sewing pieces time(hours) of motor 0 1 2 0 2 8...
- Page 16 trouble removal Error Code Description Solution Err-01 Hardware overcurrent 1、Power off, restart 2、Under normal condition, check voltage, low voltage is 176 v, high voltage is 264 v 3、Turn the handwheel to see Err-02 Software whether mechanical parts is stuck 4、Check the motor plug 5、Factory overcurrent reset、test the motor angle 6、Replace the electronic control box Err-03...
- Page 17 trouble removal Err-09 Brake circuit 1、Check whether the cement resistor plug in the electric cabinet is failure fall off2、Check whether the cement resistance burst 3、Replace cement resistance 4、Replace the electric control Err-10 Communication 1、Check the connection between control panel and controller 2、factory failure reset3、Replace the panel 4、Replace the electric cabinet Err-11...
- Page 18 trouble removal Err-14 DSP Read/Write EEPROM failure 1、factory reset Err-15 Motor over-speed 2、test the motor angle protection 3、Replace the electric cabinet Err-16 Motor reversion Err-17 HMI Read/Write EEPROM failure Err-18 Motor overload According to E08 to investigate, solution is the same as E08. Sewing motor Err-23 blocked...
- Page 19 Mechanical adjustment- lower shaft oil supply srew of adjusting to the oil of pump hook pipe:alumin...
- Page 20 Needle bar oil amount is too Mechanical adjustment-armshaft oil supply large, adjust Down bobbin the position of 供油系统的原理 Oil supply of winder, the wick Panel internal regulate the wick The installation of lubricato wick of Needle bar In the process of high speed machine, needle bar in the move up and down, the sleeve friction, at the...
- Page 21 oil return pipe:Mainly absorbed back Mechanical adjustment-oil return the excess oil of the head, to avoid oil to the workbench from the needle bar or press foot linoleum :Absorb the excess oil supply, then oil return pipe oil return pipe...
- Page 22 Mechanical adjustment- Adjustment of the needle bar height Adjustment of the needle bar height: When the needle in the lowest, hook within half a pinhole.
- Page 23 Mechanical adjustment- Adjustment of the hook Turn the handwheel to make the hook tip to the center needle, and then continue to turn the handwheel to make the needle from down to up in 2.2 2.5 mm, then to keep hook tip to above the pinhole between 1-1.2 mm, and also the horizontal distance between needle and the hook tip is 0-0.1 mm.
- Page 24 Mechanical adjustment- Adjustment of Positioning hook Adjustment of Positioning hook: The left to right of the positioning hook is generally about 0.5-1.0 mm. The gap is too large, the sound is loud, the gap is too small, crossed Positioning hook the line.
- Page 25 Mechanical adjustment- Feeding Dog Angle 1、When the needle pitch reaches the maximum, by adjusting the feed dog before and after the screw, make before and after the feed dog do not touch the needle plate 2、By adjusting the feed dog of the high and low screws, so that the feed dog at the highest,exposed needle plate plane 1-1.2mm feed dog high and low screws Feed dog tilt screw...
- Page 26 Mechanical adjustment- Adjustment of the Synchronization 机针与送布时间的同步调整:(needle plate、top of the feed dog、Pinhole bottom flush)To get the synchronous adjustment of needle and the feed dog, easy breakage when feed dog is too slow, back stitch is more obvious. When the feed dog is too quickly, the thread is not tight, especially when using a thick thread is more obvious.
- Page 27 Mechanical adjustment-coincidence degree of the back stitch needle pitch Loosen the two retaining screws, adjust the reverse stitching eccentric shaft, make the back and forth stitch coincidence. 偏心轴 retaining screws...
- Page 28 Mechanical adjustment- take-up lever function、installation function:From top to bottom: Pay-off for the hook to hook thread、when the hook turn to 180 degrees,the take-up lever take back the extra thread, form stitch。 installation:take-up plane aim to the first screws 。 The first screws take-up plane...
- Page 29 Mechanical adjustment- Stitch adjustment method-link Press the button on the lockstitch dial,rotate to the left stitch becomes larger,rotate to the right, stitch becomes smaller。...
- Page 30 Mechanical adjustment- trimming...
- Page 31 剪线标准调节方法 Adjustment Method of Trimming Standard • 针杆运转反向 Reverse needle bar operations • 旋梭运转反向 Reverse Hook operation • 旋梭分线点 Hook distribution point • 机针中心线 center line of the needle • 旋梭分线点距离机针中心线5mm左右 the distance between hook distribution point and the center line of the needle is about 5mm.
- Page 32 Mechanical adjustment-Mounting and dismounting of motor encoder.mp4 The screw( will be cancelled in the future), if it exists, please take it down Operation Sequence: firstly. 1.Take down the hand wheel and then utilize hex key(4mm) to loose four electric control fastening screws (represented as ABCD in the picture) 2.Take down the electronic control box and then use hex key (4mm) to loose the screw (represented as E in the lower left corner of the picture)
- Page 33 Mechanical adjustment- grating film Announcements : 1. Rotating the first screw of the motor grating film to fix flat. 2. After replacing the grating film, need to make sure the left-right position of the grating film, and don’t touch the encoder. CONFIDENTIA 项目名称...
Need help?
Do you have a question about the A4 and is the answer not in the manual?
Questions and answers
I have a problem with my Jake A4s the presser foot bar is very low and is swinging around please help
If the presser foot bar on your Jack A4 is too low and swinging around, you should check and adjust the presser bar spring inside the machine. To do this:
1. Remove the faceplate to access the presser foot mechanism.
2. Loosen the bottom securing nut that holds the presser foot tension adjustment.
3. Carefully unscrew and remove the adjustment assembly, but avoid fully removing the spring unless necessary.
4. Ensure the presser bar spring is properly seated—its rod should sit flush with the spring.
5. Reassemble and tighten the components, making sure the bar is stable and correctly positioned.
Improper seating can cause instability or damage.
This answer is automatically generated
HI. I'm a problem with automatic trimming sistem, it's not working even with the botton selected. Any help with this. It's a Jack A4s model
The troubleshooting steps for the automatic trimming system on a Jack A4s model are:
1. If the thread cannot be cut:
- Check if the trimming cam is in the correct position and adjust it if needed.
- Ensure the movable knife and fixed knife are in proper contact; adjust their positions.
- Replace the moving blade if it is damaged.
- Grind or replace the fixed blade if it is dull or damaged.
2. If the machine stops after trimming:
- Adjust the trimming cam to the correct position.
This answer is automatically generated
DOLŽINO ŠIVA NI MOŽNO NASTAVITI, GUMB NE DELUJE-ne gre ga premikati v desno
saya ada masalah dengan mesin jahit jack A4E, sejak pisau otomatisnya patah dan untuk beberapa lama g diganti kemudian setelah pisau diganti tapi g bisa motong otomatis meski sudah diinjak kebelakang
mau tanya kalo mesin jahit A4E untuk alih bahasa indonesia mesti mencet apa? tadinya bahasa indonesia karena di pencet2 operator jahit bahasanya jd ganti..Terima Kasih..ditunggu jawabannya di email
Baskı ayağı çok hızlı sert inip kalkıyor
The Jack A4 presser foot may be moving up and down too quickly due to the "midway press foot lifter" being activated. If the corresponding icon is displayed, it means the lifter is on, which could cause rapid movement. Pressing the button again to turn it off may resolve the issue. Additionally, adjusting the presser foot tension using the securing nut might help control the movement.
This answer is automatically generated