Fermax Duox Veo XS Installer Manual
Ambiance monitor
Hide thumbs
Also See for Duox Veo XS:
- Installer manual (52 pages) ,
- Quick start manual (33 pages) ,
- Technical book (108 pages)

Related Manuals for Fermax Duox Veo XS


Summary of Contents for Fermax Duox Veo XS
- Page 1 Monitor Veo XS Ambiance Duox Duox Veo XS Ambiance Monitor MANUAL DE INSTALADOR INSTALLER’S MANUAL...
- Page 2 Publicación técnica de carácter informativo editada por FERMAX ELECTRÓNICA S.A.U. FERMAX ELECTRÓNICA, en su política de mejora constante, se reserva el derecho a modifi car el contenido de este documento así como las características de los productos que en él se refi eren en cualquier momento y sin previo aviso.
-
Page 3: Table Of Contents
ÍNDICE INTRODUCCIÓN INSTALACIÓN -Instalación monitor -Conexiones CARACTERÍSTICAS TÉCNICAS DESCRIPCIÓN DE PRODUCTO - Monitor Veo XS AMBIANCE - Botones - Leds PROGRAMACIÓN 1. Pantalla táctil - Botones de navegación 2. Acceder a menú de administrador y de usuario 3. Menu administrador 1. -
Page 4: Introducción
INTRODUCCIÓN El monitor VEO XS AMBIANCE DUOX con pantalla táctil, representa un nuevo diseño electrónico que incorpora la tecnología DUOX de audio y video, alimentación y datos a través de dos hilos no polarizados. Las caracteristicas fundamentales del sistema duox son las siguientes: •... -
Page 5: Instalación
INSTALACIÓN INSTALACIÓN MONITOR Montaje Desmontaje Detalle CONEXIONES CL CH A+ - CL CH Bin, Bin: Datos, audio y video. T, -: pulsador de llamada puerta vivienda (P1). A+, -: Conexión Prolongador de llamada ref 2040 / Activador de Luces y timbres ref. 2438. CL, CH, M: Para conectar el monitor a una red domótica DOBISS mediante una red de comunicación CAN. - Page 6 CASCADA DISTRIBUCIÓN M CL M CL M CL AMPLIACIONES ref. 2438 ACTIVADOR DE LUCES ADS REF. 2438 ADS LIGHT COMMANDER Max. 2A 110-240Vac 50-60Hz M CL +A -A F1 2A 110-240Vac 110-240Vac ref. 2040 M CL MONITOR VEO XS AMBIANCE DUOX...
-
Page 7: Características Técnicas
CARACTERÍSTICAS TÉCNICAS 18 Vdc Alimentación (sin polaridad) Consumo SIN bucle inductivo CON Bucle inductivo - en reposo: 77 mA - en reposo: 77 mA - máximo: 407 mA - máximo: 850 mA - menú de domótica: 140 mA - menú de domótica: 140 mA Número de terminales por vivienda Dirección de cada monitor: 6 dígitos 000001...999999... -
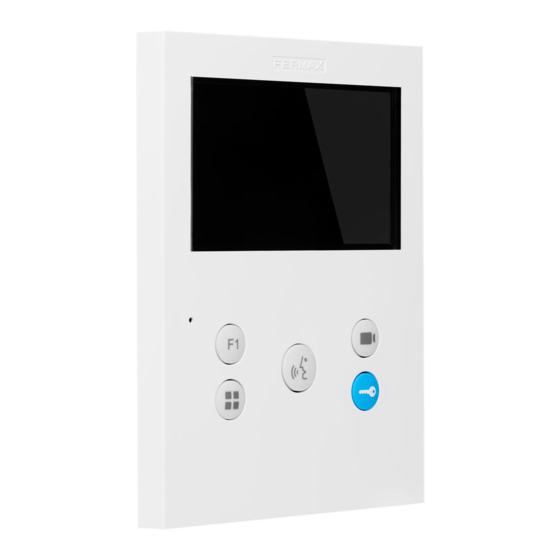
Page 8: Botones
BOTONES Botón de abrepuertas / llamada a conserje. · Estando en comunicación con la Placa de Calle (audio sólo o video sólo o audio + video), al pulsar este botón se activa el abrepuertas. · Con el monitor en reposo, al pulsar este botón se realiza una llamada al con- serje (si existe conserjería y el monitor esta en modo día o mixto). -
Page 9: Programación
PROGRAMACIÓN: 1. PROGRAMACIÓN: PANTALLA TÁCTIL - BOTONES DE NAVEGACIÓN iconos gráfi cos de navegación En la pantalla táctil del monitor se mostrarán las opciones a traves de icónos gráfi cos. La navegación se realizará a través de los iconos y su selección a través de la pulsación en la pantalla. - Page 10 Pantalla: Menú USUARIO Pantalla: Menú ADMINISTRADOR Pulsando el botón MENÚ, se accede directamente: - A la opción de Programación del monitor del Menú de Administrador, si el monitor no está programado. - A la pantalla del Menú de Usuario si el monitor está programado. Pantalla: Opción Programación del Pantalla: Menú...
-
Page 11: Menu Administrador
3. PROGRAMACIÓN: Pantalla MENÚ ADMINISTRADOR Existen varias opciones: 1. Programación de la dirección del Monitor. 2. Bucle inductivo. 3. Doormatic. 4. Reset de parámetros. 5. Acerca de. 6. Modo de conversación 3.1 MENÚ ADMINISTRADOR: PROGRAMACIÓN dirección monitor ¡El monitor no funcionará mientras no haya sido programado! Nota: El led azul parpadeando muy lento indica que el monitor está... - Page 12 b) Desde Placa. en la pantalla, se escucha Pulsar un bip en el monitor. Automáticamente el monitor se conecta con la placa de calle activando la cámara. In- troducir desde la placa el código de llamada para ese monitor. Dependiendo del tipo de placa instalada: •...
- Page 13 Notas: El tiempo desde que se escucha el bip de confi rmación de entrada en programación del monitor y se produce la llamada desde la placa para programar la dirección del monitor, debe ser inferior a 2 minutos y medio. - La placa desde la que se realiza la programación debe estar como placa máster.
-
Page 14: Menu Usuario
3.5 MENÚ ADMINISTRADOR: ACERCA DE Pulsando , en pantalla se muestra un código QR que permite acceder a la documen- tación completa del monitor. 3.6 MENÚ ADMINISTRADOR: MODO DE CONVERSACIÓN Dentro del menú de administrador se puede seleccionar entre modo Simplex y Manos Libres. - Page 15 4.1 MENÚ USUARIO: AJUSTE DE VOLUMEN DEL MONITOR Es posible ajustar el volumen de melodía en un rango de diez posibles valores. En primer lugar se muestra y se escucha el volumen actual que podrá ir aumen- tando (+) o decrementando (-). Obtener la regulación deseada.
- Page 16 4.4 MENÚ USUARIO: FUNCIÓN F2 La función F2 envía un comando de activación para poder activar un dispositivo auxiliar. En la pantalla se notifi cará la acción: F2 ON durante 3 segundos. Esta función está en la pantalla principal del menú de usuario. Se envía por el bus el comando F2 incluyendo la dirección del monitor para activar el dispositivo auxiliar conectado al bus como por ejemplo un relé...
- Page 17 4.5.1 Ajustes parámetros de usuario: SELECCIÓN DE MELODÍAS Pulsando sobre el icono el monitor permite seleccionar una melodía independiente para la placa y otra para la conserjería Permite asignar entre 5 tonos diferentes de melodías. a) Selección melodía placa Pulsando esta opción se puede cambiar la melodía que se escuchará...
- Page 18 Pulsar sobre el formato deseado del tipo de fecha. La opción seleccionada será sombreada durante un momento (250ms) y a continuación se pasará al menú de con- fi guración de hora/fecha. También se puede pasar pulsando el cur- sor correspondiente Si por algún motivo se pierde la alimentación, la confi...
- Page 19 4.5.5 Ajustes parámetros de usuario: AYUDA Pulsando , en pantalla se muestra un código QR que permite acceder a un enlace promocional que explica en detalle el sistema digital DUOX creado por FERMAX. 4.5.6 Ajustes parámetros de usuario: ACTIVACIÓN/DESACTIVACIÓN DOORMATIC (Según confi guración).
- Page 20 4.6 MENÚ USUARIO: ACCESO AL MENÚ DOMÓTICO DOBISS Se podrá acceder a la aplicación domótica Dobiss desde el propio menú de usuario del monitor o realizando una pulsación corta en cualquier zona de la pantalla estando el monitor en estado de reposo. Una vez en la aplicación de domótica Dobiss, los botones siguen manteniendo la funcio- nalidad, excepto el botón de menú...
- Page 21 Color 5.2 AJUSTES: AJUSTES AUDIO Durante el tiempo que está abierto el canal de audio se puede regular el volumen del audio. Para realizar el ajuste de audio, pulsar el botón (menú) o pulsar la pantalla táctil y aparecerá en pantalla un menú contextual para dicho ajuste. Placa video Placa audio Manual Usuario: FUNCIONAMIENTO...
-
Page 22: Funcionamiento
FUNCIONAMIENTO 1. FUNCIONAMIENTO: ATENDER A UNA LLAMADA a) Modo manos libres: Al presionar el pulsador de llamada en la Placa de Calle, se produce un tono de lla- mada en ésta y en el monitor, además de encenderse la pantalla. Se dispone de 30 segundos para contestar antes de que regrese a la situación de reposo. -
Page 23: Activación Manual Del Monitor (Autoencendido)
2. FUNCIONAMIENTO: ACTIVACIÓN MANUAL DEL MONITOR (AUTOENCENDIDO) Con el monitor en reposo o en cualquier menú que no sea el del administrador, pulsar el botón (cámara), para encender manualmente el monitor. Se establece comunicación con la placa 0 del bloque correspondiente al monitor (si existe). Si no existe, se realizaría el autoencendido con la placa 1 del mismo bloque y en caso de que ésta tampoco estuviera, se establecería comunicación con la placa confi... -
Page 24: Regulación De Volumen De Llamada (Potenciómetro)
3. FUNCIONAMIENTO: REGULACIÓN DE VOLUMEN DE LLAMADA (POTENCIÓMETRO) Partiendo del estado de reposo, si se desliza el potenciómetro se puede ajustar el volumen de llamada a un valor entre el mínimo y el máximo (Se disponen de 10 niveles de volumen). Notas: - La regulación afecta a todas las melodías que genera el monitor: placas de calle y timbre de puerta. - Page 25 En el caso de que haya capturas de imágenes que no hayan sido visualizadas por el usuario aparecerán notifi caciones en el icono del menú de usuario y en la pantalla de video. El icono de visualización de imágenes Cuando se produce una llamada, se infor- cambia mostrando un círculo azul con el ma de que existen fotos sin visualizar, no número de imágenes por visualizar (máxi-...
- Page 26 Technical publication for information purposes edited by FERMAX ELECTRÓNICA S.A.U. FERMAX ELECTRÓNICA applies a continuous improvement policy, therefore it reserves the right to modify the contents of this document, as well as the product features hereof at any time and without prior notice. Any modifi cation will be refl ected in subsequent editions of this document.
- Page 27 5. User parameter settings 6. Access to the DOBISS home automation menu 5. Video and audio settings OPERATION 1. Answering a call 2. Activating the monitor manually (Auto-On) 3. Call volume control (Potentiometer) 4. Displaying images DUOX VEO XS AMBIANCE MONITOR...
- Page 28 Parameter confi guration by via the touch screen. • Brightness, contrast and colour settings. • Auxiliary Functions F1 and F2. • Induction loop (according to model). • Doormatic (depending on confi guration). • Automatic image capture (with memory) • Home automation control. DUOX VEO XS AMBIANCE MONITOR...
- Page 29 ‘M’ and ‘CL’. See the 970105 VEO XS AMBIANCE Monitor Home Automation Mode Manual. JP1: Line adaptation bridge: • Right: Adaptation type A. • Centre: Adaptation type C. • Left: Without line adaptation. DUOX VEO XS AMBIANCE MONITOR...
- Page 30 DISTRIBUTION M CL M CL M CL EXPANSIONS ref. 2438 ACTIVADOR DE LUCES ADS REF. 2438 ADS LIGHT COMMANDER Max. 2A 110-240Vac 50-60Hz M CL +A -A F1 2A 110-240Vac 110-240Vac ref. 2040 M CL DUOX VEO XS AMBIANCE MONITOR...
- Page 31 Induction loop Identifi ed with this label (depending on model). · Includes an induction loop that works with devices worn by people with hearing disabilities. Note: In hearing aids with manual mode selection, the Digital Mode must be set. DUOX VEO XS AMBIANCE MONITOR...
- Page 32 Intermittent. Indicates that the Do Not Disturb feature is enabled. Blue LED: Intermittent. Monitor not programmed (idle). Switched on. Conversation in hands-free audio mode. On/Intermittent. Conversation in simple audio mode Green LED: According to confi guration. DUOX VEO XS AMBIANCE MONITOR...
- Page 33 . The conversation mode icon will change depending on the selected mode: Hands-Free Mode SIMPLEX MODE (Push to Talk) DUOX VEO XS AMBIANCE MONITOR...
- Page 34 To access the Administrator Menu when the monitor is programmed, two steps must be performed: 1. Press the MENU button to access the User Menu. 2. Whilst on the User Menu, press the follow- ing buttons simultaneously: DUOX VEO XS AMBIANCE MONITOR...
- Page 35 on the screen and access the screen to pro- Programming the call number: Press gram the dwelling number (numbers from right to left). Once the monitor address has been programmed, this will be indicated by a continually lit red LED. DUOX VEO XS AMBIANCE MONITOR...
- Page 36 After a few seconds, the monitor will return to the rest position. Once the monitor address has been programmed, this will be indicated by a continually lit red LED. DUOX VEO XS AMBIANCE MONITOR...
- Page 37 Note: A blue LED, blinking slowly, indicates that the monitor is not programmed. As the reset process erases the programmed monitor address, when the LED is fl ashing it will indicate that the reset is fi nished. DUOX VEO XS AMBIANCE MONITOR...
- Page 38 User Menu screen if the monitor is programmed. There are several options: 1. Monitor volume settings 2. Do Not Disturb function 3. Display images 4. F2 Function 5. User parameter settings 6. Home automation control application DUOX VEO XS AMBIANCE MONITOR...
- Page 39 4.3 USER MENU: DISPLAY IMAGES This icon allows you to view images that have been automatically captured and delete them. For more information see Chapter Operation: Image Display. 28 07 2017 08 15 011 028 DUOX VEO XS AMBIANCE MONITOR...
- Page 40 1. Melody selection 2. Date and time settings 3. Enable/disable image capture 4. Reset the confi guration parameters 5. User help 6. Enable/Disable Doormatic Note: In this screen you can see the Doormatic parameter enabled. DUOX VEO XS AMBIANCE MONITOR...
- Page 41 4.5.2 User parameter settings: DATE AND TIME SETTINGS By pressing the icon, a menu appears to select the date format, displayed in the previous images. By default, it displays the last format selected and shaded in grey. DUOX VEO XS AMBIANCE MONITOR...
- Page 42 - You can not validate with incorrect date and time data. - You can directly access the date/time menu by pressing the on-screen notifi cation on the main menu. 4.5.3 User parameter settings: ENABLE/DISABLE IMAGE CAPTURE DUOX VEO XS AMBIANCE MONITOR...
- Page 43 4.5.5 User parameter settings: HELP Pressing , the screen will display the QR code that allows access to a promotional link that explains in detail the digital DUOX system that Fermax has created. 4.5.6 User parameter settings: ENABLE/DISABLE DOORMATIC (According to confi guration).
- Page 44 The audio can also be activated from these screens (pick up receiver). Note: You will have 30 seconds to change the Video Settings, and when this time is up the monitor will return to idle mode. Brightness Contrast DUOX VEO XS AMBIANCE MONITOR...
- Page 45 While it is open, the audio channel can be used to adjust the volume of the audio. To make audio adjustments, press the button (menu) or press the touch screen and a shortcut menu for that setting will be displayed. Video Panel Audio Panel User Manual: FUNCTIONING DUOX VEO XS AMBIANCE MONITOR...
- Page 46 / telephones returning to idle mode. Trying to pick up any of them will result in a ‘line busy’ tone. - If communication is not established with the outdoor panel, the monitor will switch off automatically after 30 seconds. DUOX VEO XS AMBIANCE MONITOR...
- Page 47 - Once a conversation with a panel is over, pressing the auto-start button within the following 15 seconds will reconnect you to that panel. Panel 0, monitor block Panel 1, monitor block Panel 0, General Entrance Panel Identifi er DUOX VEO XS AMBIANCE MONITOR...
- Page 48 , the selected picture will be deleted. The user can navigate through the saved photos, even when the confi rmation win- dow is active. 28 / 07 / 2017 08 / 15 011/028 DUOX VEO XS AMBIANCE MONITOR...
- Page 49 fi rst, this icon appears when the image is displayed, indicating that the date and time settings that appear next to the image are not correct. 01 / 01 / 2017 00 / 00 001/018 DUOX VEO XS AMBIANCE MONITOR...
- Page 50 DUOX VEO XS AMBIANCE MONITOR...
- Page 51 DUOX VEO XS AMBIANCE MONITOR...
- Page 52 Avd. Tres Cruces, 133 46017 Valencia Spain Para más información, visitar www.fermax.com Contacto: tec@fermax.com www.fermax.com/contact For more information, visit www.fermax.com Contact: tec@fermax.com www.fermax.com/contact...
Need help?
Do you have a question about the Duox Veo XS and is the answer not in the manual?
Questions and answers