Fermax Veo XS Duox Installer Manual
Hide thumbs
Also See for Veo XS Duox:
- Installer manual (52 pages) ,
- Quick start manual (33 pages) ,
- Technical book (108 pages)

Related Manuals for Fermax Veo XS Duox


Summary of Contents for Fermax Veo XS Duox
- Page 1 Monitor Veo XS Duox Duox Veo XS Monitor MANUAL DE INSTALADOR INSTALLER’S MANUAL...
- Page 2 Publicación técnica de carácter informativo editada por FERMAX ELECTRÓNICA S.A.U. FERMAX ELECTRÓNICA, en su política de mejora constante, se reserva el derecho a modifi car el contenido de este documento así como las características de los productos que en él se refi eren en cualquier momento y sin previo aviso.
-
Page 3: Table Of Contents
ÍNDICE INTRODUCCIÓN INSTALACIÓN -Instalación monitor -Conexiones CARACTERÍSTICAS TÉCNICAS DESCRIPCIÓN DE PRODUCTO - Monitor Veo XS - Botones - Leds PROGRAMACIÓN 1. Acceder a menú de administrador y de usuario 2. Botones de navegación y pulsadores del monitor 3. Menu administrador 1. -
Page 4: Introducción
INTRODUCCIÓN El monitor VEO XS duox representa un nuevo diseño electrónico que incorpora la tecnología duox de audio y video, alimentación y datos a través de dos hilos no polarizados. Las caracteristicas fundamentales del sistema duox son las siguientes: •... -
Page 5: Instalación
INSTALACIÓN INSTALACIÓN MONITOR Montaje Desmontaje CONEXIONES Bin, Bin: Datos, audio y video entrada. Bout, Bout: Datos, audio y video salida (conexion en cascada). T, -: Pulsador de llamada puerta de vivieda. A+, -: Conexion Prolongador de llamada o Activador de luces y timbres F1: Función adicional (salida negativo “-”... - Page 6 CASCADA DISTRIBUCIÓN AMPLIACIONES ref. 2438 ACTIVADOR DE LUCES ADS REF. 2438 ADS LIGHT COMMANDER Max. 2A 110-240Vac 50-60Hz +A -A F1 2A 110-240Vac 110-240Vac ref. 2040 DUOX VEO XS MONITOR...
-
Page 7: Características Técnicas
CARACTERÍSTICAS TÉCNICAS 18 Vdc Alimentación (sin polaridad) Consumo SIN bucle inductivo CON Bucle inductivo - en reposo: 30 mA - en reposo: 30 mA - máximo: 370 mA - máximo: 770 mA Número de terminales por vivienda Dirección de cada monitor: 6 dígitos 000001...999999 Temperatura de funcionamiento [-5, +40 °C] / [23, 104 °F]... -
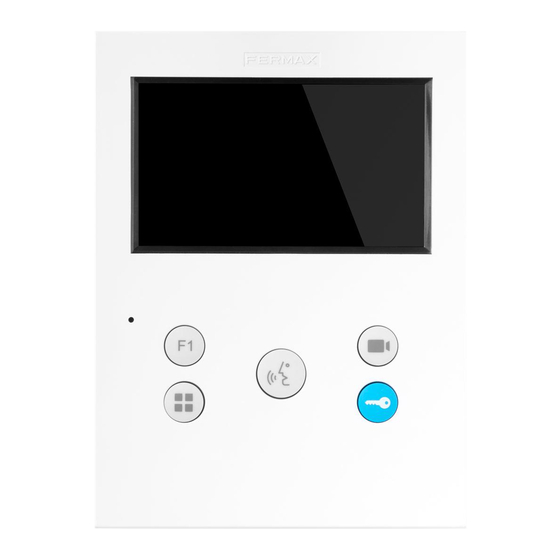
Page 8: Botones
BOTONES Botón de abrepuertas / llamada a conserje. · Estando en comunicación con la Placa de Calle (audio sólo o video sólo o audio + video), al pulsar este botón se activa el abrepuertas. · Con el monitor en reposo, al pulsar este botón se realiza una llamada al con- serje (si existe conserjería). -
Page 9: Programación
PROGRAMACIÓN: 1. PROGRAMACIÓN: ACCEDER A MENÚ DE USUARIO Y DE ADMINISTRADOR Pantalla: Menú ADMINISTRADOR Pantalla: Menú USUARIO Pulsando el botón MENÚ, se accede directamente: - A la opción de Programación del monitor del Menú de Administrador, si el monitor no está programado. - A la pantalla del Menú... -
Page 10: Botones De Navegación Y Pulsadores Del Monitor
2. Estando en la pantalla del Menú de Usuario, pulsar simultáneamente los botónes: 2. PROGRAMACIÓN: BOTONES DE NAVEGACIÓN Y PULSADORES DEL MONITOR botones de navegación Los iconos visualizados en la pantalla (botones de navegación: x, <, > y), se manejan con los pulsadores correspondientes ubicados en el monitor: x : Volvemos a la pantalla anterior o stand-by. -
Page 11: Programacion Dirección Monitor
3.1 MENÚ ADMINISTRADOR: PROGRAMACIÓN dirección monitor ¡El monitor no funcionará mientras no haya sido programado! Nota: El led azul parpadeando muy lento indica que el monitor está sin programar y una vez programada la dirección del monitor se indica mediante el led rojo fi jo. Existen tres opciones para programar el monitor desde: a) Desde Placa. - Page 12 Se produce un tono de llamada diferente, confi rmando la programación del monitor y se sigue visualizando la imagen de la cámara. Transcurridos unos segundos el monitor vuelve a reposo. Una vez programada la dirección del monitor se indica mediante el led rojo fi jo. b) Desde Monitor.
-
Page 13: Bucle Inductivo
3.2 MENÚ ADMINISTRADOR: BUCLE INDUCTIVO Desde esta pantalla se permite activar/desactivar el bucle inductivo incluido en el monitor (según modelo). Esta pantalla aparece en todos los modelos de los monitores lleven o no incluido el bucle inductivo. Pedir el modelo adecuado si se requiere esta funcionalidad. La línea blanca abajo del icono indica en la función en la que nos encontramos. -
Page 14: Menu Usuario
4. PROGRAMACIÓN: Pantalla MENÚ USUARIO Pulsando el botón MENÚ, se accede directamente a la pantalla del Menú de Usuario si el monitor está programado. Existen varias opciones: 1. Ajuse de volumen del monitor 2. Función no molestar 3. Función F2 4. - Page 15 El led rojo del monitor parpadea lento cuando está activo el modo no molestar. Se visualiza una vez se ha salido de progra- mación. 4.3 MENÚ USUARIO: FUNCIÓN F2 La función F2 envía un comando de activa- ción para poder activar un dispositivo auxiliar. En la pantalla se notifi...
- Page 16 4.4.1 Ajustes parámetros de usuario: SELECCIÓN DE MELODÍAS El monitor permite seleccionar una melodía independiente para la placa y otra para la conserjería. a) Selección melodía placa Seleccionando esta opción se puede cambiar la melodía que se escuchará en el monitor cuando se realice una llamada desde la placa de la calle.
- Page 17 Si se desea realizar el reset confirmar la opción. 4.4.4 Ajustes parámetros de usuario: AYUDA En pantalla se muestra un código QR que permite acceder a un enlace promocional que explica en detalle el sistema digital Duox creado por FERMAX. DUOX VEO XS MONITOR...
-
Page 18: Ajustes De Video Y Audio
5. AJUSTES: VIDEO Y AUDIO 5.1 AJUSTES: AJUSTE VIDEO: BRILLO - CONTRASTE - COLOR El monitor permite realizar los ajustes de brillo, contraste y color mientras se haya recibido una llamada (sin descolgar) o realizando un autoencendido (cámara), (ver capítulo Funcionamiento: Autoencendido). -
Page 19: Funcionamiento
5.2 AJUSTES: AJUSTE AUDIO Durante el tiempo que está abierto el canal de audio se puede regular el volumen del audio. Para realizar el ajuste de audio, pulsar el botón (menú) y aparecerá en pantalla un menú contextual para dicho ajuste. FUNCIONAMIENTO 1. -
Page 20: Activación Manual Del Monitor (Autoencendido)
Notas: - En caso de haber varios monitores/teléfonos en la misma vivienda sólo conseguirá audio el primero que descuelgue, volviendo a reposo el resto de monitores/teléfonos. Si se intenta descolgar alguno de ellos se obtendrá un tono de línea ocupada. - Si no se establece comunicación con la placa de calle, el monitor se apaga automática- mente pasados 30 seg. -
Page 21: Regulación De Volumen De Llamada (Potenciómetro)
Desde estas pantallas también se puede: Activar la Cambiar la placa de función F1 comunicación Abrir la puerta 3. FUNCIONAMIENTO: REGULACIÓN DE VOLUMEN DE LLAMADA (POTENCIÓMETRO) Partiendo del estado de reposo, si se desliza el potenciómetro se puede ajustar el volumen de llamada a un valor entre el mínimo y el máximo (Se disponen de 10 niveles de volumen). - Page 22 Technical publication of an informative nature published by FERMAX ELECTRONICA S.A.U. As part of its constant improvement policy, FERMAX ELECTRONICA reserves the right to modify the content of this document and the characteristics of the products referred to in it at any time and without prior notice. Any modifi cation will be refl...
- Page 23 TABLE OF CONTENTS INTRODUCTION INSTALLATION -Monitor installation -Connections TECHNICAL CHARACTERISTICS 7 PRODUCT DESCRIPTION 7 - Veo XS Monitor - Buttons - Leds PROGRAMMING 9 1. Access the administrator and user menu 2. Navigation buttons and monitor buttons 3. Administrator Menu 1.
-
Page 24: Introduction
INTRODUCTION The VEO XS duox monitor presents a new electronic design that includes duox technology for audio and video, power and data via two non-polarized wires. The fundamental characteristics of the duox system are as follows: • Monitor power supply via 18 Vdc bus. -
Page 25: Installation
INSTALLATION INSTALLING THE MONITOR Assembly Disassembly CONNECTIONS: Bin, Bin: Data, audio and video input. Bout, Bout: Data, audio and video output (cascade connection). T, -: Button to call home door. A+, -: Call extension connection or light and bell activator F1: Additional Functions (negative output “-”... - Page 26 CASCADE DISTRIBUTION EXTENSIONS Ref. 2438 ACTIVADOR DE LUCES ADS REF. 2438 ADS LIGHT COMMANDER Max. 2A 110-240Vac 50-60Hz +A -A F1 2A 110-240Vac 110-240Vac Ref. 2040 DUOX VEO XS MONITOR...
-
Page 27: Product Description
TECHNICAL FEATURES 18 Vdc Power (no polarity) Consumption NO Induction loop WITH Induction loop - in standby: 25 mA - in standby: 25 mA - maximum: 370 mA - maximum: 770 mA Number of terminals per residence Each monitor's address: 6 digits 000001...999999 Operating Temperature [-5, +40 °C] / [23, 104 °F]... -
Page 28: Buttons
BUTTONS Lock Releases / Call Guard Unit Button. · While in conversation with the Street Panel (only audio, only video or audio + video), pressing it will activate the open door lock-release. · Pressing this button whilst the monitor is on standby will result in a call being made to the guard unit (where one exists). -
Page 29: Programming
PROGRAMMING: 1. PROGRAMMING: ACCESS A USER AND ADMINISTRATOR MENU Screen: ADMINISTRATOR Menu Screen: USER Menu By pressing the MENU button, you directly access: - The monitor’s Programming option on the Administrator Menu, if the monitor is not programmed. - The User Menu screen if the monitor is programmed. Screen: USER Menu Screen: ADMINISTRATOR Menu Programming the monitor option... -
Page 30: Navigation Buttons And Monitor Buttons
2. When on the User Menu screen, simultan- eously press these buttons: 2. PROGRAMMING: NAVIGATION BUTTONS AND MONITOR BUTTONS Navigation buttons The icons viewed on the screen (navigation buttons: x, <, > y), are handled with the cor- responding buttons located in the monitor: x : Return to the previous screen or stand-by. - Page 31 3.1 ADMINISTRATOR MENU: PROGRAMMING monitor address The monitor will not function until it has been programmed! Note: A slow blue blinking led means that the monitor is not programmed and once pro- grammed, the monitor’s address is indicated via a red fi xed led. There are three monitor programming options: a) From the Panel.
- Page 32 A different call tone is produced, confi rming the monitor’s programming and the camera’s image is still viewed. After a few seconds the monitor returns to standby. Once the monitor’s address is programmed it is indicated via a fi xed red light. b) From the Monitor.
- Page 33 3.2 ADMINISTRATOR MENU: INDUCTION EAR LOOP From this screen you can activate/deactivate the induction loop included in the monitor (according to the model). This screen appears in all models of the monitors, whether or not it has an induction loop. Ask for the right model if you want this function.
-
Page 34: User Menu
4. PROGRAMMING: USER MENU Screen By pressing the MENU button,you directly access the User Menu if the monitor is programmed. There are several options: 1. Adjust the monitor volume 2. Do not disturb mode 3. F2 Function 4. User parameter settings 4.1 USER MENU: MONITOR VOLUME SETTINGS You can adjust the ringtone volume within a range of ten possible values. - Page 35 The monitor’s red LED blinks slowly when the do not disturb option is activated. It appears once exited from the programming. 4.3 USER MENU: F2 FUNCTION The F2 function sends an activation command to be able to activate an auxiliary device. The screen notifi...
- Page 36 4.4.1 User parameter settings: RINGTONE SELECTION The monitor allows you to select a ring tone independently for the panel and guard unit. a) Select panel ring tone Selecting this option you can change the ring tone that is heard on the monitor when you make a call from the street panel.
- Page 37 If you want to reset it, confi rm this option. 4.4.4 User parameter settings: HELP A QR code appears on the screen that allows you to access a promotional link explaining the Duox digital system created by FERMAX. DUOX VEO XS MONITOR...
-
Page 38: Operating
5. SETTINGS: VIDEO AND AUDIO 5.1. SETTINGS VIDEO ADJUSTMENTS: BRIGHTNESS - CONTRAST - COLOUR The monitor allows you to adjust brightness, contrast and colour while you have received a call (without hanging up) or when performing an auto-start "camera", (see chapter Operating: Auto-start). -
Page 39: Answering A Call
5.2 SETTINGS: AUDIO SETTINGS While the audio channel is open the audio volume can be regulated. In order to set the audio, press (MENU) and a menu screen appears for this setting. FUNCTION 1. OPERATION: ANSWERING A CALL a) "Hands-free" Mode: When the call button on the Entry Panel is pressed a call tone sounds both on the panel and on the monitor, causing the screen to start up. - Page 40 Notes: - If there are various telephones in the same home, the audio will only come from the fi rst one picked-up, leaving the remaining monitors/phones in standby. If you try hanging one of them up, a busy signal will sound. - If communication is not established with the entry panel, the monitor will automatically turn off after 30 seconds.
-
Page 41: Call Volume Regulation (Potentiometer)
From these screens you can also: Activate F1 Change communication panel Open the door 3. OPERATION: CALL VOLUME REGULATION (POTENTIOMETER) Starting from standby mode, use the potentiometer to adjust the call volume to any setting between the maximum and minimum levels (there are 10 settings). Notes: - Regulation affects all ringtones generated by the monitor: street panels and entrance ringtones. - Page 44 Para más información, visitar www.fermax.com Contacto: tec@fermax.com www.fermax.com/contact For extended information, visit www.fermax.com Contact: tec@fermax.com www.fermax.com/contact...
Need help?
Do you have a question about the Veo XS Duox and is the answer not in the manual?
Questions and answers