Table of Contents
Advertisement
Quick Links
本書は取付け作業前・ご使用前に必ずお読みください。
取付けは必ず専門業者に依頼してください。
お読みになった後は、大切に保管してください。
本製品は下記に示す車両のみ取付け可能です。装着車種と適合車種を確認してください。
商
品
名
用
途
コード№
製品説明書品番
車
名
型
式
エンジン形式
年
式
備
考
LIFT UP
取扱説明書
適合車両
HKS HIPERMAX G+ LIFT UP
80270-AS004
80271-AS004
80272-AS004
80273-AS004
80274-AS004
スズキ ジムニー シエラ
・純正バンプラバーをご使用ください。
(ショートバンプラバー使用不可)
・減衰力調整については、P15減衰力調整方法をご参照ください。
自動車専用部品
FULL KIT
FRONT FULL SET
REAR FULL SET
FRONT DAMPER SET
REAR DAMPER SET
E04415-S80020-00
JB74W
K15B
2018/7~
80270-AS004
Advertisement
Table of Contents

Related Manuals for HKS HIPERMAX G+ LIFT UP


Summary of Contents for HKS HIPERMAX G+ LIFT UP
- Page 1 LIFT UP 取扱説明書 本書は取付け作業前・ご使用前に必ずお読みください。 取付けは必ず専門業者に依頼してください。 お読みになった後は、大切に保管してください。 適合車両 本製品は下記に示す車両のみ取付け可能です。装着車種と適合車種を確認してください。 商 品 名 HKS HIPERMAX G+ LIFT UP 用 途 自動車専用部品 80270-AS004 FULL KIT 80271-AS004 FRONT FULL SET コード№ 80272-AS004 REAR FULL SET 80273-AS004 FRONT DAMPER SET 80274-AS004 REAR DAMPER SET 製品説明書品番...
- Page 2 目 次 ●目 次 ●用語の説明 ●改訂の記録 ●本製品の取扱いについて はじめに ・・・・・・・・・・・・・・・・・・・・・・・・・・・・・・・・・・・・・・・・・・・・・・・・・2 安全上の注意 ・・・・・・・・・・・・・・・・・・・・・・・・・・・・・・・・・・・・・・・・・・・・・2 お使いいただく前に ・・・・・・・・・・・・・・・・・・・・・・・・・・・・・・・・・・・・・・・2 取付け時の注意 ・・・・・・・・・・・・・・・・・・・・・・・・・・・・・・・・・・・・・・・・・・・3 取付け後の確認 ・・・・・・・・・・・・・・・・・・・・・・・・・・・・・・・・・・・・・・・・・・・3 減衰力の調整 ・・・・・・・・・・・・・・・・・・・・・・・・・・・・・・・・・・・・・・・・・・・・・3 維持・管理 ・・・・・・・・・・・・・・・・・・・・・・・・・・・・・・・・・・・・・・・・・・・・・・・4 異常・故障時の対応 ・・・・・・・・・・・・・・・・・・・・・・・・・・・・・・・・・・・・・・・4 アフターサービス ・・・・・・・・・・・・・・・・・・・・・・・・・・・・・・・・・・・・・・・・・4 廃却について ・・・・・・・・・・・・・・・・・・・・・・・・・・・・・・・・・・・・・・・・・・・・・4 ●本製品の取付けについて セット内容の確認 ・・・・・・・・・・・・・・・・・・・・・・・・・・・・・・・・・・・・・・・・・5 サスペンションASSY構成図 ・・・・・・・・・・・・・・・・・・・・・・・・・・・・・6 フロントサスペンションASSY取外し ・・・・・・・・・・・・・・・・・・・・・7 フロントサスペンションASSY取付け ・・・・・・・・・・・・・・・・・・・・・9 リアサスペンションASSY取外し ・・・・・・・・・・・・・・・・・・・・・・・・12 リアサスペンションASSY取付け ・・・・・・・・・・・・・・・・・・・・・・・・13 減衰力調整方法...
- Page 3 本製品の取扱いについて はじめに この度はHKS HIPERMAX SERIESをお買い上げいただき誠にありがとうございます。 本製品を安全にご使用いただき、機能を充分に発揮させるために本書をお読みください。 取付け終了後は本書に記載されている内容を守り、安全に使用してください。 本書は取付けを行う前に必ず読み、よく理解したうえで作業を行ってください。 ●本書は本製品を安全に取付けていただき、お客様または第三者への危険や損害を未然に防止するため、守っていただきたい 注意事項を示しています。 ●本製品はノーマル車両、HKS製品取付け車両を基準に開発されております。 適合車両以外に取付けた場合は、本製品の機能・性能及び安全性について保証いたしかねます。 ●お客様または第三者が本製品及び付属品を誤使用したことにより受けた損害については、当社は一切責任を負いかねます。 ●本製品の仕様は付属品を含め、改良のため予告なく変更することがあります。 ●本書は予告なく改版することがあります。 ●本書はお読みになった後も、本製品の側に置いてご活用ください。 安全上の注意 本書では、下記のような記号を使用しお客様への危険レベルを示しています。 警 告 作業者または使用者が、死亡または重傷を負う可能性がある場合 作業者または使用者が、傷害を負う危険が想定される場合(人損)拡大物損の発生が想定される場合 注 意 (拡大物損とは、当該製造物が原因で誘発された物的損害(例えば車両の破損及び焼損)) お使いいただく前に 本製品を正しくお取扱いいただくために、下記の注意事項を必ず厳守してください。 警 告 ・本製品の交換、車高の調整に際して、車載ジャッキを使用した車体の持ち上げは絶対に行わないでください。 必ず自動車専用リフトかガレージジャッキとリジッドラックを使用してください。 車載ジャッキを使用すると車体が不安定な状態となり、車両が落下してケガをしたり、最悪の場合は死亡する恐れが あります。 ・本製品には窒素ガスが封入されています。分解したり、火に入れないでください。 また、地面に落とす等の強い衝撃は与えないでください。分解・衝撃等で爆発する恐れがあります。 注 意 ・本キット装着により、衝突被害軽減ブレーキ等の運転支援システムが正しく機能しない可能性があります。 ・本キット装着による誤作動や不具合に関して責任を負いかねます。 ●シリンダーの継ぎ目部分からオイルがにじむ場合がありますが、組立て時にOリングの外側に微量のオイルが残ったための にじみで異常ではありません。...
- Page 4 取付け時の注意 ●本製品の取付けは、必ず専門業者に依頼してください。 ●本製品の加工、改造は絶対に行わないでください。 ●ガス封入口から窒素ガスを抜いたり、充填しないでください。 ●本製品を交換する際は必ず左右(2本)同時に交換してください。 ●スプリング脱着作業には、スプリングコンプレッサーを使用してください。 ●スプリング脱着作業時は、スプリングコンプレッサーの引っ掛かり状態を確認して作業してください。 ●サスペンションのアッパーマウントの取付け・取外しの際に、インパクトレンチは使用しないでください。 やむをえず使用する場合は、スプリングの反発力及びバネ下重量がサスペンションに掛かり、サスペンションが伸び切った 状態での作業は避け、スプリングが遊んでいる状態でサスペンションを縮めて作業するか、もしくはジャッキ等を用い サスペンションを縮めた状態で作業してください。 インパクトレンチの誤った使用により、内部部品の脱落または異音の発生する原因となる可能性があります。 ●本書及び整備書に従ってノーマルサスペンションASSYを取外してください。 取外したサスペンションASSYや純正部品は廃棄せず大切に保管してください。 ●本書に従って車両に本製品を取付けてください。 (サスペンションに左右があるものは、左右を区別するためのステッカーが貼付けてあります。) ●各ボルト・ナットを本書及び整備書に記載されている規定トルクで締付けてください。 規定トルクで締付けない場合、ボルト・ナットのネジ部破損や、ゆるみ、ショックアブソーバ内部破損の原因になります。 ●スプリングは、本キット以外のスプリングを使用しないでください。 警 告 ・本製品のシャフトを工具等でつかまないでください。油漏れの原因になります。 ・六角穴付き皿ボルトをゆるめたり外したりしないでください。高圧ガスが噴出し、ショックアブソーバの機能が 失われます。 ・スプリングが圧縮されている状態でスプリングコンプレッサーが脱落すると不測の方向に各部品が飛散し、負傷する 恐れがあります。 取付け後の確認 ●下記の項目を確認してください。 ・各ボルト・ナットが本書及び整備書に記載されている規定トルクで締付けられているか。 ・ブレーキホースやABSセンサハーネス等が、他の部品と干渉やこすれがないか。 (オプションパーツとして汎用ブラケット:1799-SA010を設定してあります。) ・本製品にタイヤやホイール等、他の部品が接触していないか。 ●タイヤ及びホイールは、いかなる場合でもサスペンション本体と干渉しないものを使用してください。本製品にタイヤや ホイール等、他の部品が接触・干渉した状態で使用を続けると、油漏れや作動不良の原因になります。 ●チェーン装着に関して、車高が下がることに伴い、タイヤサイズや使用するチェーンによっては、フェンダーと干渉しやすく なる可能性があります。 ●走行中に異音や異常な振動等の異変が生じた場合は、ただちに車両を停止し、取付けを依頼した専門業者へ点検を依頼して ください。 減衰力の調整 ●減衰力ダイヤルは30段あります。右回しに締込み、止まったところからクリック感が最初に感じられるところまで戻したところ が0段となります。締込む際、クリック感に比べ過度に締込むと内部部品が破損し、調整不能になる恐れがあります。...
- Page 5 維持・管理 ●快適に運転していただくために、必ずお車を運転する前に日常点検を行ってください。 日常点検はドライバーの責任です。必ず実施してください。 ●本製品取付け後は、ならし運転が必要です。50km前後を目安に速度を抑えて走行してください。 ●本製品使用期間中は、定期的に各部の締付け・車高・汚れ等を確認し、必要に応じて増し締め・調整・清掃を行ってください。 ●経年変化によりピロボール・シャフト等が磨耗し、サスペンションの性能の低下や音が発生する場合があります。 異常・故障時の対応 ●故障の修理はお客様ご自身では対処せず、必ず専門業者に依頼してください。 ●走行中、異音・異臭・振動等の異変があった場合は、ただちに車両の運転を中止し、専門業者に修理を依頼してください。 アフターサービス ●本製品に関するお問い合わせ及びオプションパーツ・紛失部品の購入・オーバーホールのご依頼は、お買い上げの販売店に お問い合わせください。 ●本製品取付け後に修理・オーバーホール等が生じた場合、本製品(サスペンション単体)のみをお預かりさせていただく場合が あります。 修理・オーバーホール作業期間中にお車を使用される場合の為に、本製品取付け時に取外したサスペンションや純正部品は 廃棄せず大切に保管してください。 廃却について ●廃却する場合はお客様ご自身で対処せず、必ずお買い上げの販売店または専門業者に依頼してください。 ●オイルが飛散する場合がありますので、必ず安全メガネを着用し、作業してください。 - 4 - 80270-AS004...
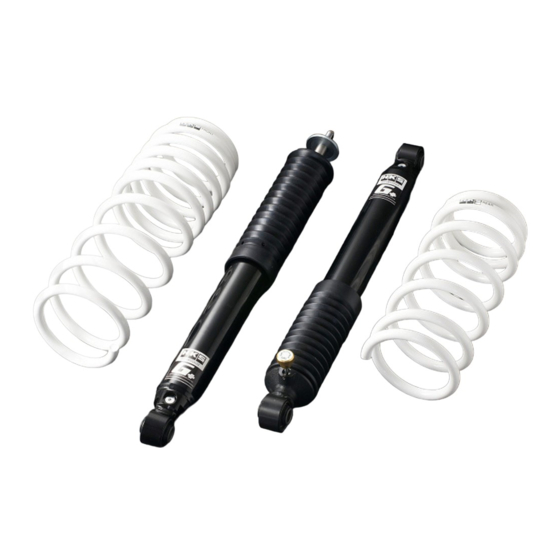
- Page 6 本製品の取付けについて ◎取付け作業前に必ずお読みください。 セット内容の確認 取付け前に、下記のセット内容の有無・数量を確認してください。 フロントショックアブソーバASSY リアショックアブソーバASSY フロントコイルスプリング リアコイルスプリング(右側) リアコイルスプリング(左側) 六角レンチ(3.0 ㎜) ゴムキャップ エクステンションボルト スペーサー 保証書 取扱説明書(本書) - 5 - 80270-AS004...
- Page 7 サスペンションASSY構成図 フロント リ ア フランジナット(同梱品) 締付トルク:35N・m プレート(同梱品) リアショックアブソーバ ASSY(同梱品) ボディ フロントショックアブソーバ クッション(純正部品) カラースフェリカル(同梱品) プレート(同梱品) 減衰力調整ダイヤル(同梱品) ダストブーツ(同梱品) エクステンションボルト(同梱品) 締付トルク:50N・m バンプストッププレート スペーサー(同梱品) (同梱品) プレートの向きに注意して取付 けてください。(溝(凹み)の ある側をCリングに向けてくだ バンプストッパ(純正部品) さい。) 締付トルク:50N・m Cリング(同梱品) バンプラバー(同梱品) リアコイルスプリング (同梱品) フロントショックアブソーバ (左側) (右側) ASSY(同梱品) ※リアコイルスプリングは車高適正化のため自由長が 左右で異なっています。 取付けの際はリアコイルスプリングの左右識別ラベ ルを確認してください。 また左側用リアコイルスプリングの端面に赤いペイント マークが施してあるので、合わせてご確認ください。...
- Page 8 フロントサスペンションASSY取外し 警 告 本製品の交換に際して、車載ジャッキを使用した車体の持ち上げは絶対に行わないでください。 車載ジャッキを使用すると車体が不安定な状態となり、調整中に車両が落下してケガをしたり、最悪の場合は死亡する 恐れがあります。必ず自動車用リフトか、ガレージジャッキとリジッドラックを使用してください。 1. 車両をジャッキアップし、タイヤを取外してください。 2. ジャッキを使用してフロントアクスルを支えてください。 ① 3. フロントショックアブソーバASSYのロッド先端部を固定し、 ①フロントショックアブソーバASSYアッパー取付ナット フロントショックアブソーバクッションリテーナ フロントショックアブソーバクッション を取外してください。(図1-1) ※本製品取付けの際 図1-1 ①フロントショックアブソーバASSYアッパー取付ナット フロントショックアブソーバクッションリテーナ は使用しません。 4. ②フロントショックアブソーバASSYロア取付ボルト・ナット を取外してください。(図1-2) 5. フロントショックアブソーバASSYを車両から取外してください。 注 意 ② フロントショックアブソーバASSYを取外す際、ブレーキホー 図1-2 ス・ABSセンサハーネスを引っ張らないようにしてください。 引っ張った場合、ブレーキの故障・破損の原因となります。 6. ③スタビライザリンク取付ナットを取外し、 スタビライザリンクを切離してください。(図1-3) ③ 図1-3 7. ④ABSセンサ取付ボルトを取外し、ABSセンサ ⑤...
- Page 9 フロントサスペンションASSY取外し 9. エアロッキングハブのバキュームホースを切り離してください。 (図1-5) ⑥ 10.⑥ABSセンサハーネス取付ボルトを取外し、 フロントアクスルからABSセンサハーネス を取外してください。(図1-5・1-6) 切り離す 図1-5 11.⑦フロントラテラルロッド取付ボルトを取外し、 ラテラルロッドを車両から切り離してください。(図1-6) ⑥ ※この時、ボルトの抜け止めピンを抜いてから 取外してください。 ⑦ 図1-6 12.⑧フロントプロペラシャフト取付ボルトを取外し、 プロペラシャフトを切離してください。(図1-7) ※この時、フランジにマーカーペン等で合わせマークを付けてから 取外してください。 13.フロントアクスルを支えているジャッキをゆっくり下げながら、 スプリングを車両から取外してください。 ⑧ 図1-7 注 意 ・スプリングを取外す際、ブレーキホース・ABSセンサハーネスを引っ張らないようにしてください。引っ張った場合、 ブレーキの故障・破損の原因となります。 ・アッパーマウントを取外す際、インパクトレンチは使用しないでください。 ・ネジ部を破損変形させないよう注意してください。 ・フロントショックアブソーバトップのフランジナットを取外す際、六角ソケット・ヘキサゴンレンチは充分に差し込 んで作業を行ってください。 - 8 - 80270-AS004...
- Page 10 フロントサスペンションASSY取付け 注 意 各部の締付トルクは、本説明書指定値またはメーカー発行の整備要領書に従ってください。 指定値に従わない場合ボルト・ナットのネジ部破損やショックアブソーバ内部破損の原因になります。 ・取付けは取外しと逆の手順で行います。 フロントコイルスプリング合わせ位置 1. フロントアクスルをジャッキで支えながら、 フロントコイルスプリング(同梱品) を取付けてください。 ※フロントコイルスプリング下部の端末をフロントアクスル段付部 に合わせて取付けてください。(図2-1) また、フロントコイルスプリングの上下を間違えないよう、ロゴ マークの向きを確認して取付けてください。 2. 自動車メーカー発行の整備要領書に従って、 図2-1 P6「サスペンションASSY構成図」を参考に フロントショックアブソーバクッション(純正部品)を フロントショックアブソーバASSY(同梱品) に取付けてください。 3. ②フロントショックアブソーバASSYロア取付ボルト・ナット を仮締めして、フロントショックアブソーバASSYを車両 に取付けてください。(図2-2) ② 図2-2 4. ⑨フランジナット フロントショックアブソーバクッション(純正部品) プレート ⑨ を仮締めしてください。(図2-3) 図2-3 5. ⑧フロントプロペラシャフト取付ボルト(締付トルク:50N・m) を使用し、プロペラシャフトを取付けてください。(図2-4) ※この時、フランジに付けた合わせマークの位置に合わせて 取付けてください。 ⑧...
- Page 11 フロントサスペンションASSY取付け 6. ⑦フロントラテラルロッド取付ボルト(締付トルク:160N・m) を使用し、ラテラルロッドを車両に取付けてください。 ⑥ (図2-5) ※ボルトに抜け止めピンを入れてください。 ⑦ 図2-5 7. エアロッキングハブのバキュームホースを差し込んでください。 (図2-6) ⑥ 8. フロントアクスルにABSセンサハーネスを取付け、 ⑥ABSセンサハーネス取付ボルト (締付トルク:8.8N・m) を取付けてください。(図2-5・2-6) 差し込む 図2-6 9. ⑤キャリパピンボルト (締付トルク:22N・m) ⑤ を使用し、フロントブレーキキャリパ を取付けてください。(図2-7) ※ブレーキホースがねじれないよう注意して取付けてください。 10.④ABSセンサ取付ボルト (締付トルク:8.8N・m) を使用し、ABSセンサを取付けてください。(図2-7) ④ 図2-7 11.③スタビライザリンク取付ナット (締付トルク:50N・m) を使用し、純正スタビライザリンクを取付けてください。 (図2-8) 12.仮締めしていた ②フロントショックアブソーバASSYロア取付ボルト・ナット (締付トルク:60N・m) ⑨フランジナット (締付トルク:35N・m)...
- Page 12 フロントサスペンションASSY取付け 13.P15「減衰力調整方法」を参考に減衰力の調整を行ったら、 ⑩ゴムキャップ(同梱品) を取付けてください。(図2-9) 14.アクスルを支えているジャッキをおろしてください。 ⑩ 15.タイヤを取付け、車両をジャッキからおろしてください。 図2-9 注 意 ・タイヤを取付け後、本製品がタイヤやホイール等、他の部品に接触していないことを確認してください。 接触していると、油漏れや作動不良の原因になります。 ・本製品に交換後は車高の変化に伴いアライメントに狂いが生じます。アライメントの狂いは走行安定性の低下や タイヤの偏磨耗などの悪影響を及ぼしますので、交換後は必ずアライメントを適正値に調整してください。 - 11 - 80270-AS004...
- Page 13 リアサスペンションASSY取外し 警 告 本製品の交換に際して、車載ジャッキを使用した車体の持ち上げは絶対に行わないでください。 車載ジャッキを使用すると車体が不安定な状態となり、調整中に車両が落下してケガをしたり、最悪の場合は死亡する 恐れがあります。必ず自動車用リフトか、ガレージジャッキとリジッドラックを使用してください。 1. 車両をジャッキアップし、タイヤを取外してください。 2. ※LEDヘッドランプ仕様車の場合 ①車高センサ取付ボルトを取外し、車高センサ を取外してください。(図3-1) 3. ジャッキを2台使用して、リアアクスルを左右で支えてください。 ① 図3-1 4. ②リアショックアブソーバASSYアッパー取付ボルト を取外してください。(図3-2) ② 図3-2 5. ③リアショックアブソーバASSYロア取付ボルト・ナット を取外してください。(図3-3) 6. リアショックアブソーバASSYを車両から取外してください。 7. リアアクスルを支えているジャッキをゆっくり下げながら、 スプリングを車両から取外してください。 ③ ※この時、ジャッキは左右片側ずつ下げてください。 図3-3 8. ④バンプストッパ を取外してください。(図3-4) 注 意 ④ ・リアショックアブソーバASSYとスプリングを取外す際、 ブレーキホース・ABSセンサハーネスを引っ張らないように してください。引っ張った場合、ブレーキの故障・破損の原因と...
- Page 14 リアサスペンションASSY取付け 注 意 各部の締付トルクは、本説明書指定値またはメーカー発行の整備要領書に従ってください。 指定値に従わない場合ボルト・ナットのネジ部破損やショックアブソーバ内部破損の原因になります。 ・取付けは取外しと逆の手順で行います。 エクステンションボルト 1. P6「サスペンションASSY構成図」を参考に、 (同梱品) スペーサー エクステンションボルト(同梱品) (締付トルク:50N・m) (同梱品) を車両に取付け、 スペーサー(同梱品) ④バンプストッパ(純正部品) (締付トルク:50N・m) を取付けてください。(図4-1) 2. リアアクスルをジャッキで支えながら、 ④ リアコイルスプリング(同梱品) を取付けてください。 図4-1 ※リアコイルスプリングには左右があります。 リアコイルスプリング合わせ位置 P6「サスペンションASSY」構成図を参考にラベル、 ペイントマークを確認してください。 ※リアコイルスプリング下部の端末をリアアクスル段付部に 合わせて取付けてください。(図4-2) また、リアコイルスプリングの上下を間違えないよう、ロゴ マークの向きを確認して取付けてください。 3. ③リアショックアブソーバASSYロア取付ボルト・ナット 図4-2 を仮締めして、リアショックアブソーバASSYを車両 に取付けてください。(図4-3) 減衰力調整ダイヤル ※減衰力調整ダイヤルが下向き内側になるよう取付けてください。 下向き内側に...
- Page 15 リアサスペンションASSY取付け ① 図4-5 注 意 ・タイヤを取付け後、本製品がタイヤやホイール等、他の部品に接触していないことを確認してください。 接触していると、油漏れや作動不良の原因になります。 ・本製品に交換後は車高の変化に伴いアライメントに狂いが生じます。アライメントの狂いは走行安定性の低下や タイヤの偏磨耗などの悪影響を及ぼしますので、交換後は必ずアライメントを適正値に調整してください。 - 14 - 80270-AS004...
- Page 16 減衰力調整方法 本製品は、フロントサスペンションASSYが標準タイプ、リアショックアブソーバASSYが横調整タイプとなっています。 フロントの減衰力調整は、ゴムキャップ(同梱品)を外して行ってください。(図2-9) リアの減衰力調整は、リアショックアブソーバASSY下部側面の減衰力調整ダイヤルで行ってください。 減衰力の調整と範囲 ●標準タイプ ・シャフト上端部にダイヤルが取付けられているものは、そのダイヤルで調整してください。 ・シャフト上端部に穴の空いているものは、同梱の減衰力調整六角レンチを差込んで調整してください。 ●ストラットタイプ ・サスペンション底面に取付けられているダイヤルで調整してください。 ●横調整タイプ ・サスペンション下部側面に取付けられているダイヤルで調整してください。 最 弱 出荷時 最 強 ※ 軽く右回りに一杯締込み 最強より30段 最強より15段 MAX G+ LIFT UP 左回りに少し戻し 戻した位置 戻した位置 クリックした位置 ※最強を0クリックとする コンフォート性重視の場合 出荷時より5段戻し、20段あたりを目安に調整してください。 スポーツ性重視の場合 出荷時より5段締込み、10段あたりを目安に調整してください。 ●ワンポイントアドバイス ・フワフワする場合・・・減衰力ダイヤルを締込み、減衰力を強くしてください。 ・ゴツゴツする場合・・・減衰力ダイヤルを戻して、減衰力を弱くしてください。 左回り 右回り 左回り 右回り...
- Page 17 開発車両データ 本製品の開発に使用した車両データは下記のとおりです。 車高データは、開発時の社内実測値です。車両の仕様や個体差などにより差が生じることがあります。 また、なじみにより取付後しばらくして車高が変化することがあります。 スズキ ジムニー シエラ(JB74W) 仕様 : K15B FRONT REAR 項目 車重 タイヤサイズ (空気圧) 195 / 80 - 15 ( 180 ) 195 / 80 - 15 ( 180 ) ホイールサイズ 5.5 JJ × 15 inset + 5 5.5 JJ × 15 inset + 5 スプリングレート...
- Page 18 - 17 - 80270-AS004...
- Page 19 - 18 - 80270-AS004...
- Page 20 株式会社エッチ・ケー・エス 〒418-0192 静岡県富士宮市北山7181 http://www.hks-power.co.jp/ (禁無断複写、転載) (株)エッチ・ケー・エス 改訂No. 発行月 3-1.01 2020/3 80270-AS004...
- Page 21 Always have access to a factory service manual. To avoid injury, follow the safety precautions contained in the factory service manual. Vehicles Application Chart Product HKS HIPERMAX G+ LIFT UP Product Category AUTOMOBILE PARTS 80270-AS004 FULL KIT...
-
Page 22: Handling Instruction
● This product was designed based on installation onto a specific factory vehicle HKS product are installed. The product performance is not guaranteed if this product is installed to an inapplicable vehicle. ● HKS will not be responsible for any damage caused by incorrect installation and/or use, or use after modification and/or dismantling of this product. -
Page 23: Safety Precautions
· Installing this kit may cause a malfunction of brake, driving support system such as collision avoidance system. · HKS will not be responsible for a malfunction and/or failure of those driving support systems after installing this product. ● Oil may exude from the cylinder joint; this is normal. A small amount of oil remains outside of the O-ring after assembly. -
Page 24: Confirmation After Installation
CAUTION · Do not hold the shaft of this product by a tool. It may cause oil leakage. · Do not loosen the hexagon socket countersunk head screw. If neglected, blowout of high pressure gas may be caused, and the function of the shock absorber may be lost. ·... -
Page 25: Maintenance
● For inquiries about this product, purchase of optional parts, purchase of missing parts, and/or overhaul, please contact the dealer the product is purchased. ● In case of repair or overhaul is required after installation, HKS may retain only the product. Please keep the removed factory Suspension assembly and Stock parts. They may use as a replacement. -
Page 26: Product Installation
PRODUCT INSTALLATION Parts List Front Shock Absorber Assy Rear Shock Absorber Assy Front Coil Spring Rear Coil Spring (Right Side) Rear Coil Spring (Left Side) Allen Wrench (3.0mm) Rubber Cap Extension Bolt Spacer Warranty Certificate Installation Guide - 5 - 80270-AS004... - Page 27 Suspension Components FRONT REAR FLANGE NUT (KIT PARTS) Torque Specs: 35N·m PLATE (KIT PARTS) REAR SHOCK ABSORBER ASSY (KIT PARTS) BODY FRONT SHOCK ABSORBER CUSHION (FACTORY) SPHERICAL COLLAR (KIT PARTS) PLATE (KIT PARTS) ADJUSTMENT DIAL (KIT PARTS) DUST BOOT (KIT PARTS) EXTENSION BOLT (KIT PARTS) Torque Specs: 50N·m...
- Page 28 CAUTION · Perform installation after the vehicle has cooled down sufficiently. · For height adjustments, only adjust height within the range specified in this manual. If adjusted above or below the specified range, the suspension and/or vehicle may become damaged. ·...
- Page 29 1. Removing the Factory Front Suspensions 7. Remove the following: ⑤ The ABS sensor installation bolt ④ The ABS sensor. (Diagram 1-4) 8. With the brake line attached, Remove the following: The caliper pin bolt ⑤ ④ The front brake caliper (Diagram 1-4) 1 - 4 *Use a s-shaped hook or other things to support the caliper so that the...
- Page 30 2. Installing the Front Suspensions NOTICE Refer to the service manual for torque specs when tightening bolts and nuts. Make sure to tighten the bolts and/or nuts to the specified torque to avoid the damage to the bolts, nuts and/or shock absorber internals. 1.
- Page 31 2. Installing the Front Suspensions 6. Install the lateral rod to the vehicle using the front lateral rod installation bolt ⑦ . ⑥ (Torque Specs: 160N·m) (Diagram 2-5) *Put the fixing pin into the bolt. ⑦ 2 - 5 7. Insert the vacuum hose of air locking hub. (Diagram 2-6) ⑥...
- Page 32 2. Installing the Front Suspensions 13. Referring to “Adjusting the Dampening” on page 15, After adjusting the dampening, install the provided rubber cap ⑩ . (Diagram 2-9) 14. Remove the jack from the axle. ⑩ 15. Mount the wheels back on, then lower the vehicle. 2 - 9 CAUTION After re-mounting the tires, make sure the product does not come into contact with the wheels/tires.
- Page 33 3. Removing the Factory Rear Suspensions WARNING When installing this product, do not use scissor-jacks supplied with the vehicle. Use of unstable scissor-jacks can lead to severe bodily injury or death. Always use vehicle lifts/hoists or garage jacks with jack-stands. 1.
- Page 34 4. Installing the Rear Suspensions NOTICE Refer to the service manual for torque specs when tightening bolts and nuts. Make sure to tighten the bolts and/or nuts to the specified torque to avoid the damage to the bolts, nuts and/or shock absorber internals. 1.
- Page 35 4. Installing the Rear Suspensions ① 4 - 5 CAUTION After re-mounting the tires, make sure the product does not come into contact with the wheels/tires. Re-alignment is required after installation of this product. - 14 - 80270-AS004...
- Page 36 5. Adjusting the Dampening Dampening adjustment and range The standard strut type ● · For a suspension that a dial is attached to the shaft’s top, use the dial for adjustment. · For a suspension that has a hole on top of the shaft, insert the provided adjustment allen wrench to the hole to adjust the dampening force.
- Page 37 Data from the test vehicle during development of this product is as follows. Vehicle height data is measured by HKS. Vehicle height data might be different depends on the vehicle specification. Vehicle height might be changed after driving a few miles.
- Page 38 - 17 - 80270-AS004...
- Page 39 - 18 - 80270-AS004...
- Page 40 HKS Co., Ltd. 7181 Kitayama, Fujinomiya, Shizuoka 418-0192, JAPAN http://www.hks-power.co.jp/en/ REV. NO. DATE 3-1.01 3/2020 80270-AS004...
Need help?
Do you have a question about the HIPERMAX G+ LIFT UP and is the answer not in the manual?
Questions and answers