Advertisement
Quick Links
Advertisement

Related Manuals for Hongda USA Coloured Glaze Time


Summary of Contents for Hongda USA Coloured Glaze Time
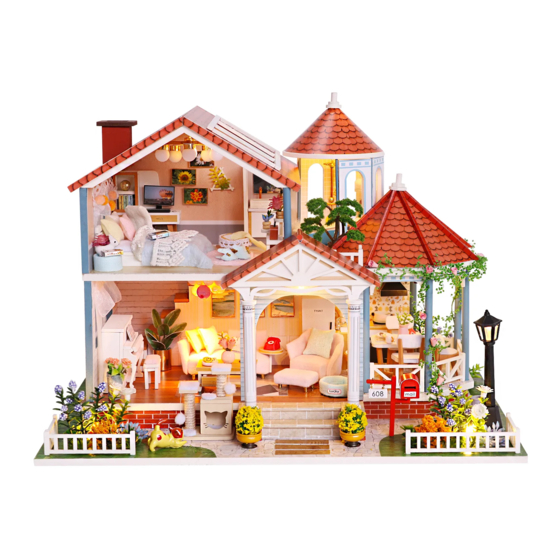
- Page 1 Coloured Glaze Time Coloured Glaze Time L2001 Instruction manual L2001 Instruction manual...
- Page 2 Testing on LED function Tips for assembling Be sure to test the LED lights before making the lighting, 1.Picures shown on the package may be slightly different from the actual product. note that the LED white wire to the negative, gray wire 2.All the materials are taken in the operation step, put the remaining materials back into the original pocket to the positive reference to the following figure until the installation is completed.(Avoid material loss during installation)
- Page 3 Thumbnail of material list (reference only) Contents Materials Package Name Name Materials Package A Bag A16(all printing paper and template paper are set Printing in the A16 paper accessories, a total of 2 pieces of A3 chandelier on K bag+M bag page 16 single-sided printing paper + 2 pieces of A4 single-sided paper...
- Page 4 Before making, cut out J01 and J02 according to the templates. E05 E05 J01(piano A16-2 stool) A16-2 A16-3 A16-1 J25-2 J25-1 J02(piano stool) A16-2 J25-2 A16-1 A16-3 Glue printed paper A16-1 to the back of the piano J01(piano stool) J02(piano stool) J25-1 J25-1 J02(piano stool)
- Page 5 A14-1 A14-1 A16-7-1 L02:0.8cm A16-7-3 J25-3 A16-8-3 A16-7-3 A16-8-2 A16-8-1 A16-7-2 L19:0.4cm J28-1 L04:1cm*2 A16-7-1 K31:0.6cm K32:0.2cm L19:0.4cm A16-7-2 Turn A16-7-2 over and stick it on F04. J28-1 L04:1cm As shown in the picture, roll the Put flowers and L13 flowers well.
- Page 6 A14-5 A14-7 A14-6 A14-7 A14-6 A14-5 A14-6 A14-7 A14-6 A14-7 A16-10 A16-10 A14-8 A14-9 A14-9 A14-9 L05:0.1cm A14-8 A14-10 A14-11 A14-12 A16-11-1 A16-13 A14-10 A14-9 F11 F11 A16-12 A16-11-2 A16-11-1 A25-13 A14-11 A14-12 J25-4-2 J25-4-1 L02:3cm L03:5.2cm A16-11-3 0.8cm A16-11-2 A16-11-4 L03:2.4cm A16-11-3...
- Page 7 Before making, cut out J01 and J02 according to the templates. A16-14-1 J01(backrest for J01(backrest for A14-13 A16-14-2 big sofa 2) big sofa 1) J01(cushion for big sofa) J02(big sofa non- J02(big sofa non-woven cushion 1) woven cushion 2) J02(big sofa non- J02( big sofa non-woven woven cushion 1)
- Page 8 Before making, cut out J01 and J02 A15-2 according to the templates. A16-18 J01(backrest for small sofa 1) J01(backrest for small sofa 2) A15-2 Wrap the black edge of Stick 2 pieces of A15-2 together A15-2 with A16-18 J01(cushin for (small sofa J02(small sofa non (small sofa...
- Page 9 Before making, cut out J03 Dining J03(cushion for stool1) according to the templates J03(cushion for stool1) table A16-22-3 A16-22-1 A14-14 (cushion for (cushion for (cushion for stool 2) stool 2) stool 3) (cushion for (backrest for stool 3) (backrest for stool) A16-22-2 stool)
- Page 10 Dining room A14-16 chandelier Pass M01 through A14-16 A14-16 as shown. Second floor chandelier J27-3 J27-1 J27-2 A14-16 J25-6 Refer to the third J25-6 step of the dining A14-16 J27-1 Punch a hole in it with an awl room chandelier 0.3cm J27-3 J27-2...
- Page 11 Before making, cut out J24 J24(office according to the template. table) A16-27 A16-27 L19:0.5cm*4 J24(office table) L19:2cm Before making, cut out J02 and J11 according to the templates. J11(office chair1) J11(office chair 2) J02(office chair non-woven fabric) (Note: PVC is inside Previously folded A16-24 he cabinet.) J11(office chair1)
- Page 12 A16-27-2 J27-4-2 A13-3 Do the same with the other hanging pictures. Do the same with the other hanging pictures. Before making, cut out J02, J03, J07 and J08 according to the templates. J03(mattress) J02(mattress) J07(bed) J08(bed) J25-8 J25-8 Stick the non-woven fabric Wrap them together in J03, and cardboard together J25-8 on top...
- Page 13 Before making, cut out J05 according to the templates. A16-30-1 A16-30-1 J05(basket) J18:40cm A16-30-1 A14-16-1 A16-29 A14-16-1 J16:6.5cm Before making, cut out J07 according to the templates. J18:40cm A16-31 (slipper 2) J07(slipper1) (slipper 2) J07(slipper 1) J14:6.5cm J05(basket) A16-31 J07(slipper 1) J25-9 Cut J07 in the position of the L05:0.3cm*2...
- Page 14 Before making, cut out J02 and J07 according to the templates. J07(cat litter1) J02(cat litter J07(cat litter 1) J02(cat litter non-woven fabric1) J25-10 non-woven fabric 2) J02(cat litter non- woven fabric 2) J07(cat J25-10 J02(cat litter non-woven fabric1) litter 2) use J07Use J07 to stick the cat litter A16-34 non-woven fabric 1...
- Page 15 Before making, cut out J26 according to the template. A14-18 A14-20 A14-17 J26(mirror) J26(mirror) J27-5 A14-19 A14-20 A14-17 Tear off the blue film. A16-35 A16-36-2 A14-20 A14-19 A14-18 A16-36-2 A16-36-1 J27-5 L03 :2cm Stick A14-18 with printed paper L01 :1.8cm A16-36-2.
- Page 16 A16-37-2 A16-37-2 A16-38 A16-38 A16-40 A16-39 A16-39 C16 C16 A16-39 A16-41 A14-24 (need 2pieces) Before making, cut out J24 according to the template. A16-42-1 A16-42-2 J24(bathroom) C09(5 pieces) A16-42-2 J24(bathroom) A16-42-2 A16-42-1 Hollow out a window Turn it over and stick A16-42-2 A16-42-1 (need 5pieces)
- Page 17 A16-43 A16-43 A16-44-1 A16-44-1 Use a knife to cut a gap in the A16-44-2 position of the picture to facilitate the passage of the rear lamp wire. A16-44-2 Before making, cut out J02 according to the templates. A16-45 A14-25 A14-25 J02(ledge non L02:1.6cm -woven fabric)
- Page 18 A16-47-2 J27-6 Glue one end of To stick in Bend the wire as pictured. the wire together. a flowerpot 1.8cm A16-46 Fold in half and stick Use L16 to wrap K28 Cut out the leaves. Affix L17 to the Stick the leaves one by to make a ball with surfaces.
- Page 19 Note the position of second floor Note the position of the the hypotenuse. hypotenuse, aligned at the top. chandelier A16-53 A16-52 (hypotenuse) (top view) (hypotenuse) side view Glue the second floor chandelier To hollow out the window to the middle of the roof. Wrap A09 with A16-53.
- Page 20 Note the position of the gap A12 A16-59-1 picture Use a knife to make a gap at the position Stick the hanging picture on the position of the Stick A12 in position on the drawings. drawing, and then stick the printed paper A16-59-1 shown in Fig.
- Page 21 potted plant 3 The wire passes through the gap How to make potted plant 3 is on page 23. in the stairs left behind. office table bedside carpet table C10 cut to 4.8cm slipper 0.5cm wall shelf 0.9cm 0.6cm 0.5cm L02:4cm 0.4cm 0.4cm...
- Page 22 A16-61 A16-60 A16-60 Stick a led light M01 on the top of the bathroom in the position shown in the figures A16-62 A16-62 As shown in the picture, stick the lamp wire As shown in the figure, fold A16-62 according bookcase of the second floor chandelier as shown in the picture.
- Page 23 A14-27 A14-27 gap B04. A14-29 A14-28 A14-28 A14-27 A14-27 Note the location of the gap. Note the location of the gap. A16-65 A16-65 Wrap the MDF board with A16-65, and pierce the gap on the drawing with a tool to Fix M01 on K30, then cut a notch with facilitate wiring.
- Page 24 Cut L11 two piecess and insert L08. L06(15pieces) cut out L14 Cut L14 and stick it on the drawing. L11(3pieces) Before making, cut out J28-02 according to the templates. J28-02 L04:2cm*12 (need 12pieces) J28-02 L04:2cm As shown in the figure, As shown in the cat tower As shown in the figure,...
-
Page 25: Dust Cover
Installation of dust cover dust cover (Upgrade version accessories need to be purchased separat ely) Ripped one side of kraft paper, leaving one side of kraft paper scale:1:10 scale:1:10 Take out the plexiglass and tear off the scale:1:10 K06 plexiglass(transparent) K05 plexiglass(transparent) kraft paper with text on each piece of K04 plexiglass(transparent) - Page 26 With dust cover at night With dust cover at daytime...
- Page 28 The instruction manual should be keep,after assembled The instruction manual should be keep,after assembled...
Need help?
Do you have a question about the Coloured Glaze Time and is the answer not in the manual?
Questions and answers