Table of Contents
Advertisement
Quick Links
Advertisement
Table of Contents

Subscribe to Our Youtube Channel
Related Manuals for Check Point 6000 Series


Summary of Contents for Check Point 6000 Series
- Page 1 30 April 2020 6000 AND 7000 APPLIANCES REPLACING MEMORY...
- Page 2 Check Point. While every precaution has been taken in the preparation of this book, Check Point assumes no responsibility for errors or omissions. This publication and features described herein are subject to change without notice.
- Page 3 For more about this release, see the Latest Version of this Document document in PDF format Download the latest version of this Feedback Check Point is engaged in a continuous effort to improve its documentation. Please help us by sending your comments Revision History Date Description...
-
Page 4: Table Of Contents
Table of Contents Table of Contents 6000 and 7000 Appliances Installing and Removing Memory Preparing the Appliance 6000 and 7000 Appliance Configuration 6200/6400/6600/6700 Base Appliances DIMM Configuration 6200 Plus/Turbo and 6400/6600/6700 Plus Appliances DIMM Configuration 6500 Appliances DIMM Configuration 6800 Appliances DIMM Configuration 6900 Base Appliances DIMM Configuration 6900 Plus Appliances DIMM Configuration 7000 Base Appliances DIMM Configuration... -
Page 5: 6000 And 7000 Appliances Installing And Removing Memory
The appliance is in a clean environment and on a level surface. You can physically access and open the cover of the appliance. You have the Check Point memory kit. Important To protect the appliance and the memory modules from electrostatic discharge damage, make sure that you are properly grounded before you touch these components. - Page 6 6000 and 7000 Appliances Installing and Removing Memory To prepare the appliance: 1. Shut down the appliance from the WebUI, CLI, or by pressing and releasing the power switch quickly. Note that pressing and holding the power switch is not recommended as it results in a forced and immediate shut down.
-
Page 7: 6000 And 7000 Appliance Configuration
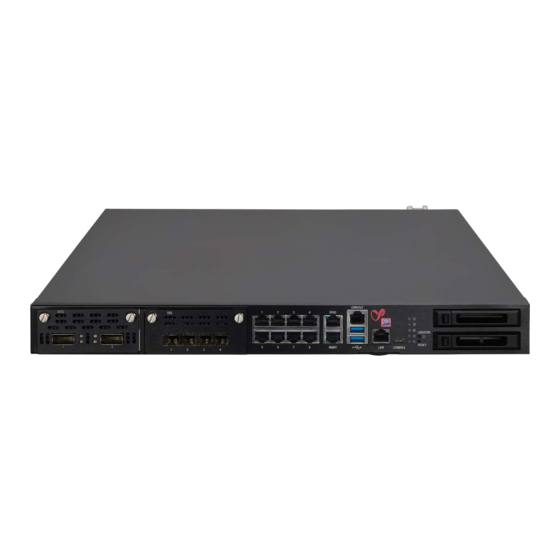
6000 and 7000 Appliances Installing and Removing Memory Item Description Appliance cover Appliance cover screws ESD grounding plug (for placement in all models, see the Rear Panel section in 6000 and 7000 Appliances Getting Started Guide 6000 and 7000 Appliance Configuration The memory sockets in the 6000 appliances are colored black and blue. -
Page 8: 6200/6400/6600/6700 Base Appliances Dimm Configuration
6000 and 7000 Appliances Installing and Removing Memory 6200/6400/6600/6700 Base Appliances DIMM Configuration The 6200/6400/6600/6700 Base appliances have a default memory configuration of 8 GB with one DIMM in memory slot A1. You can upgrade to 16 GB or 32 GB. Use the applicable upgrade procedure below. - Page 9 6000 and 7000 Appliances Installing and Removing Memory To upgrade to Use DIMMs Procedure Slots 32 GB 4 x 8 GB Install four 8 GB DIMMs In all memory slots 32 GB Upgraded Configuration Top View (front panel of the appliance is at the bottom of the diagram) 6000 and 7000 Appliances Replacing Memory | 9...
-
Page 10: 6200 Plus/Turbo And 6400/6600/6700 Plus Appliances Dimm Configuration
6000 and 7000 Appliances Installing and Removing Memory 6200 Plus/Turbo and 6400/6600/6700 Plus Appliances DIMM Configuration The 6200 Plus/Turbo and 6400/6600/6700 Plus appliances have a default memory configuration of 16 GB with two DIMMs in memory slots A1 and B1. You can upgrade to 32 GB. Use the upgrade procedure below. -
Page 11: 6500 Appliances Dimm Configuration
6000 and 7000 Appliances Installing and Removing Memory 6500 Appliances DIMM Configuration The 6500 appliances have a default memory configuration of 8 GB with one DIMM in memory slot number 2. You can upgrade to 16 GB or 32 GB. Use the applicable upgrade procedure below. 8 GB Default Configuration Top View (front panel of the appliance is at the bottom of the diagram) - Page 12 6000 and 7000 Appliances Installing and Removing Memory 16 GB Upgraded Configuration Top View (front panel of the appliance is at the bottom of the diagram) To upgrade to Use DIMMs Procedure Slots 32 GB 4 x 8 GB Install four 8 GB DIMMs In all memory slots 32 GB Upgraded Configuration Top View...
-
Page 13: 6800 Appliances Dimm Configuration
6000 and 7000 Appliances Installing and Removing Memory 6800 Appliances DIMM Configuration The 6800 appliances have a default memory configuration of 16 GB with two 8 GB DIMMs in memory slots numbers 1 and 3. You can upgrade to 32 GB or 64 GB. Use the applicable upgrade procedure below. - Page 14 6000 and 7000 Appliances Installing and Removing Memory To upgrade to Use DIMMs Procedure Slots 64 GB 8 x 8 GB Install eight 8 GB DIMMs In all memory slots 64 GB Upgraded Configuration Top View (front panel of the appliance is at the bottom of the diagram) 6000 and 7000 Appliances Replacing Memory | 14...
-
Page 15: 6900 Base Appliances Dimm Configuration
6000 and 7000 Appliances Installing and Removing Memory 6900 Base Appliances DIMM Configuration The 6900 Base appliances have a default memory configuration of 16 GB with two 8GB DIMMs in memory slots A1 and B1. You can upgrade to 32 GB or 64 GB. Use the applicable upgrade procedure below. - Page 16 6000 and 7000 Appliances Installing and Removing Memory To upgrade to Use DIMMs Procedure Slots 64 GB 4 x 16 GB Install four 16 GB DIMMs In all memory slots 64 GB Upgraded Configuration Top View (front panel of the appliance is at the bottom of the diagram) 6000 and 7000 Appliances Replacing Memory | 16...
-
Page 17: 6900 Plus Appliances Dimm Configuration
6000 and 7000 Appliances Installing and Removing Memory 6900 Plus Appliances DIMM Configuration The 6900 Plus appliances have a default memory configuration of 32 GB with two 16 GB DIMMs in memory slots A1 and B1. You can upgrade to 64 GB. Use the upgrade procedure below. 32 GB Default Configuration Top View (front panel of the appliance is at the bottom of the diagram) -
Page 18: 7000 Base Appliances Dimm Configuration
6000 and 7000 Appliances Installing and Removing Memory 7000 Base Appliances DIMM Configuration The 7000 Base appliances have a default memory configuration of 16 GB with two 8GB DIMMs in memory slots 3 and 4. You can upgrade to 32 GB or 64 GB. Use the applicable upgrade procedure below. - Page 19 6000 and 7000 Appliances Installing and Removing Memory To upgrade to Use DIMMs Procedure Slots 64 GB 4 x 16 GB Install four 16 GB DIMMs In memory slots 2, 3, 4, and 5 64 GB Upgraded Configuration Top View (front panel of the appliance is at the bottom of the diagram) 6000 and 7000 Appliances Replacing Memory | 19...
-
Page 20: 7000 Plus Appliances Dimm Configuration
6000 and 7000 Appliances Installing and Removing Memory 7000 Plus Appliances DIMM Configuration The 7000 Plus appliances have a default memory configuration of 32 GB with two 16 GB DIMMs in memory slots 3 and 4. You can upgrade to 64 GB. Use the upgrade procedure below. 32 GB Default Configuration Top View (front panel of the appliance is at the bottom of the diagram) -
Page 21: Removing Dimms
6000 and 7000 Appliances Installing and Removing Memory Removing DIMMs Important - The appliance contains sharp metal parts such as the heat sink fin and bracket that can cause injury or damage the DIMMs. Make sure that you prepare the appliance before you remove DIMMs. For more information, see "Preparing the Appliance"... - Page 22 6000 and 7000 Appliances Installing and Removing Memory If necessary, pull one end of the DIMM, then the other, to gradually release it from the contact pins. Important - Make sure that there are no leftover parts inside the appliance. 5.
-
Page 23: Installing Dimms
6000 and 7000 Appliances Installing and Removing Memory Installing DIMMs You can add more DIMMs to the memory sockets. Important - The appliance contains sharp metal parts such as the heat sink fin and bracket that can cause injury or damage the DIMMs. To install DIMMs in the appliance: 1. - Page 24 6000 and 7000 Appliances Installing and Removing Memory The top of the DIMM is smooth. The bottom edge has two different-length sets of contacts, which connect to the slots on the socket. Important : Only touch the top corners of the DIMM. Pressing on the heat sink or other DIMM components can damage the hardware.
- Page 25 6000 and 7000 Appliances Installing and Removing Memory The retaining clips move into the lock position as you press the DIMM into position. 5. Do steps 1 - 4 again for the other DIMMs. 6. Make sure that there are no leftover parts in the appliance. 7.
-
Page 26: Verifying The Memory Configuration
6000 and 7000 Appliances Installing and Removing Memory Verifying the Memory Configuration 1. In the CLI, enter Expert mode. 2. Run: # free -g -o Example for a 6500 appliance with 16 GB of memory: [Expert@gw-419463:0]# free -g -o total used free shared...
Need help?
Do you have a question about the 6000 Series and is the answer not in the manual?
Questions and answers